Advertisement
Quick Links
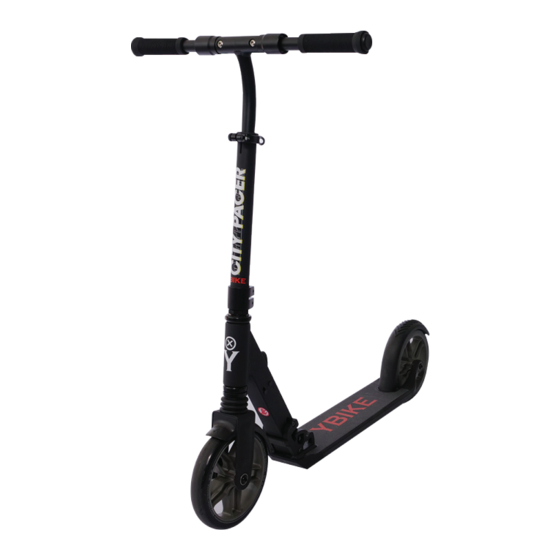
OWNER'S MANUAL
Read this manual carefully: Read and understand this entire manual before use the product!
This Owner's Manual contains important information on safety, operation and maintenance
of your YBIKE City Pacer
the SAFETY ALERT symbol with the exclamation point in the triangle means
ATTENTION! BE ALERT! YOUR SAFETY CAN BE AFFECTED.
failure to follow instructions associated with a warning symbol could result in severe injury
or death to the rider, a passenger, a bystander, or a person inspecting or repairing the scooter.
Advertisement

Related Manuals for YBIKE CITY PACER


Summary of Contents for YBIKE CITY PACER
- Page 1 Read this manual carefully: Read and understand this entire manual before use the product! This Owner’s Manual contains important information on safety, operation and maintenance of your YBIKE City Pacer the SAFETY ALERT symbol with the exclamation point in the triangle means ATTENTION! BE ALERT! YOUR SAFETY CAN BE AFFECTED.
-
Page 2: Table Of Contents
C O NTE NTS: 1. SAFETY....................2 2. BEFORE YOU BEGIN................4 3. ASSEMBLY AND SETUP..............5 4. PRE-RIDE CHECKLIST...............10 5. HOW TO RIDE...................11 6. REPAIR AND MAINTENANCE............12 7. WARRANTY..................13 NOTE: Manual illustrations are for demonstration purposes only. Illustrations may not re ect exact appearance of actual product. -
Page 3: Safety
WA RNI NG SAFETY PRECAUTIONS: The use of the YBIKE City Pacer can be a hazardous activity and precautions should be taken to avoid dangerous situations. Use at your own risk and use common sense! Be sure to read the entire manual before riding. Please pay close attention to the following notices in particular: WARNING! This ride-on is intended to be USED and ASSEMBLED by an ADULT. - Page 4 ASS EM BLY AND SETUP REQUIRED TOOLS: 1x 5mm allen key WARNING: Keep ngers clear of the pivoting mechanism when folding or unfolding the scooter. Make sure others are standing clear.
-
Page 5: Before You Begin
U NFO LDING TH E S CO O TE R F OR F IRST TIM E USE 1. To release the folding mechanism, place the scooter on the ground, put one foot on the deck plate and pull the joint release lever up. Raise T-bar up until it is securely locked in the upright position. -
Page 6: Assembly And Setup
③ ④ NOTE: The joint release lever is spring-loaded and will automatically lock in the upright position when fully upright. IF the folding handle does not completely open or the handlebar does not lock, STOP RIDING. - Page 7 Check local laws and regulations to see where and how you may use your YBIKE City Pacer legally. In many states and local areas scooter riders are required BY LAW to wear a helmet. Check local laws and regulations regarding laws governing helmet use and scooter operation in your area.
- Page 8 ADJUST I NG T HE H AN DL EBA R HE IG HT 1. To adjust the height of the handlebars, open the quick-release lever and slide the T-bar to the desired position and re-secure to lock into place. When the T-bar is raised to the maximum height, depress the push button located directly below the quick release lever to unlock the T-bar.
- Page 9 BE FO RE YOU BEGI N BOX CONTENTS: 1. Remove contents from box. - Scooter 2. Remove the separators that protect the components - Allen wrenches from damage during shipping. - Owner’s manual...
- Page 10 CLAMP 1. Using a 5 mm Allen key, check that the collar clamp bolt(s) are tightened securely. This item is tightened and quality inspected at the factory, but there is a slight chance that the e ects of shipping or handling may have caused the bolt(s) to loosen.
-
Page 11: Pre-Ride Checklist
PRE - RID E CHECKLIST LOOSE PARTS - Check and secure all fasteners before every ride. - Make sure the collar clamp, quick release lever, and handlebar spring sleeves are locked and properly in place before riding. (As shown in gure 4, 6, 7) Please note: self-locking nuts and other self-locking xings may lose their e ectiveness after being used several times and may need replacing. -
Page 12: How To Ride
H O W TO RIDE 1. Place one foot on the baseboard, push forward with the other foot. 2. Steer with both hands on the handlebars. 3. For enhanced cornering, lean slightly into the direction of the turn. 4. For controlled stops, apply the brake by stepping on the rear brake. 5. -
Page 13: Repair And Maintenance
R E PA IR AND MAINT ENAN CE CLEANING YOUR SCOOTER Wipe with a damp cloth to remove dirt and dust. Do not use industrial cleaners or solvents as they may damage the surfaces. Do not use alcohol, alcohol-based or ammonia- based cleaners as they may damage or dissolve the plastic components or soften the decals or decal adhesive. -
Page 14: Warranty
WAR R ANTY The manufacturer warranties this product to be free of manufacturing defects for a period of 6 months from date of purchase. This Limited Warranty does not cover normal wear and tear, or any damage, failure or loss caused by improper assembly, maintenance, or storage. This Limited Warranty will be void if the product is ever used in a manner other than for recreation, is modi ed in any way or rented. - Page 15 EN JOY Y OU R NEW Y BI KE C ITY P AC ER!