Table of Contents
Advertisement
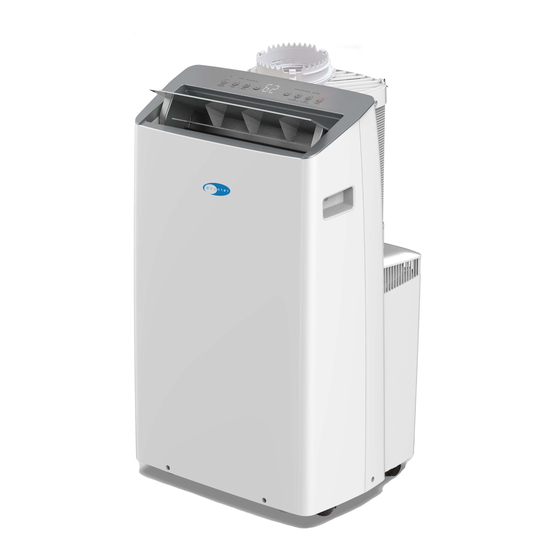
Whynter NEX Inverter Dual Hose Portable Air Conditioner
with Wi-Fi & LCD Remote
MODEL: ARC-1030WN / ARC-1230WN / ARC-1230WNH
Congratulations on your new Whynter product. To ensure proper operation, please read this Instruction
Manual carefully before using this product. Keep this manual in a safe place for future reference.
Advertisement
Table of Contents

Subscribe to Our Youtube Channel
Related Manuals for Whynter ARC-1030WN


Summary of Contents for Whynter ARC-1030WN
- Page 1 Wi-Fi & LCD Remote MODEL: ARC-1030WN / ARC-1230WN / ARC-1230WNH Congratulations on your new Whynter product. To ensure proper operation, please read this Instruction Manual carefully before using this product. Keep this manual in a safe place for future reference.
- Page 2 Thank you for choosing Whynter. Please follow the instructions provided in this user manual to obtain the very best performance from your steam oven. We trust that your Whynter steam oven will provide the performance and reliability that we stand for.
-
Page 3: Table Of Contents
Table of Contents PAGE SAFETY PRECAUTIONS SAFETY COMPLIANCE PREPARATION INTRODUCTION / TECHNICAL DATA ACCESSORIES WINDOW KIT INSTALLATION 8 - 10 CONTROL PANEL 11 - 12 13 - 14 OPERATION INSTRUCTIONS REMOTE CONTROL 15 - 16 16 - 17 CLEANING AND MAINTENANCE 18 - 19 TROUBLESHOOTING WARRANTY... -
Page 4: Safety Precautions
SAFETY PRECAUTIONS Read Safety Precautions Before Operation and Installation To prevent death or injury to the user or other people and property damage, the following instructions must be followed. Inco rrect operation due to ignoring of instructions may cause death, harm or damage. •... -
Page 5: Safety Compliance
Do not press the buttons on the control panel with anything other than your fingers. • Do not remove any fixed covers. Contact Whynter Customer Support if this unit if it is not working properly, or if it has been dropped or damaged. -
Page 6: Preparation
PREPARATION All illustrations in the manual are for explanation purpose only. Your machine may be slightly different. The actual shape shall prevail. The unit can be controlled by the unit control panel alone or with the remote controller. Control Panel Air Outlet Air Filter Handle (both sides) -
Page 7: Introduction / Technical Data
The Inverter technology will be featured in our NEX line of portable air conditioners. By utilizing this much more efficient technolo- gy, Whynter’s Inverter variable-speed system allows the compressor to optimize efficiency and power consumption together, while maintaining a specified output. -
Page 8: Accessories
ACCESSORIES Image Accessory Image Accessory Description Foam Seal B 2 pieces (Adhesive) Hose-in-hose (Air intake hose & 1 set Foam Seal C exhaust hose) 2 pieces (Non-Adhesive) Security Bracket 1 set Air outlet adapter 1 piece Exhaust Connector 1 piece Drain Hose 1 piece Module A B C*... - Page 9 WINDOW KIT INSTALLATION NOTE: Once the Exhaust Hose assembly and Adjustable Window Slider are prepared, choose from one of the following two installation methods. Hung Window or Sliding Window Installation 1. Cut adhesive foam seals A and B to the correct lengths and attach them to the window frame as shown. 2.
- Page 10 WINDOW KIT INSTALLATION NOTE: Once the Exhaust Hose assembly and Adjustable Window Slider are prepared, choose from one of the following two installation methods. Hung Window or Sliding Window Installation 4. If desired, install the security bracket with 2 screws as shown. 5.
-
Page 11: Control Panel
CONTROL PANEL DISPLAY ICONS Wireless feature (Wi-Fi enabled models only) Illuminates to show wireless connection is activated. Operation Mode Indicator Lights Illuminates to show current mode operation. LED Display Shows the set temperature in °F or °C and the Auto-timer settings. While on FAN modes, it shows the room temperature. Fan Speed Indicator Lights Illuminates to show the set fan speed. - Page 12 CONTROL PANEL CONTROL BUTTONS Up and Down buttons Adjusts set temperature 1°F | 1°C increments or timer hours (0 - 24 hours). NOTE: This unit is capable of displaying set temperature in Fahrenheit or Celsius. To convert from one to another, press and hold the Up and Down buttons for 3 seconds.
-
Page 13: Operation Instructions
OPERATION INSTRUCTIONS BEFORE USING YOUR APPLIANCE • Remove the exterior and interior packing • Before connecting the appliance to the power source, let it stand upright for approximately 4 hours. This will reduce the possi- bility of a malfunction in the cooling system from handling during transportation SWITCHING ON/OFF THE AIR CONDITIONER The appliance can be switched ON or OFF by pressing the POWER button on the control panel or the ON/OFF button on the remote control... - Page 14 OPERATION INSTRUCTIONS TIMER (DELAYED SWITCH ON / OFF) FUNCTION This function mode enables a delayed switch ON or delayed switch OFF of the air conditioner. The time (hours) delay can be se t, enabled and disabled. SETTING SWITCH OFF TIMER With the air conditioner operating in any function mode, press the TIMER button.
-
Page 15: Remote Control
REMOTE CONTROL The portable air conditioner can be switched on by the remote control. To transmit signals from the remote control to the air conditioner, point the front part of the remote handset towards the control panel on the air conditioner. Reception of the signal is confirmed by a beep. -
Page 16: Cleaning And Maintenance
• DO NOT operate the portable air conditioner if the power supply was damaged during cleaning. A damaged power cord must be replaced with a new cord. Contact Whynter Customer Support for more information. WATER DRAINAGE When the internal drain pan becomes full the appliance will beep 8 times and the digital display will show error code P1. The air conditioning or dehumidifying action will stop but the fan may continue to operate. - Page 17 If any other error code appears on the display, unplug the air conditioner and allow it to sit undisturbed for 5 minutes. If the error code persists when the unit is plugged back in, please contact Whynter Customer Support. Page 17...
-
Page 18: Troubleshooting
• Drain water from the air conditioner • Possible loose internal connection. • Please contact Whynter for service. • The room temperature is outside of • This unit is designed to work in ambi- The unit turns on but the compressor... - Page 19 TROUBLESHOOTING Many common portable air conditioner problems are easily resolved. Try the troubleshooting suggestions below to see if the problems can be resolved before having to contact the service department. PROBLEM POSSIBLE CAUSES SOLUTIONS • Windows or doors are open •...
-
Page 20: Warranty
HEREIN. CLAIMS BASED ON IMPLIED WARRANTIES, INCLUDING WARRANTIES OF MERCHANTABILITY OR FITNESS FOR A PARTICULAR PUR- POSE, ARE LIMITED TO ONE YEAR OR THE SHORTEST PERIOD ALLOWED BY LAW, BUT NOT LESS THAN ONE YEAR. WHYNTER SHALL NOT BE LIABLE FOR CONSEQUENTIAL OR INCIDENTAL DAMAGES SUCH AS PROPERTY DAMAGE AND INCIDENTAL EXPENSES RESULTING FROM ANY BREACH OF THIS WRITTEN LIMITED WARRANTY OR ANY IMPLIED WARRANTY.
Need help?
Do you have a question about the ARC-1030WN and is the answer not in the manual?
Questions and answers
Can the window kit be used for a vertical window opening if not is there an adapter sold