Table of Contents
Advertisement
Quick Links
Advertisement
Table of Contents

Related Manuals for Tomahawk TPC80H


Summary of Contents for Tomahawk TPC80H
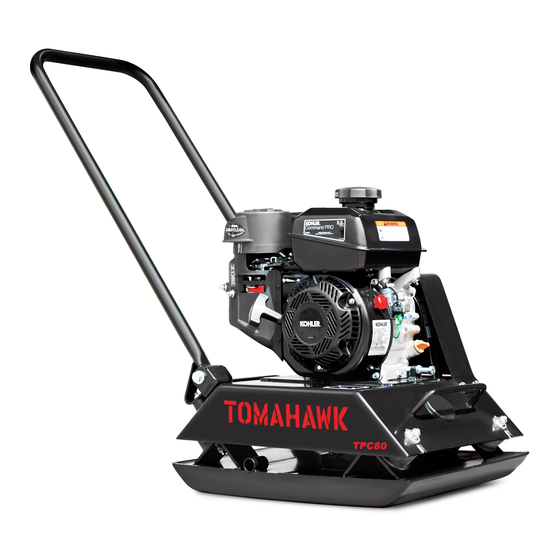
- Page 1 TPC80 / TPC80H Operation Manual PLATE COMPACTOR...
-
Page 2: Table Of Contents
Table of Contents 1. Safety Information --------------------------------------------------------------------- 1.1 Laws Pertaining to Spark Arresters ---------------------------------------------------------- 1.2 Operating Safety --------------------------------------------------------------------------------- 1.3 Operator Safety while using Gasoline Engines ------------------------------------------ 1.4 Service Safety ------------------------------------------------------------------------------------ 2. Technical Data ----------------------------------------------------------------------------- 2.1 Engine Data --------------------------------------------------------------------------------------- 2.2 Machine Data ------------------------------------------------------------------------------------ 3. -
Page 3: Safety Information
Tomahawk Power. The information contained in this manual is based on machines in production at the time of publication. Tomahawk Power reserves the right to change any portion of this informa- tion without notice. -
Page 4: Laws Pertaining To Spark Arresters
1.2.2 NEVER touch the engine or muffler while the engine is on or immediately after it has been turned off. These areas get hot and may cause burns. 1.2.3 NEVER use accessories or attachments that are not recommended by Tomahawk Power. Damage to equipment and injury to the user may result. -
Page 5: Operator Safety While Using Gasoline Engines
1.2.11 ALWAYS store equipment properly when it is not being used. Equipment should be stored in a clean, dry location out of the reach of children. 1.2.12 ALWAYS operate machine with all safety devices and guards in place and in working order. -
Page 6: Technical Data
Labels provide important operating instructions and warn of dangers and hazards. 2. Technical Data 2.1 Engine Data Model TPC80 - 5.5HP Kohler Model TPC80 - 6HP Kohler Model TPC80H - 5.5HP Honda Model Engine Make Kohler CH255 Kohler CH260 Honda GX160 Engine Type... -
Page 7: Machine Data
2.2 Machine Data Model TPC80 - 5.5HP Kohler Model TPC80 - 6HP Kohler Model TPC80H - 5.5HP Honda Model Centrifugal Force 13 Kn 13 Kn 13 Kn Max Exciter Speed 5800 RPM 5800 RPM 5800 RPM Compaction Force 3000 lb/ft... -
Page 8: To Start
3.3 TO Start (Fig.1) 3.3.1 Open fuel valve by moving lever to the right (a1). Note: If engine is cold, move choke lever to close position (b1). If engine is hot, set choke to open position (b2). 3.3.2 Turn engine switch to "ON" (e1). 3.3.3 Open throttle by moving it slightly to left (d1). -
Page 9: To Stop
Plates equipped with water tanks can be used for compacting asphalt. This plate is not recommended for compacting cohesive soils with a heavy clay content. For cohesive soil, use a Tomahawk PMR68. 3.6 Operation (Fig.2) Run engine at full throttle and allow plate to pull itself along at its normal speed. When operating on an incline it may be necessary to assist plate by pushing it forward slightly. -
Page 10: Maintenance
4. Maintenance 4.1 Periodic Maintenance The chart below lists basic engine maintenance. Refer to engine manufacturer's Operation Manual for additional information on engine maintenance. Daily After Every 2 Every Every before first 20 weeks or month or year or starting hours 50 hours 100 hours... -
Page 11: Drive Belt
4.3 Drive Belt (Fig.3) On new machines or after installing a new belt, check belt tension after first 20 hours of operation. Check and adjust belt every 50 hours thereafter. To change the belt: 4.3.1 Remove the four hex nuts securing the belt cover. (B-C) 4.3.2 Remove the 1st belt. -
Page 12: Spark Plug
To change fluid: 4.4.1 Remove the rubber cap from the front of the compactor’s housing. (A) 4.4.2 Remove the drain nut from the compactor’s exciter box with a 19mm socket. (B) 4.4.3 Tip baseplate up and drain fluid from exciter assembly. -
Page 13: Engine Oil
4.5.1 Remove spark plug and inspect it. 4.5.2 Replace plug if the insulator is cracked or chipped. 4.5.3 Clean spark plug electrodes with a wire brush. 4.5.4 Set the electrode gap (a). 4.5.5 Tighten spark plug securely. CAUTION: A loose spark plug can become very hot and may cause engine damage. -
Page 14: Air Cleaner
4.7 Air Filter (Fig. 7) NEVER use gasoline or other types of low flash point solvents for cleaning the air cleaner. A fire or explosion could result. WARNING NEVER run engine without air cleaner: Severe engine damage will occur. CAUTION The engine is equipped with a dual element air cleaner. -
Page 15: Carburetor Adjusment
Fig. 8 4.9 Carburetor Adjustment (Fig. 9) 4.9.1 Start the engine and allow it to warm up to operating temperature. 4.9.2 Set the pilot screw (a) 2 turns out. See Note. 4.9.3 With the engine idling, turn the pilot screw (a) in or out to the setting that produces the highest rpm. -
Page 16: Troubleshooting
4.10 Troubleshooting Problem / Symptom Reason / Remedy • Engine throttle control is not completely open. • Throttle control is not adjusted correctly. • Ground is too wet, plate sticking. Allow soil to dry before compacting. -Plate does not develop •... -
Page 17: Lifting Machine
4.12 Lifting Machine See Technical Data for the weight of the machine. To lift machine manually: 4.12.1 Stop the engine. 4.12.2 Obtain help from a partner and plan the lift. 4.12.3 Grasp the machine by its cage and lifting slot. 4.12.4 Lift the machine. -
Page 18: Compaction Tips
5. Compaction Tips 5.1 Soil Drop Test: Soil preparedness refers to the “wetness” of the dirt or soil. Soil needs to be 50% dry and 50% wet, before starting compaction. A simple “hand test” can deter- mine this. Pick up a handful of soil with your hand and squeeze the dirt. Observe whether the soil is powdery or if it breaks apart when dropped. - Page 19 5.3 Compaction Terms 5.3.1 Cohesive soils: Clays and mixes have a particular particle size of less than .003” or .002” and are typically classified as cohesive soils. This type of soil is primarily used for retaining pond beds and mound fills. These soils are dense due to the strongly bound mo- lecular attraction.
- Page 20 5.3.4 Static force: Found in the deadweight of machines, static force applies pressure downward on soil surfaces. As a result, soil particles compress in the topsoil layer. 5.3.5 Vibratory force: This force is engine-driven, creating a downward force, in addition to the machine's static weight.
- Page 21 6. Handle Assembly 6.1 Remove the bolts and isolation mounts from the back of the compactor. (Fig. 10) 6.2 Fit the isolation mounts into the bottom of the handles. (Fig. 11) 6.3 Align the base of the handles to the back of the compactor and fit into the brackets.
- Page 22 7.1 Poly Pad Assembly 7.1 Grab the poly pad hardware kit a 5mm allen wrench and a 13mm wrench to complete this assembly. 7.2 Flip the compactor over and begin removing the screw around the plate using a 5mm allen wrench. (Fig. 17) 7.3 Attach the pad using the larger screws found in the hardware kit.
- Page 26 13” x 11” plate for narrow trenches and corners Includes 3.5 gallon water tank for asphalt compaction Optional Honda Engine model: TPC80H 3 Year Engine Warranty & 1 Year Product Warranty 3 Year Engine Warranty & 1 Year Product Warranty 3 Year Engine Warranty &...
- Page 27 3 Year Engine Warranty & 1 Year Product Warranty 1 Year Product Warranty (866) 577-4476 www.tomahawk-power.com * Visit www.tomahawk-power.com for terms and conditions. Coupon must be redeemed at checkout at www.tomahawk-power.com. Coupon may be subject to change and/or expire at any time, without notice.
Need help?
Do you have a question about the TPC80H and is the answer not in the manual?
Questions and answers