Table of Contents
Advertisement
Quick Links
Advertisement
Table of Contents

Related Manuals for E-Mu EMAX II

Summary of Contents for E-Mu EMAX II
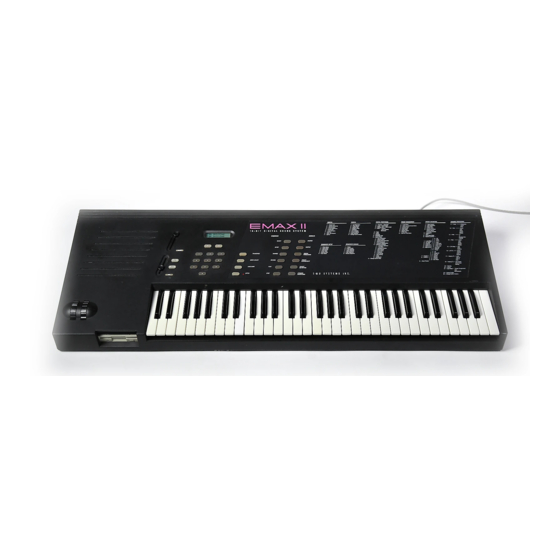
- Page 1 EMAX II OPERATIONS MANUAL Copyright E-mu Systems Inc.
- Page 2 (831) 438-1921 mportant Notice: In order to to obtain warranty service on your Emax II, the serial number sticker must be intact and you must have a sales receipt or other proof of purchase. If there is no serial number sticker on your unit, please contact E-mu Systems at once.
- Page 3 Emax II operation manual...
- Page 4 2201-06, Emax II are not blocked. USER-MAINTENANCE INSTRUCTIONS 1. The Emax II should be kept clean and dust free. Periodically wipe the unit with a clean, lint free cloth. Do not use solvents or cleaners.
- Page 5 8. This Emax II may be equipped with a polarized line plug (one blade wider that the other). This is a safety feature. If you are unable to insert this plug into the outlet, do not defeat the safety purpose of the plug.
-
Page 6: Table Of Contents
Other Definitions ......................... 16 GUIDED TOURS Guided Tour No. 1 - Meet the Emax II ................21 Guided Tour No. 2 - Specifying the Current Voice ............25 Guided Tour No. 3 - Dynamic Processing of a Voice ............. 27 Guided Tour No. - Page 7 Emax II operation manual CONTENTS MASTER (continued) 5. Format Disk ........................57 6. Erase HD Bank ......................... 59 7. Bird Run ..........................60 8. Backup/Restore ....................... 60 0. Define Custom ....................61 1. Copy HD to HD ....................61 2. New Banks Only ....................62 3.
- Page 8 Emax II operation manual CONTENTS DIGITAL PROCESSING (continued) 8. Crossfade Loop ........................ 96 9. Digital Effects ........................98 1. Gain/Attenuation ..................... 98 2. Reverse Sound ....................99 3. Change Sample Rate ..................99 4. Change Pitch ....................100 5. Transform Multiplication ................101 6.
- Page 9 Emax II operation manual CONTENTS DYNAMIC PROCESSING (continued) 21. Keyboard Mode ......................163 22. Control Enable ......................164 SEQUENCER Play ............................167 Record ..........................167 Stop ............................167 Select Sequence ........................168 Sequencer Manage 1. Tempo ..........................168 2. Clock Source ........................169 3.
- Page 10 Spectrum Synthesis Experiments ..................219 Digital Sound Transfer MIDI Supplement APPENDIX Velocity Charts ........................230 Emax II Memory Expansion ....................235 Technical Specifications ....................236 MIDI Implementation Chart .................... 237 Note-to-Frequency Conversion Chart ................238 Index ............................. 239 Warranty ..........................243...
- Page 11 Emax II operation manual...
-
Page 12: Introduction
Emax II operation manual Introduction INTRODUCTION WHAT'S AN EMAX II? INSTANT GRATIFICATION CONNECTION INSTRUCTIONS CONNECTION DIAGRAM... - Page 13 Emax to sound like a piano, sample a piano; if you want it to sound like a barking dog, sample a dog. Pre-sampled sounds can also be loaded into Emax II’s memory from disks. Emax II also contains Spectrum Synthesis, a powerful additive synthesizer.
- Page 14 5. Turn on power; Emax II will do a drive check for a few seconds, then the display will say “Please Insert Disk” if you do not have a hard disk or “Checking SCSI 1, then Booting from SCSI 1”...
- Page 15 Emax II operation manual SELECT DRIVE 6. Press the button labeled DRIVE SELECT on the front panel of Emax II. Use the data slider to select "SCSI 0: Floppy", if you want to load a floppy disk; or "SCSI 1 Conner", if you have a built-in hard disk drive.
- Page 16 II in stereo, you will never be satisfied with mono again. Connect the left and right audio out phone jacks to the inputs of your mixer or stereo preamp. Emax II will also drive stereo headphones, which can be plugged directly into the headphone output. For maximum dynamic range, keep the front panel volume control turned up full.
- Page 17 Line Out of Mixer Main Outs Male RCA plug Male Phone plug & Speakers Home Stereo This diagram shows how various pieces of equipment can be interfaced with the Emax II. The connections to the Emax II rack are identical.
- Page 18 Emax II provides a MIDI In and a MIDI Out/Thru port. The MIDI In port on the Emax II is connected to the MIDI Out port of an external MIDI controller which could be a keyboard, a sequencer, MIDI drum kit or whatever. Note that the Emax II can only respond to information that your controller transmits.
- Page 19 Up to 7 external devices can be connected the the SCSI port. Each device on the SCSI bus must have its own unique ID number so that Emax II can distinguish it from the other devices. If you have an Warning: All SCSI devices connected to internal hard disk, it will be assigned ID #1.
-
Page 20: Emax Ii Basics
Emax II operation manual EMAX II BASICS SAMPLING BASICS THE BANK SAMPLES & VOICES MAKING A PRESET THE CURRENT PRESET THE CURRENT VOICE MORE ABOUT VOICES OTHER DEFINITIONS THE BIG RE-CAP... - Page 21 Emax II operation manual...
-
Page 22: Sampling Basics
SAMPLING BASICS The Emax II is conceptually like a tape recorder in that it records sound. However, the recording process is very different since Emax II records into its computer memory. Computers can accept information only in the form of numbers, so first Emax II converts audio signals into numbers. -
Page 23: The Bank
The bank contains all of Emax II’s memory, which includes preset, voice, sample and sequence data. Consider the bank as the central storehouse for all of Emax II’s data. Although the memory is volatile, meaning that the data disappears when you turn off power or load a new bank, the bank data can be saved permanently on disk to keep a record of your work. -
Page 24: Making A Preset
Emax II operation manual Making a Preset EMAX II BASICS You may process this raw sample via filtering, truncation and so on to create a Voice. Individual voices can be saved to disk and loaded from disk as part of a Preset. The preset can store up to two voices per key, each identified by a two-digit voice number and the voice’s original pitch. -
Page 25: More About Voices
MODULE A Module controls a particular section of the Emax II. There are six main modules (see the labels to the right of the 12 main pushbuttons) and a sequencer module that has six sub-modules (see the labels to the left of the 12 main pushbuttons). - Page 26 Greater storage. The hard disk can hold many banks; the floppy, half a bank or less. Faster access time. A 1 Megabyte bank can be saved from the Emax II to the hard disk in 12 seconds (as opposed to 2 minutes for saving to floppy), or loaded from the hard disk to the Emax in 6 seconds (as opposed to 50 seconds from a floppy).
-
Page 27: Other Definitions
However, remember that the bank only retains this information for as long as the Emax II is plugged in and turned on. Of course, we don’t expect you to leave the thing on all the time, which brings us to the subject of saving data on disks. -
Page 28: The Big Re-Cap
If not, re-read the previous information again. If it still doesn’t make sense, plunge right into the Guided Tours - as you actually work with the Emax II, all of the above definitions will make sense as you relate theory to practice. - Page 29 Emax II operation manual...
-
Page 30: Guided Tours
Emax II operation manual GUIDED TOURS Guided Tour No. 1 Meet the Emax II Guided Tour No. 2 Specifying the "Current Voice" Guided Tour No. 3 Dynamic Processing of a Voice Guided Tour No. 4 Realtime Control Programming Guided Tour No. 5 Basic Sampling Guided Tour No. - Page 31 Emax II operation manual...
-
Page 32: Guided Tour No. 1 - Meet The Emax Ii
GUIDED TOUR #1: MEET THE EMAX II Welcome to the Guided Tours! If you have just met Emax II for the first time, follow these tours until you complete the Guided Tours section. This will get you “up and running”... - Page 33 If you are using an external hard disk, make sure that it is correctly connected (Connection Instructions) and formatted (MASTER 5) for the Emax II. 1. Press the button labeled DRIVE SELECT and use the data slider to locate the hard disk.
- Page 34 When you’re ready to check out some more sounds, proceed. THE EMAX II “MODULAR” SYSTEM The left side of the Emax II front panel includes the volume, data slider, ON/YES and OFF/NO (Increment and Decrement) buttons, the Liquid Crystal Display, two cursor control buttons, and a numeric keypad.
- Page 35 Remember—if you want to save modified voices or presets, save the altered bank to disk. Otherwise, any changes will be lost as soon as power to the Emax II is interrupted. ACTIVATING A MODULE, SELECTING FUNCTIONS, DE-ACTIVATING A MODULE Here’s important background information on how to access the various module...
-
Page 36: Guided Tour No. 2 - Specifying The Current Voice
Guided Tour #2 GUIDED TOURS TUNING THE EMAX II TO OTHER INSTRUMENTS Refer to MASTER 1. This function demonstrates how Emax II uses the data slider to adjust a parameter (in this case, overall tuning). TRANSPOSING THE KEYBOARD Refer to FUNCTION, TRANSPOSE and follow the instructions. - Page 37 (GENERAL INSTRUCTIONS 2). With this preset, however, there are only primary voices. Emax II is a smart little critter, so it won’t ask you to select between primary and secondary voices unless both types of voices are present.
-
Page 38: Guided Tour No. 3 - Dynamic Processing Of A Voice
Emax II operation manual Guided Tour #3 GUIDED TOURS SPECIFYING THE DYNAMIC PROCESSING MODULE CURRENT VOICE Now that we know how many voices there are in the preset, and the range covered by each voice, let’s specify a range of voices to be altered by the Dynamic Processing module, starting with the lowest voice. - Page 39 Guided Tour #3 Emax II operation manual GUIDED TOURS WORKING WITH THE FILTER You could activate the Filter Setup function directly by keying in 13. However, let’s investigate another way to select the Filter function. Move the data slider to catalog the various Dynamic Processing functions.
- Page 40 Emax II operation manual Guided Tour #3 GUIDED TOURS 2. Now we need to change over to DYNAMIC PROCESSING 14. Press ENTER to exit from the current function (see GENERAL INSTRUCTIONS 3), and the display will show the module identifier.
- Page 41 3. Key in 17, and read over DYNAMIC PROCESSING 17. The velocity to level setting should be 06; move the slider to select different values, and note the effects. Emax II plays softer as you play softer. In other words, Emax II equates harder play with the nominal volume setting and goes down from there as you play softer.
-
Page 42: Guided Tour No. 4 - Realtime Control Programming
Preset Definition, and refer to PRESET DEFINITION 8. CHANGING MODULATION WHEEL DESTINATIONS Note: Emax II offers two vibrato options: Pre-programmed (which adds a constant, selectable amount of vibrato), and realtime (where the player adds in vibrato by using one of the wheels). - Page 43 Emax II operation manual GUIDED TOURS Each Emax II wheel can be assigned to a particular destination. For example, if the left wheel is assigned to pitch, then rotating the wheel bends pitch. If assigned to the filter, rotating the wheel varies the cutoff frequency.
-
Page 44: Guided Tour No. 5 - Basic Sampling
Emax II is ready for you to key in the control source’s destination. 2. The left wheel should be assigned to 1 (pitch). Vary the wheel and check that the keyboard pitch is indeed affected. - Page 45 7. To save the sample as part of a preset, de-activate the sample module. Since memory was cleared prior to sampling, Emax II created a preset (00) called “Untitled,” and this is the preset that holds your new sample. Had you sampled into a bank with existing presets, the sample would have been stored with the current preset.
-
Page 46: Guided Tour No. 6 - Digitally Processing Samples
3. Move the cursor using the arrow keys to the End display. Use the data slider to truncate any undesired part off the end of the sample. 4. When you get tired of truncating, press ENTER. When Emax II asks if you want to “Make Truncation Permanent?”, enter NO so that the full sample is available for subsequent experiments in this tour. - Page 47 (DIGITAL PROCESSING 8), and Digital Effects (DIGITAL PROCESSING 9). The more you work with these functions, the more sense they will make, and the more easily you can get Emax II to do your bidding. A PRACTICE SAMPLING SESSION 1. Plug a microphone into the rear panel sample input jack.
- Page 48 Emax II operation manual Guided Tour #6 GUIDED TOURS 3. Set the level (SAMPLE 1). Sing "ahhhh" into the microphone (This is an easy sound to loop). The VU level should not quite reach the top of its range. Adjust the gain (use the data slider) until a good level is attained.
-
Page 49: Guided Tour No. 7 - Managing The Bank
GUIDED TOUR #8: THE SEQUENCER The Emax II sequencer is a “scratchpad” for musical ideas, and is not intended to be a sophisticated do-all whiz-bang. However, you can create sequences on a fancy com- puter and, using Supermode, download these sequences via MIDI into the sequencer (SEQUENCER SETUP 6). -
Page 50: Guided Tour No. 9 - Make Your Own
It’s better that you just start playing! The best way to learn Emax II is to dive right in. Remember, you can experiment as much as you want on stuff in the bank; you have to actually save the bank to disk in order to alter the contents of the disk, and in case you’re nervous, you can even write-protect the disk. - Page 51 Emax II operation manual...
-
Page 52: General Instructions
Emax II operation manual GENERAL INSTRUCTIONS SELECTING THE CURRENT PRESET EXITING A FUNCTION KEYBOARD NUMBERING PROTOCOL DISK HANDLING... - Page 53 Emax II operation manual...
-
Page 54: Selecting The Current Preset
1. If the Enter LED is lit steadily, pressing ENTER will return you to the module identifier. 2. De-activate the module (Emax II returns to current preset). 3. Activate another function within the module or activate another module. Remember: A modified voice or preset is saved in the bank, which loses its memory when the power goes off. -
Page 55: Keyboard Numbering Protocol
The next octave higher spans the range of C4 - B4. The next octave higher spans the range of C5 - B5. The very highest note is C6. Note: Emax II is able to accommodate an 88-note keyboard over MIDI, from keys A-1 to GENERAL INSTRUCTIONS 4 DISK HANDLING Disks represent the sum total of your experience with Emax II, and should be handled with care. - Page 56 HARD DISK DRIVE The hard disk drive built-in to your Emax II is the drive that you will want to use most often. In fact, you will be spoiled and will never again want to use a floppy disk after using the hard disk.
- Page 57 Disk Handling Emax II operation manual GENERAL INSTRUCTIONS FLOPPY DISK DRIVE disk slot disk eject button label 3.5" Micro-Disk Write-Protect Slide-Switch Open to PROTECT Slide Close to UNPROTECT...
-
Page 58: Function Buttons
Emax II operation manual FUNCTION BUTTONS TRANSPOSE SELECT DRIVE LOAD BANK ENTER DATA... - Page 59 Emax II operation manual...
-
Page 60: Transpose
If you press and hold TRANSPOSE , not only will its LED flash, but the display will show the amount of transposition referenced to C2 (see GENERAL INSTRUCTIONS 6), the second C from the left-hand side of the keyboard. For example, if the Emax II is one whole-step sharp, the display says:... -
Page 61: Select Drive
This function selects which storage device will be used when loading or saving. The Emax II, in addition to its floppy disk drive, may have an internal hard disk or up to seven external SCSI devices (hard disks, etc.) may be attached to the SCSI port located on the back panel. -
Page 62: Enter Data
ENTER is something that Emax II, rather than you, activates. Just as you can activate a module to tell Emax II something you want to do, Emax can activate this module to tell you something it wants you to do. - Page 63 Emax II operation manual...
-
Page 64: Master
Emax II operation manual MASTER 1. MASTER TUNE 2. MEMORY REMAINING 3. VELOCITY CURVE 4. ERASE ALL 5. FORMAT DISK 6. ERASE HD BANK 7. BIRD RUN 8. BACKUP/RESTORE 0. Define Custom 1. Copy HD to HD 2. New Banks Only 3. - Page 65 Emax II operation manual...
-
Page 66: Master Tune
MASTER 2 MEMORY REMAINING How close are you to filling up the Emax II memory with samples and presets? This command puts a dipstick in the memory to find out. 1. Activate MASTER 2. With an empty memory bank, the display says:... -
Page 67: Velocity Curve
MASTER MASTER 3 VELOCITY CURVE Emax II provides 14 different velocity curves (See Appendix) to provide different types of dynamics in response to your playing. The Velocity Curves do not affect incoming MIDI data and therefore this function has no purpose on a rack mount Emax II. -
Page 68: Format Disk
Use 3.5" double-sided, double-density (DSDD) disks. Avoid bargain disks. HARD DISK Just as a floppy disk must be formatted in order to receive Emax II data, so must the hard disk. Formatting, which erases any existing hard disk data, occurs for one... - Page 69 MANAGEMENT 2). Otherwise, press YES. 2. If you booted from a floppy disk, Emax II will ask you to insert the source software disk. Check that a formatted Emax II disk with the latest software is in the drive. If not, insert one.
-
Page 70: Erase Hd Bank
Emax II operation manual Erase HD Bank MASTER After formatting is complete, the display asks: Format Another Disk? Y/N To format another disk, remove the newly formatted disk from the drive, insert the next disk to be formatted in the drive, then press YES. Otherwise, press NO, whereupon the display returns to the module identifier. -
Page 71: Bird Run
If Emax II returns to the module identifier after a few seconds, all is well. Note: Occasionally a small emu will get trapped within the Emax II and run across the screen during the stabilization scan process. -
Page 72: Define Custom
MASTER 0 Define Custom This function tells the Emax II to save the previous backup function as your custom backup. When you have chosen your preferred backup scheme, simply execute it once, then use this function and it will be permanantly saved. The next time you want to backup, use the Custom Backup function and the procedure will be performed automati- cally. -
Page 73: New Banks Only
Backup/Restore Emax II operation manual MASTER The display will now ask for the Destination Mode. Your choices are: Installs backup banks in the lowest AddToEmpty Banks empty banks on the destination drive and no data is lost. CopyToSameNumber Overwrites any existing bank with the same number. -
Page 74: Custom Backup
If the destination HD become filled and cannot receive the entire backup, Emax II remembers which banks have not been backed up and allows you to change the removable media or switch SCSI ID numbers. The Continue Backup function allows you to continue backing up from where you left off. -
Page 75: New Banks To Floppy
Takes NN disks Insert disk 1 Continue to feed Emax II floppy disks as directed until the backup process is complete. This will take awhile. 7 New Banks to Floppy This function is identical to a normal backup to floppy, except that only banks that have been changed or added to since the last backup are eligible to be backed up. -
Page 76: Special
8 Install Disk 1 Copy Software The Emax II operating system deals with such tasks as disk transfers, memory manage- ment, and so on. Occasionally E-mu enhances the operating system. Each version of the operating system is numbered, as indicated when you move the data slider all the way to the top while in Special. -
Page 77: Midi Master
Emax II runs out of channels. HD Load allows you to load a hard disk bank via a MIDI program change. HD load is set to a preset that is used to tell the Emax II that the next preset change command will change the hard disk bank number. If an invalid bank number is sent, the Emax II will return to normal preset mode. -
Page 78: Recalibrate
On=Closed to Footswitch On=Open. The LCD contrast control allows you to adjust the LCD viewing angle for easy reading. On the rack mount Emax II, the LCD angle is ajusted from the front panel and not from the recalibrate menu. -
Page 79: Midi Analyzer
This function allows you to select which SCSI drive (0=floppy, 1-7=HD) Emax II will scan on initial power up for its operating software. Note: Emax II will always boot from floppy if a formatted floppy disk resides in the drive on power up. -
Page 80: Install Disk
Headroom is the amount of dynamic range remaining before clipping will occur. The amount of headroom on the Emax II is adjustable from 0 dB to 15 dB in 1 dB increments with the front panel volume control set to maximum. A headroom setting of 0 dB, for example, will provide the hottest output level, (and the highest S/N ratio) but may cause "clipping"... - Page 81 Emax II operation manual...
-
Page 82: Sample
Emax II operation manual SAMPLE 1. VU MODE/GAIN 2. PLACE SAMPLE 3. SAMPLE RATE 4. SAMPLE LENGTH 5. THRESHOLD 6. ARM SAMPLING 7. FORCE SAMPLING 8. STOP SAMPLING 0. CHANGE SAMPLE... - Page 83 Emax II operation manual...
-
Page 84: Vu Mode/Gain
3. If the meter bar hits the extreme right hand side, the headroom of the Emax II has been exceeded. Adjust the data slider, and possibly the output control of the device being sampled (if present), so that peaks are below this overload point. -
Page 85: Place Sample
SAMPLE SAMPLE 2 PLACE SAMPLE Emax II defaults to placing the sampled sound on G1, transposed down to C1 and up to B1. However, this can be changed before sampling. 1. Activate SAMPLE 2. The display shows: Spl Orig Lo XXX YY ...where XXX indicates primary, secondary or stereo voice, and YY are keyboard notes. -
Page 86: Sample Length
Note: The Sample Rates shown in Bold, have a maximum continuous sampling time equal to that of the 39kHz rate. Emax II samples at the 39kHz rate, then performs automatic sample rate conversion on the sample and frees up the additional memory for subsequent sampling. -
Page 87: Threshold
Note: Once sampling has begun, the Emax II will continue sampling even if the signal falls below the threshold level. To stop sampling, refer to SAMPLE 8 or set a specific sample length (SAMPLE 4). -
Page 88: Force Sampling
7. Sampling will begin immediately, and the display will say “Sampling.” 2. After reaching the end of the sample length (if set with SAMPLE 4), being stopped manually (SAMPLE 8), or when the Emax II runs out of memory, the display will return to the module identifier. - Page 89 Emax II operation manual...
-
Page 90: Digital Processing
Emax II operation manual DIGITAL PROCESSING 0. CHANGE VOICE 1. TRUNCATE 2. LOOP 3. RELEASE LOOP 4. LOOP MODE 5. TAPER 6. SPLICE 7. COMBINE 8. CROSSFADE LOOP 9. DIGITAL EFFECTS 1. Gain/Attenuation 2. Reverse Sound 3. Change Sample Rate 4. - Page 91 Emax II operation manual...
-
Page 92: Change Voice
YES to copy the sample—the current preset will contain the new copy in place of the original sample. Either response returns the Emax II to the module identifier. If there is “not enough memory” to duplicate the sample, the display will tell you. -
Page 93: Truncate
Truncate Emax II operation manual DIGITAL PROCESSING processing it will process the sample in those other presets. Therefore, upon selecting the voice, you will be asked if you want to copy the sample. Note that if two voices in the same preset use a single sample, then you will not be asked to copy first, and any changes will affect both voices in the preset. - Page 94 Emax II operation manual Truncate DIGITAL PROCESSING Start = 39,000 Percussive Sound Envelope Time in Seconds Adjusting the Truncation Start to 0039000, cuts one second off the beginning of the sample at the highest sample rate. 4. After setting the desired truncation points, press ENTER. The display asks:...
-
Page 95: Loop
Refer to this section for specifics. Note also that the Emax II offers two loops, each of which can loop a different portion of the signal. The Sustain Loop is operative when the key is down, and the Release Loop is operative in the release phase, when the key is up. - Page 96 Emax II operation manual Looping DIGITAL PROCESSING Loop Start = 39,000 Loop Length = 39,000 Percussive Sound Envelope Time in Seconds Example: If L reads L0039000, the loop is one second long at the highest sample rate. Select the parameter to adjust with the cursor buttons. Adjust the coarse value with the data slider and fine value with the increment and decrement keys, or enter a six-digit number.
- Page 97 As the signal loops, note the discontinuity at the “splice point.” This can produce an annoying ticking or popping sound. Fortunately, the Emax II can help find the optimum splice point for you. Set loop points as best you can, then press YES to invoke Autoloop. The computer will look for nearby points that can be spliced together with minimum discontinuity.
- Page 98 Emax II operation manual Autolooping DIGITAL PROCESSING Start Length Manually-set Loop Points Loop 1 Loop 2 3. The display now asks if you want to Autoloop... Autoloop? Press YES to autoloop, NO if you have a good loop and want to continue.
-
Page 99: Release Loop
Emax II operation manual DIGITAL PROCESSING Note: Sometimes the Emax II will choose the correct splice point from a technical standpoint, not a musical one. Therefore, if you find a good splice point, write down the S and L numbers before invoking Autoloop. Should Autoloop produce an inferior splice point, you can regain your original settings. - Page 100 Emax II operation manual Release Loop DIGITAL PROCESSING Press YES if you want to copy the Sustain Loop parameters to the Release Loop and then return to the module identifier, or NO if you want to set different parameters for the Sustain and Release Loops.
- Page 101 Press YES to autoloop, NO if you have a good loop and want to continue. Note: Sometimes the Emax II will choose the correct splice point from a technical standpoint, not a musical one. Therefore, if you find a good splice point, write down the S and L numbers before invoking Autoloop.
-
Page 102: Loop Mode
To adjust other parameters, move the cursor under the next parameter to be adjusted and again use the ON or OFF keys to make your selection. 2. After making your selection(s), press ENTER. the Emax II returns to the module identifier. -
Page 103: Taper
Set the value with the data slider . 3. After setting the desired taper point, press ENTER. The display will say “Tapering...” When tapering is complete, the Emax II will return to the module identifier and your voice will be tapered. -
Page 104: Splice
Emax II operation manual Splice DIGITAL PROCESSING DIGITAL PROCESSING 6 SPLICE Splicing marks an End point in one sample and a Start point in a second sample, then crossfades the end of the first sample and the start of the second sample over an adjustable length of time. - Page 105 Splice Emax II operation manual DIGITAL PROCESSING 3. The display says: Select Voice Play A Key Play a note within the range of the desired voice, then press ENTER. The sample used by this voice will be spliced after the sample used by the first voice.
-
Page 106: Combine
Emax II operation manual Combine Voices DIGITAL PROCESSING 8. Now comes the moment of decision, as the display asks... Make Splice Permanent? Y/N Answer NO to forget about splicing, YES to permanently splice the two samples together. When splicing is complete, the first sample of the splice will be replaced with the spliced sound. -
Page 107: Crossfade Loop
Crossfade Loop Emax II operation manual DIGITAL PROCESSING ...where XX is a preset number. Since there are two samples used in combining, first the preset containing the second sample must be identified. Select the preset, then press ENTER. 3. The display says:... - Page 108 After making your choice, press ENTER. 3. After taking a few seconds, the Emax II will ask “Truncate after Loop? Y/N. After you have made your choice, the Emax II will return to the module identifier.
-
Page 109: Digital Effects
Gain/Attenuate Emax II operation manual DIGITAL PROCESSING Hints: Before doing a crossfade, copy the voice whose loop is to be crossfaded to another preset. Since crossfading permanently alters the voice, keeping a copy lets you retrieve the original voice and try again. -
Page 110: Reverse Sound
2. Use the slider to select the desired amount of attenuation (down to -40 dB) or gain (up to +40 dB), then press ENTER. Emax II tells you this “Changes Data! OK?” If you can handle that, press YES. The display will say “Computing...” during the time the level is changed. -
Page 111: Change Pitch
Modifies Sample& Takes XX min.OK? ... XX being the time it take the Emax II to do the calculations for the conversion. 3. Press YES to convert, NO to return to the module identifier. Note: The rates given in the NewRate column are the actual Emax II sample rates. The sample rates shown in the sample module are approximations. -
Page 112: Transform Multiplication
Modifies Sample& Takes XX min.OK? ... XX being the time it takes Emax II to do the calculations for the pitch change. 3. Press YES to change the pitch, NO to return to the module identifier. Pitch Change requires memory space to perform its calculations. In some cases there may not be enough memory left to convert the sound, in which case the display warns you. - Page 113 If you do have enough sample memory to complete the operation, the display will say: Modifies Sample& Takes XX min.OK? ... XX being the time it takes Emax II to perform the necessary calculations. 4. Press YES to continue, NO to return to the module identifier. APPROACHING TRANSFORM MULTIPLICATION Transform Multiplication can be thought of as a sounding board on a mechanical musical instrument.
-
Page 114: Spectrum Synthesizer
Virtually any imaginable waveform may be created. After a sound has been created it may be spliced, combined, and processed in the same manner as a sound that has been sampled into Emax II. 1. Select DIGITAL EFFECTS 6 and the display will say:... - Page 115 Emax II operation manual...
-
Page 116: Preset Management
Emax II operation manual PRESET MANAGEMENT 1. LOAD PRESET 2. SAVE COMPRESSED 3. CREATE PRESET 4. ERASE PRESET 5. COPY PRESET 6. RENAME PRESET 7. PRESET SIZE 8. SAVE ALL 16 BIT... - Page 117 Emax II operation manual...
-
Page 118: Load Preset
PRESET MANAGEMENT 1 LOAD PRESET Use this to load an individual preset from disk into the Emax II memory bank. 1. Insert the disk containing the preset to be loaded into the disk drive. 2. Activate PRESET MANAGEMENT 1. The display says:... -
Page 119: Save Compressed
The compressed format is the same data format used in the Emax I. This function can be used to create high quality Emax I banks. Emax II banks saved as compressed will be compatible with an Emax I, with a few exceptions: 1) Only banks which are 1 Meg or smaller can be saved compressed. -
Page 120: Create Preset
Emax II operation manual Create Preset PRESET MANAGEMENT PRESET MANAGEMENT 3 CREATE PRESET Creating a preset provides a home for all those great samples you have. 1. Activate PRESET MANAGEMENT 3. The display says: Create Preset XX Select A Preset ...where XX defaults to the first empty preset. -
Page 121: Copy Preset
Copy Preset Emax II operation manual PRESET MANAGEMENT PRESET MANAGEMENT 5 COPY PRESET Use this function to copy one preset into another preset. 1. Activate PRESET MANAGEMENT 5. The display says: Copy PXX Select A Preset ...where XX is the preset to be copied (the source preset; this defaults to the current preset). -
Page 122: Preset Size
Emax II operation manual Preset Size PRESET MANAGEMENT preset to be renamed (use the slider or numeric keypad) then press ENTER. 2. Use the cursor buttons to select the character to be changed. Select the character itself with either the data slider (moving the slider all the way to the bottom of its travel produces a space), or the keyboard keys. -
Page 123: Save All 16 Bit
PRESET MANAGEMENT PRESET MANAGEMENT 8 SAVE ALL 16 BIT This function saves the entire Emax II bank to disk in 16-bit linear format. 1. Use the DRIVE SELECT function to select the destination disk drive. 2. Activate PRESET MANAGEMENT 8. -
Page 124: Preset Definition
Emax II operation manual PRESET DEFINITION 1. COPY VOICE (s) 2. EDIT ASSIGNMENT 3. ERASE VOICE 4. STEREO VOICE 5. CROSSFADE 6. ARPEGGIATOR 7. MIDI 8. PITCH BEND RANGE 9. REALTIME CONTROLS 0. STACK PRESETS... - Page 125 Emax II operation manual...
-
Page 126: Copy Voice
Emax II operation manual Copy Voice PRESET DEFINITION PRESET DEFINITION 1 COPY VOICE(S) This function copies voice(s) from one preset to another. Application: Copying a voice back to a subset of its former range gives you another voice that uses the same sample. Using this technique, you can dynamically process each voice separately. - Page 127 Copy Voice Emax II operation manual PRESET DEFINITION Use the data slider to select whether you will copy primary, secondary or both voices, then press ENTER. Caution: If you select both, even though the source preset contains no secondary voices, you can overwrite double voices during the copying process (step 7).
- Page 128 ...where XXX defaults to your previous selection in step 2 (note: if in step 2 you selected both, then the Emax II will automatically go to step 9). This step allows you to copy primary voice(s) to secondary locations and visa versa.
-
Page 129: Edit Assignment
...where XXX is either Pri or Sec. Use the data slider to select whether you will edit the primary or secondary voice, then press ENTER. If there are only primary or secondary voices, Emax II will automatically go to step 2. 2. The display now says:... - Page 130 To select the output channels (Out) over which the voice will appear, move the cursor under Out and select the desired output - Main, or one of the A, B, C submix outs. Press ENTER, and the Emax II will return to the module identifier. OUTPUT...
-
Page 131: Erase Voice
... where XXX is either Pri, Sec or Both. Use the data slider to select whether you will erase the primary, secondary, both voice(s), then press ENTER. If there are only primary or secondary voices, Emax II will automatically go to step 2. -
Page 132: Stereo Voice
PRESET DEFINITION 4 STEREO VOICE The Emax II plays back stereo samples, with no loss of polyphony. Stereo is implemented using the primary and secondary voices and selecting Stereo Voice mode. Stereo Voice mode uses all primary voice parameters for both primary and secondary layers. - Page 133 ...where XX is either on or off. Use the ON and OFF buttons to select whether stereo voice is on or off, then press ENTER. The Emax II will inform you that secondary parameters will be altered if you select stereo voice on. If that’s okay, press YES; otherwise, press NO to abort and the Emax II will return to the module identifier.
-
Page 134: Crossfade
Emax II operation manual Crossfade/Cross-switch PRESET DEFINITION PRESET DEFINITION 5 VELOCITY XFADE/SWITCH, POSITIONAL XFADE Velocity Crossfade crossfades between the primary and secondary voices ac- cording to how hard you play the keyboard. One voice will become louder as you play harder and softer as you play softer, while the other voice will become louder as you play softer and softer as you play harder . - Page 135 Crossfade/Cross-switch Emax II operation manual PRESET DEFINITION Velocity XFade Application: Fade between cellos and violins, depending on how hard you play a key. Have a fuzz guitar sound assigned so that playing softly plays the fundamental, and playing harder brings in a feedback note an octave above the fundamental.
- Page 136 Emax II operation manual Crossfade/Cross-switch PRESET DEFINITION You now may select from the following choices: XFade Off = There is no crossfading between the primary and secondary voices. Velocity XFade = One voice will become louder as you play more forcefully; the other voice will become softer.
-
Page 137: Arpeggiator
Arpeggiator Emax II operation manual PRESET DEFINITION PRESET DEFINITION 6 ARPEGGIATOR SETUP You’re going to love this arpeggiator: It does a lot and it’s easy to set up. Best of all, arpeggiation settings are stored with the preset so that different presets can have totally different arpeggiation characteristics. - Page 138 Emax II operation manual Arpeggiator PRESET DEFINITION 4. The next menu item chooses the note value; the display says: Note Value: 1/16 Use Data Slider Use the data slider to select between the following arpeggiation note values: 1/2 note, 1/4 note, 1/4 triplet, 1/8, 1/8 triplet, 1/16 (default setting), 1/16 triplet, 1/32, 1/32 triplet, and (believe it or not) 1/96 note.
- Page 139 For example, suppose you played C2 with an interval of 5 (a major fifth) and up mode arpeggiation. the Emax II would arpeggiate between C2 and G2. An arpeggio Extension specifies how many times the interval will be extended. For...
- Page 140 Emax II operation manual Arpeggiator PRESET DEFINITION 9. The next menu item produces the following display: Interval: Oct Use Data Slider Use the data slider to specify the arpeggiation interval, as listed below: m2 = minor second M2 = major second...
- Page 141 Use Data Slider Use the data slider buttons to choose the desired clock option. Your choices are: internal Emax II’s arpeggiator syncs to the internal clock at the tempo chosen in the previous step. MIDI Emax II’s arpeggiator syncs to MIDI clock signals coming in over the MIDI in port.
- Page 142 Emax II operation manual Arpeggiator PRESET DEFINITION Use the data slider or numeric keypad to set the arpeggiator velocity value. The lowest possible value (obtained by entering 000) gives the following display: Velocity: Played Use Data Slider Each note will arpeggiate at a volume level determined by the velocity with which the note was played.
- Page 143 The display will confirm your choice; press ENTER to jump back to the module identifier, otherwise press the right arrow cursor button to continue the setup. Note: The Emax II will not let you choose a lower note higher than the currently selected upper note.
-
Page 144: Midi
Basic Channel 01 [01-16] /Slider This is the default channel over which this particular Emax II preset will send and receive MIDI information. To change channels, use the data slider or the numeric keypad. To jump back to the module identifier press ENTER, otherwise press the right arrow cursor button to continue the setup. - Page 145 MIDI also carries program (preset) change information from one synthesizer to another. Press ON if you want the Emax II to send and receive program changes, or OFF if you want to select Emax II presets independently of other MIDI instruments. To jump back to the module identifier press ENTER, otherwise press the right arrow cursor key to continue the setup.
- Page 146 Notes,Wheels: on Select on/off Press ON if you want the Emax II to send and receive note and wheel MIDI data as well as MIDI clock signals. Press OFF if you want the Emax II to send and receive MIDI clock signals but not note and wheel signals.
- Page 147 MIDI Emax II operation manual PRESET DEFINITION To return to the module identifier press ENTER, otherwise press the right arrow cursor button to continue the setup. 10. The next screen says: Rt Wheel <-> 01 [00-33] / Slider You may now assign a controller number to the Right Wheel in exactly the same manner as you assigned a controller number to the Left Wheel in step 9.
- Page 148 Example: Suppose a second MIDI unit’s vibrato controller is assigned to MIDI control number 01, and that MIDI control source A on Emax II controls the filter cutoff frequency. Selecting 01 for MIDI control source A would control Emax II’s filter cutoff frequency via the second MIDI unit’s vibrato information.
-
Page 149: Pitch Bend Range
...where X is a number between 0 and 4. 2. Select the desired number with the data slider, numeric keypad. Press ENTER after making your choice, and the Emax II will return to the module identifier. PRESET DEFINITION 9 REAL-TIME CONTROLS Real-time functions are designed for fast, easy selection while playing live. - Page 150 MIDI. These MIDI control sources are given controller numbers (see PRESET DEFINITION 7). These numbers match up with the numbers of the controllers “transmitting” data from a MIDI unit into the Emax II. For more information, see the MIDI supplement.
- Page 151 Or, assign this destination to the Right wheel when you need (MIDI Menu), then as- sign the MIDI A or B to a manual volume control (such as during fadeouts) or to a MIDI control for pseudo- Level. automated mixdown effects when driving Emax II from a sequencer.
- Page 152 Emax II operation manual Realtime Controls PRESET DEFINITION Assigning LEVEL to the left wheel can also be useful. At center position, the volume level is audible but can be increased by rotating the wheel away from you. Rotate the wheel towards you to fade out the sound completely.
- Page 153 Realtime Controls Emax II operation manual PRESET DEFINITION Application Hint: When assigned to the right wheel, rotating the wheel away from you increases the amount of tremolo. Assigning this destination to the pedal provides foot- controlled tremolo. Tremolo is useful for “Bo Diddley” and surf music guitar sounds, as well as for simulating some electric piano sounds.
- Page 154 Emax II operation manual Realtime Controls PRESET DEFINITION FOOTSWITCH DESTINATIONS Emax II has input jacks for two footswitches • Destination: (Footswitch) 0 To turn off the footswitc irst select the footswitch then select 0. • Destination: (Footswitch) 1 ARP CTRL...
-
Page 155: Stack Presets
For instance; if the current preset is 01, then presets 02, 03, and 04 may be stacked up so that one key will sound all four presets. The polyphony of the Emax II will vary according to the voice architecture of each preset in the stack. - Page 156 Emax II operation manual Stack Presets PRESET DEFINITION Stack Presets XX thru YY ... where XX is the current preset and YY is the last preset that will be stacked. 3. Use the slider to select the number of presets to be be stacked. Press ENTER after...
- Page 157 Emax II operation manual...
-
Page 158: Dynamic Processing
Emax II operation manual DYNAMIC PROCESSING 00. CHANGE VOICE 11. ATTEN/TUNING/DELAY 151 12. VCA AHDSR 13. FILTER SETUP 14. FILTER AHDSR 15. LFO SETUP 16. LFO TO 17. VELOCITY TO A 18. VELOCITY TO B 19. PANNING 20. CHORUS 21. KYBD MODE... - Page 159 Emax II operation manual...
-
Page 160: Change Voice
3. You may select the entire keyboard by pressing the DYNAMIC PROCESSING or the ENTER button twice in sucession. 4. If the preset contains only primary or secondary voices, the Emax II is smart enough to bypass the first screen and say:... - Page 161 If, however, you wish to process just a portion of the voice assignment, simply copy the desired range (PRESET DEFINITION 1) back into the current preset. Emax II will now consider this a whole new voice for independent processing.
-
Page 162: Attenuation/Tuning/Delay
Emax II operation manual Atten, Tuning, Delay DYNAMIC PROCESSING DYNAMIC PROCESSING 11 VOICE ATTENUATION, TUNING, and DELAY This function varies the attenuation, tuning, and delay for the current voice. 1. Activate DYNAMIC PROCESSING 11. The display will say: Attn Tune Delay 00dB +00ct 00 2. - Page 163 VCA Envelope Emax II operation manual DYNAMIC PROCESSING 2. Select the desired parameter for adjustment with the cursor buttons, then use the data slider to change the parameter value. Refer to the diagram as you read the following descriptions of the five envelope parameters.
- Page 164 Emax II operation manual VCA Envelope DYNAMIC PROCESSING Note: If the filter and VCA release are both at 32 (also see DYNAMIC PROCESSING 14), a key will sustain at the sustain level even after you take your fingers off the keys. This is like the HOLD function found on standard synthesizers.
- Page 165 Filter Controls Emax II operation manual DYNAMIC PROCESSING DYNAMIC PROCESSING 13 FILTER FREQUENCY, Q, ENVELOPE AMOUNT, TRACKING This function determines the filter’s initial cutoff frequency and Q (sharpness), the extent to which the associated AHDSR envelope affects the filter cutoff frequency, and the effect of keyboard position on cutoff frequency.
- Page 166 Emax II operation manual Filter Controls DYNAMIC PROCESSING +100 (maximum positive envelope) higher filter cutoff lower filter initial filter (no envelope) cutoff cutoff frequency -100 (maximum inverted envelope) Inverted envelopes can be generated by applying a negative envelope amount. Keyboard Tracking Application: With no tracking, a voice will become progressively less bright as you play higher on the keyboard.
-
Page 167: Filter Ahdsr
Filter Envelope Emax II operation manual DYNAMIC PROCESSING DYNAMIC PROCESSING 14 FILTER ENVELOPE This function sets the attack, decay, sustain, and release characteristics of the filter AHDSR envelope generator. Application: Change the filter cutoff frequency dynamically over time. 1. Activate DYNAMIC PROCESSING 14. The display will say:... -
Page 168: Lfo Setup
LFO Variation: In addition to having true, one-LFO-per-voice polyphonic modula- tion, the Emax II also has a great feature called variation. With 00 variation, each key will have the same vibrato rate. Increasing variation (to a maximum of 15) alters the LFO rate every time you hit a key;... -
Page 169: Lfo To
LFO Routing Emax II operation manual DYNAMIC PROCESSING 3. After making your selections, press ENTER to return to the module identifier. DYNAMIC PROCESSING 16 LFO TO (VIBRATO, TREMOLO, FILTER Fc, PANNING) The LFO can modulate four different parameters—pitch, amplitude, filter cutoff frequency, and stereo placement. -
Page 170: Velocity To A
Application: Sample sounds from an instrument (i.e. older synthesizers) without dynamics, and assign velocity dynamics in the Emax II. Application: Acoustic instruments often sound brighter when played forcefully. Emax II can simulate this effect by tying filter cutoff to keyboard dynamics. -
Page 171: Velocity To B
Velocity Routing Emax II operation manual DYNAMIC PROCESSING Q: Determines the extent to which keyboard velocity controls filter Q. When set to 00, no matter how hard or soft you play the Q stays constant. With positive values (up to +15), playing more forcefully increases the Q. -
Page 172: Panning
Emax II operation manual Panning DYNAMIC PROCESSING 2. Select the desired parameter for adjustment with the cursor buttons, then use the data slider to change the parameter value. These are the available parameters: Atk: Determines the extent to which keyboard velocity controls VCA attack time. -
Page 173: Chorus
Chorus Emax II operation manual DYNAMIC PROCESSING 2. Use the data slider to vary the stereo placement; moving the marker to the left shifts the sound to the left, and moving the marker to the right shifts the sound to the right. -
Page 174: Keyboard Mode
Emax II operation manual Keyboard Mode DYNAMIC PROCESSING DYNAMIC PROCESSING 21 KEYBOARD MODE (Solo, Non-Transpose, Output Channel Assignment) Output Channel Assignment: allows you to reassign any area of the keyboard to specific outputs without having to assign each individual voice. -
Page 175: Control Enable
Control Enable Emax II operation manual DYNAMIC PROCESSING OUTPUT Main Sub A = Primary Voice = Secondary Voice Sub B Sub C Groups of voices can be assigned to specific output channels using Dynamic Processing 21. DYNAMIC PROCESSING 22 CONTROL ENABLE This unique function allows you to exempt specific voices from certain real-time control functions. -
Page 176: Sequencer
Emax II operation manual SEQUENCER PLAY RECORD STOP SELECT SEQUENCE SEQUENCER MANAGE 1. TEMPO 2. CLOCK SOURCE 3. LOAD SEQUENCE 4. ERASE SEQUENCE 5. COPY SEQUENCE 6. RENAME SEQUENCE SEQUENCER SETUP 1. TRACK STATUS 2. TRACK PRESET 3. AUTO EXTEND 4. - Page 177 Emax II operation manual...
-
Page 178: Play
“free-up” another 4629 notes of sequencer time. (27,000 x .5) ÷ 3 = 4629. If you have a hard disk for your Emax II, you can create and save sequences up to the limit of your memory (over a million notes with no samples). The limit for saving sequences to floppy disk is 85,333 notes (512 kBytes) for all sequences (ie. -
Page 179: Select Sequence
Pressing play returns to tempo display. SEQUENCER MANAGE 1 TEMPO This sets the tempo for Emax II’s internal clock. 1. With the sequence module active, press MANAGE then select 1. The display says: Tempo: =120.00... -
Page 180: Clock Source
Clock Source SEQUENCER MANAGE SEQUENCER MANAGE 2 CLOCK SOURCE You can drive the Emax II sequencer from the internal clock, MIDI, or three different flavors of pulse signals. 1. With the Sequencer module active, select 2. The display says: Clock: internal Use Data Slider 2. - Page 181 ...where XX is the sequence number selected in the previous step (source sequence), and YY is the sequence number the loaded sequence will have in the Emax II’s bank (destination sequence; this defaults to the first available empty sequence). Use the slider or numeric keypad to select one of the 50 sequences in the Emax II.
-
Page 182: Erase Sequence
SEQUENCER MANAGE 4 ERASE SEQUENCE This function erases a sequence in the Emax II memory. It does not erase a sequence from disk. To erase a sequence from disk, you must first load the disk, erase the sequence, then save the bank to disk (PRESET MANAGEMENT 1. -
Page 183: Copy Sequence
...where XX is the sequence number selected in the previous step (source sequence), and YY is the sequence number the copied sequence will have in Emax II’s bank (destination sequence; this defaults to the first available empty sequence). Use the slider, or numeric keypad to select one of the 50 sequences in Emax II. -
Page 184: Rename Sequence
(moving the slider all the way to the bottom of its travel produces a space),the increment buttons,or the keyboard keys. You can also use the numeric keypad to enter any numbers that are part of the name. 4. Press ENTER after naming the sequence; Emax II returns to the module identifier. -
Page 185: Sequencer Setup
SEQUENCER SETUP SEQUENCER SETUP 1 TRACK STATUS Emax II’s sequencer has 16 tracks. If the track is unrecorded, its status can be set to Record. If it is recorded, its status can be set to Play, Mute, or Record (to re-record). -
Page 186: Auto Extend
Emax II operation manual Auto Extend SEQUENCER SETUP 2. The display now says: Use the Track->Preset function in SuperMode to assign presets to MIDI Track XX —> PYY channels. Select A Preset ...where XX is the track number to be re-assigned and YY is the preset number currently assigned to the track. -
Page 187: Erase Track
Press ENTER. Emax II, which always does what it can to help you prevent embarrassing mistakes, asks “Are You Sure Y/N.” If yes, press YES, otherwise press NO. -
Page 188: Supermode
...where XX is the source track number and YY is the destination track number. Select the destination track number (data slider or keypad) and press ENTER. The source track will be erased, its data will now be in the destination track, and Emax II will return to the module identifier. - Page 189 The sequencer will start Emax II and send its MIDI data through the MIDI OUT into the Emax II MIDI IN. Emax II should be set for MIDI clock in. Either stop Emax II manually to terminate the downloading process, or stop the sequencer.
- Page 190 SEQUENCER SETUP play the sequence to make sure all is well. If it is, call up SEQUENCER SETUP 6, turn off SuperMode, press ENTER, and Emax II will return to the module identifier. IN BRIEF: To access multiple presets thru MIDI...
- Page 191 Emax II operation manual...
-
Page 192: Advanced Applications
Emax II operation manual ADVANCED APPLICATIONS THE ART OF SAMPLING Part 1: Taking the Best Possible Sample Session #1: Sampling from Tape Session #2: Sampling Acoustic Instruments Session #3: Sound Effects Part 2: Maniplulating the Sample Part 3: Multi -Sampling... - Page 193 Emax II operation manual...
-
Page 194: The Art Of Sampling
Part One: TAKING THE BEST POSSIBLE SAMPLE What comes out of the Emax II can only be as good as what you put in: Strive for maximum fidelity when sampling. Here are some ways to increase sample quality. GENERAL TIPS Live Sampling : Sample “live”... - Page 195 With all the instruments patched in place and connected to each other, turn off the Emax II and insert a ground lift adapter between the Emax II plug and the wall. CAUTION : Removing the ground connection defeats the safety advantage of using a three-wire plug, so use this technique only as a last resort and exercise extreme caution.
- Page 196 Equalization : If using EQ gives a better instrument sound, then use it. You want the best possible sound going into the Emax II, and if a little EQ is indicated, it’s best to add it while recording rather than having to think about it during playback.
-
Page 197: Session #1: Sampling From Tape
Variable speed can help increase high frequency response as well. Record a sample on tape, then set the recorder to half speed and record the sound into the Emax II. Assign the original pitch to one octave below the sample’s pitch, the low note also one octave... -
Page 198: Session #2: Sampling Acoustic Instruments
Creative use of multi-tracking: Try multi-tracking sounds on a conventional recorder, then sampling the combination sound into the Emax II. Recording a half-speed piano note along with an electric bass and a little bit of analog synth in the background gives a pretty outrageous bass sound... - Page 199 But if you transpose the sound over a wide range, the vibrato will change from seasick-slow to Loony Tunes fast. Besides, the Emax II allows you to add vibrato anyway using the modulation wheels or other controllers. This gives you more flexibility, since you can alter the speed as required and bring the vibrato in and out as desired.
- Page 200 Some of my better samples have come from pulling parts off one track of a multi-track recorder, with the musician’s knowledge, of course. The problem then becomes how to capture the performance, since the Emax II only allows a couple of minutes of sampling even with maximum memory. As you might expect, the best sound does indeed come from playing a sound directly into the Emax II, but that is only practical for certain types of samples.
-
Page 201: Session #3: Sound Effects
Then call up sounds that seem well suited to sampling and stuff them into the Emax II. Just about anything works for percussive effects, but some sound effects can also be tuned for melodic and chordal uses. - Page 202 Try To Get As Much Level As Possible On Tape If you’re using an inexpensive tape recorder, any extra noise can be a real problem, although you can use the Emax II’s internal filter, VCA and envelopes to reduce and sometimes eliminate this noise.
-
Page 203: Part 2: Manipulating The Sample
One approach to dealing with this problem is to even out the level of the decaying part of the signal going into the Emax II, either by manually turning up the Emax II’s sample input gain control, or via compression (limiting) of the original signal. This produces a signal with more limited dynamics. - Page 204 Emax II operation manual Maniplulating Samples THE ART OF SAMPLING looping isn’t good, the sound would be less realistic than recording the regular sound along with its natural decay. Suppose we sample a sound that has a fairly bright pluck-type attack, then settles down into sustain.
- Page 205 Applying the right kind of envelope to the filter will help dramatically towards lowering the overall amount of noise. Signal Processing with the Emax II Pitch Transposer with Regeneration: To make a voice sound as if it is being pitch-...
-
Page 206: Part 3: Multi-Sampling
Emax II operation manual Multi-Sampling THE ART OF SAMPLING Part Three: MULTI-SAMPLING You would think that sampling an instrument would be a piece of cake, right? After all, you just play a note, sample it, and there it is—you’re done. - Page 207 Parametric EQ Emax II operation manual THE ART OF SAMPLING tracking is for. By setting the tracking to zero (i.e. the filter frequency stays the same regardless of where you play on the keyboard), or slightly higher, these high notes can be tamed to the point where they sound acceptable.
-
Page 208: Fix It In The Mix
Emax II operation manual Fixitinthemix FIX IT IN THE MIX WITH A SAMPLING KEYBOARD by Craig Anderton Uh-oh. You’re doing a mix and you start hearing things...like clicks, and pops, and out- of-tune parts, and even a fluffed note on the piano section in the second verse. And the singer didn’t quite make that high D... - Page 209 Fixitinthemix Emax II operation manual FIX IT IN THE MIX TESTING A SPLICE POINT Do you get as nervous as I do when slicing up a multi-track master tape? It’s no fun to slash a 2-inch tape into pieces, only to find that maybe that snare hit wasn’t the right splice point after all.
- Page 210 AND THERE’S MORE! While technically not a fix-it-in-the-mix application, some samplers [Emax II, ed.] let you slow the sampling rate way down, thus allowing very long sampling times. This can be a real boon to songwriters. I don’t know about you, but I often come up with words by playing a chorus or verse over and over and over again until I’ve got most of the words...
- Page 211 Fixitinthemix Emax II operation manual FIX IT IN THE MIX END OF LINE Samplers make great musical instruments, no doubt about that. But they also make versatile digital recorders with very useful editing capabilities. Next time you need to fix something in the mix, see if a sampler won’t do the job in the quickest, sim- plest, and most cost-effective manner.
-
Page 212: Multi-Timbral Operation
The SuperMode Map directs a Track to the appropriate Preset. WHAT IS A SUPERMODE MAP? It is the sequence, labeled 00 on all E-mu factory disks, in which all 16 tracks have been recorded with nothing for one second. This is so that there exists a ‘sequence’ where you can assign presets to any one of the sixteen tracks. - Page 213 After you’ve slaved the Emax II sounds to your sequencer, and finished working on the music, it is possible to download all the data into the Emax II so you won’t have to carry the dedicated sequencer around with you. In doing this, you’re actually turning that Supermode Map into a real sequence.
-
Page 214: Multi-Timbral Banks
Problems come when you see the flashing error message; "Not Enough Sample Memory". This message is telling you that you have run out of sample memory. On an Emax II with only one Megabyte of RAM, this message will appear frequently when trying to load presets. - Page 215 Check the preset sizes of the presets you want to load (PRESET MANAGEMENT 7) before loading them. If the total number of samples in the presets you want to load exceeds the memory capacity of your Emax II (524,244 samples on a 1 Meg unit), you must take action.
-
Page 216: Spectrum Synthesis
Simply being able to create any waveform is not enough. The waveform of a sound must vary over time or the sound is static and uninteresting. Enter the Time Slice. Emax II’s Spectrum Synthesis allows you to specify up to 24 complex waveforms, (called Spectrums) and to either step or fade through them during the course of the sound. -
Page 217: Spectrums
After a sound has been created it may be spliced, combined, and processed in the same manner as a sound that has been sampled into the Emax II. ABOUT SPECTRUMS The spectrum synthesizer development disk contains 95 pre-programmed spectrums for you to use, or you may create and store your own. -
Page 218: Timeslice
Emax II operation manual Timeslices SPECTRUM SYNTHESIS A spectrum may be placed at any of the 24 “time slice” locations. Placing a spectrum at a given time slice will determine the timbre of the sound at that point in time. -
Page 219: Creating Sounds
CREATING SOUNDS The best way to learn about the spectrum synthesizer is by creating a sound, so load the Spectrum Synth development disk into your Emax II and follow these simple steps... DEFINE THE LOCATION First, we must define the location and the length of the sound. This can be accomplished in one of three ways: Select a preset 95-99 on the Spectrum Synth development disk. -
Page 220: Interpolation
”. Press ENTER to return to the Synth Options menu. SYNTHESIZE! At this point it is time to tell the Emax II to generate the sound that you have defined. This is done by pressing #0 (Synthesize!) on the keypad. There are two modes of synthesis - “Smooth”... -
Page 221: Frequency Spectrum
Frequency Spectrum Emax II operation manual SPECTRUM SYNTHESIS SPECTRUM SYNTH OPTIONS MENU There are ten options listed in the spectrum synthesis menu. Each of these options covers a specific function or group of functions, and some contain sub-menus and functions. -
Page 222: Time Slice
Emax II operation manual Frequency Spectrum SPECTRUM SYNTHESIS COPY a Spectrum (Use for creating a duplicate spectrum which can then be modified) A. Press #1 on the keypad to access the Frequency Spectrum menu options. B. Use the slider to select the number of the spectrum you wish to copy. Press ENTER. - Page 223 Time Slices Emax II operation manual SPECTRUM SYNTHESIS C. Press YES to start the drawing countdown. You will see the display countdown 5...4...3...2...1... When the countdown finishes, the drawing process starts. The cursor position automatically moves from left to right - each position of the cursor denoting one partial.
-
Page 224: Amplitude Contour
Emax II operation manual Amplitude Contour SPECTRUM SYNTHESIS T SLICE -> SP (Use for moving a time slice to a spectrum location) A. Press #2 on the keypad to access the Time Slice menu options. B. Use the slider to select the number of the time slice you wish to move. Press ENTER. -
Page 225: Pitch Contour
Pitch Contour Emax II operation manual SPECTRUM SYNTHESIS C. Press NO to get to the amplitude contour EDIT screen. Press YES to edit. D. Use the slider to enter the amplitude of the partial at each time slice. Amplitude is shown in percentages on the right hand side of the screen. - Page 226 Emax II operation manual Pitch Contour SPECTRUM SYNTHESIS can draw the pitch of the partial at each of the 24 time slice locations. The bar graph displays the relative pitch of the partial at each time slice, from plus 1 semitone to minus 1 semitone.
-
Page 227: Pitch/Ratios
Pitch /Ratios Emax II operation manual SPECTRUM SYNTHESIS 5. PITCH/RATIOS In this menu you may determine the pitch of the note you are synthesizing, and define the ratios of all of the partials. Original pitch may range from CØ to C5. Partials may be any ratio to the fundamental pitch from 1.00 to 40.99. -
Page 228: Load Parameters
Emax II operation manual Load/Save Params SPECTRUM SYNTHESIS C. Press ENTER. D. Use the slider to select the time slice you wish to interpolate to. E. Press ENTER to return to the Synth Options menu. Note: An easy way to create a sound is to place a spectrum at time slice #1, place another spectrum at time slice #24, then Interpolate from time slice 1 to time slice 24. -
Page 229: Erase Parameters
Erase Params Emax II operation manual SPECTRUM SYNTHESIS 9. ERASE PARAMETERS The following parameters may be erased: None Backup #1 Backup #2 Backup #3 Current Parameters Spectrums (entire palette) All! (everything listed above) To ERASE parameters: A. Press #9 on the keypad to access the Erase screens. -
Page 230: Approaching Spectrum Synthesis
And remember that some of the best sounds are created by chance. There is a great deal to be learned about sound. Spectrum Synthesis (and the Emax II in general) can be thought of as a powerful audio laboratory. Spectrum Synthesis is just one of the tools in your lab. - Page 231 OTHER TIPS Save Time You have noticed that the Emax II takes time to perform the thousands of calculations necessary for Spectrum Synthesis. You can save your valuable time by working on short sounds (.6 sec to 1.2 sec), then lengthening it when it sounds the way you want.
-
Page 232: Digital Sound Transfer
Emax II key A2. If it is requested to send sample # 280, then the secondary voice assigned to Emax key A2 will be sent. If there is no voice on Emax II key A2, the request will be ignored. The diagram below shows the MIDI key numbers in relation to the Emax II keyboard. - Page 233 Emax I voices loaded into the Emax II, the ouput routing will be as follows: Emax I Emax II 1->1 X->2 X->3 X->4 X = any channel number X->5 X->6 X->7 X->8 Emax I voices which are in Dual Mode will play normally on the Emax II but will use two channels.
-
Page 234: Midi Supplement
MIDI is causing a certain amount of confusion among musicians. Fear not-it’s not all that hard to understand, and the Emax II makes it particularly easy to deal with. For those of you who aren’t that familiar with MIDI, we’ll first answer some common questions. - Page 235 MIDI instrument responds to these channels. In Omni mode, the Emax II (or any other MIDI keyboard) listens to all channels at once. No matter how many notes from how many sources make it through the MIDI bus into the instrument, when in Omni mode it will attempt to play all of them.
- Page 236 MIDI synthesizer, and vice-versa. Slave two keyboards together to create a composite sound. For example, you might like the sound of Emax II violins fading in as the attack of a digital synth violin patch fades out.
- Page 237 MIDI OUT jack as MIDI controller #19. Also, if MIDI controller #19 comes in the MIDI IN jack, the Emax II will treat it the same as it does its own Left Wheel, i.e., change pitch. The Emax II’s MIDI Ctrl A and MIDI Ctrl B, unlike its other four controllers, are only accessible via the MIDI IN port.
- Page 238 For a practical example of how to use this feature, suppose you want to use the Emax II footpedal to simultaneously fade out the Emax II and a MIDI’ed synthesizer. During MIDI setup, select the “Pedal”...
- Page 239 Emax II operation manual...
-
Page 240: Appendix
Emax II operation manual APPENDIX VELOCITY CURVES EMAX II MEMORY EXPANSION TECHNICAL SPECIFICATIONS MIDI IMPLEMENTATION CHART NOTE-FREQ. CONVERSION CHART INDEX WARRANTY... -
Page 241: Velocity Charts
Emax II operation manual VELOCITY CURVES More Output More 1. Linear Velocity More Output More 2. Heavy Handed Velocity More Output More 3. Heavy Handed Velocity... - Page 242 Emax II operation manual VELOCITY CURVES More Output More 4. Heavy Handed Velocity More Output More 5. Clipped Velocity More Output 6. Concaved More Exponential 1 Velocity...
- Page 243 Emax II operation manual VELOCITY CURVES More Output 7. Concaved More Exponential 2 Velocity More Output 8. Concaved More Exponential 3 Velocity More Output 9. Concaved More Exponential 4 Velocity...
- Page 244 Emax II operation manual VELOCITY CURVES More Output 10. Concaved More Exponential 5 Velocity More Output More 11. S-Shape 1 Velocity More Output More 12. S-Shape 2 Velocity...
- Page 245 Emax II operation manual VELOCITY CURVES More Output More 13. S-Shape 3 Velocity More Output More 14. Trigger Velocity...
-
Page 246: Emax Ii Memory Expansion
The amount of memory in your Emax II determines the bank size and thus the amount of sample time which can reside in the unit at one time. Emax II comes standard with either 2 or 6 Megabytes of memory, but it can be considerably expanded. Memory expansion kits may be added to increase the bank size up to 8 Megabytes. -
Page 247: Technical Specifications
Emax II operation manual EMAX II TECHNICAL SPECIFICATIONS AUDIO CHANNELS: 32 (16 Stereo) AUDIO OUTPUTS: 2 Main (stereo, poly) 6 Submix (3 stereo, poly) Stereo/Phones Mono SUBMIX INPUTS: 6 (3 stereo) MAX OUTPUT LEVEL: +4 dB into 600Ω INPUT IMPEDANCE:... -
Page 248: Midi Implementation Chart
16 channels simultaneously. When SuperMode is on, the Omni/Poly setting is ignored, but the MIDI notes/wheels flag of the current preset is still checked by Emax II to determine whether or not to accept or ignore incoming MIDI perform- ance data. -
Page 249: Note-To-Frequency Conversion Chart
Note-Freq Converter Emax II operation manual NOTE-TO-FREQUENCY CONVERSION CHART Use this chart when performing Spectrum Synthesis or to compute perfect single cycle loops. note frequency note frequency note frequency note frequency 16.35 Hz 77.78 Hz 369.99 Hz 1760.00 Hz 17.32 Hz 82.41 Hz... -
Page 250: Index
Emax II operation manual Index A-H INDEX delay aftertouch See pressure LFO delay 157 arpeggiator 126-132 voice delay 151 attack 151, 152, 156 disk realtime control of 142 drive selection 50 attenuation of voices 98, 151 floppy disk 15, 45... - Page 251 Index H-P Emax II operation manual INDEX headroom selection control 69 HD bank load 67 hold 151-153, 156 input 7 key number chart 221 level control 138-139, 140 ID number, SCSI local control 135 inputs 5-8 master functions 66 install disk function 69...
- Page 252 Emax II operation manual Index P-T INDEX poly 134, 224 stop sampling 77 power requirements See also precautions section saving pressure basics 17 pressure sensitive keyboard 15 compressed format 108 receiving MIDI pressure 138-139 16- bit format 112 primary 14...
- Page 253 Index P-W Emax II operation manual INDEX guided tour 35 tuning alternate tunings 151 master tune 55 voice tuning 151 VCA 151-153 VCA guided tour 29 velocity velocity control of... 159-161 velocity crossfade 123-125 velocity cross/switch 123-125 velocity curves selection 56...
-
Page 254: Warranty
Warranty Registration Card is filled out and returned to E-mu Systems within 14 days from the date of purchase. Cases may arise where E-mu's Service Department or one of E-mu's authorized service centers will ask for a copy of your sales receipt to facilitate warranty service. - Page 255 Emax II operation manual...
- Page 256 (018) Sound on Sound Home Studio Recording (019) (021) Non-Music/Sound Magazines? What other products would you like to see marketed by E-mu Systems? How would you characterize the service you received from our dealer? Splendid Very Good Fair Poor Abysmal Additional Comments: Please fold this card and return it to us within 10 days of your purchase.
- Page 257 Emax II operation manual Fold Here NO POSTAGE NECESSARY IF MAILED IN THE UNITED STATES BUSINESS REPLY MAIL FIRST CLASS PERMIT NO. 209 SANTA CRUZ, CA POSTAGE WILL BE PAID BY ADDRESSEE E-mu Systems, Inc. P.O. BOX 67127 SCOTTS VALLEY, CA 95067-7127...
Need help?
Do you have a question about the EMAX II and is the answer not in the manual?
Questions and answers