Table of Contents
Advertisement
Quick Links
Advertisement
Table of Contents

Summary of Contents for Edimax WP-4500K
- Page 1 WP-4500K User Manual 03-2021 / v1.0...
-
Page 2: Table Of Contents
II-2. TX Installation ..............13 II-3. Share the Screen ..............14 II-4. Adding/Pairing TX and RX ............ 14 III. WP-4500K Web UI (Base User) ......15 III-1. Network Management ............16 III-1-1. Connect to 5GHz Wi-Fi ............. 16 III-1-2. Remember Wi-Fi ..............18 III-2. - Page 3 III-2-6. Display Mode ................22 III-2-7. Reboot Timer ................23 III-2-8. One Touch Play settings ............23 III-3. About Device ................ 24 IV. WP-4500K Web UI (Administrator) ......25 IV-1. Wi-Fi Channel ............... 26 IV-2. LAN IP Settings ..............27 IV-3. SSID ..................28 IV-4.
- Page 4 Download Pairing File ........... 44 IV-24. Reboot ................44 IV-25. Reset to Factory Default ..........45 V. Connecting the WP-4500K via Smatrphone App ..45 IV-1. Android OS ................45 IV-2. iOS ..................46 VI. Applications & Operation ........47...
-
Page 5: Product Information
I. Product Information The WP-4500K Wireless Projection System offers efficiency and creativity with unprecedented Native 4K HD wireless presentation solution for business meetings, wedding or hug conference room. Easy plug-and-play makes group presentations possible with just one click, users can cast, interact and receive high-quality imagery over multiple types of devices (desktop, laptop, tablet and mobile). -
Page 6: I-1. Package Contents
WP-4500K (RX) (For WP-4500RX) (USB power cable included) HDMI Cable (100 cm) HDMI Cable (30 cm) Quick Installation Guide I-2. System Requirement* Windows 7/8/10 32bit/64bit Mac 10.9 iOS 9 Android 5 *Additional version information will be announced on the EDIMAX website. -
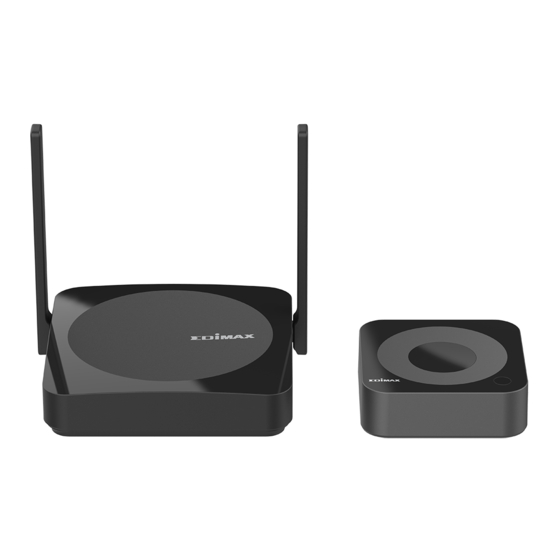
Page 7: I-3. Hardware Interface
I-3. Hardware Interface I-3-1. RX Overview... -
Page 8: I-3-2. Tx Overview
Description Antenna Power Jack Power Button USB Port Ethernet Port HDMI Out Port Reset Button I-3-2. TX Overview... -
Page 9: I-4. Led Status
Description Main Button Side Button & LED HDMI In Port USB Power Cable I-4. LED Status LED Status LED Color Side Button LED Color Description TX is in Host mode and Green not projecting. TX is in Guest mode and not projecting. -
Page 10: I-5. Applications & Operation
I-5. Applications & Operation 1. When Host has projected on screen, and Guest required sharing the screen. Host can grant permission to the Guest. Host Guest Indicator 1... - Page 11 Indicator 2 ingle click to allow, double click to deny the request. Indicator 3 When host grant permission to the guest: (Share Screen) Combination...
- Page 12 When host deny the request: (Keep full screen) 2. Host grants permission to the Guest in full screen when share screen mode is on. Host Guest Indicator 1 Long press the main button.
- Page 13 Indicator 2 Single click the side button. Indicator 3 Guest projects the screen in full screen size: Combinations...
- Page 14 3. Host retrieves share screen request when Guest in full screen mode. Host Guest Indicator 1 Single click the main button. Indicator 2 Host Guest Combination...
- Page 15 4. Host retrieves full screen request when Guest in full/share screen mode. Host Guest Indicator 1 Long press the main button. Indicator 2 Host Combination...
-
Page 16: Ii. Hardware Installation
II. Hardware Installation Please follow the steps below to install your WP-4500K projection system, II-1. RX Installation 1. Attach the power supply to the RX. 2. Press the Power Button at the back of the RX... -
Page 17: Ii-2. Tx Installation
3. Plug HDMI cable into both your RX and projector’s, TV's or monitor’s HDMI ports. II-2. TX Installation 1. Plug TX USB cable into your laptop USB port. 2. Plug HDMI cable into both your TX and laptop. -
Page 18: Ii-3. Share The Screen
II-3. Share the Screen 1. Press the main button on the TX to share your laptop screen to the, TV or monitor. 2. Press again the main button to disconnect. Main button For more details, please refer to the I-5 Applications & Operation. II-4. -
Page 19: Wp-4500K Web Ui (Base User)
User. NOTE: Please login as administrator for higher level of access control. Please follow the steps below to access the WP-4500K Web UI. 1. Connect the SSID “Edimax_WHDMI” from your laptop network Wi-Fi and find the password via RX landing page. -
Page 20: Iii-1. Network Management
WP-4500K and encryption. III-1-1. Connect to 5GHz Wi-Fi In this page you can connect WP-4500K to the internet via external Wi-Fi from the list or manually add network. Connect WP-4500K to the available SSID from the list and enter the Wi-Fi... -
Page 22: Iii-1-2. Remember Wi-Fi
Alternatively, you can click the “Add Network” button to manually add network. In this page you can define the encryption type in WPA/WPA2, OPEN or 802.1xEAP. III-1-2. Remember Wi-Fi In this page you can allow WP-4500K to remember the previous W-Fi settings... -
Page 23: Iii-2. Device Management
III-2. Device Management This page allows user to configure Language, Resolution, Resolution Mode, Maximum Connections, Android Audio Streaming, Display Mode, Reboot Timer and One Touch Play settings. III-2-1. Language Scroll down and choose your language from the list. -
Page 24: Iii-2-2. Resolution
III-2-2. Resolution Move the slider to the resolution you want, and then click Ok. III-2-3. Resolution Mode In this page there are two modes for resolution. -
Page 25: Iii-2-4. Maximum Connections
III-2-4. Maximum Connections This page allows user to configure maximum connections limit for WP-4500K. Please select the applicable maximum connections for your usage. WP-4500 supports up to 32 users and the defaults maximum connection is 8 users. NOTE: Please be aware that when multiple users use a single device, more... -
Page 26: Iii-2-5. Android Audio Streaming
III-2-5. Android Audio Streaming Enable the function to allow Android users to cast video and audio to the external display. NOTE: Please be aware that the default setting of Android audio streaming is Off. III-2-6. Display Mode WP-4500 supports below Display Modes. Item Description Fit to screen... -
Page 27: Iii-2-7. Reboot Timer
III-2-7. Reboot Timer WP-4500 will automatically reboot every 8 hours under the following conditions: None of the TX is connected to RX. None of the device is connected to RX, including Windows, Android, macOS, iOS. III-2-8. One Touch Play settings Allows the device becomes an active resource when pressing the button. -
Page 28: Iii-3. About Device
1. SSID information 2. IP address 3. MAC 4. WP-4500K’s Resolution 5. 5G Wi-Fi Channel Information 6. WP-4500K Firmware Version 7. Internet IP Information 8. LAN MAC Information 9. USB device connection status 10: Connected Devices Status 11: Connected BT Devices Status... -
Page 29: Wp-4500K Web Ui (Administrator)
WP-4500K Web UI (Administrator) The Admin Setting page allows users with higher access authorization to customize WP-4500K network settings and features. -
Page 30: Iv-1. Wi-Fi Channel
IV-1. Wi-Fi Channel In this page you can set up WP-4500k Wi-Fi Channel. Item Description Country Please select the correct country for 5GHz channel Select a wireless channel from 36 – 165 Channel Bandwidth Select the bandwidth in 20MHz or 80MHz NOTE: Please be aware that users cannot configure the Wi-Fi Channel while WP-4500 is connecting to the external internet. -
Page 31: Iv-2. Lan Ip Settings
IV-2. LAN IP Settings The LAN IP Settings page is used to configure the settings for LAN network, including IP address, Default Gateway, Subnet mask, DNS. -
Page 32: Iv-3. Ssid
IV-3. SSID The SSID page is used to customize the SSID, including renaming, Hide SSID or Turn Off SSID. NOTE: After changing the new SSID, please reconnect WP-4500k by re-pairing the TX and RX. Item Description Specify the WP-4500K static IP address on the IP Address configuration. -
Page 33: Iv-4. Password
IV-4. Password You can change or hide the Wi-Fi connection password on the landing page. IV-5. Sketch You can turn On/Off sketch in this page. -
Page 34: Iv-6. Central Management System
IV-6. Central Management System You can turn On/Off Central Management System in this page. IV-7. Conference Control This Conference Control page allows assign monitor split screen position that will appear on monitor's screen. -
Page 35: Iv-8. My Screen
IV-8. My Screen The My Screen page allows users to change the theme of the main page of RX by uploading images. NOTE: Images (ONG format) size should be 1920 x 1080 resolution and 2MB in size. IV-9. Wallpaper Switch This page allows users to set wallpaper URL and check interval. -
Page 36: Iv-10. Dynamic Wallpaper
IV-10. Dynamic Wallpaper The Dynamic Wallpaper allows you to use wallpapers as native Dynamic Desktops after monitor idle for a certain number of minutes. You can set the idle time when this mode enabled. IV-11. Host Control The host control allows the 1st user to become the Host of display, all other casting requests will be transferred to Host before casting. -
Page 37: Iv-12. Airview
IV-12. Airview The Airview page allows users to enable/disable Airview function. And you can set the number of times the monitor updates with new images each second in Refresh Rate. Item Description Auto Allow Requests The new request will be cast on screen directly. The new request will be mirrored in screen split when Share screen this function is on. -
Page 38: Iv-13. Airplay Support
IV-13. Airplay Support The Airplay function allows iOS /Mac users to cast without TX. IV-14. Admin Password The Admin Password page allows the users to change the password for better security. -
Page 39: Iv-15. Screen Saver
IV-15. Screen Saver The Screen Saver page allows users to set the idle time and can be set to blank the screen after a period of user inactivity. IV-16. Wi-Fi Enterprise The Wi-Fi Enterprise page allows admin to upload Digital certificates. -
Page 40: Iv-17. Fixed Host
Assigning a specific IP address as the fixed host. Fixed device Assigning a certain device as the fixed host. IV-17. Fixed Host set a specific device as fixed host. The Fixed Host page allows users to NOTE: Please reboot your WP-4500K before new settings will take effect. -
Page 41: Iv-18. Google Cast
IV-18. Google Cast The Google Cast page allows users to direct casting via Chromecast for Android, macOS users. NOTE: Please be aware that when casting via Chromecast, the WP-4500K must connect to the internet. IV-19. Castcode Control The Castcode Control page allows users to set castcode to prevent... -
Page 42: Iv-20. Upgrade
IV-20. Upgrade The Upgrade page allows users to update WP-4500K firmware. NOTE: RX must connect to the internet. IV-21. Wi-Fi Diagnostic Tool The Wi-Fi Diagnostic Tool allows users to easily test TX wireless networks and its corresponding information. Please tap the “Collect TX’s signal” button to... - Page 43 Auto Channel Selection: The Auto Channel Selection scans all available channels and connects to the channel with the best signal. Tap the “Apply and Reboot” button to start scanning the channels. Connection Quality Test: In this page you can test the TX network connection by tapping the “Stat Test” button.
- Page 44 Throughput Test: The Throughput Test page allows users to use the tool to analyze WP-4500K networks throughput performance.
- Page 45 Manual Test: The Manual Test page allow users to manually adjust the bandwidth to check the throughput of your WP-4500K. Tap the “Start Manual Test” button to start the testing.
- Page 47 Wi-Fi Band Setup: The Wi-Fi Band Setup page allows users to set the Wi-Fi channel before testing. Tap the Apply button to save the changes.
-
Page 48: Iv-22. Multicast
IV-22. Multicast You can broadcast to multiple RX by turning on the Multicast function in this page. IV-23. Download Pairing File The Download Pairing File page allows users to download the pairing file from the RX. You can save the pairing file in USB disk and plug into the TX for pairing. -
Page 49: Iv-25. Reset To Factory Default
The Reset to Factory Default page allows users to remotely reset RX, TX or RX+TX to factory default settings. V. Connecting the WP-4500K via Smatrphone App You can connect the WP-4500K via “Google Home” in Android and iOS “AirPlay or Screen Mirroring”. IV-1. Android OS Please follow the steps below to connect your WP-4500K with Android phone via “Google Home”... -
Page 50: Iv-2. Ios
2. Connect the SSID “Edimax_WHDMI” from your Android phone and enter the default password via RX landing page. IV-2. iOS Please follow the steps below to connect your WP-4500K with iOS phone via “Screen Mirroring” or “AirPlay Mirroring”. 1. Connect the SSID “Edimax_WHDMI” from your iOS phone and enter the default password via RX landing page. -
Page 51: Applications & Operation
Please follow the steps below to mirror your screen to the monitor. 1. Follow the instructions on “Hardware Installation” Chapter to set up the WP-4500K projector system. 2. Connect the SSID “Edimax_WHDMI” from your laptop network Wi-Fi and enter the via RX landing page. - Page 52 Icon/Item Description This icon shows the Airplay status ( activated or deactivated) This icon shows the RX paring and connection status. The number (2) shows the total number of TX that are connected to the RX. This icon shows the Wi-Fi signal status (connected or disconnected) This icon shows the RJ45 port connection status (connected or disconnected)
- Page 53 COPYRIGHT Copyright Edimax Technology Co., Ltd. all rights reserved. No part of this publication may be reproduced, transmitted, transcribed, stored in a retrieval system, or translated into any language or computer language, in any form or by any means, electronic, mechanical, magnetic, optical, chemical, manual or otherwise, without the prior written permission from Edimax Technology Co., Ltd.
- Page 54 Max. Transmit Power (dBm) 5G Wi-Fi: 5150-5250 12.79 A simplified DoC shall be provided as follows: Article 10(9) Hereby, Edimax Technology Co., Ltd. declares that the radio equipment type Wireless transmitter is in compliance with Directive 2014/53/EU The full text of the EU declaration of conformity is available at the following internet address: http://www.edimax.com/edimax/global/...
- Page 55 version of this device is also authorized for use in EFTA member states: Iceland, Liechtenstein, Norway, and Switzerland. EU Countries Not Intended for Use None EU Declaration of Conformity English: This equipment is in compliance with the essential requirements and other relevant provisions of Directive 2014/53/EU, 2014/35/EU.
- Page 56 Declaration of Conformity We, Edimax Technology Co., Ltd., declare under our sole responsibility, that the equipment described below complies with the requirements of the European Radio Equipment directives. Equipment: Wireless transmitter Model No.: WP-4500TX The following European standards for essential requirements have been followed:...
- Page 57 Declaration of Conformity We, Edimax Technology Co., Ltd., declare under our sole responsibility, that the equipment described below complies with the requirements of the European Radio Equipment directives. Equipment: Wireless receiver Model No.: WP-4500RX The following European standards for essential requirements have been followed:...
Need help?
Do you have a question about the WP-4500K and is the answer not in the manual?
Questions and answers