Table of Contents
Advertisement
Advertisement
Table of Contents

Summary of Contents for GME AccuSat MT610G PLB
- Page 1 MT610G PERSONAL LOCATOR BEACON INSTRUCTION MANUAL...
-
Page 2: Owner Details
OWNER DETAILS: Name ............Address ..........................Tel: ..............UIN (Hex ID) # ..........DISTRIBUTED BY: MT610G... -
Page 3: Table Of Contents
CONTENTS OWNER DETAILS .................. 2 DISTRIBUTED BY .................. 2 INTRODUCTION ..................5 GENERAL INFORMATION ............... 5 KEY FEATURES OF THE MT610G PLB ............ 5 GLOSSARY .................... 6 HOW THE PLB WORKS ................7 ABOUT THE COSPAS-SARSAT SYSTEM ............7 REGISTRATION AND TRANSFER OF OWNERSHIP ........8 REGISTERING YOUR PLB ................ - Page 4 PHYSICAL ....................27 GPS/GALILEO RECEIVER ................28 OTHER FEATURES ..................28 REFERENCES ..................28 NOTICES & WARNINGS ................ 29 COPYRIGHT NOTICE ..................29 WARNING ....................29 GME WARRANTY ..................29 WARRANTY PERIOD ................... 32 NATIONAL AUTHORITY INFORMATION ..........32 MT610G...
-
Page 5: Introduction
INTRODUCTION Congratulations on purchasing your new Accusat Pocket Series Personal Locator Beacon (PLB). A GPS equipped GME Accusat MT610G is one of the most advanced 406 MHz digital satellite beacons available today. Using new digital frequency generation technology, GME have developed and approved world wide, a new family of affordable high performance 406 MHz Personal Locator Beacons. -
Page 6: Glossary
MT610G PLB comes with a lanyard and Instruction Manual *Prolonged storage at temperatures higher than 20°C will result in reduced useful life of the battery. For Approval Certificates, please visit https://www.gme.net.au/beacon-information GLOSSARY This section provides a list of acronyms and their expansions/descriptions that are used in this manual. -
Page 7: How The Plb Works
HOW THE PLB WORKS Your MT610G PLB is a self-contained 406 MHz digital radio transmitter that emits an internationally-recognized distress signal on a frequency monitored by the COSPAS-SARSAT satellite system. The MT610G contains a unique identity code which can be cross-referenced to a database of registered 406 MHz beacons, allowing the beacon’s owner to be immediately identified in the event of an emergency. -
Page 8: Registration And Transfer Of Ownership
REGISTRATION AND TRANSFER OF OWNERSHIP Your MT610G PLB has been programmed with a unique identifying code which will be transmitted by the PLB in an emergency. You must register your PLB to provide authorities with immediate access to your details when the PLB is detected. Registering your PLB also allows authorities to identify you and your emergency contacts. -
Page 9: Transferring Ownership Of A Plb
The new owner is also required to provide their National Authority with the information as required on the registration form. This obligation transfers to all subsequent owners. For Approval Certificates, please visit https://www.gme.net.au/beacon-information. REGISTRATION CONTACTS Australian Users New Zealand Users... -
Page 10: Preventing Accidental Activation
PREVENTING ACCIDENTAL ACTIVATION The signal from a PLB is regarded by authorities as an indication of distress and is given an appropriate response. It is the responsibility of every owner of a PLB to ensure that it is not activated unintentionally, or in situations that do not justify its use. -
Page 11: Contacts For Reporting Activations
CONTACTS FOR REPORTING ACTIVATIONS If you suspect that a PLB has been activated inadvertently, you MUST turn it off and report it immediately to your National Authority‘s Rescue Coordination Centre to prevent an unnecessary search. When reporting, you should include the following: •... -
Page 12: Parts Of The Plb
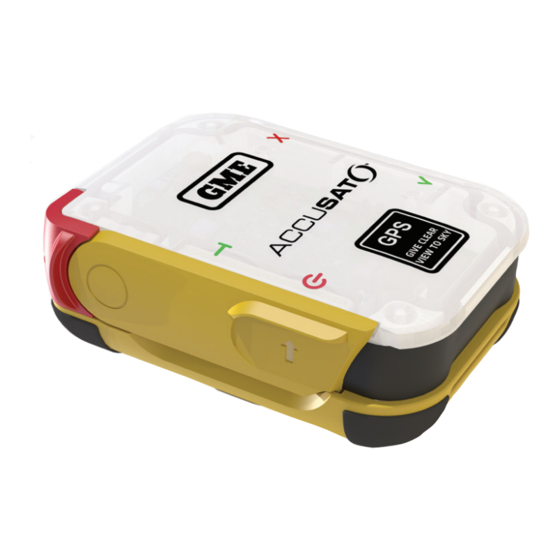
PARTS OF THE PLB The graphics below display the main parts of the PLB with the antenna closed (undeployed) and raised (deployed). Antenna Strobe Light Area Latch Red LED Indicator Antenna Green LED Indicator Latch PLB with Antenna Closed GPS Receiver PLB with Antenna Raised MT610G... -
Page 13: Plb Parts & Functions
PLB PARTS & FUNCTIONS The table below provides details about the functions of specific PLB parts. Part Function Antenna Latch Holds the antenna in a locked position. When unclipped, the antenna can be raised, revealing the Test On/Off buttons. Antenna Wraps around the PLB unit, covering/protecting the Test and On/Off buttons from damage and accidental use. -
Page 14: Storage
STORAGE • The MT610G PLB must be stored at a temperature between -30°C to +70°C (-22°F to +158°F). • Avoid exposure to the chemicals and organic solvents listed below (this list includes but is not limited to the listed items): •... -
Page 15: Battery Replacement
If there is any doubt as to the PLB’s serviceability, contact your local dealer, authorised service centre or GME Customer Support (GME Pty Ltd, PO Box 96, Winston Hills NSW 2153, Australia; Tel: (02) 8867 6000, Fax: (02) 8867 6199, Email: servadmin@gme.net.au) for advice. -
Page 16: Testing Your Plb
Push the antenna latch at the top of the PLB to release the antenna. Refer the image that follows. NOTE: - GME recommends a maximum of 2 self-tests per month. Do not over-test as each test consumes battery power. MT610G... - Page 17 Unwrap the antenna until fully extended. Lift the antenna until it clicks into place (at a 90°angle perpendicular to the body of the PLB). Briefly press and release the Test button (marked ‘T’) to begin the test. MT610G...
-
Page 18: General Self-Test Indication Scheme
PLB is undergoing a General red LED at the beginning Self-Test. However, this PLB of the test. was previously activated. Contact GME for advice. Red and Green LEDs flash PLB is undergoing a General 3 times simultaneously. Self-Test; however, the PLB... -
Page 19: Gps Self-Test Procedure
PLB has failed one or more tests and may require servicing. Contact GME for advice. GPS SELF-TEST PROCEDURE A GPS self-test allows you to perform a complete GPS satellite acquisition check of your PLB. It is recommended that you perform a GPS self-test up to 2 times per year. -
Page 20: Gps Self-Test Indication Scheme
Eight short red flashes at the end of the test indicate that the PLB has not obtained the GPS position. Ensure that you follow the GPS self-test instructions, and repeat the test. If the test continues to fail, contact GME for advice. MT610G... -
Page 21: Activating The Plb
ACTIVATING THE PLB This section details the ideal conditions and procedure to activate your PLB. IDEAL CONDITIONS FOR ACTIVATION • For best performance, activate the PLB in an area with a clear view of the sky. Deploying the PLB within an enclosure, particularly one which is electrically conductive such as under a car roof, will reduce the signal strength and may mean that it cannot be detected by rescue satellites or overflying aircrafts. -
Page 22: Best Practices When Using Your Plb
BEST PRACTICES WHEN USING YOUR PLB The images below describe best practices to follow when using the PLB. Avoid deploying the PLB in water. The antenna must point towards the sky. Do not cover the Avoid placing the PLB without GPS receiver area of the PLB. -
Page 23: Plb Activation Procedure
PLB ACTIVATION PROCEDURE Push the antenna latch at the top of the PLB to release the antenna. Unwrap the antenna until fully extended. Lift the antenna until it clicks into place (at a 90° angle perpendicular to the body of the PLB). Press and hold the On/Off button for at least 2 seconds. -
Page 24: Deactivating The Mt610G
Open the PLB by removing the 4 retaining screws at the rear of the device. Note: The screws are under the ‘anti-tamper’ plastic plugs. Separate the two parts (top and bottom) of the PLB plastic case to access the battery area. Remove the battery. Contact the GME service team for technical support. MT610G... -
Page 25: Transporting / Travelling With Plbs
The MT610G PLB contains 2 lithium metal battery packs with less than 2 gms of lithium content. They are not classified as hazardous products for transportation. However, you are advised to contact the nearest dealer or the GME service team prior to shipping, as regulations may change. -
Page 26: Specifications
SPECIFICATIONS MODES OF OPERATION Type Description Activated UHF (406) and VHF (homer) complete with high intensity light. Comprehensive internal diagnostics with visual operator feed-back. Self-Test UHF test message (inverted synchronisation compatible with portable beacon testers). Comprehensive diagnostics of GPS circuitry and real-time position GPS Self-Test acquisition test with visual operator feedback. -
Page 27: Battery
BATTERY Type Description Useful Battery Life 7 years** Replacement Method By service centre or factory only. Not user-replaceable. Battery Chemistry LiMnO (0.6 g Lithium per cell) Battery 2 electronically isolated batteries, each consisting of 2 cells type Configuration CR123A PHYSICAL Type Description Operating... -
Page 28: Gps/Galileo Receiver
GPS/GALILEO RECEIVER Type Description Type Ultra-high sensitivity GPS L1C/A, Galileo E1B/C Channels 72-channel, GPS/GALILEO Search Engine. Antenna Ceramic Patch Antenna. Cold start 30 seconds typical. Acquisition Hot start 1 second typical. OTHER FEATURES Type Description Standards & COSPAS-SARSAT T.001 & T.007; AS/NZS 4280.2 Approvals Meets UN requirements for transport as non-hazardous cargo Transport... -
Page 29: Notices & Warnings
It is important that you read this manual thoroughly. GME WARRANTY AGAINST DEFECTS FOR AUSTRALIAN CUSTOMERS This warranty against defects is given by GME Pty Ltd, A.C.N. 000 346 814 (We, Us, Our or GME). Our contact details are set out in clause 2.g. This warranty statement only applies to products purchased in Australia. - Page 30 All component parts removed under this Warranty become the property of GME. To the extent permitted by law, Our sole liability for breach of a condition, warranty or other obligation implied by law is limited:...
- Page 31 We can contact you. You should send your claim to: GME Pty Ltd PO Box 96, Winston Hills NSW 2153, Australia Tel: (02) 8867 6000, Fax: (02) 8867 6199 Email: servadmin@gme.net.au...
-
Page 32: Warranty Period
WARRANTY PERIOD We provide the following warranty on GME and Kingray products. No repair or replacement during the warranty period will renew or extend the warranty period past the period from original date of purchase.
Need help?
Do you have a question about the AccuSat MT610G PLB and is the answer not in the manual?
Questions and answers