Table of Contents
Advertisement
Quick Links
Advertisement
Table of Contents
Troubleshooting

Related Manuals for Hupfer TEUH-2/VS27-33


Summary of Contents for Hupfer TEUH-2/VS27-33
- Page 1 Operating Instructions Plate dispenser TE-2/V19-26 | TE-2/V27-33 | TE-2/VK19-26 | TEH-1/V19-26 | TEH-1/V27-33 | TEH-2/V19-26 | TEH-2/V27-33 | TEUH-1/VS19-26 | TEUH-2/VS19-26 | TEUH-2/VS27-33 | TEUH-2/VC19-26 | EBR/V19-26 | EBR/V27-33 | EBRH/V19-26 | EBRH/V27-33 | EBRH-2/V19-26 4330000_A6...
-
Page 2: Introduction
Plate dispenser TE-2/V19-26 | TE-2/V27-33 | TE-2/VK19-26 | TEH-1/V19-26 | TEH-1/V27-33 | TEH-2/V19-26 | TEH-2/V27-33 | TEUH-1/VS19-26 | TEUH-2/VS19-26 | TEUH-2/VS27-33 | TEUH-2/VC19-26 | EBR/V19-26 | EBR/V27-33 | EBRH/V19-26 | EBRH/V27-33 | EBRH-2/V19-26 Read these operating instructions carefully before the first operation of the appliance. -
Page 3: Table Of Contents
Introduction Chapter 1 Table of Contents Page 3 Table of Contents Introduction Appliance Information Table of Contents List of Abbreviations Definitions of Terms Orientation Guide Notes on Use of Manual 1.6.1 Notes on the Manual Structure 1.6.2 Notes and their Illustrations used in the Chapters Safety Instructions Introduction Warning Symbols Used... - Page 4 Introduction Chapter 1 Page 4 Table of Contents 5.2.2 Spring adjustment 5.2.3 Calculating the plate dispenser capacity Operation 5.3.1 Switching on the appliance 5.3.2 Loading the appliance 5.3.3 Moving the appliance Measures at the End of Operation Fault Detection and Troubleshooting Safety Measures Notes on Troubleshooting Fault and Action Table...
-
Page 5: List Of Abbreviations
Introduction Chapter 1 List of Abbreviations Page 5 List of Abbreviations Abbreviation Definition Rule of the Professional Association Regulation of the Professional Association Communauté Européenee European Community Deutsches Institut für Normung German Institute for Standardisation, technical regulations and technical specifications European Community European Union European Standard... -
Page 6: Definitions Of Terms
Introduction Chapter 1 Page 6 Definitions of Terms Definitions of Terms Term Definition Authorised specialist An authorised specialist is a specialist that has been trained by the manufacturer, an authorised service dealer or a company assigned by the manufacturer. Cover A bell-shaped cover for keeping food warm on plates and dishes. -
Page 7: Orientation Guide
Introduction Chapter 1 Orientation Guide Page 7 Orientation Guide The front "The front" means the side of the plate dispenser where the push bars are arranged. The operating staff stays at this side to move the appliance. The side of the built-in appliances named as "the front" means the side, at which the staff operates the plate dispenser. -
Page 8: Notes On Use Of Manual
Introduction Chapter 1 Page 8 Notes on Use of Manual Notes on Use of Manual 1.6.1 Notes on the Manual Structure This manual is structured in functional and task orientated chapters. 1.6.2 Notes and their Illustrations used in the Chapters DANGER Brief description of danger There is an imminent danger to life and limb of the user and / or third parties... -
Page 9: Safety Instructions
Safety Instructions Chapter 2 Introduction Page 9 Safety Instructions Introduction The chapter on safety instructions describes the risks associated with the appliance in terms of product liabil- ity (according to the EU Directive). Warning Symbols Used Symbols are used in these operating instructions to point out the dangers that can occur while operating or cleaning the appliance. -
Page 10: Additional Safety Instructions For Heated Appliances
§ ® Never pull the mains plug out of the socket by the lead. The standard models of HUPFER applianc- es are equipped with a Schuko® angle plug. In contrast to a straight Schuko® plug this plug only sticks insignificantly out of the socket and so cannot be damaged by being hit at the side. If the appli- ance is moved without pulling out the mains plug beforehand, the socket can be severely damaged or even pulled out from the wall as a result of leverage arising from overstretching of the lead. -
Page 11: Safety Instructions For Cleaning And Care
Safety Instructions Chapter 2 Safety Instructions for Cleaning and Care Page 11 § Do not use any extension leads in wet and damp areas. § Only insert mains plugs into suitable sockets. If the mains plug does not fit, the lead of the appliance is to be retrofitted by authorised specialist staff. -
Page 12: Description And Technical Data
Description and Technical Data Chapter 3 Page 12 Performance Description Description and Technical Data Performance Description Plate dispensers are intended for storage of clean crockery items ready for use in the food service industry and large-scale catering establishments. They are used mainly for storage of warmed crockery ready for use on food distribution belts and storage of plates at normal temperature or chilled on self-service counters in bistros or cafeterias. -
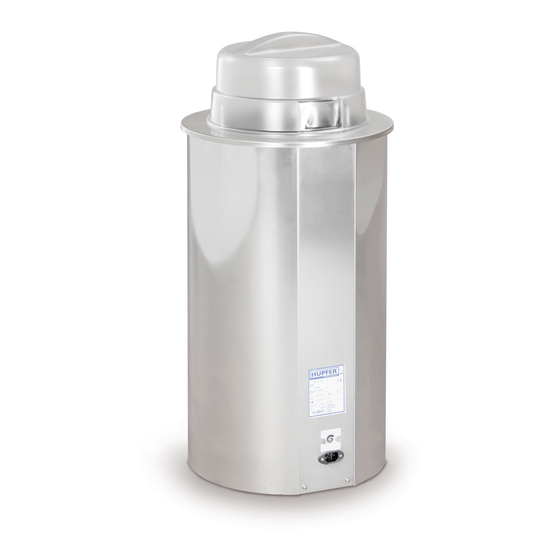
Page 13: Appliance Description
Description and Technical Data Chapter 3 Appliance Description Page 13 Appliance Description 3.4.1 View of the appliance - Plate dispenser Figure 1 View of the appliance Push bar 7 Swivel casters without brakes Thermostat for setting the temperature* 8 Corner bumpers On / Off switch* 9 Guide basket Plug park (dummy socket)*... -
Page 14: Appliance Description
Description and Technical Data Chapter 3 Page 14 Appliance Description 3.4.3 Appliance description The plate dispensers accommodate clean chinaware and plates made of toughened glass in a adjustable, spring-loaded guide basket. Owing to the use of special springs, crockery items are moved automatically and constantly over the entire lift upwards to a uniform dispensing height. -
Page 15: Technical Data
Description and Technical Data Chapter 3 Technical Data Page 15 Technical Data Dim. TE-2/V19-26 TE-2/V27-33 TE/-2/VK19-26 View of the appliance Plate dispenser, unheated Plate dispenser, unheated Plate dispenser, unheated and without cooling device and without cooling device with cooling device Own weight 68.3 (31) 70.5 (32) - Page 16 Description and Technical Data Chapter 3 Page 16 Technical Data Dim. TEH-1/V19-26 TEH-1/V27-33 TEH-2/V19-26 TEH-2/V27-33 View of the appliance Plate dispenser, Plate dispenser, Plate dispenser, Plate dispenser, heated heated heated heated Own weight 66.1 (30) 77.1 (35) 90.3 (41) 112.4 (51) (kg) Payload 154.3 (70)
- Page 17 Description and Technical Data Chapter 3 Technical Data Page 17 Dim. TEUH-1/VS19-26 TEUH-2/VS19-26 TEUH-2/VS27-33 TEUH-2/VC19-26 View of the appli- ance Plate dispenser, Plate dispenser, Plate dispenser, Plate dispenser, heated heated heated heated Own weight 68.3 90.3 112.4 121.2 (kg) (31)
- Page 18 Description and Technical Data Chapter 3 Page 18 Technical Data Built-in plate dispenser Dim. EBRH-2/V19-26 EBR/V19-26 EBR/V27-33 EBRH/V19-26 EBRH/V27-33 View of the appliance Own weight 59.5 13.2 15.4 30.8 37.4 (kg) (27) (14) (17) Payload 308.4 121.2 132.2 121.2 132.2 (kg) (140) (55)
-
Page 19: Rating Plate
EBRH/V19-26 EBRH/V27-33 Power re- quirement Protection IPX4 IPX4 IPX4 class The corresponding test marks can be found on our homepage at www.hupfer.de. Rating Plate Figure 3 Rating plate Disposal of old appliances Nominal current Certificates/label Frequency Protection class Nominal voltage... -
Page 20: Transport, Assembly, Putting Into Operation And Decommissioning
Transport, Assembly, Putting into Operation and Decommissioning Chapter 4 Page 20 Transport Transport, Assembly, Putting into Operation and Decommis- sioning Transport ATTENTION Appliance damages caused by improper transport In the case of off-site transport in a vehicle such as a lorry, the appliances should be secured properly. - Page 21 Transport, Assembly, Putting into Operation and Decommissioning Chapter 4 Assembly (Built-in appliances only) Page 21 Figure 5 Worktop cut-out EBR/V27-33 Step 1: Preparation § Prepare cut-outs in the worktop corresponding to the indicated dimensions. The worktop cut-out dimensions are given in mm as shown in the drawing. §...
-
Page 22: Heated Appliances (Ebrh/V19-26 | Ebrh/V27-33 | Ebrh-2/19-26)
Transport, Assembly, Putting into Operation and Decommissioning Chapter 4 Page 22 Assembly (Built-in appliances only) EBR/V27-33 § Insert the appliance EBR/V27-33 into the worktop cut-out from above and fasten it. Figure 7 Assembly instructions EBR/V27-33 4.2.2 Heated appliances (EBRH/V19-26 | EBRH/V27-33 | EBRH-2/19-26) DANGER Hazardous electrical voltage The electrical voltage may be considerably dangerous to limb and life of per-... - Page 23 Transport, Assembly, Putting into Operation and Decommissioning Chapter 4 Assembly (Built-in appliances only) Page 23 Figure 8 Worktop cut-out EBRH/V19-26 Figure 9 Worktop cut-out EBRH/V27-33 Figure 10 Worktop cut-out EBRH-2/V19-26 Plate dispenser 4330000_A6 TE-2/V19-26, 27-33 | TE-2/VK19-26 | TEH-1/V19-26, 27-33 | TEH-2/V19-26, 27-33 | TEUH-1/VS19-26 | TEUH-2/VS19-26, 27-33 | TEUH-2/VC19-26 EBR/V19-26, 27-33 | EBRH/V19-26, 27-33 | EBRH-2/V19-26...
- Page 24 Transport, Assembly, Putting into Operation and Decommissioning Chapter 4 Page 24 Assembly (Built-in appliances only) Step 1: Preparation § Prepare cut-outs in the worktop and the front cladding corresponding to the indicated dimensions. The worktop cut-out dimensions are given in inch (mm) as shown in the corresponding drawing of the built-in appliance.
- Page 25 Transport, Assembly, Putting into Operation and Decommissioning Chapter 4 Assembly (Built-in appliances only) Page 25 Figure 12 Worktop cut-out EBRH/V27-33 Figure 13 Worktop cut-out EBRH-2/V19-26 Step 3: Connect § Connect the appliance according to the wiring diagram: Insert the appliance plug of the lead set into the socket of the plate dispenser and the mains plug of the lead set into the on-site power supply socket.
-
Page 26: Putting Into Operation
Transport, Assembly, Putting into Operation and Decommissioning Chapter 4 Page 26 Putting into Operation Putting into Operation Before the appliance is put into operation it must be clean and dry. Before the first use of the appliance, re- move the protective plastic film from the metal plates. The following appliance functions must be checked before putting it into operation: §... -
Page 27: Operation
Operation Chapter 5 Arrangement and Function of the Operating Elements Page 27 Operation ATTENTION Exposed springs When pressing down the stacking platform manually, the springs are ex- posed. Reaching into the gaps of the exposed springs may cause hand inju- ries. -
Page 28: Crockery Guide Adjustment
Operation Chapter 5 Page 28 Plate Dispenser Adjustment Basically, the appliance must be adjusted if at least one of the following crockery parameters alters: § Diameter § Height § Stack height § Weight. 5.2.1 Crockery guide adjustment Before loading, the crockery guides must be adjusted to the diameter of the crockery items and fixed in the locking positions provided. -
Page 29: Spring Adjustment
Operation Chapter 5 Plate Dispenser Adjustment Page 29 Adjust retaining bolts Figure 16 Retaining bolts § If it is necessary to alternate between the rows of holes in the plate dispenser model 27-33 (except TEUH-2VC27-33), the upper holders of the crockery guides must also be inserted into the available holes. - Page 30 Operation Chapter 5 Page 30 Plate Dispenser Adjustment Before loading the appliance, the dispensing height must be adjusted to the kind of crockery used. The dis- pensing height is adjusted by hooking or unhooking tension springs. So long as the same kind of plates is always used, the dispensing height only needs to be set once.
-
Page 31: Calculating The Plate Dispenser Capacity
Operation Chapter 5 Operation Page 31 5.2.3 Calculating the plate dispenser capacity The total capacity of a plate dispenser depends on the kinds of crockery loaded and the number of dispens- ing tubes. All the leading manufacturers give the necessary data for calculating the intermediate stack height in the fol- lowing manner: : Intermediate stack height : Height of the first crockery item... -
Page 32: Switching On The Appliance
Operation Chapter 5 Page 32 Operation NOTE Use of the cover The cover ensures effective protection against ingress of dust and condensed water even during relatively long periods of temporary storage. Using the cov- er in the heated appliances lowers the heat loss upwards and reduces the heating time of the inserted crockery or delays the cooling of pre warmed crockery. -
Page 33: Loading The Appliance
Operation Chapter 5 Operation Page 33 5.3.2 Loading the appliance NOTE Loading Before the crockery items are inserted, the crockery guide and the stack height must be set correctly. Insert the items individually or in small safely manageable stacks. NOTE Warm-keeping items Metal-coated warm-keeping items filled with wax can also be heated up wrong in the most powerful plate dispenser. -
Page 34: Moving The Appliance
Operation Chapter 5 Page 34 Measures at the End of Operation § Remove the cover and put it down. § Take out the plates. § Put the cover back on. NOTE Appliances with cooling slots The appliances are intended to provide cooled crockery. For this purpose, the loaded appliances must remain in cold stores for several hours. -
Page 35: Fault Detection And Troubleshooting
Fault Detection and Troubleshooting Chapter 6 Safety Measures Page 35 Fault Detection and Troubleshooting Safety Measures DANGER Hazardous electrical voltage The electrical voltage may be considerably dangerous to limb and life of per- sons and lead to injuries. Before looking for faults, switch off the appliance at the mains. Pull out the mains plug and insert it into the plug park provided. - Page 36 Fault Detection and Troubleshooting Chapter 6 Page 36 Fault and Action Table Fault Possible cause Action Appliance becomes warm; indicator Defective On / Off switch. Take the appliance out of operation light does not come on. and have it checked and repaired by authorised specialist staff, if neces- sary.
-
Page 37: Cleaning And Care
Cleaning and Care Chapter 7 Safety Measures Page 37 Cleaning and Care Safety Measures DANGER Hazardous electrical voltage The electrical voltage may be considerably dangerous to limb and life of per- sons and lead to injuries. Before cleaning, switch off the appliance at the mains. Pull out the mains plug and insert it into the plug park provided. -
Page 38: Special Care Instructions
Cleaning and Care Chapter 7 Page 38 Special Care Instructions The plastic covers can be cleaned manually with a damp cloth. In the case of solid impurities, appliances can also be cleaned in a commercial dishwasher. Washing and rinsing agents suitable for polycarbonate should be used. -
Page 39: Spare Parts And Accessories
Spare Parts and Accessories Chapter 8 Introduction Page 39 Spare Parts and Accessories Introduction Service work should only be carried out by authorised specialists. Defective components should only be replaced with original parts. In the event of after-sales service and when ordering spare parts, always specify the data and corresponding part number indicated on the rating plate. - Page 40 Spare Parts and Accessories Chapter 8 Page 40 Spare Parts and Accessories List 014040101 Tension spring stainless steel 10gr (package contents 5 piece) Ø1.5/Ø20/146 set 014040164 Tension spring stainless steel 5gr Ø1.0/Ø12/146 (package contents 5 piece) 4318000 Guide basket steel 336/293/130 cpl 4322000 Cover PC Ø310/103/3 transp...
- Page 41 Spare Parts and Accessories Chapter 8 Spare Parts and Accessories List Page 41 TEH-2/V 27-33 014000402 Swivel caster Ø 125 with breaks plate, bearing, incl. 4 nuts plastic 014000401 Swivel caster Ø 125 plate, bearing, plastic incl. 4 nuts 0191176895 Push bar left+right PP 192/180/30 black incl.
- Page 42 Spare Parts and Accessories Chapter 8 Page 42 Spare Parts and Accessories List 91146181 radial Ø120 240V 60Hz 38W UL 91141227-1 Cable set TEUH/ VS 91092186 Adjustment bracket Ø 7.8/805/114 cpl TEUH-2/VS 27-33 014000402 Swivel caster Ø 125 with breaks plate, bearing, incl.
- Page 43 Spare Parts and Accessories Chapter 8 Spare Parts and Accessories List Page 43 91095077 Limiter temp. protection 90°C 2Ö 014040228-01 Thermostat 30-130°C set (package contents 2 piece) 014001300 On / Off switch w. frame, spray h. 014001013 Hot air fan 240V/50HzR2K150AC037 4328004 Cable set...
- Page 44 Spare Parts and Accessories Chapter 8 Page 44 Spare Parts and Accessories List EBRH/V 27-33 014040101 Tension spring stainless steel 10gr (package contents 5 piece) Ø1.5/Ø20/146 set 014040164 Tension spring stainless steel 5gr (package contents 5 piece) Ø1.0/Ø12/146 set 91009066 Guide basket steel 345/345/130 coat.
-
Page 45: Annex
Annex Chapter 9 EC Declaration of Conformity Page 45 Annex EC Declaration of Conformity Plate dispenser 4330000_A6 TE-2/V19-26, 27-33 | TE-2/VK19-26 | TEH-1/V19-26, 27-33 | TEH-2/V19-26, 27-33 | TEUH-1/VS19-26 | TEUH-2/VS19-26, 27-33 | TEUH-2/VC19-26 EBR/V19-26, 27-33 | EBRH/V19-26, 27-33 | EBRH-2/V19-26... - Page 46 Annex Chapter 9 Page 46 EC Declaration of Conformity Plate dispenser TE-2/V19-26, 27-33 | TE-2/VK19-26 | TEH-1/V19-26, 27-33 | TEH-2/V19-26, 27-33 | TEUH-1/VS19-26 | TEUH-2/VS19-26, 27-33 | TEUH-2/VC19-26 EBR/V19-26, 27-33 | EBRH/V19-26, 27-33 | EBRH-2/V19-26 4330000_A6...
Need help?
Do you have a question about the TEUH-2/VS27-33 and is the answer not in the manual?
Questions and answers