
Subscribe to Our Youtube Channel
Related Manuals for Beko WX943440W


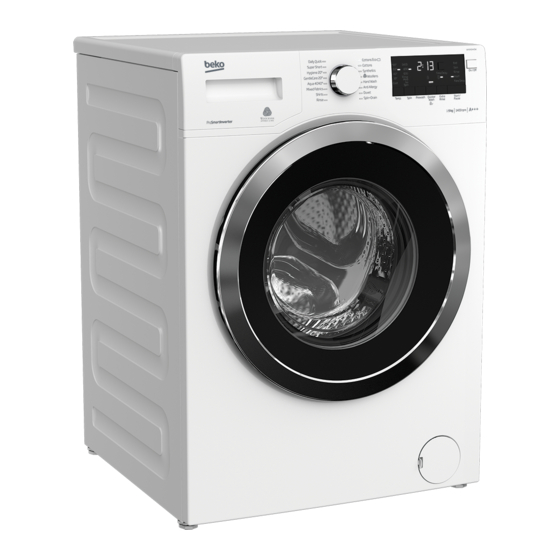
Summary of Contents for Beko WX943440W
- Page 1 Washing Machine User’s Manual الغسالة دليل المستخدم WX 943440W EN / AR Document Number= 2820524718_EN/ 26-12-18.(11:07)
- Page 2 Please read these instructions first before using your appliance Dear Customer, Thank you for choosing a Beko appliance. Please take some time to read this user manual before using your appliance, to ensure you know how to safely operate the controls and functions.
-
Page 3: Table Of Contents
TABLE OF CONTENTS 1 General safety instructions 1.1 Life and property safety ---------------------------------------------------------------------------5 1.2 Children's safety -----------------------------------------------------------------------------------6 1.3 Electrical safety ------------------------------------------------------------------------------------7 1.4 Hot surface safety ---------------------------------------------------------------------------------7 2 Important instructions for the environment 2.1 Compliance with WEEE Directive ------------------------------------------------------------------8 2.2 Package information ------------------------------------------------------------------------------8 3 Intended use 4 Your product 4.1 Overview -------------------------------------------------------------------------------------------9... - Page 4 TABLE OF CONTENTS 4.6 Operating the product ----------------------------------------------------------------------------24 4.6.1 Control panel ----------------------------------------------------------------------------------------------24 4.6.2 Programme and consumption table ---------------------------------------------------------------------25 4.6.3 Programme selection ------------------------------------------------------------------------------------27 4.6.4 Programmes ---------------------------------------------------------------------------------------------27 4.6.5 Temperature selection -----------------------------------------------------------------------------------29 4.6.6 Spin speed selection -------------------------------------------------------------------------------------29 4.6.7 Auxiliary function selection ------------------------------------------------------------------------------30 4.6.8 End Time --------------------------------------------------------------------------------------------------31 4.6.9 Starting the programme ---------------------------------------------------------------------------------32 4.6.10 Loading door lock ---------------------------------------------------------------------------------------32 4.6.11 Changing the selections after programme has started -----------------------------------------------32...
-
Page 5: General Safety Instructions
General safety instructions This section includes security instructions which may help prevent the injuries and material damage risks. All kinds of warranties shall be invalid if these instructions are not observed. 1.1 Life and property safety Never place the product on a carpet-covered floor. Electrical parts will get overheated since air cannot circulate from under the device. -
Page 6: Children's Safety
1.2 Children's safety This product can be used by children who are at the age of 8 and over and the people whose physical, sensory or mental skills are not fully developed or who do not have necessary required experience and knowledge as long as they are supervised or trained about the safe use of the product and its risks. -
Page 7: Electrical Safety
1.3 Electrical safety If the product has a failure, it should not be operated unless it is repaired by an Authorised Service Agent. Risk of electric shock! This product is designed to resume operating in the event of powering on after a power interruption. If you wish to cancel the programme, see "Cancelling the programme"... -
Page 8: Important Instructions For The Environment
Important instructions for the environment 2.1 Compliance with WEEE Directive This product complies with EU WEEE Directive (2012/19/EU). This product bears a classification symbol for waste electrical and electronic equipment (WEEE). This product has been manufactured with high quality parts and materials which can be reused and are suitable for recycling. -
Page 9: Your Product
Your product 4.1 Overview 1- Power cable 2- Top panel 3- Control panel 4- Drain hose 5- Loading door 6- Filter cap 7- Adjustable feet 8- Detergent drawer 9 / EN Washing Machine / User’s Manual... -
Page 10: Package Contents
4.2 Package Contents 9- Power cable 10- Drain hose 11- Transportation safety bolts* 12- Mains water inlet hose (One of the following filter types is used for the mains hose connection.) a- Electronic water shut-off b- Mechanical water shut-off c- Standard 13- Liquid detergent container** 14- User Manual 15- Blind plug***... -
Page 11: Technical Specifications
4.3 Technical specifications Complying Commission Delegated Regulation (EU) No 1061/2010 Supplier name or trademark Beko Model name WX943440W Rated capacity (kg) Energy efficiency class / Scale from A+++ (Highest Efficiency) to D (Lowest Efficiency) A+++ Annual Energy Consumption (kWh) Energy consumption of the standard 60°C cotton programme at full load (kWh) 0.940... -
Page 12: Installation
4.4 Installation • Preparation of the location and electrical, tap water and waste water installations at the place of installation is the customer's responsibility. • Make sure that the water inlet and discharge hoses as well as the power cable are not folded, pinched or crushed while pushing the product into its place after installation or cleaning procedures. -
Page 13: Removing The Transportation Locks
4.4.3 Removing the transportation locks Loose all bolts with an appropriate wrench until they turn freely. Remove the transport safety bolts by rocking them slightly. Insert the plastic covers from the bag containing the user manual into the openings on the rear panel. -
Page 14: Connecting The Drain Hose To The Drain
4.4.5 Connecting the drain hose to the drain • Attach the end of the drain hose directly to the waste water drain, lavatory or bathtub. CAUTION: Your drain house will be flooded if the hose comes out of its housing during water discharge. -
Page 15: Adjusting The Feet
4.4.6 Adjusting the feet CAUTION: In order to ensure that the product operates more silently and vibration- free, it must stand level and balanced on its feet. Balance the machine by adjusting the feet. Otherwise, the product may move from its place and cause crushing and vibration problems. CAUTION: Do not use any tools to loosen the lock nuts. - Page 16 Electrical requirements Before you insert the plug into the wall socket make sure that the voltage and the frequency shown in the rating label corresponds to your electricity supply. We recommend that this appliance be connected to the mains supply via a suitable switched and fused socket in a readily accessible position.
-
Page 17: Initial Use
Transportation of the product 1. Unplug the product before transporting it. 2. Remove water drain and water supply connections. 3. Drain all water that has remained in the product. 4. Install transportation safety bolts in the reverse order of removal procedure. Never move the product without the transportation safety bolts properly fixed in place! WARNING: Packaging materials are dangerous to children. -
Page 18: Preparation
4.5 Preparation 4.5.1 Sorting the laundry * Sort laundry according to type of fabric, colour, and degree of soiling and allowable water temperature. * Always obey the instructions given on the garment tags. LAUNDRY WASH SYMBOLS Symbols for washing on machine WASH Maximum... -
Page 19: Preparing Laundry For Washing
4.5.2 Preparing laundry for washing • Laundry items with metal attachments such as, underwiring, belt buckles or metal buttons will damage the product. Remove the metal pieces or wash the clothes by putting them in a laundry bag or pillow case. •... -
Page 20: Loading The Laundry
4.5.4 Loading the laundry 1. Open the laundry cover. 2. Put the laundry items into the product in a loose manner. 3. Push and close the loading cover until you hear the locking sound. Ensure that no items are caught in the door. The loading door is locked while a programme is running. The door can only be opened a while after the programme comes to an end. - Page 21 Choosing the detergent type Detergent type to be used depends on the fabric type and colour. • Use different detergents for coloured and white laundry. • Wash your delicate clothes only with special detergents (liquid detergent, wool shampoo, etc.) used solely for delicate clothes. •...
- Page 22 Using gel and tablet detergent • If the gel detergent thickness is fluidal and your product does not contain a special liquid detergent cup, put the gel detergent into the main wash detergent compartment during first water intake. If your product contains a liquid detergent cup, fill the detergent into this cup before starting the programme.
-
Page 23: Tips For Efficient Washing
4.5.7 Tips for efficient washing Clothes Delicates/ Light Colours and Black/Dark Colours Woollens/ Whites Colours Silks (Recommended (Recommended (Recommended (Recommended temperature temperature temperature range temperature range range based on range based on based on soiling level: based on soiling level: soiling level: cold soiling level: cold 40-90 o C) -
Page 24: Operating The Product
4.6 Operating the product 4.6.1 Control panel 21 22 17 - Programme selection knob 18 - Temperature indicator 19 - Spin speed indicator 20 - Duration information display 21 - Child lock enabled indicator 22 - End Time Setting button 23 - Door lock enabled indicator 24 - Programme Follow-up indicator 25 - On / Off button... -
Page 25: Programme And Consumption Table
4.6.2 Programme and consumption table Selectable temperature Programme (°C) range °C 60** 0.94 1400 Cold-60 Cottons Eco 60** 44.5 0.81 1400 Cold-60 40** 44.5 0.81 1400 Cold-60 2.50 1400 • • • Cold-90 Cottons 1.90 1400 • • • Cold-90 1.20 1400 •... - Page 26 The auxiliary functions in the table may vary according to the model of your product. Water and power consumption may vary subject to the changes in water pressure, water hardness and temperature, ambient temperature, type and amount of laundry, selection of auxiliary functions and spin speed, and changes in electric voltage.
-
Page 27: Programme Selection
4.6.3 Programme selection 1 Determine the programme suitable for the type, quantity and soiling level of the laundry in accordance with the "4.6.2 Programme and consumption table". Programmes are limited with the highest spin speed appropriate for that particular type of fabric. - Page 28 “The wool wash cycle of this machine has been approved by The Woolmark Company for the washing of machine washable wool products provided that the products are washed according to the instructions on the garment label and those issued by the manufacturer of this washing machine.
-
Page 29: Temperature Selection
• Rinse Use when you want to rinse or starch separately. • Spin+ Drain Use to drain the water in the product. 4.6.5 Temperature selection Whenever a new programme is selected, the recommended temperature for the selected programme appears on the temperature indicator. To decrease the temperature, press the Temperature Adjustment button. -
Page 30: Auxiliary Function Selection
Rinse Hold If you are not going to unload your clothes immediately after the programme completes, you can use rinse hold function to keep your laundry in the final rinsing water in order to prevent them from getting wrinkled when there is no water in the product. Press Start/ Pause button after this process if you want to drain the water without spinning your laundry. -
Page 31: End Time
• Prewash A Prewash is only worthwhile for heavily soiled laundry. Not using the Prewash will save energy, water, detergent and time. • Extra Rinse This function enables the product to make another rinse in addition to the one already made after the main wash. -
Page 32: Starting The Programme
4.6.9 Starting the programme 1. Press Start / Pause button to start the programme. 2. Programme follow-up light showing the startup of the programme will turn on. If no programme is started or no key is pressed within 10 minute during programme selection process, the product will turn off automatically. -
Page 33: Child Lock
4.6.12 Child Lock Use Child Lock function to prevent children from tampering with the product. Thus you can avoid any changes in a running programme. You can switch on and off the product with On / Off button when the Child Lock is active. When you switch on the product again, programme will resume from where it has stopped. -
Page 34: Maintenance And Cleaning
4.7 Maintenance and cleaning Service life of product extends and frequently experienced problems will be reduced if it is cleaned at regular intervals. 4.7.1 Cleaning the detergent drawer Clean the detergent drawer at regular intervals (every 4-5 washing cycles) as shown below in order to prevent accumulation of powder detergent in time. -
Page 35: Cleaning The Body And Control Panel
After every wash make sure that no foreign substance is left in the drum. If the holes on the door bellow shown in the figure are blocked, open the holes using a toothpick. Foreign metal substances will cause rust stains in the drum. Clean the stains on the drum surface by using cleaning agents for stainless steel. - Page 36 If the product fails to drain water inside it, the pump filter is clogged. Filter must be cleaned whenever it is clogged or every 3 months. Water must be drained off first to clean the pump filter. In addition, prior to transporting the product (e.g., when moving to another house) water should be drained completely.
-
Page 37: Troubleshooting
Troubleshooting Problem Reason Solution Programme does not start • Press the Start / Pause / Cancel Start / Pause / Cancel button was not pressed. button. after closing the door • Reduce the amount of laundry and It may be difficult to close the loading door in case make sure that the loading door is of excessive loading. - Page 38 Problem Reason Solution Loading door cannot be The cover lock is activated due to the water level • Drain the water by running the Pump or Spin programme. inside the product. opened. • Wait until the programme completes. Product is heating up the water or it is at the spinning cycle.
- Page 39 Problem Reason Solution Programme time does not There might be unbalanced load in the product. • Automatic unbalanced load detection system might be activated due to the countdown. (*) unbalanced distribution of the laundry in the product. Product does not switch to •...
- Page 40 Problem Reason Solution Washing performance is • Clean the drum regularly. For this Regular drum cleaning is not applied. procedure, please see "4.7.2 Cleaning poor: Oily stains appeared the loading door and the drum". on the laundry. (**) Washing performance Odours and bacteria layers are formed on the •...
- Page 41 Problem Reason Solution Laundry does not smell like Detergent is put in the wrong compartment. • If detergent is put in the prewash compartment although prewash the softener. (**) cycle is not selected, the product can take this detergent during rinsing or softener step.
- Page 42 Problem Reason Solution Foam is overflowing from • Mix 1 tablespoonful softener and Too much detergent is used. ½ l water and pour into the main the detergent drawer. wash compartment of the detergent drawer. • Put detergent into the product suitable for the programmes and maximum loads indicated in the “4.6.3 Programme and consumption table”.
- Page 45 الحل السبب المشكلة .ثوقبتجفرفقديجقالمسحمققثبلقإضافةقالمسحمق Š ق .توقمضعقالمنظفقفيقديجقمبتل (**)تب يقمسحمققفيقالديج.ق احتفظقبالمنظفاتقمخل ةقفيقبرئةقخالرةقمنقاليطمبةقمالق Š ق .أصبحقالمنظفقيط ب ًا .تعيضهاقلديجاتقالحيايةقالزائدة .افحصقضخطقالماء Š ق .ضخطقالماءقمنخفض .افحصقالق مبقمنظفهاقإذاقكانتقمسدمدة Š ق ثدقركمنقالمسحمققالممجمدقفيقتجمرفقالخسلةقاليئرسرةقثدقأصابهق البللقعندقسحبقماءقالخسلةقالتحضريرة.قتوقانسدادقق مبقثسوق .المنظف .اتصلقبميكزقخدمةقمعتمد Š ق .هناكقمشكلةقفيقصماماتقديجقالمسحمق القتخلطقالمنظفقبالمنعو.قثوقبخسلقالديجقمتنظرفهقبالماءق Š ق .ثدقركمنقالمنظفقثدقاختلطقمعقالمنعو .الساخن .4.4.2نظفقالحلةقبانتظاو.قلهذاقاألمي،ق ر ُيجىقمياجعةقق Š...
- Page 46 الحل السبب المشكلة ثدقركمنقتوقتفعرلقنظاوقالكشفقالتل ائيقعنقالحملق Š ق .ثدقركمنقهناكقحملقغريقمتمازنقفيقالخسالة (*)العدقتنازليقلمثتقالبينامجقالقرعمل.ق غريقالمتزنقنترجةقالتمزرعقغريقالمتمازنقللمالبسقفيق .االسطمانة ثدقركمنقتوقتفعرلقنظاوقالكشفقالتل ائيقعنقالحملق Š ق .ثدقركمنقهناكقحملقغريقمتمازنقفيقالخسالة (*)الخسالةقالقتنت لقإلىقخطمةقالعصي.ق غريقالمتزنقنترجةقالتمزرعقغريقالمتمازنقللمالبسقفيق .االسطمانة .افحصقالفلتيقمخيطموقسحبقالمراهقمتصيرفها Š ق .لنقت موقالخسالةقبعملرةقالعصيقإذاقلوقرتوقتصيرفقالماءقبالكامل .قاستخدوقف طقالكمرةقالمناسبةقمنقالمنظف Š ق ثدقتظهيقاليغمةقالزائدةقمثدقرتوقتنشرطقنظاوقامتصاصقاليغمةق .التل ائيقنترجةقالستخداوقالمنظفقبصميةقزائدة استخدوقالكمرةقالممصىقبهاقمالمناسبةقللماءقالعسيقمكمرةق Š ق .استخداوقكمرةقمنظفقغريقكافرةقأقناءقالخسرلقلفتياتقطمرلة نتائجقعملرةقالخسرلقغريقميضرة:قالمالبسق .المالبس (**)تتحملقإلىقاليمادي.ق .اختيقديجةقالحيايةقالمناسبةقللمالبسقالميادقغسلها Š...
- Page 47 استكشاف األعطال وإصالحها الحل السبب المشكلة .قاضخطقعلىققزيقبدءق/قإر افقمؤثتق/قأمقزيقاإللخاء Š ق بدءق/قإر افقمؤثتق/قلوقرتوقالضخطقعلىقزيقاإللخاء .لوقربدأقالبينامجقبعدقإغالققالباب احيصقعلىقت لرلقكمرةقالخسرلقمتح ققمنقأنقبابق Š ق .ثدقركمنقمنقالصعبقغلققبابقالتحمرلقعندقاإلفياطقفيقالتحمرل .التحمرلقمخلققبشكلقصحرح "ق)التشخرلق/قإر افقOnق/قOff"قاضخطقمطم ال ًقعلىقالزيق Š ق انت القالخسالةقإلىقمضعقالحمارةقالذاترةقبسببقمشكلةقفيقاإلمدادق .القرمكنقبدءقتشخرلقالبينامجقأمقاخترايه التشخرل(قلمدةق3ققمانٍ قإلعادةقضبطقالخسالةقعلىقإعداداتق .()علىقسبرلقالمقالقجهدقالترايقأمقضخطقالماء،قمغريقذلك ("المصنع.ق)ياجع.ق"إلخاءقالبينامج .القرعدقهذاقاألميقعطل،قفالماءقغريقضايقبالخسالة Š ق .ثدقرتب ىقبعضقالماءقفيقالخسالةقنترجةقعملراتقمياثبةقالجمدة .رمجدقماءقفيقالخسالة .ثوقبتشخرلقالصنابري Š...
- Page 48 .3 ق قاتبعقاإلجياءاتقأدناهقلتصيرفقالمراه :إذا كانت الغسالة مزودة بخرطوم لصرف المياه عند الطوارئ اسحبقخيطموقتصيرفقالطمايئقمنقمبرته قa ضعقمعاءقكبريقعندقطيفقالخيطمو.قثوقبتصيرفقالماءق قb داخلقالمعاءقعنقطيرققنزعقالسدادةقالممجمدةقفيقطيفق الخيطمو.قعندقامتالءقالمعاء،قثوقبسدقمدخلقالخيطموقبإعادةق تيكربقالسدادة.قمبعدقتفيرغقالمعاءقكييقاإلجياءقالسابقق .لتصيرفقالماءقمنقالخسالةقبالكامل عندقاالنتهاءقمنقتصيرفقالماء،قأغلققنهارةقالخيطموق قc .بالسدادةقميةقأخيىقمقبتقالخيطموقفيقمكانه .ثوقبتدمريقمإزالةقفلتيقالمضخة قd .4 ق ثوقبتنظرفقأيقب اراقممجمدةقداخلقالفلتيقمقاأللراف،قإنقمجدت،قحملقمضخةقالتصيرف .5 . ق استبدلقالفلتيق 6 . ق إذاقكانقغطاءقالفلتيقمكم ن ً اقمنقثطعترن،قأغلققغطاءقالفلتيقبالضخطقعلىقالم بض.قإذاقكانقالفلتيقمكمناقمنقثطعةقماحدة،ق .ضعقالم...
- Page 49 4.4.4 تنظيف فلترات مدخل الماء رمجدقفلتيقفيقطيفقكلقصماوقمنقصماماتقسحبقالماءقعندقالجزءقالخلفيقمنقالخسالةقمأر ض ًاقفيقطيفقكلقخيطموقمنق خياطروقسحبقالماءقالمتصلةقبالصنبمي.قتعملقهذهقالفالتيقعلىقمنعقالممادقالخيربةقماألمساخقالممجمدةقفيقالماءقمنقدخملق .الخسالة.قمرنبخيقتنظرفقالفالتيقعندماقتتسخ .اغلققالصنابري 1 . ق فكقصمامرلقخياطروقسحبقالماءقللمصملقإلىقالفالتيقفيق 2 . ق صماماتقسحبقالماء.قثوقبتنظرفهاقباستخداوقفيشاةقمناسبة.قإذاق كانتقالفالتيقمتسخةقتمام ا ً ،قثوقبإزالتهاقمنقأماكنهاقباستخداوقكماشةق .مثوقبتنظرفهاقبهذهقالطير ة أخيجقالفالتيقالتيقباألطيافقالمستمرةقلخياطروقسحبقالماءقمعق 3 . ق .الجمانقمثوقبتنظرفهماقتمام ا ً قتحتقمراهقجايرة . ً استبدلقالسداداتقمالفالتيقبعنارةقمأحكوقيبطهاقردمر ا 4 . ق 5.4.4 تصريف...
- Page 50 4.4 الصيانة والتنظيف .تمتدقفتيةقخدمةقالخسالةقمت لقمماجهةقالمشكالتقالمتكييةقإذاقتوقتنظرفهاقعلىقفتياتقمنتظمة 1.4.4 تنظيف درج المنظف ثوقبتنظرفقديجقالمنظفقعلىقفتياتقمنتظمةق)كلق4قإلىق5قدمياتقغسرل(قكماقهمقممضحق .باألسفلقلمنعقتيسبقمسحمققالخسرلقبميميقالمثت ايفعقالجزءقالخلفيقمنقالسرفمنقإلزالتهقكماقهمقممضح.ق .فيقحالةقبدءقتجمعقكمرةقمنقالماءقمال م ُنعوقبشكلقزائدقفيقثسوقال م ُنعو،قرنبخيقتنظرفقالسرفمن قاضخطقعلىقالدائيةقالمن طةقفيقثسوقيشقالماءق)السرفمن(قب سوقال م ُنعوقماسحبهقباتجاهكقحتىقرخيجقهذاقال سوقمنق 1 ق .الخسالة اغسلقديجقمسحمققالخسرلقمالسرفمنقبكمرةقمفريةقمنقالماءقالفاتيقفيقالحمض.قلحمارةقبشيتكقمنقمالمسةقالفضالت،ق 2 . ق .ثوقبتنظرفهقبفيشاةقمناسبةقمعقايتداءقثفازات .قأدخلقالديجقميةقأخيىقفيقممضعهقبعدقالتنظرفقمالتأكدقمنقمضعهقبصميةقجردة 3 ق 2.4.4 تنظيف باب التحميل واألسطوانة بالنسبةقالالتقالخسرلقالتيقتتمفيقعلىقبينامجقتنظرفقحلةقالخسالة،قريجىقمياجعةقكرفرةقالتشخرل-قبيامجقالخسالة.ق بالنسبةقألالتقالخسرلقالتيقالقتتمفيقعلىقبينامجقتنظرفقحلةقالخسالة،اتبعقالخطماتقالتالرةقلتنظرفقحلةقالخسالةق:ق...
- Page 51 31.3.4 إلغاء البرنامج ق)تشخرلق/قإر افقOn / Offرتوقإلخاءقالبينامجقعندقإر افقتشخرلقالخسالةقمتشخرلهاقميةقأخيى.قاضخطقمطم ال ً قعلىقاليزق تشخرل(قلمدةق3ققمان ٍ .ق ) (تشغيل/إيقافOn / Off أقناءقتشخرلقثفلقاألطفال،قلنقرتوقإلخاءقالبينامج.قعلركقإلخاءقثفلقاألطفالقأم ال ً .ق إذاقضخطتقعلىقالزيق إذاقأيدتقفتحقبابقالتحمرلقبعدقإلخاءقالبينامجقملكنقتعذيقفتحقبابقالتحمرلقألنقمستمىقالمراهقفيقالخسالةقأعلىقمنقفتحةقبابقالتحمرل،قف وق )Pum + Spin( تحديد البرنامج .قمثوقبتصيرفقالمراهقالممجمدةقفيقالخسالة قإلىقبينامجقتصيرفقمعصيق بتدمريقم بضق 41.3.4 انتهاء البرنامج ."قعلىقالشاشةقعندقانتهاءقالبينامجEnd"تظهيق إذاقلوقت وقبالضخطقعلىقأيقزيقلمدةق01قدثائق،فستتحملقالخسالةقإلىقمضعقإر افقالتشخرل.قرتوقإر افقتشخرلقالشاشةقمكافةق المؤشيات.ق...
- Page 52 9.3.4 بدء تشغيل البرنامج .قلبدءقالبينامجStartق/قPause1 . ق اضخطقعلىقزيقبدء/إر افقمؤثتق .2 . ق رضيءقضمءقمتابعةقالبينامجقلرشريقإلىقبدءقتشخرلقالبينامج فيقحالةقعدوقبدءقأيقبينامج،قأمقعدوقالضخطقعلىقأيقمفتاحقفيقغضمنق1ق01-دثائققأقناءقعملرةقتحدردقالبينامج،قتتحملقالخسالةقإلىقمضعق ق)اإلر افق(ق.قرتوقإر افقتشخرلقالشاشةقمكافةقالمؤشيات.قOFF .قإر افOFF/تشخرلقONسرتوقعيضقخطماتقالبينامجقالمنتهيقإذاقثمتقبالضخطقعلىقزيق 01.3.4 قفل باب التحميل .رمجدقنظاوقثفلقفيقبابقالتحمرلقللخسالةقمماقرمنعقفتحقالبابقعندماقركمنقمستمىقالماءقغريقمناسب .رضيءقيمزق"قالبابقالم فل"قعلىقالشاشةقأمقعندقإثفالقبابقالتحمرل 11.3.4 تغيير التحديدات بعد بدء تشغيل البرنامج .بعدقبدءقالبينامجقرمكنكقإجياءقالتخررياتقالتالرة 1.11.3.4 انتقال الغسالة إلى وضع اإليقاف المؤقت ق)بدء/إر...
- Page 53 7.3.4 اختيار الوظائف اإلضافية ثوقبتحدردقالمظائفقاإلضافرةقالمطلمبةقثبلقبدءقتشخرلقالبينامج.ق .عندقاخترايقأيقبينامج،مقإذاقتوقتحدردقمظرفةقإضافرة،قسرضيءقمصباحقالمظرفة سمفقرممضقمصباحقالمظرفةقاإلضافرةقالتيقالقرمكنقتحدردهاقأقناءقالبينامجقالحالي،قمقسمفقرصديقالجهازقإنذايقصمتي.ق باإلضافةقإلىقذلك،قرمكنكقأرضاقتحدردقأمقإلخاءقالمظائفقالمساعدةقالمناسبةقلتشخرلقالبينامجقبعدقبدءقدميةقالخسرل.قإذاقمصلتق دميةقالخسرلقن طةقحرثقرمكنقاخترايقأيقمظرفةقمساعدة،مسمفقرصديقالجهازقإنذايقصمتي،قمقسمفقرممضقمصباحق المظرفةقالمتعل ة.ق بعضقالمظائفقالقرمكنقتحدردهاقم ع ًا.قعندقاخترايقمظرفةقإضافرةققانرةقتتعايضقمعقالمظرفةقاألملىقثبلقتشخرلقالخسالة،قفست موقالخسالةقبإلخاءق المظرفةقاألملىقبرنماقتستميقالمظرفةقالقانرةقفيقالعمل.قعلىقسبرلقالمقال،قإذاقتوقتحدردقمظرفةقالخسلقالسيرعقبعدقتحدردقمظرفةقالمراهقاإلضافرة،ق .رتوقإلخاءقمظرفةقالمراهقاإلضافرةقمتب ىقمظرفةقالخسلقالسيرعقثردقالتفعرل ("القرمكنقاخترايقمظرفةقإضافرةقالقتتمافققمعقالبينامجقالذيقتوقتحدرده.ق)ياجع،ق"جدملقالبيامجقماالستهالك بعضقالبيامجقبهاقمظائفقإضافرةقالبدقمنقتشخرلهاقفيقمثتقمتزامن.قهذهقالمظائفقالقرمكنقإلخاؤها.قلنقرممضقإطايقالمظرفةقاإلضافرةقبلق .سرممضقالجزءقالداخليقف ط ) (الغسيل المبدئيPrewash ق تكمنقالخسلةقالتحضريرةقمجدرةقف طقمعقالمالبسقشدردةقاالتساخ.قرؤديقعدوقاستخداوقالخسلةقالتحضريرةقإلىقتمفريقالطاثةق .مالماءقممسحمققالخسرلقمالمثت ) (الغسيل السريعQuicker Wash • قاأللرافقالصناعرة.قحرثقت للقمنقعددقمياتقSyntheticsقالمالبسقال طنرةقمCottonsرمكنقاستخداوقهذهقالمظرفةقلبيامجق .الخسرلقمأر ض ًاقت للقمنقعددقخطماتقالشطفقللخسرلقثلرلقاالتساخ .عندقتحدردقهذهقالمظرفة،قثوقبتحمرلقالخسالةقبنصفقالحدقاألثصىقلكمرةقالمالبسقالمحددةقفيقجدملقالبيامج...
- Page 54 6.3.4 جدول البرامج واالستهالك نطاققديجةقحيايةقثابلقلالخترايق (بينامجق)ديجةقحياية ديجةقمئمرة 60بايد 1400 0,94 **60 60بايد 1400 0,81 44,5 **60 CottonsقEco 60بايد 1400 0,81 44,5 **40 90بايد 1400 2,50 90بايد 1400 1,90 Cottons 90بايد 1400 1,20 30-90 1400 2,50 AntiقAllergy 60بايد 1200 1,30 Synthetics 60بايد...
- Page 55 4.3.4 اختيار درجة الحرارة .عندقاخترايقبينامجقجدردقرتوقعيضقديجةقالحيايةقالمناسبةقلهذاقالبينامجقعلىقمؤشيقديجةقالحياية ق)ضبطقديجةقالحياية(.قسمفقتنخفضقديجةقTemperatureقAdjustmentلخفضقديجةقالحياية،قاضخطقعلىقزيق .الحيايةقتديرج ر ًا .(ق)اإلر افقالمؤثتPauseإذاقلوقرصلقالبينامجقلخطمةقالتسخرن،قرمكنكقتخرريقديجةقالحيايةقدمنقتبدرلقالخسالةقإلىقمضعق 5.3.4 اختيار سرعة الدوران .عندقتحدردقبينامجقجدرد،قرتوقعيضقسيعةقالعصيقالممصىقبهاقللبينامجقالمحددقعلىقمؤشيقسيعةقالعصي ق)ضبطقسيعةقالعصي(.قرتوقخفضقسيعةقالعصيقSpinقSpeedقAdjustmentلخفضقسيعةقالعصي،قاضخطقعلىقزيق بشكلقتديرجي.ق "ق)بدمنقعصي(قعلىقNoقSpin""ق)إر افقالشطف(قمRinseقHold"بعدقذلك،قبناءقعلىقطيازقالخسالة،قتظهيقالخراياتق .الشاشة.قياجعقثسوق"اخترايقالمظائفقاإلضافرة"قلشيحقهذهقالخرايات إيقاف الشطف إذاقلوقتكنقتيغبقفيقتفيرغقالخسرلقبعدقانتهاءقالبينامجقمباشي ة ً ،قرمكنكقاستخداوقمظرفةقتعلرققالشطفقماإلب اءقعلىقالمالبسق /“ق)بدءStart/Pause„فيقمراهقالشطفقاألخريةقلتجنبقتجعدقالمالبسقبسببقعدوقمجمدقماءقفيقالخسالة.قاضخطقعلىقزيق تمثفقمؤثت(قبعدقهذهقالعملرةقإذاقأيدتقتصيرفقالماءقدمنقعصيقالخسرل.قرستميقالبينامجقفيقالعملقمركتملقبعدقتصيرفق .الماء ق)بدءق/قStartق/قPauseق)سيعةقالعصي(قماضخطقزيقSpinقSpeedإذاقكنتقتيردقعصيقالخسرلقالذيقبالماء،قاضبطق .(إر افقمؤثت .رتوقاستكمالقالبينامج.قرتوقتصيرفقالماء،قمرتوقعصيقالخسرلقماكتمالقالبينامج .(ق)اإلر افقالمؤثتPauseإذاقلوقرصلقالبينامجقلخطمةقالعصي،قرمكنكقتخرريقالسيعةقدمنقتبدرلقالخسالةقإلىقمضعق قهمقاسوقالمؤسسةقالبيرطانرةقللحساسرة.قشعايهاقاألساسيقهمق“إحكاوقباعتمادرة”.قعندماقAllergyقUK“ تييقمنتجً اقرحملقهذاقاشعايقفهذاقرعنيقضمانةقأنقتوقاختبايهقعلم ر ًاقمتوقالتح ققمنقفعالرتهقفيقمستمىق ت...
- Page 56 ( )أصوافWoollens ق استخدوقهذاقالبينامجقلخسلقالمالبسقالصمفرة.قحددقديجةقالحيايةقالمناسبةقالتيقتتمافققمعقالملص اتقعلىقالمالبس.قاستخدوق .منظفاتقمناسبةقمعقالمالبسقالمصنمعةقمنقالصمف „ماف تقشيكةقعالمةقالصمفقعلىقصالحرةقدميةقالخسرلقبهذهقالخسالةقلخسرلقالمنتجاتقالصمفرةقال ابلةققللخسرلقاآللىقشيرطةقاتباعقااليشاداتق "قM13985.المذكميةقبالتركتقالملصققبالمالبسقمتعلرماتقالشيكةقالمنتجةقلهذهقللخسالة.ق .فىقالمملكةقالمتحدة،قماريلنداقمهمنجقكمنجقمالهندقتعتبيقعالمةقلصمفقشهادةقتجايرةقمعتمدة )ق(قطن اقتصاديCottons Eco ق استخدوقهذاقالبينامجقلخسلقمالبسكقال طنرةقالمترنةقمالمالبسقالكتانرةقذاتقاالتساخقالعادي.قباليغوقمنقأنهقرخسلقلفتيةقأطملق منقجمرعقالبيامج،قإالقأنهقرمفيقكقريً اقفيقالطاثةقمالمراه.قثدقتكمنقديجةقحيايةقالمراهقالفعلرةقمختلفةقعنقديجةقالحيايةق المحددة.قعندماقت موقبتحمرلقاآللةقبخسرلقأثلق)مقل.قنصفقالكمرةقأمقاثل(،قف دقرصبحقمثتقالبينامجقأثصيقتل ائر ا ً .قفيقهذهق الحالة،قسرنخفضقاستهالكقالطاثةقمالمراهقبشكلقأكبيقمماقرمفيقغسرلقاثتصاديقأكقي.قهذاقالبينامجقمتاحقفيقالممدرالتقالتيق .بهاقمؤشيقللمثتقالمتب ي (ق)واقي الطفلAnti Allergy ق استخدوقهذاقالبينامجقلخسرلقالمالبسقالتيقتتطلبقغسرلقمضادقللحساسرةقمصحيقبديجاتقحيايةقعالرةقمدميةقغسرلقمكقفةق مطمرلة.ق (20° ق)ناعمGentleCare 20° ق استخدوقهذاقالبينامجقلخسلقالمالبسقالناعمة.قفهمقرخسلقالمالبسقبحيكاتقلطرفةقمبدمنقدميةقعصيقم اينةقببينامجقغسرلق .المالبسقالمصنمعةقمنقاأللرافقالصناعرة.قرجبقاستخدامهقللمالبسقالتيقرمصىقبخسلهاقفيقبينامجقالمنسمجاتقالحساسة (ق)غسيل يدويHand Wash ق استخدوقهذاقالبينامجقلخسلقالمالبسقالصمفرة/اليثر...
- Page 57 3.4 تشغيل المنتج 1.3.4 لوحة التحكم 1ق-قم بضقاخترايقالبينامج 8ق-قلمبةقمؤشيقمتابعةقالبينامج 2ق-قمصابرحقتحدردقديجاتقالحياية 9ق-قزيقالتشخرلق/قإر افقالتشخرل 3ق-قمصابرحقاخترايقسيعةقالدميان 01ق-قزيقبدءقالتشخرلق/قإر افقمؤثت 4ق-قمدةقعيضقالمعلممات 11ق-قأزيايقالمظائفقاإلضافرة 5ق-قمصباحقثفلقأمانقمنقأجلقاألطفال 21ق-قزيقضبطقسيعةقالدميان 6ق-قزيقإعدادقمثتقاالنتهاء 31ق-قزيقضبطقديجةقالحياية 7ق-قمصباحقزيقفتحقالباب 41ق-قمصباحقاخترايقالبينامج 2.3.4 اختيار البرنامج ."1 ق حددقالبينامجقالمناسبقللنمع،قكمرة،قمديجةقاتساخقالمالبسقمف ً اقلـ"جدملقاالستهالكقمالبينامج ق 1 ق حددقالبينامجقالمطلمبقباستخداوقم بض"اخترايقالبينامج".ق .البيامجقمحددةقبأعلىقسيعةقعصيقمناسبةقلهذاقالنمعقالمحددقمنقالنسرج .عندقتحدردقالبينامجقالذيقست موقباستخدامه،قعلركقأنقتأخذقفيقالحسبانقنمعقالنسرج،قماللمن،قمديجةقاالتساخ،قمديجةقحيايةقالمراهقالمسممحقبها .علركقدائم ا ً قتفضرلقثرمةقديجةقالحيايةقالمنخفضةقمالتيقتتناسبقمعقنمعقالخسرل.قتمقلقالحيايةقالعالرةقاستهالكقأكقيقللطاثة 3.3.4 برامج...
- Page 58 7.2.4 إرشادات للغسيل الفعال المالبس Delicates "المالبس /"الرقيقة /األلوان الداكنة األلوان الفاتحة والمالبس Woolens األلوان السوداء البيضاء /"األصواف المالبس الحريرية Silks )نطاققديجةقالحيايةق )نطاققديجةقالحيايةق )نطاققديجةقالحيايةقال م ُمصىقبهاق )نطاققديجةقالحيايةقال م ُمصىقبهاق ال م ُمصىقبهاقبناءقعلىق ال م ُمصىقبهاقبناءقعلىق بناءقعلىقمستمىقاالتساخ:قبايدق04-ق بناءقعلىقمستمىقاالتساخ:ق09-04ق مستمىقاالتساخ:قبايدق مستمىقاالتساخ:قبايدق04-ق (ديجةقمئمرة (ديجةقمئمرة...
- Page 59 :إذا كانت الغسالة غير مزودة بكوب للمنظف السائل . ق القتستخدوقمسحمققالتنظرفقالسائلقللخسلةقالتحضريرةقفيقبينامجقالخسلةقالتحضريرة ق رحدثقالمنظفقالسائلقالب عقفيقالمالبسقعندقاستخدامهقمعقمظرفةقالبدءقالمتأخي.قإذاقكنتقتيردقاستخداوقمظرفةقالبدءق .المتأخي،قفالقتستخدوقالمنظفقالسائل استخدام الجل و منظفة األقراص ق إذاقكانقالمنظفقالجلقرمرلقإلىقالسرملةقمالقتحتميقالخسالةقعلىقكمبقللمنظفقالسائل،قضعقالمنظفقالجلقفيقم صميةق منظفقالخسلةقاليئرسرةقأقناءقدخملقالماءقللميةقاألملى.قإذاقكانتقالخسالةقمزمدةقبكمبقللمنظفقالسائل،قفامألقالمنظفقفيق .هذاقالكمبقثبلقبدءقالبينامج . ق إذاقكانقالمنظفقالجلقالقرمرلقللسرملةقأمقإذاقكانقعلىقهرئةقثيصقكبسملةقسائلة،قفضعهقفيقاالسطمانةقمباشيةقثبلقالخسرل . ق ضعقأثياصقالمنظفقفيقم صميةقالخسرلقاليئرسيق)م صميةقيثو:ق"2"(قأمقضعهقمباشي ة ً قفيقالحلةقثبلقالخسرل استخدام النشاء . ق...
- Page 60 6.2.4 استخدام مسحوق التنظيف وال م ُ نعم عندقاستخداوقالمنظف،قالمنعو،قالنشا،ققصباغةقاألثمشة،قالمبرض،قمزرلقاأللمان،قأمقمزرلقالكلس،قاثيأقتعلرماتقجهةقالتصنرعقالمكتمبةقعلىق .العبمةقماتبعقالم ادريقالمحددة.قاستخدوقكمبقالمعاريةقإنقكانقمتمفيا :رتكمنقديجقمساحرققالتنظرفقمنققالقةقم صميات -ق)1(قللخسلةقالتحضريرة -ق)2(قللخسلةقاليئرسرة -ق)3(قللمنعمات .-ق) (قباإلضافةقإلىقذلك،قتمجدقثطعةقسرفمنقفيقم صميةقالمنعو مسحوق التنظيف وال م ُ نعمات ومواد التنظيف األخرى . ق أضفقمسحمققالخسرلقمال م ُنعماتقثبلقبدءقتشخرلقبينامجقالخسرل ! ق أقناءقدميةقالخسرل،قالقتتيكقممزعقالمنظفقمفتمحً ا ق عندقاستخداوقأحدقالبيامجقبدمنقالخسلةقالتحضريرة،قالقرنبخيقمضعقمسحمققغسرلقفيقم صميةقالخسلةقالتحضريرةق )م...
- Page 61 2.4 اإلعداد 1.2.4 تصنيف الغسيل .* ق ثوقبتيتربقالخسرلقمف ا ً قألنماعقاألثمشة،قماللمن،قمديجةقاالتساخ،قمديجةقحيايةقالمراهقالمسممحقبها .* ق اتبعقدم م ًاقالتعلرماتقالممجمدةقبملص اتقالمالبس 2.2.4 تجهيز المالبس للغسيل ق تعملقالمالبسقمالمخسمالتقالميفققبهاقممادقمعدنرةقمقلقحماالتقالصديقمإبزروقاألحزمةقماألزيايقالمعدنرةقعلىقإلحاقق .الضييقبالخسالة.قثوقبإزالةقاألجزاءقالمعدنرةقأمقاغسلقالمالبسقعنقطيرققمضعهاقفيقكرسقالخسرلقأمقكرسقمخدة ق أخيجقجمرعقالممادقبالجرمبقمقلقالعمالت،قاألثالو،قممشابكقاألمياققماثلبقالجرمبقمنقالداخلقللخايجقمنظفها.قثدقتتسببق .هذهقاألشراءقفيقإلحاققالضييقبالخسالةقمتتسببقفيقحدمثقضمضاء . ق ضعقالمالبسقصخريةقالحجوقمقلقجمايبقاألطفالقمالجمايبقالنارلمنقفيقكرسقغسرلقأمقكرسقمخدة . ق ضعقالستائيقداخلقالخسالةقدمنقضخطها.قأزلقاألشراءقالملح ةقبالستائي . ق أغلققالسمستق)األبازرو(قمثوقبتقبرتقاألزيايقغريقالمحكمةقمإصالحقالق مبقمالتمزثات . ق ثوقبخسلقالمنتجاتقالممرزةقبملص اتق"ثابلةقللخسرلقبالخسالة"قأمق"تخسلقردم ر ًا"قباستخداوقالبينامجقالمناسب ق...
- Page 62 6.1.4 ضبط األرجل :تنبيه رجبقأنقتمضعقغسالتكقفيقمضعقمستميقممتمازنقعلىقأثدامهاقحتىقتعملقبصمتقمبدمنقاهتزاز.قثوقبممازنةقالجهازقعنقطيرقق .ضبطقاألثداو.قمإال،قف دقتتحيكقالخسالةقمنقمكانهاقمتسببقمشكالتقالتصادوقماالهتزاز :تنبيه .القتستخدوقأيقأدماتقلفكقصمامرلقال فل.قمإالقف دقتتعيضقللتلف .ثوقبفكقصمامرلقال فلقعندقاألثداوقردم ر ًا 1 ق . ٍ اضبطقاأليجلقحتىقر فقالجهازقفيقمضعقمستم ٍ قممتمازن 2 ق .أحكوقجمرعقصمامرلقاألثفالقبالردقميةقأخيى 3 ق 7.1.4 التوصيالت الكهربية ثوقبتمصرلقالمنتجقبمنفذقمؤيضقمحميقبصماوقكهيبيق61قأمبري.قلنقتكمنقالشيكةقمسئملةقعنقأيقتلفقثدقرحدثقعندق .استخداوقالخسالةقدمنقتأيرضققحسبقماقرتفققمعقال ماعدقالمحلرة . ق رنبخيقأنقتتمافققالتمصرالتقمعقال ماعدقالمحلرةقللتمصرل ق رجبقأنقتكمنقتمصرالتقاألسالكقلدائيةقالمأخذقالكهيبائيقكافرةقلتلبرةقاحتراجاتقاألجهزة.قرمصىقباستخداوقثاطعقالدائيةق .(GFCI)الكهيبائرةقالمعربةق...
- Page 63 4.1.4 توصيل مصدر إمداد الماء ضخطقإمدادقالماءقالمطلمبقلتشخرلقالخسالةقرتيامحقمنق1قإلىق01قبايق)1.0ق–ق01قملليقباسكال(.قرلزوقتدفققمنق01قإلىق08قلتيقماءقفيق الدثر ةقمنقالصنبميقمفتمحقبشكلقكاملقلكيقتعملقالخسالةقبطير ةقسلسة.قثوقبتمصرلقصماوقخفضقضخطقالماءقإنقكانقضخطقالماءقأعلىقمنق .ذلك :تنبيه مرياعىقعدوقتمصرلقالخساالتقذاتقمنفذقدخملقالماءقالفيديقبصنبميقالماءقالساخن.قمفيقهذهقالحالةقسرتلفقالخسرلقأمقستتحملق .الخسالةقإلىقمضعقالحمارةقملنقتعمل :تنبيه .القتستخدوقخياطروقمداخلقالماءقال درمةقأمقالمستخدمةقفيقالخسالةقالجدردة.قحرثقأنهاقثدقتتسببقفيقحدمثقب عقبالمالبس .أحكوقتقبرتقصمامرلقالخيطموقبالرد.قالقتستخدوقأداةقعندقيبطقالصمامرل 1 ق عندقإتماوقتمصرلقالخيطمو،قتح ققماقإذاقكانقهناكقمشكالتقفيقالتسيبق 2 ق عندقن اطقالتمصرلقبفتحقالصنبميقتمام ا ً .قمفيقحالةقمجمدقأيقتسيربقأغلقق الصنبميقمأزلقالصمملة.قأعدقيبطقالصامملةقبإحكاوقبعدقالكشفقعلىقالعازل.ق لمنعقتسيبقالمراهقمالتلفراتقالناتجةقعنقذلك،قحافظقعلىقالصنابريقمخل ةقعندماق .القتستخدوقالجهاز 5.1.4 توصيل خرطوم الصرف بفتحة الصرف ق ثوقبتقبرتقطيفقخيطموقالصيفقمباشيةقبفتحةقالصيف،قأمقالميحاض،قأمققحمضقاالستحماوق :تنبيه...
- Page 64 1.4 التركيب ق قاستعنقبأثيبقمكرلقخدمةقمعتمدقلتيكربقالمنتج.ق ق قإعدادقالمكانقمالتجهرزاتقالكهيبرةقمتجهرزاتقإمدادقالماءقمتصيرفهقفيقمكانقالتيكربقرعدقمنقمسئملرةقالعمرل.ق ق ق قتأكدقمنقعدوقانقناءقمدخلقالماءقمخياطروقالتصيرفقمأر ض ًاقكبلقالطاثة،قأمقانحشايهاقأمقتش هاقأقناءقدفعقالمنتجقفيقمكانهق بعدقإجياءاتقالتيكربقأمقالتنظرف.ق ق قتأكدقمنقإجياءقالتيكربقمالتمصرالتقالكهيبائرةقللجهازقمنقخاللقفنيقخدمةقمعتمد.قجهةقالتصنرعقغريقمسؤملةقعنق األعطالقالمتيتبةقعنقإجياءاتقر موقبهاقشخصقغريقمعتمد.ق ق ثبلقالتيكرب،قرجبقالتأكدقبصي ر ًاقمنقخلمقالمنتجقمنقالعرمب.قمفيقحالةقمجمدقعرمبقالقت وقبتيكربه.قرمكنقأنقتمقلق .المنتجاتقالتالفةقخطيً اقعلىقسالمتك 1.1.4 المكان المالئم للتركيب . ق ضعقالجهازقعلىقأيضرةقصلبةقممستمرة.قالقتضعهقعلىقالسجادقذمقالمبيقالكقرفقأمقأسطحقمشابهة ق ثدقرصلقالمزنقاإلجماليقللخسالةقمالمجففق-فيقحالةقامتالئهما-قممضعهماقفمققبعضقإلىق081قكجوقت ير ب ًا.قضعقالخسالةق !علىقأيضرةقصلبةقمقابتةقتستطرعقتحملقق...
- Page 65 المواصفات الفنية 1061/2010 االلتزام بمرسوم اللجنة المختصة (االتحاد األوروبي) رقم اسوقالمميدقأمقالعالمةقالتجايرة Beko اسوقالممدرل WX943440W السعةقالم ديةق)كجو(ق (ق)أدنىقكفاءةD+++ق)أعلىقكفاءة(قإلىقAفئةقكفاءةقاستخاللقالطاثةق/ققالم راسقمنق +++A االستهالكقالسنميقللطاثةق)كرلمماطقساعة(ق (استهالكقالطاثةقلبينامجقاألثطانقال راسيق°06وقمعقالكمرةقالكاملةق)كرلمماطقساعة 0,940 0,810 (استهالكقالطاثةقلبينامجقاألثطانقال راسيق°06وقمعقكمرةقجزئرةق)كرلمماطقساعة (استهالكقالطاثةقلبينامجقاألثطانقال راسيق°04وقمعقكمرةقجزئرةق)كرلمماطقساعة 0,810 (’ق)مضعقاإلر اف(ق)ماطoff-mode‘استهالكقال ديةقفيق 0,500 (’ق)مضعقالتشخرلقالمستمي(ق)ماطleft-onقmode‘استهالكقال ديةقفيق 0,500 االستهالكقالسنميقللماءق)لتي(ق 10780 (ق)أدنىقكفاءةGق)أعلىقكفاءة(قإلىقAفئةقكفاءةقالعصيقمالتجفرفق/ققالم راسقمنق...
- Page 66 تعليمات هامة للسالمة والبيئة WEEE 1.2 االلتزام بتوجيهات (.ققرحملقهذاقالجهازقيمزقتمضرحيقEU/2012/19)قاألميمبرةقWEEEقرتمافققهذاقالجهازقمعقتمجرهاتق .(WEEE)لنفاراتقاألجهزةقالكهيبائرةقماإللكتيمنرةق توقتصنرعقهذاقالمنتجقباستخداوقأجزاءقمممادقعالرةقالجمدةقرمكنقإعادةقاستخدامهاقباإلضافةقإلىقمناسبةقإلعادةق التدمري.قملذا،قالقتتخلصقمنقهذاقالمنتجقمعقالنفاراتقالمنزلرةقالعادرةقفيقنهارةقصالحرتهقللعمل.قمعلركقأنق تأخذهقإلىقميكزقتجمرعقخاصقبإعادةقتدمريقاألجهزةقالكهيبرةقماإللكتيمنرة.قريجىقاستشايةقالجهاتقالمحلرةق لمعيفةقأثيبقميكزقتجمرع.ق :RoHSالتمافققمعقتمجرهاتق (.ققمالقرحتميقعلىقممادقEUقRoHS/56/1102(قEUرتمافققالجهازقالذيقثمتقبشياؤهقمعقتمجرهاتق .ضايةقأمقمحظميةقمنقتلكقالمايدةقبالتمجرهات 2.2 بيانات التعبئة توقتصنرعقممادقالتعبئةقالخاصةقبالمنتجقمنقممادقثابلةقإلعادةقالتدمريقبماقرتفققمعق"ثمانرنقالبرئةقال ممرة".قالقتتخلصقمنقممادق التعبئةقمعقالنفاراتقالمنزلرةقأمقالنفاراتقاألخيى.قعلركقأنقتأخذهاقإلىقمياكزقتجمرعقممادقالتعبئةقالمخصصةقبماسطةقالجهاتق .المحلرة الغرض من االستخدام . ق قهذاقالمنتجقمصموقلالستخداوقالمنزلي.قمغريقمناسبقلالستخداوقالتجاييقمرجبقأالقرستخدوقفيقغريقالخيضقالمخصصقله . ق قتستخدوقهذهقالخسالةقف طقلخسلقمتجفرفقالمالبسقالمحددةقفيقهذاقالدلرل . ق قتخليقجهةقالصنعقطيفهاقمنقأيقمسؤملرةقمتيتبةقعلىقاالستخداوقأمقالن لقغريقالصحرح . ق قعميقخدمةقالجهازق01قسنمات.قخاللقهذهقالفتية،قسرتوقاستبدالقثطعقالخرايقاألصلرةقلتشخرلقالجهازقبشكلقسلرو AR11ق/ق...
- Page 67 ثوقبتمصرلقالمنتجقبمنفذقمؤيضقمحميقبصماوقكهيبيق61قأمبري.قالقتهملقتيكربق ق التأيرضقبماسطةقفنيقكهيبائيقمؤهل.قلنقتكمنقالشيكةقمسئملةقعنقأيقتلفراتقثدقتنشأق .عندقاستخداوقالخسالةقبدمنقطيفقأيضيقبماقرتفققمعقاللمائحقالمحلرة الق تخسلق الخسالةق بصبق الماءق فمثهاق أمق يشق الماءق علرهاق مطل ً ا!ق خطيق الصع ةق ق !الكهيبائرة القتلمسقم بسقكابلقالطاثةقبأرديقمبتلة!قالقتمسكقكابلقالطاثةقلنزعقثابسقاآللة،قعلركق ق .دائم ا ً قنزعقال ابسقبإمساكقالم بسقبأحدقاألردي،قمسحبقال ابسقبالردقاألخيى .رجبقفصلقالخسالةقأقناءقإجياءاتقالتيكرب،قمالصرانة،قمالتنظرف،قماإلصالح ق فيقحالةقتلفقكبلقالطاثة،قرجبقاستبدالهقبماسطةقالشيكةقالمصنعة،قأمقخدمةقماقبعدق ق البرع،قأمقشخصقلدرهقنفسقالمؤهالتق)مرفضلقأنقركمنقفنيقكهيباء(،قأمقشخصقماق...
- Page 68 تعليمات السالمة العامة رشملقهذاقال سوقتعلرماتقاألمنقمالتيقثدقتساعدقعلىقمنعقاإلصاباتقممخاطيقاإلصاباتق .الخطرية.قجمرعقأنماعقالضماناتقتكمنقباطلةقإذاقلوقرتوقاتباعقهذهقالتعلرمات 1.1 سالمة الحياة والمنشآت القتضعقالمنتجقعلىقأيضرةقمخطاةقبالسجاد.قستسخنقاألجزاءقالكهيبائرةقحرثقأنق ق الهماءق الق رمكنهق الدميانق منق تحتق الجهاز.ق مهمق ماق ثدق رتسببق فيق حدمثق مشكالتق .بالخسالة .انزعقثابسقالجهازقإذاقلوقركنقثردقاالستخداو ق ر موقميكزقالخدمةقدائ م ً اقبإجياءاتقالتيكربقماإلصالح.قجهةقالصنعقغريقمسؤملةق ق .عنقاألعطالقالمتيتبةقعلىقإجياءاتقر موقبهاقشخصقغريقمعتمد رجبقالتأكدقمنقيبطقخيطموقإمدادقالماءقمخيطموقالتصيرفقمعدوقتلفهما.قمإال،قثدق...
- Page 69 .توقتصنرعقهذاقالمنتجقباستخداوقأحدثقالت نراتقباستخداوقطيققصدر ةقللبرئة...
- Page 70 الغسالة دلرلقالمستخدو WX 943440W مقر ةقيثو 2820524718_AR/)52:11(.81-21-62ق...
- Page 72 Send us a secure message through our online contact us form. Please visit our website, click Contact Us and choose a product support topic from the list of options. Complete the required details and click send message. Product registrations For UK registrations please visit beko.co.uk/register and for the Republic of Ireland visit beko.ie/register.
- Page 73 Beko Free standing appliances come with a 12 month parts and labour guarantee as standard, Beko Built-in appliances come with a 12 month parts and labour guarantee as standard. This is extended to 24 months, free of charge, upon registration of the appliance. When you register your appliance for additional guarantee, you will automatically activate the ProSmart Motor 10 year guarantee.
- Page 74 If you are resident in the Republic of Ireland, this guarantee will be governed by Irish law and the Irish courts will have jurisdiction. This guarantee is provided by Beko plc. Beko House, 1 Greenhill Crescent, Watford, Hertfordshire. WD18 8QU. Beko plc is registered in England and Wales with company registration number 02415578.
- Page 75 If you have purchased an American style Fridge freezer, the standard guarantee starts from the date of original purchase of the product, and lasts for a period of twenty four (24) months unless Beko plc (the “Manufacturer”) agrees to extend the guarantee for the product in writing.
- Page 76 www.beko.com...
Need help?
Do you have a question about the WX943440W and is the answer not in the manual?
Questions and answers