Panasonic TH-98SQ1W Operating Instructions - Basic Manual
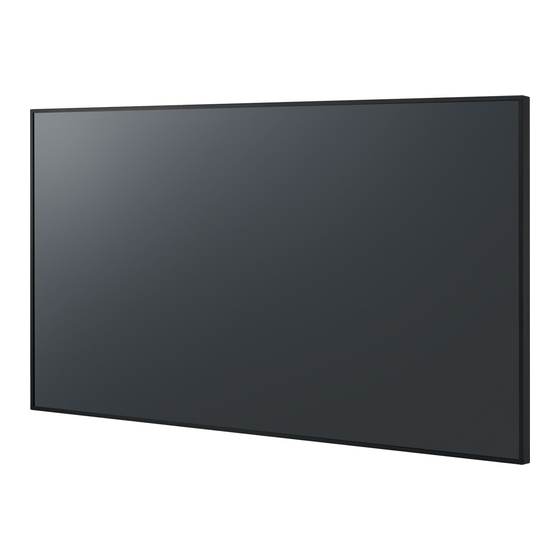
Uhd lcd display for business use
Hide thumbs
Also See for TH-98SQ1W:
- Operating instructions manual (138 pages) ,
- Operating instructions manual (33 pages) ,
- Operating instructions manual (149 pages)
Table of Contents
Advertisement
Quick Links
English
Read before use
For more information about this product, please read the "Operating
Instructions - Functional Manual".
To download the "Operating Instructions - Functional Manual", please
visit the Panasonic website (https://panasonic.net/cns/prodisplays/).
Please read these instructions before operating your set and retain
•
them for future reference.
Illustrations and screens in this Operating Instructions are images for
•
illustration purposes, and may be different from the actual ones.
Descriptive illustrations in this Operating Instructions are created
•
mainly based on the 98-inch model.
EU
TP0819TS3031 -PB
Operating Instructions
UHD LCD Display For business use
TH-98SQ1W
Model No.
TH-86SQ1W
TH-75SQ1W
TH-65SQ1W
TH-55SQ1W
TH-49SQ1W
Contents
Basic Guide
Important Safety Instructions ····················· 2
FCC STATEMENT ·································· 3
Important Safety Notice ···························· 4
Safety Precautions ·································· 6
Precautions for use ································· 9
Accessories ··········································11
Cautions when moving ··························· 15
Eyebolt ·············································· 16
Connections ········································ 17
Identifying Controls ······························· 21
Basic Controls ······································ 24
Specifications ······································ 26
Software License ·································· 29
Limited Warranty ·································· 30
LIMITED WARRANTY STATEMENT ········· 31
Customer Service ································· 32
DPQX1407ZD/X1
98-inch model
86-inch model
75-inch model
65-inch model
55-inch model
49-inch model
*Actual resolution:
3840 × 2160p
Advertisement
Table of Contents

Related Manuals for Panasonic TH-98SQ1W


Summary of Contents for Panasonic TH-98SQ1W
-
Page 1: Table Of Contents
LIMITED WARRANTY STATEMENT ········· 31 Instructions – Functional Manual”. Customer Service ································· 32 To download the “Operating Instructions – Functional Manual”, please visit the Panasonic website (https://panasonic.net/cns/prodisplays/). Please read these instructions before operating your set and retain • them for future reference. -
Page 2: Important Safety Instructions
Important Safety WARNING Instructions WARNING: To reduce the risk of electric shock, do not remove cover or back. 1) Read these instructions. No user-serviceable parts inside. Refer servicing 2) Keep these instructions. to qualified service personnel. 3) Heed all warnings. 4) Follow all instructions. -
Page 3: Fcc Statement
However, it will disappear when power supply cord. Any changes or modifications a general moving picture is displayed for a while. not expressly approved by Panasonic Corp. of North America could void the user’s authority to operate Trademark Credits this device. -
Page 4: Important Safety Notice
Important Safety IMPORTANT INFORMATION: Stability Hazard Never place a display in an unstable location. A Notice display may fall, causing serious personal injury or death. Many injuries, particularly to children, can be avoided by taking simple precautions such as: Using cabinets or stands recommended by the •... - Page 5 If you lose the fuse cover the plug must not be used until a replacement cover is obtained. A replacement fuse cover can be purchased from your local Panasonic dealer. Do not cut off the mains plug. Do not use any other type of mains lead except the one supplied with this display.
-
Page 6: Safety Precautions
55-inch model 49-inch model *2: This terminal board is supported only when the main panel facing upright, ask your local Panasonic software version of the display is 3.5000 or later and dealer. the sub software version of the display is 03.50 or For 98/86/75-inch models, do not position the unit later. - Page 7 The unit has deformed or broken parts. local Panasonic dealer. • If you continue to use the unit in this condition, it Do not touch the power supply cord or the plug could result in fire or electric shock.
- Page 8 Remove exhausted batteries from the remote control CAUTION immediately. Do not place any objects on top of the Display. Leaving the batteries unattended in it may cause • battery leakage, heat or burst. Ventilation should not be impeded by covering the ventilation openings with items such as Do not burn or breakup batteries.
-
Page 9: Precautions For Use
) with its liquid crystal 55-inch model 49-inch model Be careful of the movable structure of the power panel facing upright, ask your local Panasonic indicator and remote control sensor. dealer. As factory default, the power indicator and remote •... - Page 10 • possible. Change your password periodically. • Panasonic Corporation or its affiliate companies will • never ask for your password directly. Do not divulge your password in case you receive such inquiries. The connecting network must be secured by a •...
-
Page 11: Accessories
Accessories Power supply cord (Approx. 2 m) ● 1JP155AF1U Accessories Supply Check that you have the accessories and items shown. ● 1JP155AF1W Remote Control Transmitter × 1 ● DPVF2713ZA/X1 ● 2JP155AF1W Batteries for the Remote Control Transmitter × 2 ● 3JP155AF1W (AAA/R03/LR03 type) Clamper ×... - Page 12 Remote Control Batteries Attaching the USB Memory Cover When using a USB memory device, the USB memory Open the battery cover. cover can be attached to protect the device. Attach the USB memory cover using any of the following screw positions corresponding to the type of model.
- Page 13 Tighten the M4 screw to fix the USB Attaching the Function Board memory cover. When using a narrow-width function board, attach the supplied SLOT adaptor, and insert it to the slot. 49-inch model Note ● Before attaching or removing the function board, be sure to turn off the power of the display and remove the power plug from the outlet.
- Page 14 Using the screw removed in step 1, ● If there is a lead wire within approx. 3 mm from the end face of the circuit board, the function board fix the function board to the SLOT cannot be attached due to interference with the guide adaptor.
-
Page 15: Cautions When Moving
Cautions when 55-inch model 49-inch model Handle moving The display has handles for carrying. Hold them when moving. 98-inch model 86-inch model Handle Note ● Do not hold parts other than the handles. 98-inch model 86-inch model 75-inch model ● The following number of people are required to carry this unit. -
Page 16: Eyebolt
After removing the eyebolt, tighten Eyebolt 98-inch model 86-inch model the eyebolt cap with the flat washer 75-inch model (black) left as it is. The display has holes for attaching eyebolts (M10). When installing, use them to suspend the display. Eyebolt cap Use the eyebolt only for temporary suspension or movement for installation. -
Page 17: Connections
Connections Cable fixing Note ● 3 clampers are supplied with this unit. Fix the cables at 3 locations using the holes for clampers as shown AC cord connection and fixing / below. Cable fixing ● Before turning the power on, stop the holes (3 locations) with the clampers. - Page 18 1. Attach the clamper 49-inch model hole Holes for attaching the clampers Insert the clamper in a hole. To remove from the unit: snaps Keep pushing both side snaps and pull out the clamper. 2. Bundle the cables Set the tip in the hooks and tighten.
- Page 19 Video equipment connection Q40G1000-037-79A DisplayPort IN, DisplayPort Input / Output EXT SP: Speaker Terminal DisplayPort OUT: Terminal (Supports 4K picture) Connect to external speaker. Connect to PC or video AUDIO OUT: Analogue Audio Output equipment with DisplayPort Terminal terminal. Connect to audio equipment with 10 AV IN HDMI Input Terminal analogue audio input terminal.
- Page 20 Before connecting ● Before connecting cables, carefully read the operating instructions for the external device to be connected. ● Turn off the power of all devices before connecting cables. ● Take note of the following points before connecting the cables. Failure to do so may result in malfunctions.
-
Page 21: Identifying Controls
Identifying Controls 1 Power Indicator / Remote control sensor The Power Indicator will light. When the power of the unit is ON (Main Power On / Off button: ON) Display ● Picture is displayed: green ● When the unit enters the standby mode using the following functions: orange (red / green) Standby state with the “Quick start”... - Page 22 1 External input / output terminal Connects to video equipment, PC, etc. (see page 19) 2 <Main Power On / Off button> ( Turns the power On / Off. 3 <INPUT (Unit)> Selects the connected device. 4 <MENU (Unit)> Displays the menu screen. 5 <+ (Unit)>...
- Page 23 15 RETURN Remote Control Transmitter ● Used to return to the previous menu. 16 FUNCTION ● Displays [Function button guide]. 17 OFF TIMER ● Switches to stand-by after a fixed period. 18 Numeric buttons (1 - 6) ● Used as shortcut buttons by assigning frequently used operations.
-
Page 24: Basic Controls
Basic Controls ● When directly aiming the remote control at the remote control sensor of the main unit, the distance from the front of remote control sensor should be approx. 7 m or less. Depending on the angle, the operation Main Power On / Off button ( distance may be shorter. - Page 25 ■ ■ To turn the power ON/OFF with the remote Power ON message control The following message may be displayed when turning the unit power ON: To turn the power on ● When the power of the unit is on (Power Indicator - No activity power off Precautions red or orange), press the <Standby (ON/OFF) button>...
-
Page 26: Specifications
2 158.8 mm (W) × 1 214.3 mm (H) × 2 476.9 mm (diagonal) / 84.99” (W) × 47.80” (H) × 97.51” Model No. (diagonal) : TH-98SQ1W 98-inch model 86-inch model : TH-86SQ1W 1 895.0 mm (W) × 1 065.9 mm (H) × 2 174.2 mm 86-inch model (diagonal) / 74.60”... - Page 27 DisplayPort IN 49-inch model DisplayPort Terminal × 1 1 105 mm × 637 mm × 74 mm (excluding handles: 66 mm) / Compatible with HDCP 2.2 43.48” × 25.08” × 2.88” Audio signal: (excluding handles: 2.58”) Linear PCM (sampling frequencies: 48 kHz, 44.1 kHz, 32 kHz) Mass 98-inch model...
- Page 28 Stereo mini jack (M3) × 1 0 °C ‒ 30 °C (32 °F ‒ 86 °F) When installing the unit with its liquid crystal panel IR OUT facing upright, ask your local Panasonic dealer. There are conditions of mounting method, environmental Stereo mini jack (M3) × 1 temperature, connections and settings.
-
Page 29: Software License
[Settings] menu of this product. At least three (3) years from delivery of this product, Panasonic will give to any third party who contacts us at the contact information provided below, for a charge no more than our cost of physically performing source code distribution, a complete machine-readable copy of the corresponding source code covered under GPL V2.0, LGPL... -
Page 30: Panasonic Professional Display
Whenever the date of original purchase cannot be satisfactorily determined, the date of manufacture of the unit will be deemed to be the effective date of the warranty. Panasonic reserves the right to audit and reject any warranty claim that cannot be substantiated. -
Page 31: Limited Warranty Statement
LIMITED WARRANTY STATEMENT English... -
Page 32: Customer Service
Customer Service English... - Page 33 Disposal of Old Equipment and Batteries Only for European Union and countries with recycling systems These symbols on the products, packaging, and/or accompanying documents mean that used electrical and electronic products and batteries must not be mixed with general household waste. For proper treatment, recovery and recycling of old products and used batteries, please take them to applicable collection points in accordance with your national legislation.
- Page 34 Panasonic Canada Inc. 5770 Ambler Drive Mississauga, Ontario L4W 2T3 Panasonic Testing Centre Panasonic Service Europe, a division of Panasonic Marketing Europe GmbH Winsbergring 15, 22525 Hamburg, F.R. Germany English Web Site: https://panasonic.net/cns/prodisplays/ Printed in China © Panasonic Corporation 2019...
Need help?
Do you have a question about the TH-98SQ1W and is the answer not in the manual?
Questions and answers