
Related Manuals for Cobra CHIP650L

Summary of Contents for Cobra CHIP650L
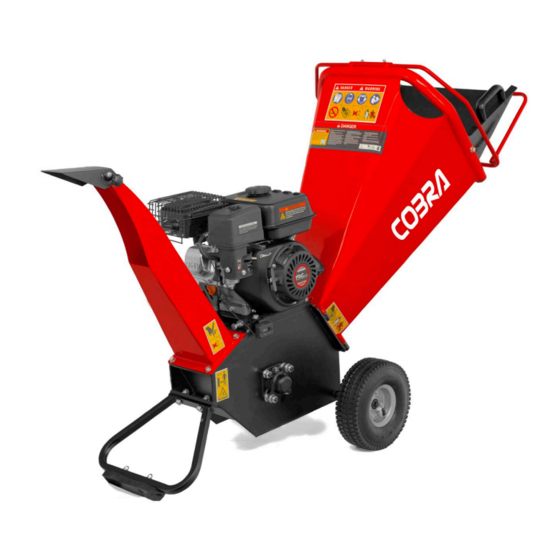
- Page 1 MODEL: CHIP650L / CHIP650LE (DR-GS-65H) COBRA PETROL CHIPPER OWNER’S MANUAL IMPORTANT Read safety rules and instructions carefully before operating equipment. Cobra Garden Machinery Henton and Chattell Ltd., London Road, Nottingham NG2 3HW UK www.cobragarden.co.uk...
-
Page 2: Table Of Contents
Table of Contents PART I: General Safety Rules ..................... 3 PART II: Familiar with the Wood Chipper ................9 PART III: Operating the Wood Chipper................10 PART IV: Maintaining the Wood Chipper ................12 PART V: Troubleshooting and Parts List ................14 PART VI: Warranty &... -
Page 3: Part I: General Safety Rules
Part I: General Safety Rules PART I: General Safety Rules Safety Labels Found on Your Unit... - Page 4 Part I: General Safety Rules WARNING Read this Safety & Operating Instructions manual before you use the Wood Chipper. Become familiar with the operation and service recommendations to ensure the best performance of your machine. Intended Purpose: CAUTION This machine is designed solely to chip wood and must not be used for any other purpose.
- Page 5 Part I: General Safety Rules Before using the wood chipper NOTICE A. Operators must be fully trained before using this machine. B. User Manual is read and understood. C. Machine is positioned on level ground, all guards are fitted and in good condition.
- Page 6 Part I: General Safety Rules safety shoes, we recommend wearing them. Do not use the machine while barefoot or wearing open sandals. Wear long trousers while operating the Wood Chipper. G. Keep bystanders at least 50 feet away from your work area at all times. Stop the engine when another person or pet approaches.
- Page 7 Part I: General Safety Rules G. Never make adjustments or repairs with the engine running. Shut down the engine, disconnect the spark plug wire, keeping it away from the spark plug to prevent accidental starting, wait 5 minutes before making adjustments or repairs.
- Page 8 Part I: General Safety Rules H. Never tamper with safety devices. Check their proper operation regularly. Before performing any maintenance or inspection procedure, shut down the engine, disconnect the spark plug wire keeping it away from the spark plug to prevent accidental starting, wait 5 minutes for machine to cool down.
-
Page 9: Part Ii: Familiar With The Wood Chipper
Part II: Familiar with the Wood Chipper PART Familiar with Wood Chipper It may be helpful to familiarize yourself with the controls and features of the Wood Chipper. If you have any question, please contact the dealers in your area. TECHNICAL SPECIFICATIONS Start Recoil Start / Electric Start... -
Page 10: Part Iii: Operating The Wood Chipper
Part III: Operating the Wood Chipper PART III: Operating the Wood Chipper It may be helpful to better familiarize yourself with the features of your Wood Chipper before beginning the steps outlined in this chapter. WARNING A. Read and understand all instructions, safety precautions, and/or warnings listed in “PART I: General Safety Rules”... - Page 11 Part III: Operating the Wood Chipper Stopping Move the Throttle Lever to IDLE. Recoil Start: Turn the Ignition Switch to the OFF position. Electric Start: Turn the Key to the OFF position. Operator Zone Wood Chipping NOTICE Woods’ and branches’ diameter should be no bigger than 80mm. WARNING Do not place your hands into the chute when loading.
-
Page 12: Part Iv: Maintaining The Wood Chipper
Part IV: Maintaining The Wood Chipper PART IV: Maintaining the Wood Chipper Regular maintenance is the way to ensure the best performance and long life of your machine. Please refer to this manual and the engine manufacturer's user manual for maintenance procedures. WARNING Before performing any maintenance procedure or inspection, stop the engine, wait five minutes to allow all parts to cool. - Page 13 Part IV: Maintaining The Wood Chipper Lubrication NOTICE All Bearings of your Chipper are sealed units and should have sufficient lubricant to last the life of your machine with normal use. Greasing the rack and Pinion NOTICE All the rack and pinion should be greased before every use.
-
Page 14: Part V: Troubleshooting And Parts List
PART V: Troubleshooting and Parts List Most problems are easy to fix. Consult the Troubleshooting Table below for common problems and their solutions. If you continue to experience problems, contact the dealers in your area. WARNING Before performing any maintenance procedure or inspection, stop the engine, wait five minutes to allow all parts to cool. - Page 15 procedures.) Clean the cooling fins if they’re dirty. Operator Lever Lever not all the way forward when rack comes under full Snapping out of gear load. Push lever quicker and more forcefully into the full or not staying in gear. forward position.
- Page 16 Parts View Ref.No Description Ref.No. Description foundation In-feed Roller Emergency stop fixation Blade Rubber fixation Wheel axis Emergency stop Wheel spring Pulley rubber Belt Switch Belt cover Switch cover Clutch Blade spacing Belt inner cover In-feed extension plate Bearing Handle Bearing fixation plate Switch extension pipe Support foot...
-
Page 17: Part Vi: Warranty & Environment
Any damage that occurs from the use of non-genuine Cobra parts will not be covered. We reserve the right to reject any claim where the purchase cannot be verified or when it is clear that the product was not maintained properly. -
Page 18: Part Vii: Assmbly Instructions
PART VII: Assembly Instructions 1. Remove from packing & fitting the wheel axle. Use a block to support whilst securing and fitting the axle for the transport wheels. 2. Wheel split pins fitting. Fit with split pins just tight enough to get split pins in. 3. - Page 19 5. Fit the intake hopper Fit the intake hopper and secure the bolts. 6. Attach the emergency stop wire. Before operating fit the emergency stop wire. Check the engine stops correctly before operating in every case. 7. Add oil as per the engine manual Add engine oil as per the engine manufacturers instructions.
- Page 20 EC-DECLARATION OF CONFORMITY EC Declaration of Conformity We herewith declare, Cobra Garden Machinery Henton & Chattell Ltd, London Road, Nottingham NG2 3HW United Kingdom That the following machine complies with the appropriate basic safety and health requirements of the EC Directive based on its design and type, as brought into circulation by us.
Need help?
Do you have a question about the CHIP650L and is the answer not in the manual?
Questions and answers
How do you replace belts and adjuct
To replace or adjust the belts on the Cobra CHIP650L:
1. Check Belt Condition – Inspect the belts for looseness or wear.
2. Adjust Belt Tension – If the belts are too loose and slipping, tighten them as needed.
3. Replace Belts if Necessary – If the belts are worn or damaged, remove and replace them.
4. Access the Belts – Remove the belt cover and inner cover to reach the belts.
5. Loosen Pulley or Tension Mechanism – Adjust the pulley or tensioning system to remove the old belt.
6. Install New Belt – Place the new belt on the pulleys, ensuring proper alignment.
7. Tighten and Secure – Adjust the tension so the belt is firm but not overly tight.
8. Reassemble Covers – Reattach the belt cover and inner cover.
9. Test the Machine – Turn on the chipper and check for proper belt function.
These steps help maintain full chipping power and prevent slippage.
This answer is automatically generated
Hi, I **** having trouble understanding where the two wires are attached to the chipper