
Subscribe to Our Youtube Channel
Related Manuals for Digoo DG-A4

Summary of Contents for Digoo DG-A4
- Page 1 Smart IP Camera with Battery Quick User Guide 100% Wire-Free IP Camera with rechargeable battery Place it Anywhere, Watch on Phone Anytime...
-
Page 2: Table Of Contents
Content 1. Packing list ..............3 2.Product Details ............5 3. Install Cloudedge APP ........... 7 4. Add Camera to APP ..........8 5. Device Menu ............11 6. Share Video to Friend .......... 15 7. Alarm Push Notification and playback ..15 8. -
Page 3: Packing List
1. Packing list A4 Camera: 1x camera, 1x wall mount, 1x screws 1x Double-sided adhesive 1x USB cable, 1x Quick User Guide... -
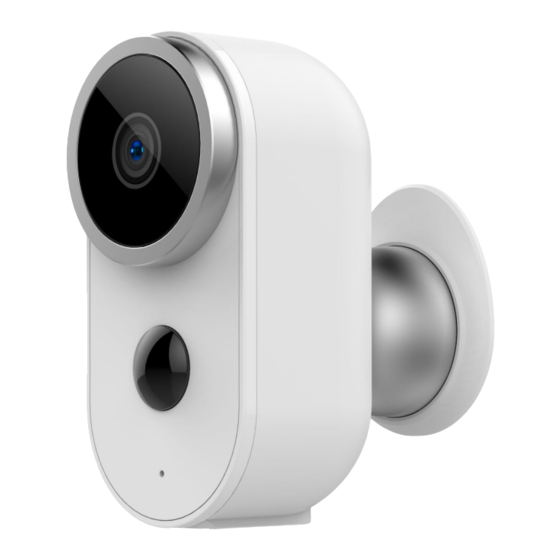
Page 4: Product Details
2. Product Details... -
Page 5: Install Cloudedge App
3. Install Cloudedge APP 3.1 Search “Cloudedge” in App store or google play store, or scan below QR Code to download and install on smart phone. NOTE: Please allow below 2 permissions when first running App. 1. Allow CloudEdge use mobile cellular data and wireless LAN (Function: If not allowed, it will be failed to add IP camera). -
Page 6: Add Camera To App
3.2 Register Account: New users need to register by e-mail, click "Register", follow the steps to complete the registration of the account, and log in. 4. Add Camera to APP 4.1 Insert micro SD card Please insert a micro SD card to record videos when motion detected and playback. - Page 7 adapter is not included in packing list. NOTE: Ensure the indicator light slowly blinking in RED before setup WiFi 4.3 Setup Wi-Fi 4.3.1 Bring the camera and phone to the router within 1 to 3 feet (30 to 100 cm) and connect wifi. NOTE: Please note camera only works under 2.4G Wi-Fi, not supports 5G Wi-Fi.
- Page 8 4.3.4 Select 2.4Ghz WiFi SSID and input password, tap NEXT 4.3.5 Put the QR code in front the camera lens 15cm. The device lens is aimed at the QR code on the phone screen with a distance of 15 After device recognizes the QR code, it will sound "bugu", if heard it...
-
Page 9: Device Menu
5. Device Menu Camera Menu 1. Add a camera 2. Camera time 3. Live view button 4. Camera icon 5. Camera name 6. Alarm information icon red dot indicates alarm occurs, click to view alarm screenshot or video 7.Cloud Storage 8.Devices list 9. - Page 10 11. Camera settings 12. Battery capacity 13. SD, HD options 14. Full screen option 15.Sound on/off button 16. Bit rate 17. WiFi signal strength 18. Live view options 19.History:Video playback 20. Cloud: Cloud Storage 21. Screenshot option 22. Intercom: hold it and talk 23.
- Page 11 25. Video Clip, Red indicates the alarm time point; green indicates video recording after alarm 26. Zoom in/out of Video Clip time line 27. Calendar option, click on it to select the date 28. Screenshot options 29. Recording options Re-recording when the video is played back, which Saved on mobile.
- Page 12 Camera Settings Menu: Camera Settings App Account No. Camera Name Receive Notifications Device Share Device Information Basic Function Alarm Setting SD Card Cloud Storage Service 10 Device Version 11 Delete option...
- Page 13 Device Information: Network Name Signal Strength Virtual ID IP Address MAC Address Time Zone ...
- Page 14 Basic Function 1.Status Light Indicator On/Off 2. Rotate View Image Flip 3. Night Vision Auto/Off/On 4. Speaker Volume Default 70% 5. Power 1. Power Supply Mode management 2. Remaining Battery...
- Page 15 Alarm Setting Motion Detection Alarm Plan ---Low (Sensitivity) ---Time Period ---High (Sensitivity) ---Start Time ---Alarm only when people appear ---End Time...
- Page 16 SD Card Playback recording Method Event Recording Recording Time 20 seconds 40 seconds 1 minute SD card capacity Capacity Remaining Capacity Format...
- Page 17 Me Option 1. Photo 2. Nick Name 3. Account No. 4. Account QR Code 5. Device Share 6. Pictures & Videos 7. In-App Alert Sound 8. FAQ 9. Feedback 10. More ---10.1 Clear Cache ---10.2 App Version...
-
Page 18: Share Video To Friend
6. Share Video to Friend 6.1. Search or QR Code Scan to get Friend’s account NOTE: Firstly ensure Friend’s account already registered in Cloudedge app 6.2 Share video to your Friend’s account 7. Alarm Push Notification and playback Battery camera with PIR sensor is not designed for 7X24 all day recording, but just push alarm message notification to phone app and record video to SD card when PIR sensor detected human body motion events, then you can... -
Page 19: Camera Installation
setting and also mobile volume is on 2. Alarm Message Notification NOTE: please enable cloudedge app notification in mobile setting 3. Alarm snapshot and video record on SD card NOTE: please insert TF Card before power on camera 8. Camera Installation 8.1. - Page 20 9. To reduce false alarms, please note that: Do not install the camera facing any objects with bright lights, including sunshine, bright lamp lights, etc. Do not place the camera too close to a place where there frequently moving vehicles. Based on numerous tests, the recommended distance between the camera and vehicle is 15 meters (55ft).
- Page 21 Follow the guide on App, please do as below steps: 1. Please attached a photo of your device label 2. Please input the S/N number of the device 3. Please select the indicator status 4. Question Description 5. Please describe the problem in details 6.
-
Page 22: Led Status Description
Appendix: LED Status Description . Indicator description Camera status 1 No light Sleep / shutdown 2 Red light is always on Abnormal operation Restore factory settings / Red light flashes slowly network configuration (once every second) status Fast red light (multiple Try to go offline times a second) 5 Blue light is always on... - Page 23 Trouble Shooting Sheet Description Solution and operation 1) Check your WiFi name and password Unable to 2) Ensure your WiFi is 2.4G, not connect support 5G 3) Ensure your camera and phone close to router 1) Press and hold the reset button for 5 seconds Reset 2) Hear one “bugu”...
-
Page 24: Faq
FAQ: 1. Battery Camera doesn't support 7/24 constantly recording, only supports events recording when sensor human body motion detection. 2. Battery camera doesn't support any PC S/W or browser. 3. Battery Camera doesn't support 5G Wi-Fi 4. Events Video playback only works in Cloudedge app, doesn't support 3 party player. - Page 25 8. How to delete the photos and videos? Select “Me”----”Pictures & Video”----Selected---Delete 9. How to get the SN number of the IP Camera? Please follow 2 pictures: Camera Settings---- Device Information---Virtual ID 10. IP battery camera must work with Wi-Fi. It supports events recording when Wi-Fi disconnected, but firstly it should be ever connected with Wi-Fi network.
- Page 26 12.3 Please first format SD card on PC or format it on Cloudedge app. 13. How to charge IP Camera? 14. How to check the battery charging status? There is no indicator for charging status. You can check the battery charging status refer to below left picture, the battery icon will change to green color+ lightning symbol In Charging Non- Charging...
- Page 27 15. How to check the battery capacity? Camera Settings---Basic Function---Power Management ---Remaining Battery---61% NOTE: when battery in charging, it will not indicate the battery capacity.
Need help?
Do you have a question about the DG-A4 and is the answer not in the manual?
Questions and answers