Advertisement
Advertisement
Table of Contents

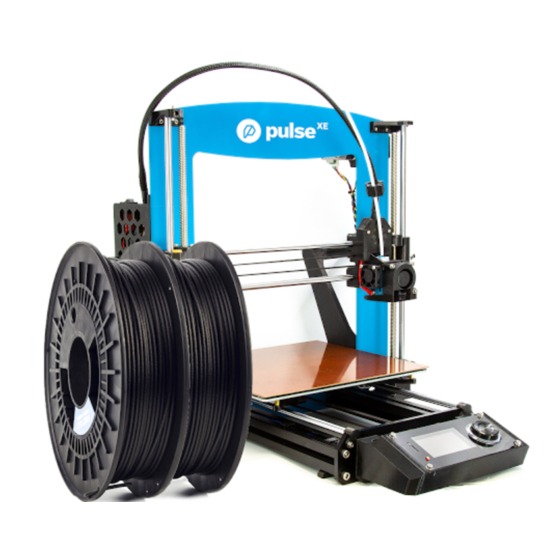
Summary of Contents for Pulse XE
- Page 1 GETTING STARTED GUIDE...
- Page 3 Getting Started Guide V#122...
- Page 5 STEP 1 UNBOXING Remove printer and accessories from the packaging. STEP 2 REMOVE ZIP TIES Cut and remove zip ties. DO NOT cut or remove any BLACK zip ties. They are used for wire management, and are meant to remain in place.
- Page 6 The red wire goes to the pin marked "+Vin". (A) PLUG IN 4-PIN CONNECTOR Blue wire goes to pin marked "BTN". (B) SNAP VIKI INTO PLACE Snap into place as shown. (C) Turn the Pulse on and check that the screen powers on and displays the printer status.
-
Page 8: Connect Power Supply
Turn the power switch on. STEP 5 PLUG USB CABLE INTO PULSE Locate the USB input on the back of your Pulse 3D printer and plug USB cable in. (B) Don't plug the USB cable into your computer yet. Doing so may cause difficulties with the initial connection setup. -
Page 10: Setup Wizard
SETUP WIZARD Open MatterControl. You should see the Setup Wizard window. If you purchased your Pulse using a MatterHackers account, sign into MatterControl using this account - your Pulse will already be loaded into your MatterControl profile. If not automatically prompted to add a printer, click the + button next to the printer list. -
Page 12: Connect Printer
Once the correct model has been selected, the Setup Wizard Detect Screen should be visible. (A) Ensure that your Pulse is powered on and the USB cable is NOT connected to your computer. Select "Continue". If you have your USB cable connected during this step, MatterControl will not be able to auto-detect the printer and you will need to go through the process again. -
Page 15: Probe Calibration
(A) Select the material you will be printing with first. We recommend using the PRO Series Filament that came with your Pulse (you do not need material loaded yet). (B) The bed will begin heating. For best calibration results, wait until the bed has reached the target temperature before proceeding. -
Page 16: Loading Filament
MatterControl will guide you through the loading process. Follow the steps on the screen. (C) For more information on Materials and Bed Surface compatibility please visit the Guides section on www.matterhackers.com/pulse STEP 15 START YOUR FIRST PRINT For specific guides for succeeding with a bunch of different materials - visit the Pulse User Guide at matterhackers.com/pulse... - Page 18 TOO HIGH IDEAL TOO LOW...
- Page 19 STEP 16 TUNING YOUR FIRST LAYER You should not need this - but if your part is not sticking to the build plate or is too difficult to remover, you can adjust the distance from the nozzle to the bed by accessing Baby Stepping in 'Movement Controls' under the Controls Tab.
- Page 20 Getting Started Guide How to succeed with a bunch of different materials Pulse User Manual Maintenance Instructions...
- Page 22 MH Build Series 3D Printing Filament is designed and priced for every maker. This affordable series comes in PLA, ABS, and PETG filament. MatterHackers PRO Series Filaments are engineered to highlight the strengths of each type of 3D printer filament. Manufactured to the tightest tolerances on the market and made in the USA, PRO Series Filaments include PLA, ABS, PETG, Nylon, Flex, and Ryno.
- Page 24 www.matterhackers.com...
Need help?
Do you have a question about the XE and is the answer not in the manual?
Questions and answers