Table of Contents
Advertisement
Quick Links
Hamax ID:
10499, Rev. 003, Manual Zenith with carrier bow
Hamax AS
Vålerveien 159
N-1599 Moss
Norway
Tel.: +47 69 23 38 38
email: customerservice@hamax.no
www.hamax.com
User
Manual
Zenith
EN
Important!
FR
Important!
NL
BELANGRIJK!
DE
Wichtig!
PL
Ważne!
NO
Viktig!
PT
IMPORTANTE!
CS
Důležité!
RO
Importantă!
DA
RU
Vigtigt!
важно!
ES
¡Importante!
SV
VIKTIGT!
FI
TÄRKEÄÄ!
SL
Pomembno!
HR
Važno
SK
Dôležité!
HU
FONTOS!
BG
Важно!
IT
TR
IMPORTANTE!
Önemli!
KO
UK
Важливо!
중요 사항
BIKE FRAME TUBE
OK!
NOT OK!
Ø = 28 • 40mm
NOT OK!
NOT
OK
OK
EN
User Manual
Congratulations on purchasing the Hamax bicycle child seat. You now have
a comfortable and safe child seat that can be adjusted to fit your child as
she/he grows.
Please read the instructions carefully before assembling or using the child
seat.
Keep these instructions in a safe place as they will be useful if you later
buy extra equipment for your child seat.
INSTALLATION
•Check there are no sharp objects, such as split
• Can be mounted on bicycles with frame tube
wires, on the bicycle that can harm the child.
diameters from 28-40 mm.
• Ensure that the restraint system is not loose or
• Cannot be mounted on bicycles with oval or
able to become trapped in any moving parts
square down tubes.
particularly the wheels, including when the
• Cannot be mounted where the luggage carrier
cycle is ridden without a child in the seat.
is wider than 160 mm.
• Always use the safety belt/restraint system,
(Note that the luggage carrier can be removed
ensuring the child is restrained in the seat.
before fitting the child seat.)
• A child sitting in a child seat should be dressed
• Cannot be mounted on cycles fitted with shock
more warmly than the rider.
absorbers.
• The child should be protected against rain with
• Can be fitted to bikes with and without a
suitable waterproof garments.
luggage carrier. If you are in any doubt that the
• Remember to put the child's helmet on
seat will fit, we recommend you seek
before starting your bicycle trip.
information from the bicycle's supplier.
• Remember that the child seat can get very hot
• The seat must only be mounted on a bicycle
standing out in the sunshine, so check the child
which is suitable for this kind of load. Please
seat before placing your child in it.
ask your bicycle supplier for detailed advice.
• When transporting the bicycle by car (outside
• Make sure the bracket screws are well
the car) remove the seat. Air turbulence might
tightened and check them at regular intervals.
damage the seat or loosen its fastenings to the
• The child seat is fitted on the frame tube of the
cycle, which could result in an accident.
bike with the bracket (6). The screws must be
tightened hard enough to fix the seat securely
WARNINGS
and prevent it from sliding.
• Warning: Do not attach extra luggage or
Make it a rule to check this before starting a
equipment to the child seat, as this could lead
trip with the bike.
to the total load exceeding 22 kg. We
• For optimal comfort and safety of the child,
recommend that extra luggage is attached at
ensure that the seat does not slope forwards,
the front of the bicycle
so that the child does not tend to slide out of it.
• Warning: Do not modify the child seat. This will
Hamax recommend that the backrest should
automatically invalidate the guarantee and the
slope backwards slightly.
manufacturer's product liability will lapse.
• Check all parts of the bike that they function
• Warning: Be aware that the load of a child in
correctly with the bicycle seat mounted.
the child seat may alter the bicycle's stability
and handling characteristics, particularly when
USE
steering and braking.
• To take a child on a bicycle, the rider must
• Warning: Never leave the bicycle parked with a
normally be over 16 years. Check your national
child in the seat unattended.
laws and regulations.
• Warning: Do not use the seat if any parts are
• The child seat is approved for children from
broken.
about 9 months to 6 years or maximum 22 kg
• Cover any exposed rear saddle spring.
weight. Ensure that you re-check from time to
MAINTENANCE
time that the child's weight and size do not
exceed the maximum capacity of the seat.
• When cleaning the seat, use only lukewarm
• Do not carrying a child that is too young to sit
soapy water.
safely in the seat as regarding minimum age of
• If the seat has been involved in an accident, is
the child. Carry only child that are able to sit
damaged, has fallen to the ground or if the
unaided for a longer period of time, at least as
bicycle has fallen with the seat attached,
long as the intended bicycle journey.
contact your dealer to check that it can still be
• Ensure that it is not possible for any part of
used. Damaged parts must always be replaced.
the child's body or clothing to come into
Contact your dealer if you are not sure how to
contact with any moving part of the seat or
fit the new parts.
cycle and to re-check as the child grows, due to
the danger of entrapment of feet in the wheel
Tip! With an extra bracket you can easily move
and of the finders in brake mechanisms and
one seat between two bicycles.
sprung saddles. The child seat gives good side
We wish you and your child many enjoyable
and feet protection. However, you are
bicycle trips with your Hamax child seat!
recommended to buy and fit a closed wheel
guard/chain guard. You can buy this at your
bicycle dealer.
Best regards from us at Hamax.
Advertisement
Table of Contents

Related Manuals for Hamax Zenith

Summary of Contents for Hamax Zenith
- Page 1 User Important! User Manual Congratulations on purchasing the Hamax bicycle child seat. You now have Important! BELANGRIJK! Manual a comfortable and safe child seat that can be adjusted to fit your child as Wichtig! Ważne! she/he grows. Viktig! IMPORTANTE! Důležité! Importantă!
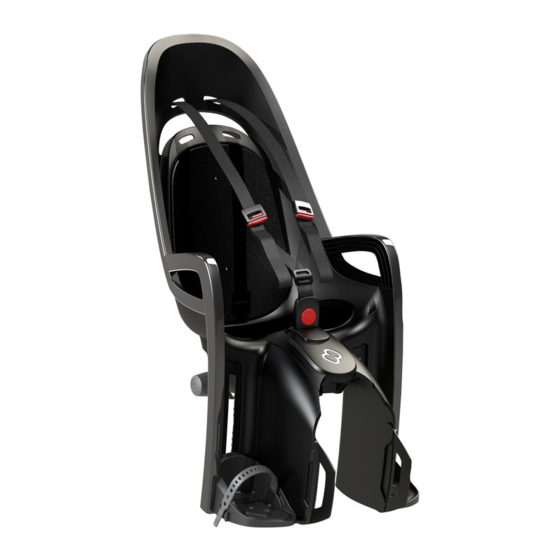
- Page 2 Zenith b) Tiras metálicas c) Tornillos de fjiación 1. Siège principal d) Indicador de seguridad 2. Système de harnais 7. Eje excéntrico 3. Fermeture de ceinture 8. Protección para los pies 4. Supports de pieds 5. Arc porteur 1. Main seat 6. Étrier de fixation complet 1. Istuin a) Étrier 2. Restraint system 2. Turvakiinnitysjärjestelmä b) Sangles métalliques 3. Vyön lukkosolki 3. Belt lock c) Vis de fixation 4. Jalkatuet d) Indicateur de sécurité 4. Foot rests 5. Kantokaari 7. Tige excentrique...
- Page 3 6. Komplett fäste a) Fäste Hoofdzitje b) Metallsektioner 2. Harnassysteem c) Fästskruvar Riemsluiting d) Säkerhetsindikator 4. Voetsteunen 7. Excenteraxel 5. Draagboog 8. Fotskydd 6. Beugelvergrendeling compleet a) Beugel b) Metalen strips 1. Hlavné sedadlo c) Bevestigingsschroeven 2. Obmedzovací systém d) Veiligheidsindicatie 3. Zámka pásu Excentrische stang 4. Opierky na nohy 8. Voetsteun 5. Oblúk nosiča 6. Kompletná upínacia konzola a) konzola 1. Siedzisko b) kovové pásy 2. System zabezpieczający c) upevňovacie skrutky 3. Klamra pasów bezpieczeństwa d) bezpečnostná kontrolka 4. Podpórki na stopy 7. Odstredivý hriadeľ...
-
Page 4: Fr Manuel De L'utilisateur
MAINTENANCE sormais d’un siège pour enfants conforta- dans le siège sans assistance en raison de • Pour nettoyer le siège, n’utilisez que de Nous vous souhaitons, à votre enfant ble et de haute sécurité, que vous pouvez leur âge. Ne transportez que des enfants l’eau savonneuse tiède. et à vous, de belles randonnées en adapter à la taille de votre enfant à la me- pouvant rester assis correctement sans vélo avec votre siège Hamax pour • Si le siège a été impliqué dans un acci- sure qu’il grandit. assistance pendant des périodes pro- dent, est endommagé, est tombé au sol enfants ! longées ou au moins pendant toute la du- ou si le vélo est tombé avec le siège fixé Veuillez lire attentivement les présentes rée prévue de la randonnée.. dessus, contactez votre concessionnaire Meilleures salutations de votre équipe instructions avant le montage ou • Assurez-vous qu’il ne soit pas possible... -
Page 5: Cs Návod K Použití
• Advarsel: Du må ikke fest ekstra brochen sind. Mit freundlichen Grüßen von Hamax bagasje eller utstyr til barnesetet da Tips! Med en ekstra brakett kan du dette kan føre til at den totale lasten på enkelt flytte ett sete mellom to sykler. setet overstiger 22 kg. Vi anbefaler at Monterings- og bruksanvisning ekstra bagasje monteres foran på Vi håper du og barnet får mange herlige sykkelturer sammen med sykkelen • Advarsel: Ikke gjør endringer på barnesetet fra Hamax! barnesetet. Dette vil automatisk gjøre Gratulerer med kjøpet av barnesetet fra barnet må du sikre at setet ikke heller garantien ugyldig og produsentens Vennlig hilsen oss på Hamax. Hamax til sykkelen din. Du har nå framover, slik at barnet ikke kan skli ut ansvar vil utløpe. et komfortabelt og sikkert barnesete av det. som kan justeres etter barnet etter Hamax anbefaler at ryggstøtten bør hvert som han/hun vokser. helle litt bakover. -
Page 6: Es Manual Del Usuario
Tips! Med et ekstra beslag kan du nemt sedačku odstraňte. Vzdušné turbulence dětskou cyklosedačkou Hamax! • Husk at give barnet hjelm på inden flytte stolen mellem to cykler. mohou poškodit sedačku nebo uvolnit cykelturen. její připevnění na jízdní kolo, což by Srdečně vás zdravíme my v Hamax. • Vær opmærksom på, at stolen kan Vi ønsker dig og dit barn mange mohlo vést k nehodě. blive meget varm, når den står ude i hyggelige cykelture med Hamax’ solen, så kontroller dette, før du barnestol! placerer barnet i stolen. • Fjern stolen, når du transporterer Venlig hilsen os fra Hamax Brugervejledning Manual del usuario Tillykke med købet af Hamax’ barnestol. bagagebærer. Du har købt en sikker og behagelig stol, Hvis du er i tvivl, om stolen vil passe, som dine børn kan vokse med. anbefaler vi dig at kontakte Enhorabuena. Ha adquirido un asiento portaequipajes antes de montar el leverandøren for yderligere vejledning. -
Page 7: Mantenimiento
• Recuerde ponerle un casco al niño voi tarttua kiinni mihinkään liikkuvaan • voidaan asentaa polkupyöriin, joiden disfrutar de máxima comodidad y antes de iniciar su trayecto en bicicleta. osaan, erityisesti pyöriin, myös siinä runkoputkiston halkaisija on 28–40 mm seguridad, compruebe que el asiento • Recuerde que el asiento infantil puede tapauksessa, että polkupyörällä ajetaan • ei voida asentaa polkupyöriin, joiden no se incline hacia delante de forma calentarse mucho si le da el sol ilman lasta istuimella. runkoputki on soikea tai nelikulmainen que el niño pueda deslizarse fuera de él. directamente. Compruebe que no esté • Varmista aina, että turvavyötä/ • ei sovellu pyöriin, joiden Desde Hamax recomendamos que el caliente antes de colocar al niño en el turvakiinnitysjärjestelmää käytetään tavaratelineen leveys on yli 160 mm respaldo quede ligeramente inclinado asiento. lapsen kiinnittämisessä istuimeen. (huomaa, että tavarateline voidaan hacia atrás. • Cuando transporte la bicicleta en el • Lastenistuimessa istuvan lapsen tulee irrottaa ennen istuimen asennusta) • Compruebe que todos los elementos exterior de un coche, quite el asiento. olla lämpimämmin puettu kuin • ei voida asentaa polkupyöriin, joissa de la bicicleta funcionen correctamente Las turbulencias podrían dañar el polkupyörän ajajan. on iskunvaimentimet edessä ja takana con el asiento montado. -
Page 8: Hr Korisnički Priručnik
• Az ülés kb. 9 hónapos kortól 6 éves gyermek súlyától megváltoznak. Želimo vama i vašem djetetu se s pedijatrom. korig, vagy legfeljebb 22 kg testsúlyig • Vigyázat: Soha ne hagyja felügyelet • Provjerite da dijete dijelovima tijela ili mnogo ugodnih vožnji biciklom sa használható. Rendszeresen ellenőrizze, nélkül leállítva a kerékpárt, ha a odjećom ne može doći u doticaj s pokret- sjedalicom tvrtke Hamax! hogy a gyermek súlya és mérete nem gyermek az ülésben ül. nim dijelovima sjedalice ili bicikla i ponav- haladja-e meg az ülés maximális • Vigyázat: Ne használja az ülést, ha ljajte tu provjeru kako dijete raste. Postoji kapacitását. bármelyik alkatrésze eltört. opasnost da mu se stopalo zaglavi u • Ne szállítson olyan gyermeket, aki a • Fedje le a nyereg kiálló hátsó rugóját. kotaču ili u oprugama sjedalice i u minimális életkort is figyelembe véve kočnom mehanizmu. Dječja sjedalica... -
Page 9: Installazione
• Non trasportare bambini troppo piccoli se in futuro acquisterete attrezza- persedere in modo sicuro sul seggiolino. ture per il seggiolino. Rispettare il limite di età minimo. Hamax 자전거 아동용 시트를 구입해 주셔서 국가의 법규와 규정을 준수하십시오. Trasportare solo bambini in grado di se- 감사합니다. 본 제품은 안전하며 안심할 수 • 아동용 시트는 연령 약 9개월 이상부터 6세 INSTALLAZIONE deresenza aiuto per un periodo di tem- 있는... - Page 10 Hamax fiets kinderzitje. U beschikt nu • Controleer of alle onderdelen van de fi- ge aan de voorkant van de fiets te een andere overplaatsen. over een comfortabel en veilig kinderzitje, ets correct werken wanneer het kinder- bevestigen. dat kan worden aangepast naarmate uw zitje is gemonteerd. • Waarschuwing: Breng nooit wijzigingen Wij wensen u en uw kindje vele leuke kind groeit. aan het kinderzitje aan. Dit zou onmiddel- fietstochten toe met uw Hamax Lees deze instructies aandachtig, voor u GEBRUIK kinderzitje! lijk de garantie ongeldig maken en alle begint met de montage en/of gebruik van • Om een kind te vervoeren met het kin- productverantwoordelijkheid van de fabri- het kinderzitje. derzitje moet de fietser tenminste 16 jaar kant te niet doen. Vriendelijke groeten van uw Hamax-team. oud zijn. Raadpleeg de lokale wetgeving • Waarschuwing: Wees bewust van het Bewaar deze instructies op een veili- en reglementeringen.
-
Page 11: Pt Instruções De Utilização
• Certifique-se de que não é possível com a cadeira fixada, contacte o seu temperatury. Prosimy o sprawdzenie que nenhuma parte do corpo ou roupa distribuidor para avaliar se ainda pode tego przed umieszczeniem dziecka w Życzymy Tobie i Twojemu dziecku da criança entre em contacto com ser utilizada. Os componentes foteliku wielu udanych wycieczek qualquer da cadeira ou da bicicleta danificados devem sempre ser • Fotelik należy zdemontować na czas rowerowych z fotelikiem Hamax! parte que se encontre em movimento e substituídos. Contacte o seu distribuidor przewożenia roweru samochodem (na volte a fazer verificações à medida que caso tenha dúvidas sobre a instalação zewnątrz). Zawirowania powietrza mogą Pozdrowienia od firmy Hamax. a criança cresce, devido ao perigo de dos novos componentes. uszkodzić fotelik lub obluzować jego encarceramento dos pés na roda e dos dedos nos mecanismos de travão e Sugestão! Se desejar utilizar a cadeira selins com molas. A cadeira oferece em duas bicicletas diferentes, poderá... - Page 12 Manualul utilizatorului unele dintre componente sunt utilizat. Piesele deteriorate trebuie deteriorate. întotdeauna înlocuite. Luaţi legătura cu • Acoperiţi orice parte expusă a arcului distribuitorul dacă nu sunteţi sigur cum de şa. să montaţi noile piese. Felicitări pentru cumpărarea scaunului capacitatea maximă a scaunului. de copil Hamax pentru bicicletă. Acum • Nu transportaţi un copil care este prea ÎNTREŢINERE Sfat! Cu un suport suplimentar puteţi aveţi un scaun confortabil şi sigur mic ca vârstă pentru a sta în siguranţă muta cu uşurinţă scaunul între două • La curăţarea scaunului folosiţi apă pentru copil, care poate fi reglat pentru în scaun. Transportaţi numai un copil biciclete. călduţă cu săpun. a se potrivi copilului dumneavoastră pe care este capabil să stea pe scaun fără • Dacă scaunul a fost implicat într-un măsură ce acesta creşte. ajutor pentru un interval de timp mai Vă dorim dumneavoastră şi accident, este deteriorat, a căzut pe jos, îndelungat, cel puţin pe toată durata copilului multe călătorii plăcute cu sau dacă bicicleta a căzut cu scaunul Vă rugăm să citiţi cu atenţie...
-
Page 13: Техническое Обслуживание
недействительности гарантии и • När cykeln ska transporteras baktill på ответственность производителя за Мы желаем Вам и Вашему ребенку delarna ska monteras, kontakta din en bil, ska barnsitsen tas av först. качество продукции потеряет силу. приятных поездок с детским återförsäljare. Luftmotståndet kan skada barnsitsen • Предупреждение: Учитывайте, что велосипедным креслом Hamax! вес ребенка в кресле может повлиять eller lossa den från cykeln, vilket kan Tips! Med ett extra fäste flyttar du orsaka en olycka. enkelt över barnsitsen från en cykel till en annan. Bruksanvisning VARNINGAR • Varning: Häng inte på något extra Vi hoppas att du och ditt barn får bagage eller utrustning på barnsitsen, massor av härliga cykelturer med... -
Page 14: Sk Návod Na Použitie
Tip! S voliteľnou konzolou môžete ľahko dieťaťa v sedadle. kolesa, zaradi česar bi lahko prišlo do presunúť sedadlo z jedného bicykla na • Dieťa, sediace v detskom sedadle by Vam in vašemu otroku želimo nesreče. druhé. malo byť oblečené teplejšie než jazdec. veliko prijetnih izletov z otroškim sedežem Hamax! • Dieťa by malo byť chránené proti dažďu Želáme vám a vášmu dieťaťu vhodným nepremokavým odevom. mnoho radostných výletov na • Nezabudnite dieťaťu nasadiť pred Návod na použitie bicykli s vaším detským sedadlom začiatkom cesty na bicykli prilbu. Hamax! • Nezabudnite, že detské sedadlo sa môže... -
Page 15: Посібник Користувача
(ззовні машини). Завихрення потоку • Для оптимального комфорту та • Убедете се, че осигурителната повітря може пошкодити крісло або безпеки дитини, переконайтеся, що система не е хлабава и не може да се Пожелаваме на вас и вашето дете послабити систему його кріплення до крісло не покосилося вперед, так як закачи до подвижни части, особено много щастливи пътувания с дитина може зісковзнути з нього. велосипеда, що може призвести до колелата, дори тогава, когато вашата детска седалка Hamax! Компанія Hamax рекомендує нещасного випадку. велосипедът се кара без дете в встановлювати крісло так, щоб спинка седалката. С уважение от Hamax. перебувала під невеликим нахилом ПОПЕРЕДЖЕННЯ • Винаги използвайте осигурителната назад. • Попередження: Не прикріпляйте до система/предпазния колан, • Перевірте правильну крісла додатковий багаж чи... -
Page 16: Технічне Обслуговування
Kullanım Kılavuzu • Uyarı: Çocuk koltuğu üzerinde İpucu! Ekstra kelepçe yardımıyla tek değişiklik yapmayın. Bu, ürüne ait koltuğu iki farklı bisiklet için garantinin geçersiz kalmasına neden kullanabilirsiniz. Hamax bisiklet çocuk koltuğunu satın • Bisiklet koltuğu monte edilmiş olur ve üreticinin ürün üzerindeki tüm aldığınız için teşekkür ederiz. haldeyken bisikletin tüm parçalarının sorumluluğu ortadan kalkar. Hamax çocuk koltuğu ile size ve Çocuğunuz büyüdükçe ayarlanabilme sorunsuz işlev yaptığını kontrol edin. • Uyarı: • Çocuğunuzun koltuğa çocuğunuza keyifli yolculuklar özelliğiyle onu konforlu ve güvenli bir diliyoruz. uygulayacağı yükün, özellikle dönüşler şekilde kavrayacak bir çocuk koltuğuna KULLANIM ve frenlemeler sırasında bisikletin sahipsiniz. • Çocuğu bisiklete oturtmak için, stabilitesini ve çalışma özelliklerini Hamax’tan en iyi dileklerimizle. sürücünün normal şartlarda 16 değiştirebileceğini unutmayın. - Page 17 User Manual Zenith...
- Page 18 Remove the transportation lock Zenith Press the front of the mounting bracket (6) to release the bracket from the transportation pins (13). Remove the transportation pins. The transportation pins (13) are recyclable. PRESS Verwijder de transportpinnen. De Zatlačte prednú časť montážnej (13). Retire los pasadores de Appuyez sur la partie frontale de transportpinnen (13) zijn recycleerbaar. konzoly (6) a konzola sa odpojí od transporte. Los pasadores de transporte l’étrier de montage (6) pour libérer...
- Page 19 Remove cable tie & protective foam blocks Zenith Remove the cable tie (11) by clipping them, then remove the protection foam blocks (12) from the front and back. Both the cable tie and protection foam blocks are recyclable. CLIP! Pic. 1 Retirez le serre-câbles (11) en le...
- Page 20 Remove locking pin Zenith Turn the seat (1) upside down. Turn the locking pin (7) and push down the two snapfits before you pull the locking pin completely out. zoom Retournez le siège (1). Tournez la Okrenite sjedalicu (1) naopačke. Întoarceţi scaunul (1) invers. Обърнете седалката (1) обратно. barre excentrique (7) et enfoncez les Okrenite ekscentrično vratilo (7) i Rotiţi axul excentric (7) şi apăsaţi în jos Завъртете ексцентричния вал (7) и deux cliquets avant de retirer pritisnite dvije kopče prema dolje, a cele două dispozitive de blocare înainte...
- Page 21 Mount the carrier bar to the seat Zenith Insert the carrier bow (5) through the holes as shown below. Insérez l’arc porteur (5) dans les Taşıyıcı yayı (5) aşağıda 다음과 같이 구멍을 통해서 캐리어 보우 trous comme illustré ci-dessous. gösterildiği gibi deliklerden takın. (5)를 삽입합니다. Stecken Sie den Trägerbogen (5) Voer de draagboog (5) door de Протягніть дугу багажника (5) wie unten dargestellt durch die gaten zoals hieronder weergegeven. через отвори, як показано нижче. Bohrungen. Przesunąć pałąk mocujący (5) Før bærebøylen (5) inn i hullene przez otwory w sposób przedstawiony...
- Page 22 Insert locking pin Zenith 1) Locked 2) Unlocked Insert the locking pin (7) through the holes under the seat base, keeping it in unlocked position to allow final adjustment later on. zoom 1) Bloqueado staan om later de eindafstelling toe te Insérez la goupille de verrouillage Vlozte blokovaci kolik (7) cez otvory 2) Desbloqueado laten. (7) dans les trous sous la base du siège, pod zakladnou sedadla, pricom ho 1) Vergrendeld en la laissant en position non verrouillée...
- Page 23 Fastening bracket (6b+c). Ne zatežite ga potpuno kako tre cablu şi ţeava cadrului. biste poslije mogli namjestiti visinu. Ako na području postavljanja metalnih Разместите крепежную скобу Zenith traka (6b) postoji žičano uže, metalne (6a) над трубой рамы велосипеда. trake (6b) postavite između žičanog Прикрепите скобу металлическими užeta i cijevi okvira. подкладками/крепежными винтами Place the fastening bracket (6b+c). Не затягивайте винты Helyezze a (6a) rögzítőkonzolt a полностью, чтобы можно было (6a) over the frame tube of the kerékpár vázcsövére. Erősítse oda a отрегулировать высоту позже. bike. Attach the bracket with the konzolt a (6b+c) fémlemezekkel/ Если в том участке, где должны быть rögzítőcsavarokkal. Ne húzza meg telje- металлические подкладки (6b), metal strips/ fastening screws sen, hogy egy későbbi szakaszban be...
- Page 24 Introduzca los extremos de la beträgt 10 Nm. Es handelt sich barra portadora (5) por el soporte (6a) Mount the bicycle child seat onto the bracket dabei jedoch lediglich um eine hasta que haga clic = posición de Empfehlung. Wenn sich die Halterung bloqueo. während der Verwendung bewegt, die Zenith Schrauben so fest anziehen, bis der Sitz 1. Regule el soporte (6a) a la altura sich nicht mehr bewegen lässt. correcta hasta que haya unos 10 o12 cm entre la rueda trasera/el Guide the carrier bow ends (5) Machen Sie es sich zur Regel, die guardabarros/el portaequipajes y el Halterung vor jeder Fahrradtour zu asiento infantil de la bicicleta.
- Page 25 2. Ezután húzza meg a konzol nou suportul, înainte de fiecare 1. Nastavte konzolu (6a) do správnej hátoldalán lévő négy rögzítőcsavart Maak er een regel van de deplasare cu bicicleta. výšky, aby bola medzi detskou spanning van de beugel voor (6c) a következő mintázat szerint sedačkou bicykla a zadným kolesom/ (meghúzás, majd meghúzás ismét): elke rit na te kijken en deze indien Вставьте концы дуги багажника blatníkom/nosičom batožiny nodig aan te spannen. (5) вниз в скобу (6a), пока не...
- Page 26 підтягніть): використанням велосипеда. grünen Sicherheitsanzeigen (6d) Componente de fixação Hamax: müssen sichtbar sein. Certifique-se de que o arco do suporte está bem preso à abraçadeira Hamax festebrakett: verificando que os indicadores de Pass på at bærebøylen er riktig festet til segurança verdes (6d) estão visíveis. braketten ved å sjekke at de grønne sikkerhetsindikatorene (6d) synes. Suportul de fixare Hamax: asiguraţi-vă că arcul de transport este Hamax Fastening bracket Upevňovací třmen Hamax: fixat corect la suport, verificând dacă Zkontrolujte, zda je připevňovací rám indicatoarele verzi de siguranţă (6d) správně připojen ke třmeni tím, že Zenith sunt vizibile. zkontrolujete, zda jsou zelené kontrolky ochrany viditelné (6d). Крепежная скоба Hamax: Hamax Fastening bracket: Удостоверьтесь, что дуга багажника Hamax monteringsbeslag: правильно прикреплена к крепёжной Kontroller, at bærebøjlen er monteret Make sure the carrier bow is correctly attached to the скобе, проверив, видны ли зелёные...
-
Page 27: Adjusting The Seat
Adjusting the seat Zenith Make sure the locking pin (7) is in the unlocked position before adjusting the seat to the correct lengthways position = max. 10 cm between the centre mark (14) on the seat and the rear hub. After adjustment, lock the seat by turning the locking pin (7) to locked position. -
Page 28: Foot Rest Adjustment
Foot rest adjustment Zenith How to release the foot rest (4): Release the footrest handle on the back by flipping it upwards. Move the foot rest (4) to the preferred height and fasten the foot rest by pressing the foot rest handle down. -
Page 29: Foot Strap Adjustment
Foot strap adjustment Zenith How to fasten/release the foot strap (a): To fasten the foot strap put the strap into the track and pull down to preferred length. The strap will automatically lock. It’s only possible to tighten the strap when it is in the track. To loosen the foot strap, just pull it out of the track. - Page 30 Extra footguard Zenith To mount the extra foot guard (8): Press the foot guard into the fitting grooves until it clicks. CLICK! Opposite view zoom Pour monter la protection de pieds Lisäpinnasuojan kiinnitys Paina Aby zamontować specjalną osłonę Montáž extra ochrany nôh (8): supplémentaire (8) : Poussez la pinnasuojaa asennusuriin, kunnes przed szprychami (8): Wcisnąć osłonę Stlačte ochranu nôh do drážok, kým protection de pied dans les rainures kuuluu naksahdus. do pasujących rowków do momentu nezapadne do svojej polohy. d’ajustement jusqu’à ce qu’elle kliknięcia. produise un clic.
-
Page 31: Restraint System
Restraint system Pic. 1 Zenith The restraint system (2) can be attached and detached by pressing in or out the belt lock (3) shown in pic. 1. It is important to press at the middle of the belt lock button (pic. 2 & 3) when detaching the restraint system. - Page 32 Chest buckle adjustment Zenith Pic. 1 The restraint system length can be adjusted by adjusting buckle a Pic. 2 and b. To adjust buckles (a+b) hold the buckle as shown in pic. 1. By pressing the red button, the belt loosens by pulling the buckle upwards.
- Page 33 Regulacja systemu Dĺžka obmedzovacieho systému sa zabezpieczającego odbywa się za dá nastaviť s pomocou spony a a b. Ak pomocą sprzączek a i b. W tym celu chcete nastaviť spony (a+b), podržte należy je uchwycić w sposób pokazany sponu podľa znázornenia na obr. 1. na rys. 1. Po naciśnięciu czerwonego Stlačením červeného tlačidla sa pás przycisku poluzować pasek ciągnąc uvoľní potlačením spony do vrchu. sprzączkę ku górze. Ak chcete utiahnuť obmedzovací systém, W celu zaciśnięcia wystarczy pociągnąć potiahnite za koniec pásu (obr. 2). za końcówki pasków (rys.) 2). Presuňte sponu (c) hore pre zaistenie Przesuwamy sprzączkę (c) w pozycję pásu tak, aby nemohol spadnúť z uniemożliwiającą zsunięcie się pasów z ramien dieťaťa (obr. 3). ramion dziecka (rys. 3). Dĺžka obmedzovacieho systému sa O comprimento do sistema de dá nastaviť s pomocou spony a a b. Ak aperto pode ser ajustado, ajustando a chcete nastaviť spony (a+b), podržte fivela a e b. Para ajustar as fivelas sponu podľa znázornenia na obr. 1. (a+b), segure a fivela tal como Stlačením červeného tlačidla sa pás apresentado na imagem. 1. Ao premir o uvoľní potlačením spony do vrchu. botão vermelho, o cinto solta-se, Ak chcete utiahnuť obmedzovací systém, puxando a fivela para cima. potiahnite za koniec pásu (obr. 2). Para apertar o sistema de aperto, basta Presuňte sponu (c) hore pre zaistenie puxar a extremidade das fitas de cinto pásu tak, aby nemohol spadnúť z (imag.
- Page 34 How to remove the seat Zenith The seat (1) is easy to PRESS remove from the bicycle when not in use. Press the cover of the bracket and pull the seat bar free from the bracket (6). a vytiahnite tyc sedadla z konzoly (6). Le siège est facile à enlever Istuin (1) on helppo tarvittaessa Fotelik (1) można łatwo zdjąć z...
- Page 35 Before embarking on a bicycle trip Zenith • Adjust the restraint system (2) • Adjust the foot rests (4) and fasten foot straps • Check the safety indicators (6d) of the bracket • Always wear helmets; both child and adult NB! Never leave your child alone in the bicycle child seat.
- Page 36 • Állítsa be a (2) biztonsági övet • Ajuste o cinto de segurança (2) • Nastavte obmedzovací systém (2). • Állítsa be a lábtartókat és húzza meg • Ajuste o apoio de pés e aperte as • Prispôsobte opierky nôh (4) a a (4) lábszíjakat correias (4) upevnite pásy na nohy. • Ellenőrizze a konzol (6d) • Verifique os indicadores de segurança • Skontrolujte bezpečnostné indikátory biztosításjelzőit. (6d) do suporte. (6d) na konzole. • A gyermek és a felnőtt is mindig • Utilize sempre capacetes de adulto e • Vždy noste prilby, dieťa aj dospelý. viseljen bukósisakot. criança. Dôležité! Nikdy nenechávajte vaše Megjegyzés! Gyermekét soha ne ATENÇÃO! Nunca deixe a sua dieťa samo na sedadle bicykla. hagyja egyedül a kerékpár criança sentada sem supervisão.
- Page 37 Extra fastening bracket Zenith With an extra bracket (6) you can easily move one seat between two bicycles. Hamax fastening bracket (6) is available in two version; standard and lockable Art. nr.: 604001 STANDARD BRACKET Art. nr.: 604002 LOCKABLE BRACKET Nº de art.: 604001 SOPORTE...
-
Page 38: Problem Solving
Should your seat be too close to the carrier/wheel when mounted, there is an extra bar available which may solve your problem. Please contact your bicycle dealer. Problem: Solution: Extra bar for small frames 604015 Zenith su problema. Por favor, póngase en oplossing bieden. Contacteer uw Une fois monté, si votre siège est Ak by bolo vaše sedadlo po montáži contacto con su distribuidor de fietshandelaar. - Page 39 This can be useful if your bicycle has a frame diameter outside the range of 28–40 mm, or if you have an electrical bicycle. Read more about the carrier adapters at www.hamax.com/child- bike-seat/caress-collection/zenith-with-carrier-adapter Full assembly instructions follows the product when purchased, and can also ble downloaded from www.hamax.com.
- Page 40 또는 전기 자전거를 사용하는 경우에 유용합니다. Вы также можете установить Koltuğu bir bagaj bisiklet 캐리어 어댑터에 대한 자세한 정보는 웹 사이트 кресло на багажник велосипеда при taşıyıcısına bir taşıyıcı adaptörü (www.hamax.com/child-bike-seat/caress- помощи переходника багажника. Это yardımıyla da takabilirsiniz. Bu, collection/zenith-with-carrier-adapter)를 может быть полезным, если bisikletinizin çerçeve çapı 28-40 mm 참조하십시오. велосипед имеет раму с внешним aralığı dışında kaldığında veya elektrikli 전체 조립 설명서는 제품과 함께 제공됩니다. диаметром 28-40 мм, или же если это bir bisikletiniz olduğunda yararlı olabilir. 당사 웹사이트(www.hamax.com)에서 электровелосипед. Taşıyıcı adaptörleri hakkında daha fazla 다운로드 수도 있습니다.
Need help?
Do you have a question about the Zenith and is the answer not in the manual?
Questions and answers