
Related Manuals for Panasonic NN-ST65JM HPE


Summary of Contents for Panasonic NN-ST65JM HPE
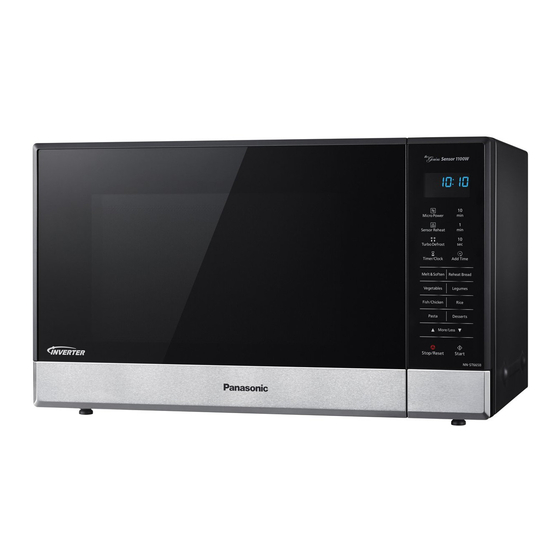
- Page 1 ORDER NO.PAPMOSH1806020CE Microwave Oven NN-ST65JM NN-ST65JB HPE (Hong Kong) YPQ (Singapore) MPQ (Malaysia) TPE (Thailand) YUE (Vietnam) © Panasonic Appliances Microwave Oven (Shanghai) Co., Ltd. 2018.
- Page 2 NN-ST65JM / NN-ST65JB...
- Page 3 NN-ST65JM / NN-ST65JB...
-
Page 4: Table Of Contents
NN-ST65JM / NN-ST65JB CONTENTS Page Page 1 SCHEMATIC DIAGRAM 5.2. Short Switch 2 DESCRIPTION OF OPERATING SEQUENCE 5.3. Magnetron 2.1. Variable power cooking control 5.4. key board membrane (Membrane switch assembly) 2.2. Inverter power supply circuit 5.5. Inverter power supply (U) 2.3. -
Page 5: Schematic Diagram
NN-ST65JM / NN-ST65JB 1 SCHEMATIC DIAGRAM... -
Page 6: Description Of Operating Sequence
NN-ST65JM / NN-ST65JB 2 DESCRIPTION OF OPERATING SEQUENCE 2.1. Variable power cooking 2.3. Turbo defrost, Auto cook control When the Auto Control feature is selected and the Start pad is tapped: High Voltage Inverter Power Supply (U) controls output power by the signal from Digital Programmer Circuit (DPC). -
Page 7: Cautions To Be Observed When Troubleshooting
NN-ST65JM / NN-ST65JB 3 CAUTIONS TO BE OBSERVED WHEN TROUBLESHOOTING Unlike many other appliances, the microwave oven is a high voltage, high current device. It is free from danger in ordinary use, though extreme care should be taken during repair. CAUTION Servicemen should remove their watches &... -
Page 8: Part Replacement
NN-ST65JM / NN-ST65JB 3.6. Verification after repair Discharging the high voltage capacitors WARNING 1. After repair or replacement of parts, make sure that the There is high voltage present with high current capabilities screws of the oven, etc. are neither loosen or missing. in the circuits of the primary and secondary windings, choke Microwave energy might leak if screws are not properly coil and heat sink of the inverter. -
Page 9: Disassembly And Parts Replacement Procedure
NN-ST65JM / NN-ST65JB 4 DISASSEMBLY AND PARTS REPLACEMENT PROCEDURE 4.1. Magnetron 1. Discharge the high voltage capacitor. 2. Remove 1 screw holding air guide A on the magnetron. 3. Remove 1 screw holding air guide A on cavity top plate. 4. -
Page 10: Low Voltage Transformer And/Or Power Relays (Rl1)
NN-ST65JM / NN-ST65JB 4.5. Door assembly 1. Support the door, remove 3 screws holding hinge A. 4.3. Low voltage transformer and/or power relays (RL1) CAUTION: Be sure to ground any static electric charge built up in 2. Open the door, remove door(U) and hinge A from cavity. your body before handling the DPC. - Page 11 NN-ST65JM / NN-ST65JB 6. Replace other components. 9. Tighten 2 mounting screws. To re-install components: NOTE: After replacement of the defective component parts of the door, reassemble it properly and adjustment so as to prevent an excessive microwave leakage. Adjustment of the door assembly (Refer page 16). 7.
-
Page 12: Turntable Motor
NN-ST65JM / NN-ST65JB 4.6. Turntable motor 4.7. Inverter power supply 1. Remove the motor cover by breaking off at the 8 spots CAUTIONS indicated by arrows with a cutter or the like. 1. Always leave the grounding plate in place. 2. - Page 13 NN-ST65JM / NN-ST65JB 6. Remove 1 screw holding H.V.Inverter to Inverter bracket. 7. Remove 1 screw holding grounding plate to H.V. Inverter. 8. Seperate H.V. Inverter from Inverter bracket by freeing 3 catch hooks on the Inverter bracket.
-
Page 14: Component Test Procedure
NN-ST65JM / NN-ST65JB 5 COMPONENT TEST PROCEDURE 5.3. Magnetron WARNING 1. High voltage is present at the output terminals of the High Voltage Inverter (U) including aluminum heat sink during any cook cycle. Continuity checks can only indicate an open filament or a 2. -
Page 15: Inverter Power Supply (U)
NN-ST65JM / NN-ST65JB 5.5. Inverter power supply (U) a. After approximately 3 seconds, oven stops operating. b. During oven operation, input current DO NOT try to REPAIR H.V. Inverter power supply (U). approximately 0.4A. Replace complete H.V. Inverter(U) Unit. INPUT CURRENT FAILURE CODE Unplug CN701 0.4A... -
Page 16: Measurements And Adjustments
NN-ST65JM / NN-ST65JB 6 MEASUREMENTS AND ADJUSTMENTS 6.1. Adjustment of primary latch 6.2. Measurement of microwave switch, secondary latch switch output and short switch. The output power of the magnetron can be determined by performing IEC standard test procedures. However,due to the 1. -
Page 17: Troubleshooting Guide
NN-ST65JM / NN-ST65JB 7 TROUBLESHOOTING GUIDE DANGER: HIGH VOLTAGES 1. DO NOT RE-ADJUST PRESET CONTROL on the H.V.Inverter (U). It is very dangerous to repair or adjust without proper test equipment because this circuit generates very large current and high voltage. Operating a misaligned inverter circuit is dangerous. 2. -
Page 18: Troubleshooting) Other Problems
NN-ST65JM / NN-ST65JB 7.2. (Troubleshooting) Other problems SYMPTOM CAUSE CORRECTIONS 1. Oven is dead. 1. Open or loose lead wire harness Fuse is OK. 2. Open thermal cutout / thermistor Check thermal cutout is defective. No display and no operation at all. 3. -
Page 19: Troubleshooting Of Inverter Circuit (U) And Magnetron
NN-ST65JM / NN-ST65JB 7.3. Troubleshooting of inverter circuit (U) and magnetron This oven is programmed with a self diagnostics failure code system which will help for troubleshooting. H95, H97, H98 and H99 are the provided failure codes to indicate magnetron and inverter circuit problem areas. This section explains failure codes of H95, H97, H98 and H99. -
Page 20: Trouble Related To Digital Programmer Circuit
NN-ST65JM / NN-ST65JB 7.4. Trouble related to Digital Programmer Circuit SYMPTOM STEP CHECK RESULT CAUSE/CORRECTIONS →Step2 No display when oven is first plugged Fuse pattern of D.P.C., FUSE1 Normal Open Replace D.P.C. or Fuse Pattern or FUSE Low voltage transforment (L.V.T.) Abnormal 0V L.V.T. -
Page 21: How To Check The Semiconductors Using An Ohm Meter
NN-ST65JM / NN-ST65JB 7.6. How to check the semiconductors using an OHM meter 7.7. H.V. INVERTER MAIN PARTS LIST (F606YBA00HP) Ref. No. Part No. Part Name & Description Pcs/Set Remarks Q701 B1JAEV000003 IGBT C701 ECWHC3B104JA FILM CAPACITOR 0.1µF,1000VDC C702 ECWF4305N851 FILM CAPACITOR 3µF,250VDC DB701... -
Page 22: Exploded View And Parts List
NN-ST65JM / NN-ST65JB 8 EXPLODED VIEW AND PARTS LIST 8.1. EXPLODED VIEW... -
Page 23: Parts List
NN-ST65JM / NN-ST65JB 8.2. PARTS LIST NOTE: 1. When ordering replacement part(s), please use part number(s) shown in this part list. Do not use description of the part. 2. Important safety notice: Components identified by mark have special characteristics important for safety. When replacing any of these components, use only manufacture’s specified parts. - Page 24 NN-ST65JM / NN-ST65JB Ref. No. Part No. Part Name & Description Pcs/Set Remarks F6614CA00QP SUPPORT RUBBER NAIL...
-
Page 25: Escutcheon Base Assembly
NN-ST65JM / NN-ST65JB 8.3. ESCUTCHEON BASE ASSEMBLY Ref. No. Part No. Part Name & Description Pcs/Set Remarks F603LCA20HP D.P.CIRCUIT (AU) ST65JM HPE F603LCA20MP D.P.CIRCUIT (AU) ST65JB YPQ/MPQ F603LCA20YU D.P.CIRCUIT (AU) ST65JB YUE F603LCA20TP D.P.CIRCUIT (AU) ST65JB TPE F8034CA20SHP ESCUTCHEON BASE ST65JM F8034CA20BMP ESCUTCHEON BASE... -
Page 26: Door Assembly
NN-ST65JM / NN-ST65JB 8.4. DOOR ASSEMBLY Ref. No. Part No. Part Name & Description Pcs/Set Remarks F30189Y00AP DOOR KEY A F302ACA20SHP DOOR A (U) ST65JM F302ACA20BMP DOOR A (U) ST65JB F302K9X70EP DOOR E (U) F30215G10XN DOOR KEY SPRING F30859Y00AP DOOR C F31459Y00AP DOOR SCREEN A... -
Page 27: Wiring Materials
NN-ST65JM / NN-ST65JB 8.5. WIRING MATERIALS Ref. No. Part No. Part Name & Description Pcs/Set Remarks F030ACA20HP LEAD WIRE HARNESS (INCLUDING MAGNETRON THERMISTOR) F030ECA20HP H.V.LEAD WIRE... -
Page 28: Packing And Accessories
NN-ST65JM / NN-ST65JB 8.6. PACKING AND ACCESSORIES Ref. No. Part No. Part Name & Description Pcs/Set Remarks F0003CA20MP INSTRUCTION MANUAL HPE,YPQ,MPQ,TPE F0003CA20YU INSTRUCTION MANUAL F0102CA20SHP PACKING CASE, PAPER F0102CA20BMP PACKING CASE, PAPER YPQ,MPQ,YUE,TPE F0104BT00QP UPPER FILLER F0105BT00QP LOWER FILLER F01067F00AP P.E.BAG F06015Q00AP COOKING TRAY... -
Page 29: Digital Programmer Circuit
NN-ST65JM / NN-ST65JB 9 DIGITAL PROGRAMMER CIRCUIT 9.1. SCHEMATIC DIAGRAM... - Page 30 NN-ST65JM / NN-ST65JB...
-
Page 31: Parts List
NN-ST65JM / NN-ST65JB 9.2. PARTS LIST Ref. No. Part No. Part Name & Description Pcs/Set Remarks BZ210 L0DDEA000014 BUZZER 2.0KHz LCD111 L5AYAYY00424 DISP HOLDER F6617CA10QP LCD HOLDER F67525E20XN DIFFUSION SHEET D4EAY5110002 VARISTOR 270V VA2,VA3 D4EAY112A036 VARISTOR 1100V MNCA0F50ABH L.S.I. IC10 C0DBGYY05981 VOLTAGE-STABILIZED IC25...
Need help?
Do you have a question about the NN-ST65JM HPE and is the answer not in the manual?
Questions and answers