Table of Contents
Advertisement
Available languages
Available languages
OWNER'S MANUAL
COMMERCIAL
WASHER
Before beginning installation, read these instructions carefully. This
will simplify installation and ensure that the washer is installed
correctly and safely. Leave these instructions near the washer after
installation for future reference.
FH069FD2F
MFL67658593
Rev.01_190507
Copyright © 2019 LG Electronics Inc. All rights reserved.
Original instructions
www.lg.com
Advertisement
Table of Contents

Related Manuals for LG FH069FD2F


Summary of Contents for LG FH069FD2F
- Page 1 Before beginning installation, read these instructions carefully. This will simplify installation and ensure that the washer is installed correctly and safely. Leave these instructions near the washer after installation for future reference. FH069FD2F Original instructions www.lg.com MFL67658593 Copyright © 2019 LG Electronics Inc. All rights reserved. Rev.01_190507...
-
Page 2: Table Of Contents
- 10. How to change add super wash type SPECIFICATIONS - 11. How to enter the - 11-1. Special price day setup LG COMMERCIAL LAUNDRY - 11-2. Non-stop rinse setup LIMITED WARRANTY - 11-3. Add Super Wash setup - 11-4. Vend type setup - card type or coin... -
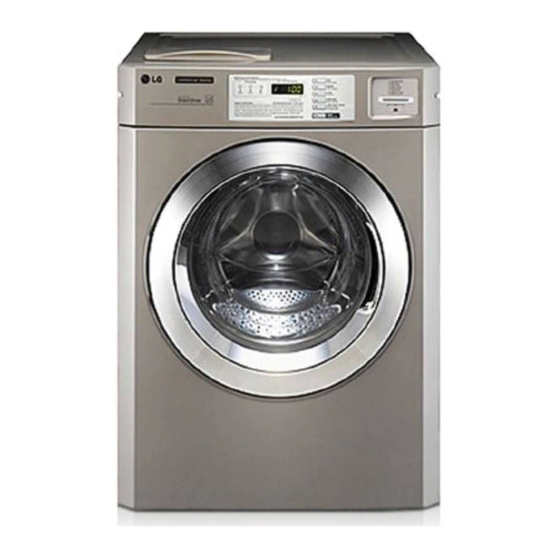
Page 3: Product Features
PRODUCT FEATURES PRODUCT FEATURES DIRECT DRIVE SYSTEM The advanced brushless DC motor drives the drum directly without using a belt and pulley. TILTED DRUM AND EXTRA LARGE DOOR OPENING The tilted drum and extra large opening make it possible to load and unload clothing more easily. ULTRA CAPACITY The larger drum enables more tumbling action and greater centrifugal force, but also less tangling and wrinkling of the laundry. -
Page 4: Important Safety Instructions
IMPORTANT SAFETY INSTRUCTIONS IMPORTANT SAFETY INSTRUCTIONS READ ALL INSTRUCTIONS BEFORE USE WARNING For your safety, the information in this manual must be followed to minimize the risk of fire or explosion, electric shock, or to prevent property damage, injury to persons, or death. Your Safety and the safety of others are very important. - Page 5 IMPORTANT SAFETY INSTRUCTIONS IMPORTANT SAFETY INSTRUCTIONS READ ALL INSTRUCTIONS BEFORE USE WARNING For your safety, the information in this manual must be followed to minimize the risk of fire or explosion, electric shock, or to prevent property damage, injury to persons, or death. The instructions shall state the substance of the following: This appliance is not intended for use by persons...
-
Page 6: Basic Safety Precautions
IMPORTANT SAFETY INSTRUCTIONS IMPORTANT SAFETY INSTRUCTIONS READ ALL INSTRUCTIONS BEFORE USE WARNING For your safety, the information in this manual must be followed to minimize the risk of fire or explosion, electric shock, or to prevent property damage, injury to persons, or death. BASIC SAFETY PRECAUTIONS WARNING To reduce the risk of fire, electric shock, or injury to persons when using this appliance, follow basic... -
Page 7: Safety Instructions For Installation
IMPORTANT SAFETY INSTRUCTIONS IMPORTANT SAFETY INSTRUCTIONS READ ALL INSTRUCTIONS BEFORE USE WARNING For your safety, the information in this manual must be followed to minimize the risk of fire or explosion, electric shock, or to prevent property damage, injury to persons, or death. SAFETY INSTRUCTIONS FOR INSTALLATION WARNING To reduce the risk of fire, electric shock, or injury to persons when using this appliance, follow basic... -
Page 8: Safety Instructions For Use, Care, Cleaning, And Disposal
IMPORTANT SAFETY INSTRUCTIONS IMPORTANT SAFETY INSTRUCTIONS READ ALL INSTRUCTIONS BEFORE USE WARNING For your safety, the information in this manual must be followed to minimize the risk of fire or explosion, electric shock, or to prevent property damage, injury to persons, or death. SAFETY INSTRUCTIONS FOR USE, CARE, CLEANING, AND DISPOSAL WARNING To reduce the risk of fire, electric shock, or injury to persons when using the washer, follow basic... - Page 9 IMPORTANT SAFETY INSTRUCTIONS IMPORTANT SAFETY INSTRUCTIONS READ ALL INSTRUCTIONS BEFORE USE WARNING For your safety, the information in this manual must be followed to minimize the risk of fire or explosion, electric shock, or to prevent property damage, injury to persons, or death. SAFETY INSTRUCTIONS FOR USE, CARE, CLEANING, AND DISPOSAL WARNING To reduce the risk of fire, electric shock, or injury to persons when using the washer, follow basic...
-
Page 10: Parts And Accessories
PARTS AND ACCESSORIES PARTS AND ACCESSORIES Parts Detergent Detergent dispenser dispenser drawer (for single (for stack model) model) Water inlets Control panel Door Shipping Power cord Door seal bolts Magnet Door Plunger Drain hose (see page 2) Leveling feet Drain pump filter cover Drain pump filter Drain hose Accessories... -
Page 11: Control Panel Features
CONTROL PANEL FEATURES CONTROL PANEL FEATURES OPL Type (Fh069FD2F) 1. Display LED 4. Start/Pause button 2. Cycle button 5. Status LED 3. Optional function button... - Page 12 CONTROL PANEL FEATURES Status LED Display LED Cycle button Start/Pause button Optional function button Display LED Optional function button Add Super Wash: Wash time or rinse cycle can The display shows the vend price and remaining time and programming options. Error be added when additional coin is inserted or a valid cash card is entered.
-
Page 13: Installation Instructions
INSTALLATION INSTRUCTIONS INSTALLATION INSTRUCTIONS Checking and choosing the Installing on a floor proper location ” Install the washing machine on a solid floor (570mm) that is strong and rigid enough to support the weight of the washing machine, even when fully loaded, without flexing or bouncing. -
Page 14: Unpacking And Removing Shipping Bolts
INSTALLATION INSTRUCTIONS Unpacking and removing shipping bolts NOTE When removing the washer from the carton base, be sure to remove the foam drum • Save the bolt assemblies for future use. To support in the middle of the carton base. prevent damage to internal components, If you must lay the washer down to remove DO NOT transport the washer without... -
Page 15: Connecting The Water Lines
Do not reuse old hoses. pling can result. Use only the inlet hoses provided with the washer. LG does not recommend the use of aftermarket hoses. • Periodically check the hoses for cracks, After connecting inlet hose to water faucets,... -
Page 16: Connecting The Drain Line
INSTALLATION INSTRUCTIONS Connecting the drain line Using a laundry tub Secure the drain hose in place to prevent Clip the end of the hose into the elbow bracket. moving and leaking. - Connect the elbow bracket within 4 inches (10 cm) from the end of the drain hose. NOTE If the drain hose is extended more than 4 inches (10 cm) beyond the end of the... -
Page 17: Leveling The Washing Machine
INSTALLATION INSTRUCTIONS Leveling the washing machine Check the washing machine’s level again. - Push or rock the top edges of the washing machine gently to make sure that the The washer tub of your new washing machine washing machine does not rock. spins at very high speeds. -
Page 18: Preparation
PREPARATION PREPARATION Precautions for fabric care before wash cycle Read and observe the following to prevent shrinkage or damage to clothes. u Check all pockets to make sure that they are u Brush heavy soil, dust, or hair off fabrics empty. -
Page 19: Fabric Care Labels
PREPARATION Fabric care labels Sorting laundry Most articles of clothing feature fabric care It is recommended that you sort laundry into labels that include instructions for proper care. similar loads that are washable in the same cycle. Refer to the following chart for sorting clothes Category Label Directions... -
Page 20: Recommended Detergent
PREPARATION Recommended detergent About the dispenser Use HE (High-Efficiency) detergent for front- The automatic dispenser consists of three loading washing machines. HE detergents compartments which hold: dissolve more efficiently and produce • Liquid chlorine bleach. fewer suds to ensure efficient washing and •... -
Page 21: Loading The Dispenser
PREPARATION Loading the dispenser Main Wash Detergent Compartment Liquid Bleach Compartment This compartment holds laundry detergent This compartment holds liquid chlorine bleach, for the main wash cycle, which is added to which will be dispensed automatically at the the load at the beginning of the cycle. Use HE proper time during the wash cycle. -
Page 22: Operating Your Washer
OPERATING YOUR WASHER OPERATING YOUR WAShER 1. Ready mode 3. Select the cycle 1) Coin / Card type Press the desired button and press the Start button. The display LED will show the – The cycle LEDs are lit at the same remaining time and the selected cycle starts. -
Page 23: Programming Mode
PROGRAMMING MODE PROGRAMMING MODE : You can check machine information or change setting on Program setup, Collect Information Data, Diagnostic Test. There are two methods that you can enter programming mode. how to enter Programming mode how to use button You can enter programming mode only for Idle You can change Washer vend price, cycle time and Cycle parameters, etc. -
Page 24: Structure Of Programming Mode - Card/Coin Type
PROGRAMMING MODE Structure of Programming mode – Card / Coin type Algorithm flow chart shows how to control the programming mode. Before program set, check the structure of the programming mode. 1. Turn on/off toggle switch or insert service card, for entering setup mode (or follow OPL type instructions). 2. -
Page 25: Structure Of Programming Mode - Opl Type
PROGRAMMING MODE Structure of Programming mode – OPL type Algorithm flow chart shows how to control the programming mode. Before program set, check the structure of the programming mode. The method of entering setup mode. 1) Push the Hot & Cold button at the same time. 2) Push the Warm button 3 times. -
Page 26: Programming Mode -Setup Mode
PROGRAMMING MODE - SETUP MODE PROGRAMMING MODE –SETUP MODE Setup Mode : (display) You can change washer vend price, cycle time, and cycle parameters, etc. Entering setup mode - Coin type – Turn on/off toggle switch. - Card type – Insert the service card. - All Types –... -
Page 27: How To Change Regular Delicates Price
PROGRAMMING MODE - SETUP MODE 2. how to change regular delicates price. Button Display Enter setup mode. You will see LqC1 Press the Hot button. Press the Warm or the Cold button until appears in the display. Press the Start button. Press the Warm or the Cold button until appears in the display. -
Page 28: How To Change Regular Warm & Cold Price
PROGRAMMING MODE - SETUP MODE 3. how to change regular warm & cold price Button Display Enter setup mode. You will see LqC1 Press the Hot button. Press the Warm or the Cold button until appears in the display. Press the Start button. Press the Warm or the Cold button until appears in the display. -
Page 29: How To Change Regular Hot Price
PROGRAMMING MODE - SETUP MODE 4. how to change regular hot price Button Display Enter setup mode. You will see LqC1 Press the Hot button. Press the Warm or the Cold button until appears in the display. Press the Start button. Press the Warm or the Cold button until appears in the display. -
Page 30: How To Change Special Price
PROGRAMMING MODE - SETUP MODE 5. how to change special price Button Display Enter setup mode. You will see LqC1 Press the Hot button. Press the Warm or the Cold button until appears in the display. Press the Start button. Press the Warm or the Cold button until appears in the display. -
Page 31: How To Change Special Delicates Price
PROGRAMMING MODE - SETUP MODE 6. how to change special delicates price Button Display Enter setup mode. You will see LqC1 Press the Hot button. Press the Warm or the Cold button until appears in the display. Press the Start button. Press the Warm or the Cold button until appears in the display. -
Page 32: How To Change Special Warm & Cold Price
PROGRAMMING MODE - SETUP MODE 7. how to change special warm & cold price Button Display Enter setup mode. You will see LqC1 Press the Hot button. Press the Warm or the Cold button until appears in the display. Press the Start button. Press the Warm or the Cold button until appears in the display. -
Page 33: How To Change Special Hot Price
PROGRAMMING MODE - SETUP MODE 8. how to change special hot price Button Display Enter setup mode. You will see LqC1 Press the Hot button. Press the Warm or the Cold button until appears in the display. Press the Start button. Press the Warm or the Cold button until appears in the display. -
Page 34: How To Change Add Super Wash Price
PROGRAMMING MODE - SETUP MODE 9. how to change add super wash price Button Display Enter setup mode. You will see LqC1 Press the Hot button. Press the Warm or the Cold button until appears in the display. Press the Start button. Press the Warm or the Cold button until appears in the display. -
Page 35: How To Change Add Super Wash Type
PROGRAMMING MODE - SETUP MODE 10. how to change add super wash type Super wash can be used to add extra wash time, rinse cycle, or both. Button Display Enter setup mode. You will see LqC1 Press the Hot button. Press the Warm or the Cold button until appears in the display. -
Page 36: How To Enter The 37 - 11-1. Special Price Day Setup
PROGRAMMING MODE - SETUP MODE 11. how to enter the can be used to enable/disable various features of the machine. Button Display Enter setup mode. You will see LqC1 Press the Hot button. Press the Warm or the Cold button until appears in the display. - Page 37 PROGRAMMING MODE - SETUP MODE 11-1. Special price day setup Special price days can be used to set special prices (discounts) on select days. Button Display Enter setup mode. You will see LqC1 Press the Hot button. Press the Warm or the Cold button until appears in the display.
-
Page 38: Non-Stop Rinse Setup
PROGRAMMING MODE - SETUP MODE 11-2. Non-stop rinse setup Non-stop rinse setup can be used to enable/disable simultaneous rinse & spin. Button Display Enter setup mode. You will see LqC1 Press the Hot button. Press the Warm or the Cold button until appears in the display. -
Page 39: Add Super Wash Setup
PROGRAMMING MODE - SETUP MODE 11-3. Add Super Wash setup Add Super Wash setup can be used to enable/disable the super wash function. Button Display Enter setup mode. You will see LqC1 Press the Hot button. Press the Warm or the Cold button until appears in the display. -
Page 40: Vend Type Setup - Card Type Or Coin
PROGRAMMING MODE - SETUP MODE 11-4. vend type setup - card type or coin type setup Vend type setup can be used to select payment type between coin type and card type. Button Display Enter setup mode. You will see LqC1 Press the Hot button. -
Page 41: Pre-Wash Setup
PROGRAMMING MODE - SETUP MODE 11-5. Pre-wash setup Pre-wash setup can be used to enable/disable a short wash cycle before the main wash. Button Display Enter setup mode. You will see LqC1 Press the Hot button. Press the Warm or the Cold button until appears in the display. -
Page 42: Twin Spray Setup
PROGRAMMING MODE - SETUP MODE 11-6. Twin spray setup Twin spray setup can be used to enable/disable water circulation during tumble. Twin spray pumps up water in the bottom of the tub to spray on laundry while tumbling. Button Display Enter setup mode. -
Page 43: How To Enter The 44 - 12-1. Pause Function Setup
PROGRAMMING MODE - SETUP MODE 12. how to enter the can be used to enable/disable the pause function. Button Display Enter setup mode. You will see LqC1 Press the Hot button. Press the Warm or the Cold button until appears in the display. - Page 44 PROGRAMMING MODE - SETUP MODE 12-1. Pause function setup Pause function setup can be used to enable/disable the ability to pause the cycle when pressing the Start/Pause button. Button Display Enter setup mode. You will see LqC1 Press the Hot button. Press the Warm or the Cold button until appears in the display.
-
Page 45: How To Enter The Special Price Day
PROGRAMMING MODE - SETUP MODE 13. how to enter the special price day can be used to select days to apply special prices. Button Display Enter setup mode. You will see LqC1 Press the Hot button. Press the Warm or the Cold button until appears in the display. -
Page 46: How To Change To Sunday
PROGRAMMING MODE - SETUP MODE 13-1. how to change to Sunday Special prices can be enabled/disabled for each day of the week. Button Display Enter setup mode. You will see LqC1 Press the Hot button. Press the Warm or the Cold button until appears in the display. -
Page 47: Special Price Beginning Time Setup
PROGRAMMING MODE - SETUP MODE 14. Special price beginning time setup can be used to set the beginning time of hourly time range for special price. Button Display Enter setup mode. You will see LqC1 Press the Hot button. Press the Warm or the Cold button until appears in the display. -
Page 48: Special Price Ending Time Setup
PROGRAMMING MODE - SETUP MODE 15. Special price ending time setup can be used to set the ending time of hourly time range for special price. Button Display Enter setup mode. You will see LqC1 Press the Hot button. Press the Warm or the Cold button until appears in the display. -
Page 49: Prewash Time Setup
PROGRAMMING MODE - SETUP MODE 16. Prewash time setup Prewash time setup can be used to set the time for prewash. Button Display Enter setup mode. You will see LqC1 Press the Hot button. Press the Warm or the Cold button until appears in the display. -
Page 50: Washing Time Setup
PROGRAMMING MODE - SETUP MODE 17. Washing time setup Washing time setup can be used to set the time for the main wash. Button Display Enter setup mode. You will see LqC1 Press the Hot button. Press the Warm or the Cold button until appears in the display. -
Page 51: Rinsing Time Per Cycle
PROGRAMMING MODE - SETUP MODE 18. Rinsing times per cycle can be used to set the number of rinses for each cycle. Button Display Enter setup mode. You will see LqC1 Press the Hot button. Press the Warm or the Cold button until appears in the display. -
Page 52: Rinsing Time Setup
PROGRAMMING MODE - SETUP MODE 19. Rinsing time setup Rinsing time setup can be used to set the time for each rinse. Button Display Enter setup mode. You will see LqC1 Press the Hot button. Press the Warm or the Cold button until appears in the display. -
Page 53: Top Spin Speed - Final Spin Time
PROGRAMMING MODE - SETUP MODE 20. Top spin speed – final spin time depends on RPM Top spin speed setup can be used to set the maximum spin RPM. Button Display Enter setup mode. You will see LqC1 Press the Hot button. Press the Warm or the Cold button until appears in the display. -
Page 54: Value Of Coin
PROGRAMMING MODE - SETUP MODE 21. value of coin 1 Value of coin 1 can be used to set the incremental coin value. Button Display Enter setup mode. You will see LqC1 Press the Hot button. Press the Warm or the Cold button until appears in the display. -
Page 55: Value Of Coin
PROGRAMMING MODE - SETUP MODE 22. value of coin 2 Value of coin 2 can be used to set the incremental coin value for kiosk systems. Button Display Enter setup mode. You will see LqC1 Press the Hot button. Press the Warm or the Cold button until appears in the display. -
Page 56: Penny Increment Pricing Offset
PROGRAMMING MODE - SETUP MODE 23. Penny increment pricing offset This represents the cent increment price offset used when debit card is setup. Button Display Enter setup mode. You will see LqC1 Press the Hot button. Press the Warm or the Cold button until appears in the display. -
Page 57: How To Change The Water Level
PROGRAMMING MODE - SETUP MODE 24. how to change the water level You can change the water level amongst three options. indicate water level 23.8 [KHz] indicate water level 23.5 [KHz] indicate water level 23.0 [KHz] Button Display Enter setup mode. You will see LqC1 Press the Hot button. -
Page 58: Beep Volume
PROGRAMMING MODE - SETUP MODE 25. Beep volume Button Display Enter setup mode. You will see LqC1 Press the Hot button. Press the Warm or the Cold button until appears in the display. Press the Start button. Press the Warm or the Cold button until appears in the display. -
Page 59: Time To Keep The Coin (Use Only For Coin Type)
PROGRAMMING MODE - SETUP MODE 26. Time to keep the coin (Use only for coin type) can be used to set the duration of maintaining the value of inserted coins. Button Display Enter setup mode. You will see LqC1 Press the Hot button. Press the Warm or the Cold button until appears in the display. -
Page 60: How To Set Drop Count
PROGRAMMING MODE - SETUP MODE 27. how to set drop count can be used to set the number of drop counts. Drops occur while the machine checks for balancing of the load as the cycle enters higher RPM. Button Display Enter setup mode. -
Page 61: How To Set Shut Down Time After Ue
PROGRAMMING MODE - SETUP MODE 28. how to set shut down time after UE Unbalance Error (UE) occurs when washer cannot balance the load within the selected drop counts. can be used to set the time for maintaining the UE status before shutting down the cycle. Button Display Enter setup mode. -
Page 62: How To Set Rinse Spin Enable
PROGRAMMING MODE - SETUP MODE 29. how to set rinse spin enable can be used to enable/disable spinning before each rinse cycle. Button Display Enter setup mode. You will see LqC1 Press the Hot button. Press the Warm or the Cold button until appears in the display. -
Page 63: How To Set Drop Count For Rinse Spin
PROGRAMMING MODE - SETUP MODE 30 . how to set drop count for rinse spin can be used to set the number of drop counts for each rinse spin. Button Display Enter setup mode. You will see LqC1 Press the Hot button. Press the Warm or the Cold button until appears in the display. -
Page 64: How To Set Auto Dosing
PROGRAMMING MODE - SETUP MODE 31. how to set auto dosing can be used to set the duration of auto dosage for each channel. Button Display Enter setup mode. You will see LqC1 Press the Hot button. Press the Warm or the Cold button until appears in the display. -
Page 65: How To Enter The 66 - 33. How To Set Custom Program
PROGRAMMING MODE - SETUP MODE 32. how to enter the Button Display Enter setup mode. You will see LqC1 Press the Hot button. Press the Warm or the Cold button until appears in the display. Press the Start button. Press the Warm or the Cold button until appears in the display. - Page 66 PROGRAMMING MODE - SETUP MODE 33. how to set custom program Button Display Enter setup mode. You will see LqC1 Press the Hot button. Press the Warm or the Cold button until appears in the display. Press the Start button. Press the Warm or the Cold button until appears in the display.
-
Page 67: Programming Mode - Test Mode
PROGRAMMING MODE - TEST MODE PROGRAMMING MODE - TEST MODE Diagnostic tests: (display) This program has been added for testing the washer and detecting errors. Entering the test mode Data Name Button Display Description Insert service card (card type) 1. Entering Entering programming mode the test mode... -
Page 68: Factory Reset
PROGRAMMING MODE - TEST MODE 2. Factory reset - After factory reset, machine information is changed to the default value. Button Display Enter setup mode. You will see LqC1 Press the Warm or the Cold button until appears in the display. Press the Start button. -
Page 69: Time Setup
PROGRAMMING MODE - TEST MODE 3. Time setup Button Display Enter setup mode. Press the Warm or the Cold button until appears You will see LqC1 in the display. Press the Start button. The display will cycle through 2000 --> 0101 --> Sat --> 0000 repeatedly. -
Page 70: Courtesy Cycle
PROGRAMMING MODE - TEST MODE 4. Courtesy cycle A courtesy cycle is like a complimentary cycle given to the customer when the washer goes out of order after the customer has made the payment to wash clothes. Button Display Enter setup mode. You will see LqC1 Press the Warm or the Cold button until appears in the display. -
Page 71: Cycle Kill
PROGRAMMING MODE - TEST MODE 5. Cycle Kill Coin / OPL type Button Display Enter setup mode. You will see LqC1 Press the Warm or the Cold button until appears in the display. Press the Start button. Press the Warm button until appears in the display. -
Page 72: Password
PROGRAMMING MODE - TEST MODE 6. Password - How to change the password. Button Display Enter setup mode. You will see LqC1 Press the Warm or the Cold button until appears in the display. Press the Start button. Press the Warm button until appears in the display. -
Page 73: Tub Clean
PROGRAMMING MODE - TEST MODE 7. Tub clean - To clean the tub, please run the TUB CLEAN cycle. Button Display Entering Tub Clean Press and hold the Warm button for at least 3 seconds. in ready/idle mode. Display shows default number of Tub Clean cycle runs Pay type: Price is per operation. -
Page 74: Programming Mode - Collect Mode
PROGRAMMING MODE - COLLECT MODE PROGRAMMING MODE - COLLECT MODE Collect information data : (display) The washer collects the usage data so that the owner can check various information like number of various cycles used, how many times card or coins used, etc. Entering the collect mode Data Name Button... -
Page 75: Collect Mode Data Lists
PROGRAMMING MODE - COLLECT MODE Collect Mode Data lists No. Abbreviation Meaning Description rgPr Regular Price 0.00 ~ 10.00 rgCP Regular Delicates Price 0.00 ~ 10.00 rgrP Regular Warm & Cold Price 0.00 ~ 10.00 rgHP Regular Hot Price 0.00 ~ 10.00 dELC Dryer Moisture Sense 0: disable... -
Page 76: Maintenance
MAINTENANCE MAINTENANCE Care after wash After the cycle is finished, wipe the door and the Cleaning the Dispenser inside of the door seal to remove any moisture. 1. The dispenser should be cleaned periodically Leave the door open to dry the washer tub to remove buildup from detergent and other interior. -
Page 77: Cleaning The Water Inlet Filters
MAINTENANCE WARNING Cleaning the water inlet filters Clean the water inlet filters periodically to • Unplug the power cord and turn off the prevent clogging. Take extra care to clean the faucets before cleaning. Failure to do so water inlet filters for areas using hard water. may cause electric shock. -
Page 78: Cleaning The Drain Pump Filter
MAINTENANCE Cleaning the drain pump filter The washing machine fails to drain if the drain pump filter is clogged. Periodically clean the drain filter to prevent clogging with foreign objects. Pull out the plug to turn off the washing Recap the plug onto the drain hose and machine. -
Page 79: Cleaning The Door Seal
MAINTENANCE NOTE Clean the door seal Clean the door seal once a month to prevent • Never load laundry while using TUB build-up of dirt in the door seal. CLEAN. The laundry may damage or become contaminated. Make sure to Wear rubber gloves and protective goggles. -
Page 80: Error Mode
ERROR MODE ERROR MODE Meaning of Error Codes that LED displays during occurrence of problem. Problem Possible Cause Solution • Water supply is not adequate in area. Check another tap in the house. • Water supply taps are not completely Fully open tap. -
Page 81: Power Fail Recovery
POWER FAIL RECOVERY & DEFAULT WASHER SETTINGS POWER FAIL RECOvERY In case of power failure, the machine stops running but the time display remains on, showing the time just before power failure. DEFAULT WAShER SETTINGS Default Settings Default Wash Time 10 Minutes Rinse Time 19 Minutes... -
Page 82: Specifications
SPECIFICATIONS SPECIFICATIONS Model FH069FD2F Name Front-loading Washing Machine Power supply 220 – 240 V ~, 50 Hz 686 mm (W) X 767 mm (D) X 983 mm (H), 1337 mm (D with door open) Size 27”(W) X 30 ”(D) X 38 ”(H),... -
Page 83: Lg Commercial Laundry Limited Warranty
13. Replacement of light bulbs, filters or any consumable parts. 14. Any accessories and software not approved or specified by LG including, but not limited to, coin drop meter, coin slide mechanism, coin vault and locks, debit card modules and cards, debit card system accessories. - Page 84 MEMO...
- Page 85 Petunjuk ini akan mempermudah pemasangan dan memastikan bahwa mesin cuci terpasang dengan benar dan aman. Simpan petunjuk ini di dekat mesin cuci setelah pemasangan sebagai referensi di kemudian hari. FH069FD2F www.lg.com Hak cipta © 2019 LG Elektronik. Semua hak cipta di lindungi...
- Page 86 - 10. Cara mengubah tipe add super wash PENGATURAN STANDAR MESIN CUCI - 11. Cara memasukkan - 11-1. Penyiapan hari harga spesial SPESIFIKASI - 11-2. Penyiapan bilas tanpa henti - 11-3. Penyiapan Add Super Wash LG COMMERCIAL LAUNDRY LIMITED WARRANTY...
- Page 87 FITUR PRODUK FITUR PRODUK SISTEM PENGGERAK LANGSUNG (Direct Drive Motor) Motor DC tanpa borstel yang canggih menggerakkan drum secara langsung tanpa menggunakan sabuk dan puli. DRUM MIRING DAN BUKAAN PINTU EKSTRA BESAR DRUM MIRING DAN BUKAAN PINTU EKSTRA BESAR KAPASITAS ULTRA Drum yang lebih besar bukan hanya memungkinkan lebih banyak gerak gulingan dan gaya sentrifugal yang lebih besar, tetapi juga meminimalkan kusut dan keriput pada cucian.
- Page 88 PETUNJUK KESELAMATAN PENTING PETUNJUK KESELAMATAN PENTING BACA SEMUA PETUNJUK SEBELUM PENGGUNAAN PERINGATAN Demi keselamatan Anda, informasi dalam buku panduan ini harus diikuti untuk meminimalkan risiko kebakaran atau ledakan, sengatan listrik, atau agar tidak terjadi kerusakan properti, cedera pada orang, atau kematian. Keselamatan Anda dan keselamatan orang lain sangat penting.
- Page 89 PETUNJUK KESELAMATAN PENTING PETUNJUK KESELAMATAN PENTING BACA SEMUA PETUNJUK SEBELUM PENGGUNAAN PERINGATAN Demi keselamatan Anda, informasi dalam buku panduan ini harus diikuti untuk meminimalkan risiko kebakaran atau ledakan, sengatan listrik, atau agar tidak terjadi kerusakan properti, cedera pada orang, atau kematian. Petunjuk harus menyatakan substansi berikut ini: Alat ini tidak ditujukan untuk digunakan oleh orang (termasuk anak-anak) yang memiliki kekurangan...
- Page 90 PETUNJUK KESELAMATAN PENTING PETUNJUK KESELAMATAN PENTING BACA SEMUA PETUNJUK SEBELUM PENGGUNAAN PERINGATAN Demi keselamatan Anda, informasi dalam buku panduan ini harus diikuti untuk meminimalkan risiko kebakaran atau ledakan, sengatan listrik, atau agar tidak terjadi kerusakan properti, cedera pada orang, atau kematian. TINDAKAN PENCEGAHAN TERKAIT KESELAMATAN DASAR PERINGATAN Untuk mengurangi risiko kebakaran, sengatan listrik, atau cedera pada orang saat menggunakan mesin ini,...
- Page 91 PETUNJUK KESELAMATAN PENTING PETUNJUK KESELAMATAN PENTING BACA SEMUA PETUNJUK SEBELUM PENGGUNAAN PERINGATAN Demi keselamatan Anda, informasi dalam buku panduan ini harus diikuti untuk meminimalkan risiko kebakaran atau ledakan, sengatan listrik, atau agar tidak terjadi kerusakan properti, cedera pada orang, atau kematian. PETUNJUK KESELAMATAN UNTUK PEMASANGAN PERINGATAN Untuk mengurangi risiko kebakaran, sengatan listrik, atau cedera pada orang saat menggunakan mesin ini,...
- Page 92 PETUNJUK KESELAMATAN PENTING PETUNJUK KESELAMATAN PENTING BACA SEMUA PETUNJUK SEBELUM PENGGUNAAN PERINGATAN Demi keselamatan Anda, informasi dalam buku panduan ini harus diikuti untuk meminimalkan risiko kebakaran atau ledakan, sengatan listrik, atau agar tidak terjadi kerusakan properti, cedera pada orang, atau kematian. PETUNJUK KESELAMATAN UNTUK PENGGUNAAN, PERAWATAN, PEMBERSIHAN, DAN PEMBUANGAN PERINGATAN...
- Page 93 PETUNJUK KESELAMATAN PENTING PETUNJUK KESELAMATAN PENTING BACA SEMUA PETUNJUK SEBELUM PENGGUNAAN PERINGATAN Demi keselamatan Anda, informasi dalam buku panduan ini harus diikuti untuk meminimalkan risiko kebakaran atau ledakan, sengatan listrik, atau agar tidak terjadi kerusakan properti, cedera pada orang, atau kematian. PETUNJUK KESELAMATAN UNTUK PENGGUNAAN, PERAWATAN, PEMBERSIHAN, DAN PEMBUANGAN PERINGATAN...
- Page 94 BAGIAN DAN AKSESORI BAGIAN DAN AKSESORI Bagian Dispenser Laci dispenser detergen detergen (Untuk (Untuk model susun) model Saluran tunggal) masuk air Panel kontrol Magnet Pintu Baut Kabel daya Sil pintu Plunyer Pintu pengiriman (Lihat halaman 2) Tabung Selang pembuangan Kaki perata Penutup filter pompa pembuangan Filter pompa pembuangan Selang pembuangan...
- Page 95 FITUR PANEL KONTROL FITUR PANEL KONTROL Tipe OPL (FH069FD2F) 1. Tampilan LED 4. Tombol Start/Pause 2. Tombol Siklus 5. LED Status 3. Tombol fungsi opsional...
- Page 96 FITUR PANEL KONTROL LED Status LED Tampilan Tombol siklus Tombol Start/Pause Tombol fungsi opsional LED Tampilan Tombol fungsi opsional Add Super Wash: Waktu pencucian atau siklus Layar menunjukkan harga vending dan opsi sisa waktu serta pemrograman. Kode kesalahan bilas dapat ditambahkan bila koin tambahan dimasukkan atau kartu tunai yang valid juga ditampilkan di sini.
- Page 97 PETUNJUK PEMASANGAN PETUNJUK PEMASANGAN Memeriksa dan memilih lokasi Memasang di atas lantai yang tepat ” Pasang mesin cuci di atas lantai kokoh yang (570mm) cukup kuat dan kaku untuk menopang berat mesin cuci, meskipun saat terisi penuh, tanpa meregang atau memantul. Jika lantai terlalu fleksibel, Anda mungkin perlu memperkuatnya agar lebih kaku.
- Page 98 PETUNJUK PEMASANGAN Mengeluarkan dari kemasan dan melepas baut pengiriman CATATAN Saat melepas mesin cuci dari alas karton, pastikan untuk melepas penopang busa • Simpan rakitan baut untuk penggunaan di drum di tengah-tengah alas karton. Jika Anda kemudian hari. Agar tidak terjadi kerusakan harus meletakkan mesin cuci agar dapat komponen internal, JANGAN mengangkut melepas bahan kemasan alas, selalu letakkan...
- Page 99 Jangan menggunakan kembali Kerusakan pada penggandeng dapat terjadi. selang lama. Gunakan hanya selang saluran masuk yang disertakan bersama mesin cuci. LG tidak menganjurkan penggunaan selang yang dijual di pasaran. Setelah menyambungkan selang saluran • Periksa selang secara berkala apakah ada...
- Page 100 PETUNJUK PEMASANGAN Menyambungkan saluran Menggunakan tabung cucian pembuangan Jepit ujung selang ke braket siku. Kencangkan posisi selang pembuangan di - Sambungkan braket siku dalam jarak 4 inci tempatnya agar tidak bergerak dan bocor. (10 cm) dari ujung selang pembuangan.Jika selang pembuangan diperpanjang lebih dari CATATAN 4 inci (10 cm) melebihi ujung siku, jamur atau mikroorganisme bisa menyebar ke...
- Page 101 PETUNJUK PEMASANGAN Meratakan posisi mesin cuci Periksa lagi kerataan posisi mesin cuci. - Dorong atau goyangkan tepi atas mesin cuci dengan lembut untuk memastikan Tabung pencuci pada mesin cuci baru Anda akan bahwa mesin cuci tidak goyang. berputar dengan kecepatan sangat tinggi. Untuk - Jika mesin cuci goyang, ulangi langkah 1 meminimalkan getaran, kebisingan, dan gerakan yang sampai 3.
- Page 102 PERSIAPAN PERSIAPAN Tindakan pencegahan untuk perawatan kain sebelum siklus pencucian Baca dan patuhi hal berikut agar pakaian tidak menyusut atau rusak. u Periksa semua saku untuk memastikan tidak u Benda asing di pintu sil mungkin menodai ada isinya. pakaian, dan air bisa bocor jika pakaian - Barang seperti klip, korek, pena, koin, tertangkap di pintu sil.
- Page 103 PERSIAPAN Label perawatan kain Menyortir binatu Sebagian besar pakaian dilengkapi label Dianjurkan agar Anda menyortir cucian menjadi perawatan kain yang mencakup petunjuk jenis cucian serupa yang dapat dicuci pada perawatan yang tepat. siklus yang sama. Lihat bagan berikut untuk menyortir pakaian Kategori Label Petunjuk...
- Page 104 PERSIAPAN Detergen yang dianjurkan Tentang dispenser Gunakan detergen HE (High-Efficiency) untuk Dispenser otomatis terdiri atas tiga mesin cuci pengisian-depan. Detergen larut kompartemen yang menampung: secara lebih efisien dan menghasilkan lebih • Pemutih klorin cair sedikit busa untuk memastikan pencucian • Pelembut kain cair dan pembilasan yang efisien.
- Page 105 PERSIAPAN Memuat dispenser Kompartemen Detergen Pencucian Utama Kompartemen Pemutih cair Kompartemen ini menampung detergen Kompartemen ini menampung pemutih klorin binatu untuk siklus pencucian utama, yang cair, yang akan disalurkan secara otomatis pada ditambahkan ke cucian pada awal siklus. waktu yang tepat selama siklus pencucian. Gunakan detergen HE (High-Efficiency) untuk CATATAN mesin cuci Anda.
- Page 106 MENGOPERASIKAN MESIN CUCI ANDA MENGOPERASIKAN MESIN CUCI ANDA 1. Mode Siap 3. Pilih siklusnya 1) Tipe koin / kartu Tekan tombol yang diinginkan dan tekan tombol Start. Tampilan LED akan menunjukkan waktu – LED siklus menyala secara bersamaan, yang tersisa dan siklus yang dipilih akan dimulai. bila harga siklusnya sama.
- Page 107 MODE PEMROGRAMAN MODE PEMROGRAMAN : Anda dapat memeriksa informasi mesin atau mengubah pengaturan pada penyiapan Program, mengumpulkan data informasi, Uji diagnostik. Ada dua metode untuk masuk ke mode pemrograman. Cara masuk ke mode Pemrograman bagaimana cara menggunakan tombol Anda dapat masuk ke mode pemrograman Anda dapat mengubah harga penawaran, waktu siklus dan parameter Siklus, dll.
- Page 108 MODE PEMROGRAMAN Struktur mode Pemrograman – Tipe Kartu/Koin Diagram alir algoritme menunjukkan bagaimana cara mengontrol mode pemrograman. Sebelum program diatur, periksa struktur mode pemrograman. 1. Alihkan sakelar ke nyala/mati atau masukkan kartu layanan, untuk masuk ke mode penyiapan (atau ikuti petunjuk tipe OPL). 2.
- Page 109 MODE PEMROGRAMAN Struktur mode Pemrograman - tipe OPL Diagram alir algoritme menunjukkan bagaimana cara mengontrol mode pemrograman. Sebelum program diatur, periksa struktur mode pemrograman. Cara masuk ke mode penyiapan. 1) Tekan tombol Hot & Cold secara bersamaan. 2) Tekan tombol Warm 3 kali. 3) Tekan tombol Start.
- Page 110 MODE PEMROGRAMAN –MODE PENYIAPAN MODE PEMROGRAMAN –MODE PENYIAPAN Mode Penyiapan : (ditampilkan) Anda dapat mengubah harga vending mesin cuci, waktu siklus, dan parameter siklus, dsb. Masuk ke mode penyiapan - Tipe koin - Alihkan sakelar ke nyala/mati. - Tipe kartu – Masukkan kartu layanan. - Semua Tipe –...
- Page 111 MODE PEMROGRAMAN –MODE PENYIAPAN 2. Cara mengubah harga delicates reguler. Tombol Tampilan Masuk ke mode penyiapan. Tekan tombol Hot. Anda akan melihat LqC1 Tekan tombol Warm atau Cold sampai muncul di layar. Tekan tombol Start. Tekan tombol Warm atau Cold sampai muncul di layar.
- Page 112 MODE PEMROGRAMAN –MODE PENYIAPAN 3. Cara mengubah harga warm & cold reguler Tombol Tampilan Masuk ke mode penyiapan. Tekan tombol Hot. Anda akan melihat LqC1 Tekan tombol Warm atau Cold sampai muncul di layar. Tekan tombol Start. Tekan tombol Warm atau Cold sampai muncul di layar.
- Page 113 MODE PEMROGRAMAN –MODE PENYIAPAN 4. Cara mengubah harga hot reguler Tombol Tampilan Masuk ke mode penyiapan. Tekan tombol Hot. Anda akan melihat LqC1 Tekan tombol Warm atau Cold sampai muncul di layar. Tekan tombol Start. Tekan tombol Warm atau Cold sampai muncul di layar.
- Page 114 MODE PEMROGRAMAN –MODE PENYIAPAN 5. Cara mengubah harga delicates spesial Tombol Tampilan Masuk ke mode penyiapan. Tekan tombol Hot. Anda akan melihat LqC1 Tekan tombol Warm atau Cold sampai muncul di layar. Tekan tombol Start. Tekan tombol Warm atau Cold sampai muncul di layar.
- Page 115 MODE PEMROGRAMAN –MODE PENYIAPAN 6. Cara mengubah harga delicates spesial Tombol Tampilan Masuk ke mode penyiapan. Tekan tombol Hot. Anda akan melihat LqC1 Tekan tombol Warm atau Cold sampai muncul di layar. Tekan tombol Start. Tekan tombol Warm atau Cold sampai muncul di layar.
- Page 116 MODE PEMROGRAMAN –MODE PENYIAPAN 7. Cara mengubah harga warm & cold spesial Tombol Tampilan Masuk ke mode penyiapan. Tekan tombol Hot. Anda akan melihat LqC1 Tekan tombol Warm atau Cold sampai muncul di layar. Tekan tombol Start. Tekan tombol Warm atau Cold sampai muncul di layar.
- Page 117 MODE PEMROGRAMAN –MODE PENYIAPAN 8. Cara mengubah harga hot spesial Tombol Tampilan Masuk ke mode penyiapan. Tekan tombol Hot. Anda akan melihat LqC1 Tekan tombol Warm atau Cold sampai muncul di layar. Tekan tombol Start. Tekan tombol Warm atau Cold sampai muncul di layar.
- Page 118 MODE PEMROGRAMAN –MODE PENYIAPAN 9. Cara mengubah harga add super wash Tombol Tampilan Masuk ke mode penyiapan. Tekan tombol Hot. Anda akan melihat LqC1 Tekan tombol Warm atau Cold sampai muncul di layar. Tekan tombol Start. Tekan tombol Warm atau Cold sampai muncul di layar.
- Page 119 MODE PEMROGRAMAN –MODE PENYIAPAN 10. Cara mengubah tipe add super wash Super wash dapat digunakan untuk menambah waktu pencucian ekstra, siklus pembilasan, atau keduanya. Tombol Tampilan Masuk ke mode penyiapan. Tekan tombol Hot. Anda akan melihat LqC1 Tekan tombol Warm atau Cold sampai muncul di layar.
- Page 120 MODE PEMROGRAMAN –MODE PENYIAPAN 11. Cara memasukkan dapat digunakan untuk mengaktifkan/menonaktifkan berbagai fitur mesin. Tombol Tampilan Masuk ke mode penyiapan. Tekan tombol Hot. Anda akan melihat LqC1 Tekan tombol Warm atau Cold sampai muncul di layar. Tekan tombol Start. Tekan tombol Warm atau Cold sampai muncul di layar.
- Page 121 MODE PEMROGRAMAN –MODE PENYIAPAN 11-1. Penyiapan hari harga spesial Hari harga spesial dapat digunakan untuk mengatur harga spesial (diskon) pada hari tertentu. Tombol Tampilan Masuk ke mode penyiapan. Tekan tombol Hot. Anda akan melihat LqC1 Tekan tombol Warm atau Cold sampai muncul di layar.
- Page 122 MODE PEMROGRAMAN –MODE PENYIAPAN 11-2. Penyiapan pembilasan tanpa henti Penyiapan pembilasan tanpa henti dapat digunakan untuk mengaktifkan/menonaktifkan pembilasan dan putaran secara simultan. Tombol Tampilan Masuk ke mode penyiapan. Tekan tombol Hot. Anda akan melihat LqC1 Tekan tombol Warm atau Cold sampai muncul di layar.
- Page 123 MODE PEMROGRAMAN –MODE PENYIAPAN 11-3. Penyiapan Add Super Wash Penyiapan Add Super Wash dapat digunakan untuk mengaktifkan/menonaktifkan fungsi super wash. Tombol Tampilan Masuk ke mode penyiapan. Tekan tombol Hot. Anda akan melihat LqC1 Tekan tombol Warm atau Cold sampai muncul di layar.
- Page 124 MODE PEMROGRAMAN –MODE PENYIAPAN 11-4. Penyiapan tipe vending - penyiapan tipe kartu atau tipe koin Penyiapan tipe vending dapat digunakan untuk memilih tipe pembayaran antara jenis koin dan jenis kartu. Tombol Tampilan Masuk ke mode penyiapan. Tekan tombol Hot. Anda akan melihat LqC1 Tekan tombol Warm atau Cold sampai muncul...
- Page 125 MODE PEMROGRAMAN –MODE PENYIAPAN 11-5. Penyiapan pra-cuci Penyiapan pra-cuci dapat digunakan untuk mengaktifkan/menonaktifkan siklus pencucian singkat sebelum pencucian utama. Tombol Tampilan Masuk ke mode penyiapan. Tekan tombol Hot. Anda akan melihat LqC1 Tekan tombol Warm atau Cold sampai muncul di layar. Tekan tombol Start Tekan tombol Warm atau Cold sampai muncul...
- Page 126 MODE PEMROGRAMAN –MODE PENYIAPAN 11-6. Penyiapan semprotan ganda Penyiapan semprotan ganda dapat digunakan untuk mengaktifkan/menonaktifkan sirkulasi air saat jatuh. Semprotan ganda akan memompa air di dasar tabung untuk disemprotkan pada cucian sambil diguling. Tombol Tampilan Masuk ke mode penyiapan. Tekan tombol Hot. Anda akan melihat LqC1 Tekan tombol Warm atau Cold sampai...
- Page 127 MODE PEMROGRAMAN –MODE PENYIAPAN 12. Cara memasukkan dapat digunakan untuk mengaktifkan/menonaktifkan fungsi jeda. Tombol Tampilan Masuk ke mode penyiapan. Tekan tombol Hot. Anda akan melihat LqC1 Tekan tombol Warm atau Cold sampai muncul di layar. Tekan tombol Start. Tekan tombol Warm atau Cold sampai muncul di layar.
- Page 128 MODE PEMROGRAMAN –MODE PENYIAPAN 12-1. Penyiapan fungsi jeda Penyiapan fungsi jeda dapat digunakan untuk mengaktifkan/menonaktifkan kemampuan guna menjeda siklus bila menekan tombol Start/Pause. Tombol Tampilan Masuk ke mode penyiapan. Tekan tombol Hot. Anda akan melihat LqC1 Tekan tombol Warm atau Cold sampai muncul di layar.
- Page 129 MODE PEMROGRAMAN –MODE PENYIAPAN 13. Cara memasukkan hari harga spesial dapat digunakan untuk memilih hari guna menerapkan harga spesial. Tombol Tampilan Masuk ke mode penyiapan. Tekan tombol Hot. Anda akan melihat LqC1 Tekan tombol Warm atau Cold sampai muncul di layar. Tekan tombol Start.
- Page 130 MODE PEMROGRAMAN –MODE PENYIAPAN 13-1. Cara mengubahnya menjadi hari Minggu Harga spesial dapat diaktifkan/dinonaktifkan untuk setiap hari dalam seminggu. Tombol Tampilan Masuk ke mode penyiapan. Tekan tombol Hot. Anda akan melihat LqC1 Tekan tombol Warm atau Cold sampai muncul di layar. Tekan tombol Start.
- Page 131 MODE PEMROGRAMAN –MODE PENYIAPAN 14. Penyiapan waktu awal harga spesial dapat digunakan untuk mengatur waktu awal rentang waktu per jam dengan harga spesial. Tombol Tampilan Masuk ke mode penyiapan. Tekan tombol Hot. Anda akan melihat LqC1 Tekan tombol Warm atau Cold sampai muncul di layar.
- Page 132 MODE PEMROGRAMAN –MODE PENYIAPAN 15. Penyiapan waktu akhir harga spesial dapat digunakan untuk mengatur waktu akhir rentang waktu per jam dengan harga spesial. Tombol Tampilan Masuk ke mode penyiapan. Tekan tombol Hot. Anda akan melihat LqC1 Tekan tombol Warm atau Cold sampai muncul di layar.
- Page 133 MODE PEMROGRAMAN –MODE PENYIAPAN 16. Penyiapan waktu pra-cuci Penyiapan waktu pra-cuci dapat digunakan untuk mengatur waktu pra-cuci. Tombol Tampilan Masuk ke mode penyiapan. Tekan tombol Hot. Anda akan melihat LqC1 Tekan tombol Warm atau Cold sampai muncul di layar. Tekan tombol Start. Tekan tombol Warm atau Cold sampai muncul di layar.
- Page 134 MODE PEMROGRAMAN –MODE PENYIAPAN 17. Penyiapan waktu pencucian Penyiapan waktu pencucian dapat digunakan untuk mengatur waktu pencucian utama. Tombol Tampilan Masuk ke mode penyiapan. Tekan tombol Hot. Anda akan melihat LqC1 Tekan tombol Warm atau Cold sampai muncul di layar. Tekan tombol Start.
- Page 135 MODE PEMROGRAMAN –MODE PENYIAPAN 18. Waktu pembilasan per siklus dapat digunakan untuk mengatur jumlah bilasan untuk setiap siklus. Tombol Tampilan Masuk ke mode penyiapan. Tekan tombol Hot. Anda akan melihat LqC1 Tekan tombol Warm atau Cold sampai muncul di layar. Tekan tombol Start.
- Page 136 MODE PEMROGRAMAN –MODE PENYIAPAN 19. Penyiapan waktu pembilasan Penyiapan waktu pembilasan dapat digunakan untuk mengatur waktu untuk setiap pembilasan. Tombol Tampilan Masuk ke mode penyiapan. Tekan tombol Hot. YAnda akan melihat LqC1 Tekan tombol Warm atau Cold sampai muncul di layar. Tekan tombol Start.
- Page 137 MODE PEMROGRAMAN –MODE PENYIAPAN 20. Kecepatan putaran puncak – waktu putaran akhir tergantung pada RPM Penyiapan kecepatan putaran puncak dapat digunakan untuk mengatur putaran maksimal RPM. Tombol Tampilan Masuk ke mode penyiapan. Press the Hot button. Anda akan melihat LqC1 Tekan tombol Warm atau Cold sampai muncul di layar.
- Page 138 MODE PEMROGRAMAN –MODE PENYIAPAN 21. Nilai koin 1 Nilai koin 1 dapat digunakan untuk mengatur nilai pertambahan koin. Tombol Tampilan Masuk ke mode penyiapan. Tekan tombol Hot. Anda akan melihat LqC1 Tekan tombol Warm atau Cold sampai muncul di layar. Tekan tombol Start.
- Page 139 MODE PEMROGRAMAN –MODE PENYIAPAN 22. Nilai koin 2 Nilai koin 2 dapat digunakan untuk menetapkan nilai pertambahan koin untuk sistem kios. Tombol Tampilan Masuk ke mode penyiapan. Tekan tombol Hot. Anda akan melihat LqC1 Tekan tombol Warm atau Cold sampai muncul di layar.
- Page 140 MODE PEMROGRAMAN –MODE PENYIAPAN 23. Selisih harga pertambahan uang receh Ini menunjukkan selisih harga pertambahan uang receh yang digunakan bila kartu debit disiapkan. Tombol Tampilan Masuk ke mode penyiapan. Tekan tombol Hot. Anda akan melihat LqC1 Tekan tombol Warm atau Cold sampai muncul di layar.
- Page 141 MODE PEMROGRAMAN –MODE PENYIAPAN 24. Cara mengubah ketinggian air Anda dapat mengubah ketinggian air di antara tiga pilihan. Menunjukkan ketinggian air 23.8 [KHz] Menunjukkan ketinggian air 23.5 [KHz] Menunjukkan ketinggian air 23.0 [KHz] Tombol Tampilan Masuk ke mode penyiapan. Tekan tombol Hot. Anda akan melihat LqC1 Tekan tombol Warm atau Cold sampai...
- Page 142 MODE PEMROGRAMAN –MODE PENYIAPAN 25. Volume bunyi alarm Tombol Tampilan Masuk ke mode penyiapan. Tekan tombol Hot. Anda akan melihat LqC1 Tekan tombol Warm atau Cold sampai muncul di layar. Tekan tombol Start. Tekan tombol Warm atau Cold sampai muncul di layar.
- Page 143 MODE PEMROGRAMAN –MODE PENYIAPAN 26. Waktu untuk menyimpan koin (Digunakan hanya untuk tipe koin) dapat digunakan untuk mengatur durasi penyimpanan koin yang telah dimasukkan. Tombol Tampilan Masuk ke mode penyiapan. Tekan tombol Hot. Anda akan melihat LqC1 Tekan tombol Warm atau Cold sampai muncul di layar.
- Page 144 MODE PEMROGRAMAN –MODE PENYIAPAN 27. Cara mengatur hitungan penurunan dapat digunakan untuk mengatur jumlah hitungan penurunan. Penurunan terjadi saat mesin memeriksa keseimbangan beban karena siklus memasuki RPM yang lebih tinggi. Tombol Tampilan Masuk ke mode penyiapan. Tekan tombol Hot. Anda akan melihat LqC1 Tekan tombol Warm atau Cold sampai muncul di...
- Page 145 MODE PEMROGRAMAN –MODE PENYIAPAN 28. Cara mengatur waktu pemadaman setelah UE Unbalance Error (UE) terjadi saat mesin cuci tidak dapat menyeimbangkan beban dalam hitungan penurunan yang dipilih. dapat digunakan untuk mengatur waktu guna mempertahankan status UE sebelum menghentikan siklus. Tombol Tampilan Masuk ke mode penyiapan.
- Page 146 MODE PEMROGRAMAN –MODE PENYIAPAN 29. Cara mengatur pengaktifan putaran pembilasan dapat digunakan untuk mengaktifkan/menonaktifkan putaran sebelum setiap siklus pembilasan. Tombol Tampilan Masuk ke mode penyiapan. Tekan tombol Hot. Anda akan melihat LqC1 Tekan tombol Warm atau Cold sampai muncul di layar. Tekan tombol Start.
- Page 147 MODE PEMROGRAMAN –MODE PENYIAPAN 30 . Cara mengatur hitungan penurunan untuk putaran pembilasan dapat digunakan untuk mengatur jumlah hitungan penurunan untuk setiap putaran pembilasan. Tombol Tampilan Masuk ke mode penyiapan. Tekan tombol Hot. Anda akan melihat LqC1 Tekan tombol Warm atau Cold sampai muncul di layar.
- Page 148 MODE PEMROGRAMAN –MODE PENYIAPAN 31. Cara mengatur takaran otomatis dapat digunakan untuk mengatur durasi takaran otomatis untuk setiap saluran. Tombol Tampilan Masuk ke mode penyiapan. Tekan tombol Hot. Anda akan melihat LqC1 Tekan tombol Warm atau Cold sampai muncul di layar. Tekan tombol Start.
- Page 149 MODE PEMROGRAMAN –MODE PENYIAPAN 32. Cara memasukkan Tombol Tampilan Masuk ke mode penyiapan. Tekan tombol Hot. Anda akan melihat LqC1 Tekan tombol Warm atau Cold sampai muncul di layar. Tekan tombol Start. Tekan tombol Warm atau Cold sampai muncul di layar. Struktur dari Isi dari •...
- Page 150 MODE PEMROGRAMAN –MODE PENYIAPAN 33. Cara mengatur program kustom Tombol Tampilan Masuk ke mode penyiapan. Tekan tombol Hot. Anda akan melihat LqC1 Tekan tombol Warm atau Cold sampai muncul di layar. Tekan tombol Start. Tekan tombol Warm atau Cold sampai muncul di layar.
- Page 151 MODE PEMROGRAMAN - MODE UJI MODE PEMROGRAMAN - MODE UJI Uji diagnostik: (ditampilkan) Program ini telah ditambahkan untuk menguji mesin cuci dan mendeteksi kesalahan. Masuk ke mode uji Nama Data Tombol Tampilan Deskripsi Masukkan kartu layanan (tipe kartu) Masuk ke 1.
- Page 152 MODE PEMROGRAMAN - MODE UJI 2. Pengembalian ke pengaturan pabrik - Setelah pengembalian ke pengaturan pabrik, informasi mesin diubah ke nilai standar. Tombol Tampilan Masuk ke mode penyiapan. Tekan tombol Warm atau Cold sampai muncul Anda akan melihat di layar. LqC1 Tekan tombol Start.
- Page 153 MODE PEMROGRAMAN - MODE UJI 3. Penyiapan waktu Tombol Tampilan Masuk ke mode Tekan tombol Warm atau Cold sampai muncul penyiapan. di layar. Anda akan melihat LqC1 Tekan tombol Start. Layar akan memunculkan 2000 --> 0101 --> Sat --> 0000 secara bergantian berulang kali. Tekan tombol Start.
- Page 154 MODE PEMROGRAMAN - MODE UJI 4. Siklus gratis Siklus gratis seperti siklus ekstra yang diberikan kepada pelanggan ketika mesin cuci rusak sedangkan pelanggan telah melakukan pembayaran untuk mencuci pakaian. Tombol Tampilan Masuk ke mode penyiapan. Tekan tombol Warm atau Cold sampai muncul Anda akan melihat di layar.
- Page 155 MODE PEMROGRAMAN - MODE UJI 5. Penghentian Siklus Tipe koin / OPL Tombol Tampilan Masuk ke mode penyiapan. Tekan tombol Warm atau Cold sampai muncul Anda akan melihat di layar. in the display. LqC1 Tekan tombol Start. Tekan tombol Warm sampai muncul di layar.
- Page 156 MODE PEMROGRAMAN - MODE UJI 6. Kata sandi - Cara mengubah kata sandi. Tombol Tampilan Masuk ke mode penyiapan. Tekan tombol Warm atau Cold sampai muncul di Anda akan melihat layar. LqC1 Tekan tombol Start. Tekan tombol Warm sampai muncul di layar. Siapkan nomor yang Anda inginkan dengan menekan tombol Warm(+) atau Cold(-).
- Page 157 MODE PEMROGRAMAN - MODE UJI 7. PEMBERSIHAN TABUNG - Untuk membersihkan tabung, operasikan siklus PEMBERSIHAN TABUNG. Tombol Tampilan Masuk ke Tekan dan tahan tombol Warm selama minimal 3 detik. Pembersihan Tampilan menunjukkan jumlah standar operasi siklus Tabung dalam Pembersihan Tabung per operasi. mode siap/diam.
- Page 158 PROGRAMMING MODE - COLLECT MODE MODE PEMROGRAMAN - MODE PENGUMPULAN Pengumpulan data informasi: (ditampilkan) Mesin cuci akan mengumpulkan data pemakaian sehingga pemiliknya dapat memeriksa berbagai informasi seperti jumlah berbagai siklus yang digunakan, berapa kali kartu atau koin digunakan, dsb. Masuk ke mode pengumpulan Nama Data Tombol Tampilan...
- Page 159 PROGRAMMING MODE - COLLECT MODE Daftar Data Mode Pengumpulan No. Singkatan Arti Deskripsi rgPr Harga Reguler 0.00 ~ 10.00 rgCP Harga Delicates Reguler 0.00 ~ 10.00 rgrP Harga Warm & Cold Reguler 0.00 ~ 10.00 rgHP Harga Hot Reguler 0.00 ~ 10.00 dELC Sensor Kelembapan Pengering 0: Nonaktifkan...
- Page 160 PEMELIHARAAN PEMELIHARAAN Perawatan setelah pencucian Setelah siklus selesai, lap pintu dan bagian Membersihkan Dispenser dalam sil pintu untuk menghilangkan air. Biarkan 1. Dispenser harus dibersihkan secara berkala pintu terbuka untuk mengeringkan bagian untuk menghilangkan kerak detergen dan dalam tabung mesin cuci. Seka bodi mesin cuci produk binatu lainnya.
- Page 161 PEMELIHARAAN Peringatan Membersihkan filter saluran masuk air • Cabut kabel daya dan tutup keran sebelum dibersihkan. Kelalaian dalam Bersihkan filter saluran masuk air secara berkala untuk mencegah terjadinya penyumbatan. untuk melakukannya dapat menyebabkan sengatan listrik. Berhati-hatilah saat membersihkan filter saluran masuk air untuk area yang menggunakan air •...
- Page 162 PEMELIHARAAN Membersihkan filter pompa pembuangan Mesin cuci gagal menguras jika filter pompa pembuangan tersumbat. Bersihkan filter pembuangan secara berkala agar tidak tersumbat oleh benda asing. Pasang kembali sumbat ke selang Cabut steker untuk mematikan mesin cuci. pembuangan dan pasang lagi selang pembuangan.
- Page 163 PEMELIHARAAN CATATAN Bersihkan sil pintu Bersihkan sil pintu sebulan sekali untuk • Jangan sekali-kali memasukkan cucian mencegah penumpukan kotoran pada sil pintu. saat menggunakan PEMBERSIHAN TABUNG. Cucian bisa rusak atau Kenakan sarung tangan karet dan kacamata terkontaminasi. Pastikan untuk pelindung. membersihkan tabung mesin bila sudah Encerkan 3/4 cangkir (177 ml) pemutih klorin kosong.
- Page 164 MODE KESALAHAN MODE KESALAHAN Arti Kode Kesalahan yang ditampilkan LED saat terjadi masalah. Masalah Kemungkinan Penyebab Solusi • Suplai air tidak cukup di area tersebut. Periksa keran lain dalam rumahan. • Keran tidak dibuka sepenuhnya. Buka keran sepenuhnya. • Selang saluran masuk air bengkok. Luruskan selang.
- Page 165 PEMULIHAN KEGAGALAN DAYA PEMULIHAN KEGAGALAN DAYA Jika terjadi kegagalan daya, mesin berhenti beroperasi tetapi tampilan waktu tetap menyala, menunjukkan waktu sesaat sebelum terjadi kegagalan daya. PENGATURAN STANDAR MESIN CUCI Pengaturan Standar Standar Waktu pencucian 10 menit Waktu Bilas 19 menit Waktu Putaran 9 Menit Waktu Pembilasan...
- Page 166 SPESIFIKASI SPESIFIKASI MODEL FH069FD2F Nama Mesin cuci pengisian-depan Catu daya 220 – 240 V ~, 50 Hz 686 mm (P) X 767 mm (L) X 983 mm (T), 1337 mm (L dengan pintu terbuka) Ukuran 27”(P) X 30 3/16”(L) X 38 11/16”(T), ”(L dengan pintu terbuka)
- Page 167 13. Penggantian bola lampu, filter, atau komponen habis-pakai. 14. Aksesori dan perangkat lunak apa pun yang tidak disetujui atau ditentukan oleh LG termasuk, tetapi tidak terbatas pada, penghitung jatuhan koin, mekanisme geser koin, brankas dan kunci koin, modul kartu debit dan kartu, aksesori sistem kartu debit.
- Page 168 PT. LG Electronics Indonesia Gandaria 8 Office Tower Lt. 29 BC & 31 ABCD Jl. Sultan Iskandar Muda, Kebayoran Lama Utara - Kebayoran Lama, Jakarta Selatan - DKI Jakarta Raya, Indonesia TANDA PENDAFTARAN PETUNJUK PENGGUNAAN MANUAL DAN KARTU JAMINAN/GARANSI DALAM BAHASA INDONESIA BAGI PRODUK ELEKTRONIK...
Need help?
Do you have a question about the FH069FD2F and is the answer not in the manual?
Questions and answers