Table of Contents
Advertisement
Quick Links
Advertisement
Table of Contents

Summary of Contents for StarDot Express Video Server
- Page 1 Express Video Servers User’s Manual w w w.stardot.com...
-
Page 3: Table Of Contents
Table of Contents Chapter 1 Configuration................5 Before You Start ...............5 What’s Included and What’s Required ........5 Parts of the Express 2 Video Server ........6 Parts of the Express 4 Video Server ........7 Parts of the Express 8 Video Server ........7 Connecting to a Network ............8 An Overview of Network Connectivity ........8 Chapter 2 Installation ................11... - Page 4 Page 4 Express Video Servers...
-
Page 5: Chapter 1 Configuration
Before You Start This manual guides you through the basic setup procedure for the Express video server and provides a detailed resource for the server’s advanced options and capabilities. Setting up the video server consists of three steps. The first step is to configure the network settings. -
Page 6: Parts Of The Express 2 Video Server
Parts of the Express 2 Video Server SW1: Switch In: S-Video, BNC2 Video Loop Output Switch Out: BNC2 Video Input SW2: Video Termination, On = Terminate Signal (default) Looping Output or BNC Video Input 2 S-Video Input BNC Video Input 1 Video Activity LEDs VIDEO 2 VIDEO 1... -
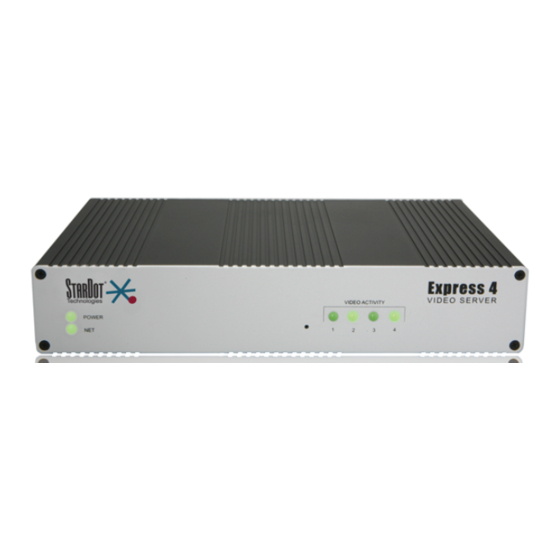
Page 7: Parts Of The Express 4 Video Server
Parts of the Express 4 Video Server Power (DC Power Jack) 4 Video Inputs with Serial Port 0, used for Looping Output 12VDC, 1A Auxiliary Device Control VIDEO INPUTS RELAY TRIGGER RS485 12VDC VIDEO OUTPUTS B GND NETWORK Ethernet Port TRIGGER I/O Serial Port 1, 3 x Input... -
Page 8: Connecting To A Network
The StarDot Tools software is the easiest way to configure the Express server. If your network automatically assigns IP addresses, you will see the server's IP address listed in StarDot Tools. Simply double- click the IP address to browse to the Express server. - Page 9 IP address it was assigned. Use the StarDot Tools software to find the IP addresses of all StarDot servers on your local network. Automatic IP Assignment (Zeroconf) If your network does not have a router that automatically assigns IP addresses (DHCP), the Express server will auto-assign its own IP address.
- Page 10 If you don’t have a serial port or using the Windows OS, there are a few options. If the video server is connected to a network with a DHCP server and your computer is not running Windows, you can log into your router (or whatever is acting as your DHCP server) and view the DHCP clients table.
-
Page 11: Chapter 2 Installation
It is possible to turn the Express server into a WiFi device on a wireless network using external hardware (wireless Ethernet bridge, wireless Ethernet Access Point configured as a client, etc.). StarDot does not provide wireless Ethernet equipment. Analog or Wireless Modem Connection... -
Page 12: Chapter 3 Accessing Express
Viewing the Video Any Javascript or Java-enabled browser can be used to view the live video. Type the Express IP address in your browser’s address bar (example: http://192.168.1.5) or use StarDot Tools to find the camera’s IP address. Accessing the Configuration Menus Virtually any web browser can be used to access the Express server's configuration menus. - Page 13 PROCESSING Resolution Resolution is the dimensional size of the image, measured in pixels. The higher the resolution, the larger the picture appears in your browser, and the longer it takes to download. Brightness This value determines the brightness of the image. Most video cameras have automatic exposure compensation so you'll rarely need to adjust the brightness.
- Page 14 Size You can limit the JPEG frame size as a means of throttling bandwidth. The value is in kilobytes (KB). 0 means no maximum. Frame Skip To lower the frame rate (and bandwidth), increase this value. A value of 0 means full frame rate, a value of 1 means skip every other frame, a value of 2 means skip every two frames Default: 0 The video input activity LEDs can be configured in a number of...
-
Page 15: Overlay Properties
Overlay Properties The Overlay Properties allow you to edit the text displayed on the video frames. TIME/DATE/TEXT STAMP Text Any text entered into this field will be stamped onto the live image. Camera location and copyright information are two examples. In addition to static text, the current date and time, as well as internal camera parameters, can all become part of the text on the live image. - Page 16 Markup Character Reference All of the following markup characters can be used in the text overlay. Additionally, any date/time markups (preceded by the % character) can be used to compose the filenames in the FTP Properties Page, which is very useful for archiving images with unique filenames (based on the current date and time, for instance).
- Page 17 Symbol Markups \260 Degree Sign, º \251 Copyright Sign, © \256 Registered Sign, ® \261 Plus-Minus Sign, ± Percentage Character, % Camera Markups ${IF} Internal Server Temperature, in Fahrenheit ${IC} Internal Server Temperature, in Celsius ${F} Weather Station Temperature, in Fahrenheit ${C} Weather Station Temperature, in Celsius ${HUM}...
-
Page 18: Ftp Properties
FTP Properties The FTP Properties instruct the Express to upload images to a remote server. After making changes, click the Apply button to save the settings in the video server. FTP Upload FTP stands for File Transfer Protocol, one of the most popular methods for transferring files over the Internet. - Page 19 Username This is the username or login name assigned to you by your hosting company. Password This is the password assigned to you by your hosting company. Path/File This field combines two elements, the image filename, preceded by an optional path or directory. Ask your web host if you need to use a directory path for the image filename.
- Page 20 IIS 4.0 Some FTP servers lock a file when a file with the same filename is constantly uploaded and renamed. If you have problems seeing your image update on your web site, try enabling the IIS 4.0 option. This option is only valid if Delete Before Rename (above) is also enabled.
- Page 21 Schedule Scheduling tells the Express when and how often to FTP images to your server. Delay This tells the Express to delay a specified number of seconds between FTP image uploads. The speed at which the Express can upload varies on the image resolution, amount of JPEG compression, Internet connection and network congestion.
-
Page 22: Date/Time Properties
Date/Time Properties The Date/Time Properties allow you to set the date and time in the Express server. After making changes, click the Apply button to save the settings in the video server. Setting the Date and Time Automatic vs. Manual - For the most accurate date & time, having the camera automatically synchronize with a network time server is recommended. - Page 23 Manual Time Set If you don’t have access to a time server, you can manually set the video server’s clock. You can do this in one of two ways. Using the Sync button, you can synchronize the Express server's clock to your PC’s clock. You may also manually modify the time and date in the Date/Time box.
-
Page 24: Network Properties
No manual configuration is needed. One negative of DHCP mode is not knowing what IP address the Express server was given. Use the StarDot Tools software to find DHCP- assigned StarDot servers on your local network. - Page 25 set the Express to Manual IP Assignment and provide the following information: • IP Address - The IP address you'd like to assign to the Express. Consult your network administrator to determine what IP address is OK to use. If you are setting up the Express behind a residential gateway or cable/DSL router, your IP address will be something similar to 192.168.1.5.
- Page 26 This allows you to access multiple Express Servers behind a single public IP address (most DSL and Cable Modem accounts provide only one public IP address). Many routers can be configured to forward unique port numbers to individual IP addresses on the private network side of the gateway. Example: Assign the Express server a web server port of 8085.
-
Page 27: Dial-Out Properties
Dial-Out Properties The Dial-Out Properties page contains all the ISP dial-up configuration information for setting up the Express connected to an analog modem. After making changes, click the Apply button to save the settings in the Express server. INTERNET DIAL-OUT CONNECTION (PPP) If the Express server's primary connection to the Internet will be a dial-up modem connection to the Internet, enter your ISP (Internet Service Provider) account information here. - Page 28 Phone Number The phone number of the ISP (Internet Service Provider). You can embed special characters in the phone number. , = pause one second # = same as # button on phone * = same as * button on phone Timeout The Express will attempt to dial up the ISP for the specified number of seconds.
-
Page 29: Security Properties
Security Properties The Security properties page contains user/password information for securing the Express server from unwanted visitors. Express Users The Express server has its own multi-user capable, password protected operating system. By default, the live images can be viewed by anyone and only the configuration pages are password protected. However, these options can be changed. -
Page 30: Advanced Menus
Upgrade Firmware Allows you to select a new firmware and upgrade the video server. You can also use the StarDot Tools software to upgrade the firmware. It is recommended that you clear the configuration settings before upgrading (see the manual config section). - Page 31 Tilt/Pan Controls the Pan/Tilt movements of the camera. Focus Allows user to manually focus the camera. For a single increase or decrease of focus, you must click the arrows at each end of the focus control panel. If a greater amount of increase or decrease is desired, you will need to click on the varying bars located in the center of the focus control panel.
-
Page 32: Dynamic Dns
“Default guide”. To set up a TZO account, visit http://stardot.tzo.com. After you’ve signed up, enter the appropriate information in either NetCam SC or your router (if it supports DDNS). -
Page 33: Trigger Properties
3.15 Trigger Properties The trigger menu allows you set up the video server to capture and upload a series of images based on a triggered event using the input ports on the back of the video server. Trigger Overview By connecting an alarm system, motion detector or other type of sensor to the back of the Express server, it is possible to gather a series of images when the sensor “triggers”... - Page 34 I/O Level Select the state of your trigger source’s output. SCHEDULE The server can wait in trigger-capture/upload mode 24 hours a day, seven days a week, or you can set whatever time window and days of the week you like. Use military time for the beginning and ending window times.
- Page 35 Delay The number of milliseconds to delay between image captures. For the fastest possible frame rate, set this to 0. Viewing other video sources during the triggered capture will affect the recording speed. Assuming no other video sources are being viewed/uploaded, here are some example frames rates for a single triggered video source: 0 ms = Max Speed 250 ms = 4 FPS (frames per second)
-
Page 36: Trigger Sensor Connection
Passive Mode If the Express is behind a proxy server, enable passive mode. If you are unsure if you need passive mode, it is usually safe to enable it anyway. Default: On Timeout If the FTP process hasn’t completed within the time specified here, the Express will attempt to restart the process. - Page 37 good for 100,000 cycles at maximum load, 100 million when unloaded. The relay is rated for 0.5A @ 125VAC; however it should never be used to directly control AC voltages from the wall outlet. It will wear out rapidly and may result in sparking with risk of fire. Switching mechanisms designed for controlling wall outlet power, which can be triggered from a low DC voltage, are available.
-
Page 38: Technical Support
Troubleshooting Guide The StarDot Tools software doesn't list the Express server on my local net- work and/or is not accessible via its IP address. Double check all cable connections and make sure the Express server's network cable is plugged into an active Ethernet hub, switch or router. - Page 39 Express Video Servers Page 39...
-
Page 40: Specifications
Specifications TECHNICAL SPECS: Express 2, 4 and 8 Image Compression Industry Standard JPEG, M-JPEG Frame Rate Express 2: 1 x 30 FPS D1 or 2 x 5 FPS D1 Express 4: 4 x 30 FPS D1 Express 8: 8 x 7.5 FPS Resolution NTSC: 704x480, 352x240, 176x120 PAL: 704x576, 352x288, 172x144... - Page 41 FCC STATEMENT OF COMPLIANCE This equipment has been tested and found to comply with the limits for a Class A digital device, pursuant to Part 15 of the FCC Rules. These limits are designed to provide reasonable protection against harmful interference when the equipment is operated in a commercial environment.
- Page 42 Notes Page 42 Express Video Servers...
- Page 43 Express Video Servers Page 43...
- Page 44 6820-H Orangethorpe Ave Buena Park, CA 90620 U.S.A. 714-908-2380 • Fax: 714-844-4336 E-mail: info@stardot.com http://www.stardot.com © Copyright StarDot Technologies express video servers manual 05-25-10.indd...
Need help?
Do you have a question about the Express Video Server and is the answer not in the manual?
Questions and answers