
Summary of Contents for Amphenol Advance IR TSCAN-750
- Page 1 TSCAN-750 Temperature Scanning Entry System User Manual Please read this manual before powering the unit on. Important safety information inside. Arrow.com. Downloaded from...
-
Page 2: Table Of Contents
Table of Contents ntroduction ....................................3 Box Contents ....................................4 Product Appearance & Interface Instruction ..........................4 Wiring Instruction ..................................5 Access Control and Attendance: Company Mode ...................................6 Operation Process ..........................................6 Add Device and Import Information ....................................6 Network Settings ..........................................7 Operate Code Settings ........................................8 Data Sync ............................................8 Menu Items .............................................9 Homepage ............................................9... -
Page 3: Introduction
Introduction TSCAN-750 Temperature Scanning Entry System supports three usage modes and is equipped with different platform software for more powerful functions. 1. Company Mode - Combined facial recognition and temperature measurement for employee access control and attendance management. Equipped with web interface to view historical statistics. 2. -
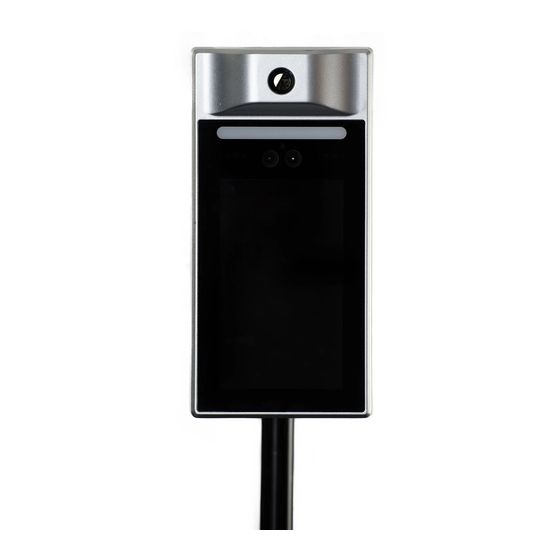
Page 4: Box Contents
Box Contents • TSCAN-750 Unit • 1 Wall Mount Kit: - 1 Wall Mount Plate • 1 Power Adapter - 4 Wall Plugs • 4 International Adapters: 1x Type A, 1x Type C, 1x Type G, - 4 KA 4x25 Screws 1x Type O No Ground - 4 KM 4x10 Screws - 4 Hex Screws... -
Page 5: Wiring Instruction
Wiring Instruction Bypass Wiring for Access Control Installations For Access Control installations using the Normally Closed relay to make/break the supply voltage to the magnetic door lock, a bypass switch/relay is recommended to maintain secure access to the building. In the event Connector 3 7-Pin 12V Power Supply, Relay Interface is disconnected from the TSCAN-750, the bypass switch/relay provides a solution to maintain secure building access control. -
Page 6: Access Control And Attendance: Company Mode
Access Control and Attendance - Company Mode Operation Process To access Company Mode, click the following button. Add Device and Import Information Login to the Attendance & Access Control Management Platform Software. Enter the device management interface to add the device. The device ID number must be consistent with the main interface on the device. -
Page 7: Network Settings
Company Mode (cont.) Network Settings Select the button in the upper right corner to set the service domain name settings for “Domain Name Settings” and “Network Settings.” The address defaults to the company’s service platform access address. This address should be changed to the local server or workstation on which you installed the Attendance &... -
Page 8: Operate Code Settings
Company Mode (cont.) Operate Code Settings Click and enter an operate code of your choosing. The initial code that you enter into this field will serve as the Operate Code used to access the Settings Menu going forward. For example, if you enter 1234 as your initial Operate Code, then you will need to use 1234 as your code each time you enter the Settings Menu. -
Page 9: Menu Items
Company Mode (cont.) Menu Items The Menu icon is hidden on the homepage. To display the icon, you must double-tap the screen. After clicking the menu icon, the interface for entering the operate code is displayed. Enter the operate code, and once verified, the menu item page is displayed. -
Page 10: Access
Company Mode (cont.) Access If the face cannot be recognized, you can choose Access to verify. Settings 10 | Advance IR © 2020 All rights reserved. Arrow.com. Arrow.com. Arrow.com. Arrow.com. Arrow.com. Arrow.com. Arrow.com. Arrow.com. Arrow.com. Arrow.com. Downloaded from Downloaded from Downloaded from Downloaded from Downloaded from... -
Page 11: Network Settings
Company Mode (cont.) Network Settings Set up device networking. Operate Code Setting Modifying the operation code requires that the device is in the online state. It can be viewed in the software/device management of the access control and attendance management platform to prevent forgetting the operation code. -
Page 12: Mask Detection
Company Mode (cont.) Mask Detection When mask detection is enabled, only those wearing masks can pass. If someone is detected not wearing a mask, an alarm will be issued and they will not be able to pass. When the liveness detection is enabled, the live detection infrared fill light will be performed after recognition. It can be set to normally open / normally closed / auto. -
Page 13: Education Mode
Access Control and Attendance - Education Mode Operation Process To access Education Mode, click the following button. Add Device and Import Information Login to the Attendance & Access Control Management Platform Software. Enter the device management interface to add the device. The device ID number must be consistent with the main interface on the device. -
Page 14: Network Settings
Education Mode (cont.) Network Settings Select the button in the upper right corner to set the service domain name settings for “Domain Name Settings” and “Network Settings.” The address defaults to the service platform access address. This address should be changed to the local server or workstation on which you installed the Attendance &... -
Page 15: Menu Items
Education Mode (cont.) Note: If there are many faces in one synchronization, the synchronization time will take longer. Please be patient. Menu Items The Menu icon is hidden on the homepage. To display it, you must double-tap the screen. After clicking the menu icon, the interface for entering the operate code is displayed. After the operate code is successfully verified, the menu item is displayed. -
Page 16: Homepage
Education Mode (cont.) Homepage Access Click to return to the homepage. If the face cannot be recognized, you can choose Access to verify. Sync Last Data The device only syncs the last modified or added user data and face photos. Sync All Data The device will clear the local cached data, and re-sync all user data and face photos. -
Page 17: Network Settings
Education Mode (cont.) Network Settings Set up device networking. Operate Code Setting Modifying the operation code requires that the device is in the online state. It can be viewed it in the software / device management of the access control and attendance management platform to prevent forgetting the operation code. -
Page 18: Access Control Settings
Education Mode (cont.) Access Control Settings The action time of the door lock can be set to specify long it will automatically close after the door is opened. Door sensor type can be selected according to the actual installed door sensor type, either normally open / normally closed. -
Page 19: Quick Screen Mode
Access Control and Attendance - Quick Screen Mode Quick Screening Mode performs temperature screening only when face recognitions is not required. This mode is equipped with Temperature Cloud APP to monitor abnormal data and snapshots. Scan the QR code below to download the Temperature Cloud APP and bind the device to view the data. Temperature Cloud APP Operation Process To access Quick Screening Mode, click the following button. -
Page 20: Settings
Quick Screen Mode (cont.) Settings Select the main interface setting icon to enter the setting interface. Network Settings Configure device networking. Measuring Modes Two measuring modes are available: Measuring Without Face Checking - Always display the temperature value without face detection, and broadcast the data within the temperature range of the human body. -
Page 21: About
Quick Screen Mode (cont.) Click Online Upgrade to automatically detect whether the software has a version update. If there is a version update, it will automatically update the latest version of the software. About Check device software version information. Help View instructions. -
Page 22: Technical Specifications
Technical Specifications Temperature measurement module parameters Measurement range 32°C~45°C/ 89.6°F~113°F Measurement accuracy ±0.5°C/ ±0.9°F (at 25±2°C/ 77±3.6°F ambient temperature) Measurement distance 8 in~20 in (20cm~50cm) Measurement response 0.5s Elevated temperature alarm point 99.1°F (37.3°C) System hardware parameters Processor ARM Cortex-A7 (Quad Core) Operating system Android 8.1 Memory size... -
Page 23: Installation Instructions
Installation Instructions • For wall mounting, the TSCAN-750 is provided with a wall mount kit, which includes: 1 Wall Mount Plate 4 Wall Plugs 4 KA 4x25 Screws 4 KM 4x10 Screws 4 Hex Screws 4 Hex Nuts 8 Flat Washers 1 ¼-20 3/8”... - Page 24 Installation Instructions (cont.) Wall-Mounted Installation 1. Attach an installation sticker to the wall. Make holes in the wall according to the height and position of the sticker, insert a wall plug, and install four hex screws. 2. Fix the hanging board on the wall with four KM 4* 10 screws.
Need help?
Do you have a question about the Advance IR TSCAN-750 and is the answer not in the manual?
Questions and answers