Table of Contents
Advertisement
> Before Start
> Part Names
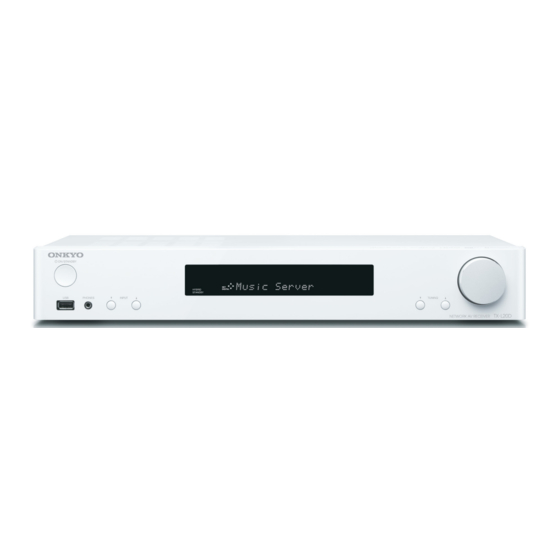
NETWORK STEREO RECEIVER
TX-L20D
Instruction
Manual
> Install
> Initial Setup
> Playback
Supplementary Information | Advanced Setup | Others
Before Start
What's in the box .................................................................... 2
Part Names
Front Panel ............................................................................. 3
Rear Panel .............................................................................. 4
Remote Controller .................................................................. 5
Display .................................................................................... 6
Install
1. Connect the Speakers ........................................................ 7
2. Connect the TV ................................................................... 8
3. Connect the HDMI AV Components ................................... 9
4. Connect the Audio Components ....................................... 10
5. Connect Other Cables .......................................................11
Initial Setup with Auto Start-up Wizard ................................. 12
Playback
AV Component Playback ...................................................... 14
Internet Radio ....................................................................... 15
Spotify ................................................................................... 16
Music Server ......................................................................... 17
USB Storage Device ............................................................. 19
®
................................................................................ 21
®
Playback ...................................................... 22
Listening to the FM/DAB Radio ............................................ 23
Listening Modes ................................................................... 26
Quick Menu .......................................................................... 28
Other Functions .................................................................... 29
Supplementary information for player functions .................... 30
Setup Menu ........................................................................... 31
Firmware Update .................................................................. 43
Troubleshooting .................................................................... 46
General Specifications .......................................................... 51
About HDMI .......................................................................... 52
License and Trademark Information ..................................... 53
E
N
Advertisement
Table of Contents

Related Manuals for Onkyo TX-L20D


Summary of Contents for Onkyo TX-L20D
-
Page 1: Table Of Contents
> Playback Supplementary Information | Advanced Setup | Others Before Start What's in the box ..............2 NETWORK STEREO RECEIVER Part Names TX-L20D Front Panel ................3 Rear Panel ................4 Remote Controller ..............5 Display ..................6 Install 1. Connect the Speakers ............7 Instruction 2. -
Page 2: What's In The Box
> Before Start > Part Names > Install > Initial Setup > Playback Supplementary Information | Advanced Setup | Others What's in the box Before Start 0 Connect speakers with 4 Ω to 8 Ω impedance. 0 The power cord must be connected only after all other cable connections are completed. 0 We will not accept responsibility for damage arising from the connection of equipment manufactured by other companies. -
Page 3: Front Panel
> Before Start > Part Names > Install > Initial Setup > Playback Supplementary Information | Advanced Setup | Others Front Panel Part Names 1. Í ON/STANDBY button: Turns the unit on or into standby mode. 2. -
Page 4: Rear Panel
> Before Start > Part Names > Install > Initial Setup > Playback Supplementary Information | Advanced Setup | Others Rear Panel 90° 180° 1. ANTENNA DAB/FM jack: Connect the supplied antenna. 2. -
Page 5: Remote Controller
> Before Start > Part Names > Install > Initial Setup > Playback Supplementary Information | Advanced Setup | Others Remote Controller 1. Í button: Turns the unit on or into standby mode. 2. Input selector buttons: Switches the input to be played. ... -
Page 6: Display
> Before Start > Part Names > Install > Initial Setup > Playback Supplementary Information | Advanced Setup | Others Display Neo:6 1. Lights in the following conditions. ASb: When Auto Standby function is enabled. ( P41) HDMI: HDMI signals are input and selected. -
Page 7: Connect The Speakers
> Before Start > Part Names > Install > Initial Setup > Playback Supplementary Information | Advanced Setup | Others 1. Connect the Speakers Install Refer to the illustration to connect the speaker system. Twist the wires of the speaker cable tightly before inserting into the SPEAKERS terminals. -
Page 8: Connect The Tv
> Before Start > Part Names > Install > Initial Setup > Playback Supplementary Information | Advanced Setup | Others 2. Connect the TV To ARC TV For a TV that supports the ARC (Audio Return Channel) P52) feature, use an HDMI cable and connect according to illustration "a". -
Page 9: Connect The Hdmi Av Components
> Before Start > Part Names > Install > Initial Setup > Playback Supplementary Information | Advanced Setup | Others 3. Connect the HDMI AV Components Cable/Satellite Streaming media BD/DVD GAME set-top box player This is an example of connection with an AV component HDM I OUT e.g. -
Page 10: Connect The Audio Components
> Before Start > Part Names > Install > Initial Setup > Playback Supplementary Information | Advanced Setup | Others 4. Connect the Audio Components Connecting a CD player Use a digital coaxial cable to connect a CD player to the DIGITAL IN COAXIAL jack. -
Page 11: Connect Other Cables
> Before Start > Part Names > Install > Initial Setup > Playback Supplementary Information | Advanced Setup | Others 5. Connect Other Cables Antenna Hookup Connect the supplied DAB/FM antenna to the ANTENNA DAB/FM terminal. Make sure the plug is pushed in all the way, then fix in place by turning the nut to the right. -
Page 12: Initial Setup
> Before Start > Part Names > Install > Initial Setup > Playback Supplementary Information | Advanced Setup | Others Initial Setup with Auto Start-up Wizard Initial Setup Initial Setup starts automatically 1. Switch the input on the TV to that assigned to the unit. 2. - Page 13 > Before Start > Part Names > Install > Initial Setup > Playback Supplementary Information | Advanced Setup | Others 1. Source Connection select "A/a" on the screen and press ENTER. To select whether to mask the password with "*" or display it in plain Check that each input source is connected correctly.
-
Page 14: Av Component Playback
> Before Start > Part Names > Install > Initial Setup > Playback Supplementary Information | Advanced Setup | Others AV Component Playback Playback Basic operations Play an AV component or TV connected to this unit with an HDMI cable or other cable. 1. -
Page 15: Internet Radio
> Before Start > Part Names > Install > Initial Setup > Playback Supplementary Information | Advanced Setup | Others Internet Radio Basic operations When this unit is connected to a network, you can listen to TuneIn or other preregistered Internet radio services. Depending on the internet radio service, the user may need to register from their computer first. -
Page 16: Spotify
(c) This button lets you start repeat or random playback. Pressing this button repeatedly cycles through the repeat modes. (d) Pressed during play this button pauses playback. Pressed while paused, and it restarts play. (e) This button plays the next track. Onkyo TX-L20D XXXX... -
Page 17: Music Server
> Before Start > Part Names > Install > Initial Setup > Playback Supplementary Information | Advanced Setup | Others Music Server It is possible to stream music files stored on PCs or NAS there may be differences in the names of items you can devices connected to the same network as this unit. - Page 18 > Before Start > Part Names > Install > Initial Setup > Playback Supplementary Information | Advanced Setup | Others The following remote controller operations are also 6. Adjust the volume using the volume bar on the "Play to" 0 Quantization bit: 8 bit, 16 bit, 24 bit possible.
-
Page 19: Usb Storage Device
> Before Start > Part Names > Install > Initial Setup > Playback Supplementary Information | Advanced Setup | Others USB Storage Device Basic play Play music files on a USB storage device. 1. Switch the input on the TV to that assigned to the unit. 2. - Page 20 > Before Start > Part Names > Install > Initial Setup > Playback Supplementary Information | Advanced Setup | Others USB Storage Device Requirements 0 Supported bitrates: Between 8 kbps and 320 kbps and DSD (.dsf/.dff/.DSF/.DFF): VBR. 0 Supported formats: DSF/DSDIFF 0 Note that operation is not guaranteed with all USB 0 Supported sampling rates: 2.8 MHz, 5.6 MHz storage devices.
-
Page 21: Airplay
Setup menu displayed set "5. Hardware" – "Power iPhone Management" – "Network Standby" to "Off". Onkyo TX-L20D XXX 0 Due to the characteristics of AirPlay wireless technology, the sound produced on this unit may slightly be behind the sound played on the AirPlay-enabled device. -
Page 22: Bluetooth Playback
2. Enable (turn on) the BLUETOOTH function of the BLUETOOTH enabled device, then select this unit from amongst the devices displayed. If a password is Onkyo TX-L20D XXX requested, enter "0000". 0 To connect another BLUETOOTH enabled device, press and hold the button until "Now Pairing..."... -
Page 23: Listening To The Fm/Dab Radio
> Before Start > Part Names > Install > Initial Setup > Playback Supplementary Information | Advanced Setup | Others Listening to the FM/DAB Radio Listening to FM Radio Using RDS Tuning Automatically RDS stands for Radio Data System and is a method of transmitting data in FM radio signals. - Page 24 > Before Start > Part Names > Install > Initial Setup > Playback Supplementary Information | Advanced Setup | Others Listening to DAB Digital Radio Easy M (Middle of the road music) 60 - 79: Good reception Light M (Light classics) 80 - 100: Excellent reception 1.
- Page 25 > Before Start > Part Names > Install > Initial Setup > Playback Supplementary Information | Advanced Setup | Others Presetting a Radio Station It allows you to register up to 40 of your favorite FM/DAB radio stations. Registering radio stations in advance allows you to tune into your radio station of choice directly.
-
Page 26: Listening Modes
> Before Start > Part Names > Install > Initial Setup > Playback Supplementary Information | Advanced Setup | Others Listening Modes Regarding the Listening Modes Stereo Press "MUSIC" (c) to select. This mode is suitable for Press "MOVIE/TV" (b), "MUSIC" (c), or "GAME" (d) on the playing music, with sound output from the front left and right remote controller to select modes suited to movies or the speakers and subwoofer. - Page 27 > Before Start > Part Names > Install > Initial Setup > Playback Supplementary Information | Advanced Setup | Others How to Check Listening Modes and Other Information Press (a) repeatedly to switch the display of the main unit in order of: Input source &...
-
Page 28: Quick Menu
> Before Start > Part Names > Install > Initial Setup > Playback Supplementary Information | Advanced Setup | Others Quick Menu By pressing the Q button on the remote controller during Music Optimizer: Improve the quality of the compressed play, you can adjust frequently used settings, such as the audio. -
Page 29: Other Functions
> Before Start > Part Names > Install > Initial Setup > Playback Supplementary Information | Advanced Setup | Others Other Functions Playing Audio and Video from Separate Sources It is possible to play audio and video from different sources. For example, you can play audio from the CD player and video from the BD/DVD player. -
Page 30: Supplementary Information For Player Functions
> Before Start > Part Names > Install > Initial Setup > Playback Supplementary Information | Advanced Setup | Others Supplementary information for player functions Supplementary Information Due to firmware (the software for the system) updates after you make your purchase or firmware changes during production of the product, there may be additions or changes to the features available compared to what is in the instruction manual. -
Page 31: Setup Menu
> Before Start > Part Names > Install > Initial Setup > Playback Supplementary Information | Advanced Setup | Others Setup Menu Advanced Setup The unit allows you to configure advanced settings to provide you with an even better experience. 1. - Page 32 > Before Start > Part Names > Install > Initial Setup > Playback Supplementary Information | Advanced Setup | Others "HDMI 1 (HDCP 2.2)" to "HDMI 4 (HDCP 2.2)": Assign a desired Impose OSD Set whether or not to display the information on the TV when the HDMI IN jack to the CD input selector.
- Page 33 > Before Start > Part Names > Install > Initial Setup > Playback Supplementary Information | Advanced Setup | Others 2. Speaker 0 Supported sampling rates for PCM signals (stereo, mono) from a digital input are 32kHz, 44.1kHz, 48kHz, 88.2kHz, 96kHz/16bit, 20bit, and 24bit. You can make changes to the connection environment of the speakers and change the ■...
- Page 34 > Before Start > Part Names > Install > Initial Setup > Playback Supplementary Information | Advanced Setup | Others ■ 3. Distance 3. Audio Adjust Set the distance from each speaker to the listening position. ■ 1. Multiplex/Mono Front Left Specify the distance between each speaker and the listening Multiplex Input Set the audio channel or language to be output when playing...
- Page 35 > Before Start > Part Names > Install > Initial Setup > Playback Supplementary Information | Advanced Setup | Others ■ 3. LFE Level 4. Source Set the low-frequency effect (LFE) level for Dolby Digital series, DTS series, Multichannel ■ 1. IntelliVolume PCM, and DSD signals.
- Page 36 > Before Start > Part Names > Install > Initial Setup > Playback Supplementary Information | Advanced Setup | Others ■ Audio Select PCM Fixed Mode Select whether to fix input signals to PCM (except multi-channel Select the priority for input selection when multiple audio sources are connected to one input PCM) when you have selected "HDMI", "COAXIAL", or selector, such as connections to both the "BD/DVD"...
- Page 37 > Before Start > Part Names > Install > Initial Setup > Playback Supplementary Information | Advanced Setup | Others 5. Hardware HDMI Standby When this is set to anything other than "Off", you can play the Through video and audio of an HDMI connected player on the TV even if ■...
- Page 38 > Before Start > Part Names > Install > Initial Setup > Playback Supplementary Information | Advanced Setup | Others ■ 2. Network Audio TV Out You can enjoy audio through the speakers of the TV while this 0 When LAN is configured with a DHCP, set "DHCP" to "Enable" to configure the setting unit is on.
- Page 39 AirPlay. This is set to Onkyo TX-L20D ****** at the time of 1. Press ENTER to display the Edit screen. purchase. (" * " stand for alphanumeric characters identifying 2.
- Page 40 > Before Start > Part Names > Install > Initial Setup > Playback Supplementary Information | Advanced Setup | Others ■ 3. Bluetooth Status Displays the status of the BLUETOOTH enabled device connected to the unit. Bluetooth Select whether or not to use the BLUETOOTH function. "Ready": Not paired "On (Default Value)": Enables connection with a BLUETOOTH "Pairing": Paired...
- Page 41 > Before Start > Part Names > Install > Initial Setup > Playback Supplementary Information | Advanced Setup | Others ■ 4. Power Management Network Standby When this feature is turned "On (Default Value)", you can turn on the power of the unit via the network using an application that Sleep Timer Allows the unit to enter standby automatically when the specified can control this unit.
- Page 42 > Before Start > Part Names > Install > Initial Setup > Playback Supplementary Information | Advanced Setup | Others 6. Miscellaneous ■ 4. Lock ■ 1. Tuner Setup Parameter Lock the Setup menu to protect the settings. "Locked": The menu is locked. DAB Auto Scan You can run the auto scan when new DAB stations are added or "Unlocked (Default Value)": The menu is unlocked.
-
Page 43: Firmware Update
> Before Start > Part Names > Install > Initial Setup > Playback Supplementary Information | Advanced Setup | Others Firmware Update Firmware Update Update function of this unit How to update firmware Updating the Firmware via Network This unit has functionality to update the firmware (the There are two methods for updating the firmware: via 0 Check that the unit is turned on, and the connection to system software) over a network or by the USB port. - Page 44 > Before Start > Part Names > Install > Initial Setup > Playback Supplementary Information | Advanced Setup | Others 4. Press ENTER with "Update" selected to start update. supported. 0 During the update, the TV screen may go black –...
- Page 45 > Before Start > Part Names > Install > Initial Setup > Playback Supplementary Information | Advanced Setup | Others 0 Do not use Í on the remote controller. If an error message is displayed: When an error occurs, "*-** Error!" is displayed on the display of this unit. ("*" represents an alphanumeric character.) Check the following: 0 *...
-
Page 46: Troubleshooting
> Before Start > Part Names > Install > Initial Setup > Playback Supplementary Information | Advanced Setup | Others Troubleshooting Others Before starting the procedure ■ Audio to the status at the time of shipment may solve the problem. Your settings will also be initialized when you reset, so note Problems may be solved by simply turning the power on/off 0 Confirm that the connection between the output jack on... - Page 47 > Before Start > Part Names > Install > Initial Setup > Playback Supplementary Information | Advanced Setup | Others ■ Listening Modes A speaker produces no sound monitor side such as a TV. 0 Make sure that the polarity of the speaker cables ( + / − ) 0 To enjoy digital surround playback, such as Dolby Digital, Check the following if the above does not fix the problem: is correct, and that no bare wires are in contact with the...
- Page 48 > Before Start > Part Names > Install > Initial Setup > Playback Supplementary Information | Advanced Setup | Others ■ Linked operation ■ Network function Cannot connect with this unit 0 Check that the BLUETOOTH function of the There is no linked operation with CEC compliant 0 If you cannot select a network service, it will become BLUETOOTH enabled device is enabled.
- Page 49 > Before Start > Part Names > Install > Initial Setup > Playback Supplementary Information | Advanced Setup | Others ■ Wireless LAN Network 0 You may need to make some settings on Windows wireless LAN router (access point) and the unit in the ®...
- Page 50 > Before Start > Part Names > Install > Initial Setup > Playback Supplementary Information | Advanced Setup | Others ■ Others Strange noises can be heard from this unit 0 If you have connected another unit to the same wall outlet as this unit, this noise may be an effect from the other unit.
-
Page 51: General Specifications
> Before Start > Part Names > Install > Initial Setup > Playback Supplementary Information | Advanced Setup | Others General Specifications Amplifier (Audio) section 5 GHz/2.4 GHz band Weight 4 kg (8.8 lbs) Rated Output Power (IEC) BLUETOOTH Section 2 ch k 85 W at 4 ohms, 1 kHz, 1 ch driven of 1% THD HDMI Communication system... -
Page 52: About Hdmi
> Before Start > Part Names > Install > Initial Setup > Playback Supplementary Information | Advanced Setup | Others About HDMI Compatible Functions 4K: This unit supports 4K (3840 2160p) and 4K SMPTE (4096 2160p) video signals. HDMI (High Definition Multimedia Interface) is a digital interface standard for connecting TVs, projectors, Blu-ray LipSync: This setting automatically corrects any Disc/DVD players, set-top boxes, and other video... -
Page 53: License And Trademark Information
BLUETOOTH enheter. Kontrollera Logic, and the double-D symbol are trademarks of Dolby Laboratories. Bluetooth SIG, Inc. and any use of such marks by Onkyo Corporation is under hos de lokala myndigheterna. license. Other trademarks and trade names are those of their respective owners. - Page 54 > Before Start > Part Names > Install > Initial Setup > Playback Supplementary Information | Advanced Setup | Others “All other trademarks are the property of their respective owners.” “Toutes les autres marques commerciales sont la propriété de leurs détenteurs respectifs.”...
- Page 55 The above-mentioned information is subject to change without prior notice. Visit the Onkyo web site for the latest update. F1711-3 (C) Copyright 2016 Onkyo & Pioneer Corporation Japan. All rights reserved. http://www.onkyo.com/privacy/ * 2 9 4 0 2 7 3 6 C *...
Need help?
Do you have a question about the TX-L20D and is the answer not in the manual?
Questions and answers