
Related Manuals for Marineland ML Series


Summary of Contents for Marineland ML Series
- Page 1 OPERATING MANUAL OPERATING MANUAL REFRIGERATED LIVE SEAFOOD DISPLAY AND HOLDING SYSTEMS ML SERIES Commercial Aquariums...
- Page 2 IMPORTANT SAFEGUARDS WARNING – To guard against injury, basic safety precautions should be observed, including the following: READ AND FOLLOW ALL SAFETY INSTRUCTIONS DANGER – To avoid possible electric shock, special care should be taken in the use of aquarium equipment. For each of the following situations, do not attempt repairs yourself;...
- Page 3 THE MARINELAND ML SERIES This manual will provide you with the information you need to successfully operate and maintain your new ML System. Please read it carefully and keep it for future reference.
- Page 4 The Marineland ML Systems are easy-to-maintain, refrigerated systems for displaying and holding large loads of live seafood. Your new system comes complete with everything you need to become fully operational: Consumables: • Marineland Sea Mix • Biological Filter Material #1 (#C0401) •...
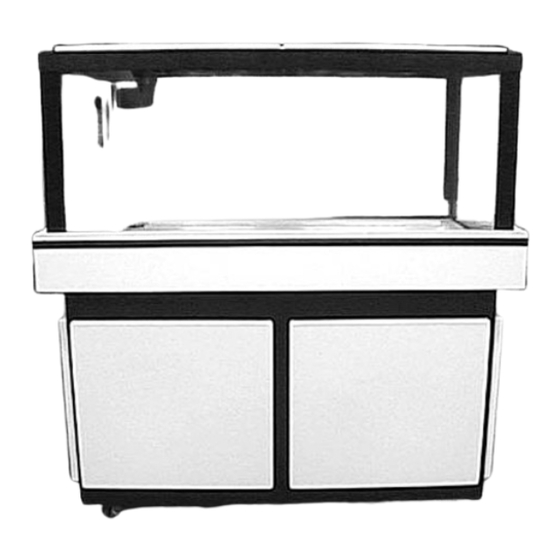
- Page 5 ML SERIES SYSTEM SPECIFICATIONS Dimensions: Capacity: Power Installation Connections: Requirements: ML-22 ML-22 ” L x 27 ” w x 53” H 50 gallons ML-22, ML-24, ML-26 Electric Supply: ML-24 ML-24 15 AMPS, 115V, 60 Hz 50” L x 27 ” w x 53” H 110 gallons 115 VAC., 60 Hz, 15 AMP...
- Page 6 ML SERIES E XPLODED 1 - Clear Plastic Lid (CP1536) 2 - Black Top Double Lid Holder (CB1541B) (not pictured) Black Top Single Lid Holder (CB1540B) 3 - Air Tube Connector (CP1516) 4 - Air Tube Assembly (CP1512) 5 - “Y” Connector (CP1515) 6 - Airstone (CS1506) 7 - 2”Air Stack Tubes (CP1510)
- Page 7 INSTALLATION The following simple steps are required to get your system up and operational. Consult exploded views for any necessary clarification. Tank Preparation 1. Locate unit near a 110–120 volt grounded outlet with a 15 amp dedicated circuit. WARNING: Do not attempt to operate unit on extension cord or non-grounded circuit.
- Page 8 4. Remove front Side Panels. Make sure system components are plugged into junction box. 5. Set thermostat (see exploded for location) 55° F . Leave it at that setting for 6 weeks to allow for bacterial growth.Then reset the temperature to 45°F .See page 17 for loading temperatures.
- Page 9 FILTRATION PREPARATION IMPORTANT: Your system contains three types of filters 1. Mechanical – Filter pads to screen out solid waste particles. 2. Chemical – Premium Activated Carbon to adsorb dissolved contaminants, discoloration, odors, toxic gases. 3. Biological – Special BIO-Mix in the tank bottom to help remove toxic ammonia and nitrites and maintain pH balance.
- Page 10 Prior to system startup, follow the few easy steps outlined below to get your system ready for operation. Refer to the exploded view (pg. 5) for additional clarification. Filter Bed Setup 1. Pour 1 inch of Biological Filter Material #2 (dolomite) over Lower False Bottom (A) and spread evenly over entire surface (B).
- Page 11 4. Place blue Bottom Filter Pad over top layer. 5. Open Drain Valve (A) and run cold,clean water through the filter bed to flush out all dolomite dust.Be careful not to expose any carbon - it will float until saturated. NOTE: To avoid spillage, position System Drain over a floor drain.
- Page 12 7. Remove Carbon Box Lid (A).Unwrap Carbon Box and place inside Carbon Filter Box Holder (B). NOTE: Before installing, gently shake cartridge to distribute carbon. Be sure to rinse Carbon thoroughly in cold, clean water until water runs clear (C).
- Page 13 SYSTEM STARTUP For Saltwater Systems Only: Add the required amount of powdered sea salt mix to tank (table below). Save the remainder to adjust salinity at a later time. Model Salt Required (approximate) ML-22 14 lbs. ML-24 28 lbs. ML-26 48 lbs.
- Page 14 MEASURING SALINITY After your system has been running for about two hours and water is clear, it is time to measure the tank’s salt level. 1. Remove Hydrometer from plastic tube. 2. Rinse plastic tube and fill it with water from tank. 3.
- Page 15 NOTE: You may occasionally need to add an extra tablespoon of liquid bacteria to your system. This may be necessary after a complete water change or extreme fluctuation in loading, e.g. adding a heavy load after a sellout. Contact Marineland or your service representative for an additional supply.
- Page 16 ADDING ANIMALS Your living biological filter is not capable of handling large loads in the beginning. It requires a 6 week “break-in” period for the bacteria to develop and cover the available surface area in the filter bed. This process cannot be rushed. We recommend very light loads for the first few weeks.Exceeding initial recommended capacity can lead to ammonia overload within 7-14 days.
- Page 17 MAINTENANCE Routine maintenance must be performed.The procedures listed below are neither difficult nor time consuming.They will keep your system clean, your stock healthy. Failure to follow these simple maintenance steps will adversely affect system performance.This could lead to premature failure of some components and loss of product.We recommend setting up a maintenance log to track procedure completion.
- Page 18 Every Two Weeks Change Carbon Filter Pad and carbon Clogged filters cannot collect waste. Uncollected waste is returned to the aquarium and will reduce system efficiency. In addition, carbon filters out dissolved pollutants, odors, chlorine, toxic gas and proteins. As with any filtering media, it is eventually exhausted and must be changed.
- Page 19 4. Cover new carbon with top of Carbon Filter Pad and tuck pad under lip of Carbon Box (A). Reinstall Carbon Box (B). Wipe down all exterior casing surfaces A vinegar/water solution (3 tablespoons vinegar to a pint of water) may be used with a clean rag or paper towel.
- Page 20 24-Hour Marineland Hotline at 1-800-322-1266. 4. Place the new airstones on each open end of each “Y” connector. NOTE: We recommend you use only Marineland airstones. They last longer and provide more bubbles for aeration. 5. With a rubber band, wrap each pair...
- Page 21 6. Re-insert white rigid tubes into Air Stacks and reattach flexible connector tubes. Do not push airstones all the way to the bottom of the tank. Every Three to Six Months Change Bottom Filter Pad Over time, your tank’s filter bed accumulates so much debris that the flow through it is reduced.This will have an adverse effect on your animals, since a reduction in flow means less oxygen available to the biological filter, which in turn reduces ammonia consumption.
- Page 22 3. Noting the water level within the disconnected Air Stack, cover the air outlet in the disconnected Stack with your finger so that all bubbling is limited to the other Stack. Water level in the disconnected Air Stack will drop. The more it drops, the more restricted the filter is.
- Page 23 5. Place new pad in tank. NOTE: To prevent air bubbles from being trapped in pad, “snake” pad over edge of tank...or roll pad up underwater and wring out air bubbles before covering Filter Bed. 6. Replace Upper False Bottom. Clean External Air Filter The External Air Filter is the brown muffler-like appendage sticking out from the top of the...
- Page 24 Clean Internal Air Filters There are three internal foam air filters located under the round plate on top of the pump.To remove the plate and gasket, unscrew the five top screws. The three filters are in the internal air chambers of the pump.To clean, simply lift out the three foam filters and rinse them in warm water (no soap).After cleaning, replace the filters, gaskets and top.
- Page 25 Every Six Months Clean Filter Bed IMPORTANT: This process, although vital to the health of your filter bed, can be very detrimental to your filter if done incorrectly. Please pay particular attention to the do’s and don’ts at the end of this section. 1.
- Page 26 5. Move gravel to one end of tank, exposing half of the bottom grid. Hose the grid to flush out any particles trapped in the holes. Repeat the process for the other half of the grid.When done, spread gravel back evenly over the entire grid. CAUTION: Do not use soap, cleaners or hot water.
- Page 27 TROUBLESHOOTING GUIDELINES CAUTION: Some of the corrective procedures recommended below may require professional attention. For a service referral, call Marineland Customer Service (800) 322-1266. If entire system abruptly shuts down… • Reset circuit breaker in main electrical panel. • Check to make sure unit is plugged in.
- Page 28 If you experience product loss shortly after arrival… • Don’t panic. Remove dead product from tank. • Check water salinity. Adjust if necessary. • Monitor water temperature. Adjust if necessary If fish roll, spin, swim belly up, behave erratically… • Adjust water temperature to match that in which they are already accustomed (shipped in).
- Page 29 Because some states do not allow the exclusion of incidental or consequential damages, this exclusion may not apply to you. Commercial Aquariums A Division of The Aquaria Group • Moorpark, CA 93021 © 2000 The Aquaria Group Printed in the U.S.A Marineland, BIO-Wheel and Black Diamond are trademarks of The Aquaria Group. 10/00 Z080157A...
Need help?
Do you have a question about the ML Series and is the answer not in the manual?
Questions and answers