
Related Manuals for Life Smart LS100


Summary of Contents for Life Smart LS100
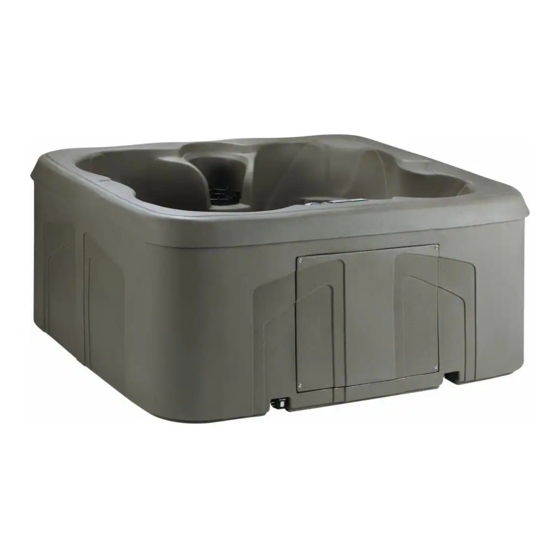
- Page 1 Check out the LifeSmart Spas channel on You Tube for helpful videos on spa ownership OWNER’S MANUAL 110V / 230V Models...
- Page 2 Length Width Height Dry Weight Water Electrical Seating Capacity 60Hz LS100/LS100DX 4 person 5'10" (178 cm) 5'1" (155 cm) 32" (81 cm) 270 lbs (122 kg) 205 gal (776 lit) 110V LS200 4 person 6'5" (196 cm) 5'6" (168 cm) 29"...
-
Page 3: Table Of Contents
TABLE OF CONTENTS TITLE PAGE CONTENTS SAFETY INFORMATION IMPORTANT SAFETY INSTRUCTIONS ............................1 IMPORTANT SPA INSTRUCTIONS ............................4 INSTALLATION PLANNING A LOCATION FOR YOUR SPA ..........................5 PLACING THE SPA ..................................6 EQUIPMENT ACCESS EQUIPMENT ACCESS PANEL ..............................7 ELECTRICAL REQUIREMENTS ELECTRICAL ....................................8 CONFIGURING SYSTEM .................................10 ELECTRICAL WIRING DIAGRAM FOR 230V USE ........................11 CONTROL PANEL OPERATION TEMPERATURE ADJUSTMENT ..............................12... -
Page 4: Safety Information
SAFETY INFORMATION IMPORTANT SAFETY INSTRUCTIONS READ AND FOLLOW ALL INSTRUCTIONS AVOIDING THE RISK TO CHILDREN DANGER: • RISK OF CHILD DROWNING. Extreme caution must be exercised to prevent unauthorized access by children. To avoid accidents, ensure that children cannot use a spa unless they are supervised at all times. - Page 5 SAFETY INFORMATION 110 VOLT CORD-CONNECTED 15 AMP MODELS: • The GFCI is located at the end of the power cord. Before each use, with the unit operating, push the TEST button. The unit should stop operating and the GFCI power indicator will go out. Wait 30 seconds and then reset the GFCI by pushing the RESET button.
- Page 6 SAFETY INFORMATION DON’T: • Place electrical appliances within 5 feet (1.5m) of the spa. • Use an extension cord to connect the spa to its power source. The cord may not be properly grounded and the connection is a shock hazard. An extension cord may cause a voltage drop, which will cause overheating of the jet pump motor and motor damage and void your warranty.
-
Page 7: Important Spa Instructions
SAFETY INFORMATION AVOIDING THE RISK OF HYPERTHERMIA Prolonged immersion in hot water can result in HYPERTHERMIA, a dangerous condition which occurs when the internal temperature of the body reaches a level above normal 98.6°F (37ºC). The symptoms of hyperthermia include unawareness of impending hazard, failure to perceive heat, failure to recognize the need to exit the spa, physical inability to exit the spa, fetal damage in pregnant women, and unconsciousness resulting in a danger of drowning. -
Page 8: Installation
INSTALLATION PLANNING A LOCATION FOR YOUR SPA Consider these things when determining where to place your spa. SAFETY FIRST: Make sure your spa is positioned so access to the equipment compartment and side panels will not be blocked. Be certain your installation will meet all city and local safety codes and requirements. -
Page 9: Placing The Spa
INSTALLATION BE AWARE: Damage caused by inadequate or improper foundation support is not covered by the spa warranty. It is the sole responsibility of the spa owner to provide a proper foundation for the spa. Make sure the foundation where the spa is placed drains water away from the spa. Proper drainage will keep components dry from rain and wet weather. -
Page 10: Equipment Access
EQUIPMENT ACCESS EQUIPMENT ACCESS PANEL Topside Control Panel Slat Slat Screw Equipment Access Panel Door Hose Electrical Recess & Drain Hose Foam Door To access the equipment compartment: • Remove 1 vertical slat and screws on each side of Equipment Access Panel Door (on some spas). -
Page 11: Electrical Requirements
ELECTRICAL REQUIREMENTS ELECTRICAL DO NOT PLUG IN YOUR SPA WITHOUT FIRST FILLING WITH WATER! DANGER – RISK OF ELECTRIC SHOCK Installations that do not conform to the following procedures and requirements may expose users to electric shock. Non-conforming installations will not be covered under warranty. Your electrical outlet must have been installed by an electrical contractor and been approved by a local building electrical inspection authority. - Page 12 ELECTRICAL REQUIREMENTS 8. CAUTION, 230V POWERED SPAS – These spas must be hard wired to your household electrical service box only. Do not use an extension cord or any other disconnect able power cord. The use of an extension cord or a disconnectable power cord is highly dangerous and will void all warranties! •...
-
Page 13: Configuring System
ELECTRICAL REQUIREMENTS CONFIGURING SYSTEM 110 VOLT INSTALLATION (CORD CONNECTED) Most Spas come with a factory-installed power supply GFCI cord and are to be plugged into a grounded type 110 volt, 15 amp receptacle. No other electrical appliance or fixture can be used on this circuit. IMPORTANT: Under NO circumstances should an extension cord be used. -
Page 14: Electrical Wiring Diagram For 230V Use
ELECTRICAL REQUIREMENTS ELECTRICAL WIRING DIAGRAM FOR 230V USE It is recommended that a licensed electrician install the power to your spa in accordance with the National Electric Code and/or any local electrical codes in effect at the time of installation. Power supply installation must include a properly rated GFCI circuit breaker. -
Page 15: Control Panel Operation
CONTROL PANEL OPERATION Initial start-up - When the spa is first powered up, the control system 1 Pump Indicator Lights begins a 2 minute Startup Mode. Different codes will display on the screen. Once Startup Mode completes, the actual temperature is displayed on the screen. -
Page 16: Adjusting Preset Filter Cycles
CONTROL PANEL OPERATION ADJUSTING PRESET FILTER CYCLES Filter duration is programmable between 0.5 and 6 hours in 30 minute increments (0.5 hours) for both filter cycles. To program the cycle times: 1. Press and hold Light button for 5 seconds until F1 is displayed. 2. -
Page 17: Diagnostic Lcd Message
CONTROL PANEL OPERATION ECONOMY MODE for LS700DX: This mode allows you to lower the temperature set point of the spa by 20°F (11°C), to change to the Economy Mode press and hold Light button for 5+ seconds until F1 is displayed. Press the Light button several times until the display shows EP 1 or use Down button to disable economy mode, the display will show EP 0. -
Page 18: Component Operation
COMPONENT OPERATION SPA COMPONENT OPERATION AIR CONTROL VALVE The air control valve serves to regulate the amount of air mixed with the water when the jets are operational. Rotate the air control in one direction to achieve the maximum jet pressure and thera- peutic action. -
Page 19: Fill Up And Start-Up Instructions
FILL UP AND START-UP INSTRUCTIONS The following procedures should be followed on initial startup and whenever the spa is drained for routine maintenance. FILLING THE SPA WITH WATER 1. Clear all the debris from your spa. 2. Be sure to open all jets to allow as much air as possible to escape from the plumbing during the filling process. -
Page 20: Adding Start-Up Chemicals
ADDING START-UP CHEMICALS WATER CHEMISTRY GUIDELINES Spa water chemistry is ultimately the responsibility of the spa owner. Improper water chemistry may result in costly repairs not covered under the spa warranty. If unsure about any step in the process, please contact a Customer Care Associate at (888) 961-7727 Ext. 8440. Initially, it is advisable to identify what minerals (e.g. -
Page 21: Spa Maintenance
SPA MAINTENANCE FILTER CARTRIDGE MAINTENANCE Every month, the filter cartridge should be cleaned to remove the objects and particles that have lodged in the cartridge pleats. Using household water pressure and a garden hose with a pressurized nozzle, push water from inside to outside of the pleats, forcing all the trapped particles out. NOTE: Never run your spa without a filter cartridge!!! This will invalidate your warranty. -
Page 22: Surface Care
SPA MAINTENANCE SURFACE CARE Do not use solvents or abrasive cleaners to clean the spa. Typically, a mild detergent and water will resolve cleaning issues. COVER CARE Please keep your cover free from dirt at all times. Use a cover cleaner or a warm mild soapy water to clean the surface. -
Page 23: Draining Or Winterizing
DRAINING OR WINTERIZING Every three to six months, depending upon the water condition, you need to renew your water. CAUTION: READ THIS BEFORE DRAINING YOUR SPA • To prevent damage to the spa’s components, unplug the spa from the outlet or turn off breaker (230V) before draining. -
Page 24: Troubleshooting Procedures
TROUBLESHOOTING PROCEDURES In the event your spa is not working the way it should, please first review all the installation and operating instructions in this manual and check the message on the panel display. If you are still not satisfied it is working properly, please follow the appropriate troubleshooting instructions. CAUTION! WARNING! SHOCK HAZARD! No User Serviceable Parts. - Page 28 303557.21 A (8/20)
- Page 29 Mire en YouTube el canal de vídeos de los spas LifeSmart donde encontrará manuales de ayuda para el usuario MANUAL DEL USUARIO Modelos de 110 V / 230 V...
- Page 30 Ancho Altura Peso seco Capacidad de Electricidad del spa agua 60 Hz LS100/LS100DX 4 personas 5'10" (178 cm) 5'1" (155 cm) 32" (81 cm) 270 libras (122 kg) 205 galones 110 V (776 litros) LS200 4 personas 6'5" (196 cm) 5'6"...
- Page 31 ÍNDICE DE CONTENIDO TÍTULO PÁGINA CONTENIDO INFORMACIÓN SOBRE SEGURIDAD INSTRUCCIONES IMPORTANTES SOBRE SEGURIDAD ....................1 INSTRUCCIONES IMPORTANTES DEL SPA ..........................4 INSTALACIÓN DÓNDE COLOCAR EL SPA ...............................5 COLOCAR EL SPA ..................................6 ACCESO AL EQUIPO PANEL DE ACCESO AL EQUIPO ..............................7 REQUISITOS ELÉCTRICOS ELECTRICIDAD ...................................8 SISTEMA DE CONFIGURACIÓN ............................10 DIAGRAMA DE CABLEADO ELÉCTRICO PARA EL USO DE 230 V ..................11...
-
Page 32: Información Sobre Seguridad
INFORMACIÓN SOBRE LA SEGURIDAD INSTRUCCIONES IMPORTANTES SOBRE SEGURIDAD LEA Y SIGA TODAS LAS INSTRUCCIONES EVITE CUALQUIER TIPO DE RIESGO PARA LOS NIÑOS PELIGRO: • RIESGO DE QUE LOS NIÑOS SE AHOGUEN. Se debe usar cautela extrema para evitar el acceso no autorizado de los niños. - Page 33 INFORMACIÓN SOBRE LA SEGURIDAD 110 VOLTIOS, MODELOS CONECTADOS POR CABLE DE 15 AMPERIOS: • El GFCI se ubica en el extremo del cable de la corriente. Antes de usar, y con la unidad en funcionamiento, pulse el botón PRUEBA (TEST). La unidad debe dejar de funcionar y el indicador de encendido GFCI se apagará.
- Page 34 INFORMACIÓN SOBRE LA SEGURIDAD QUÉ NO HACER: • No coloque los aparatos eléctricos a 5 pies (1,5 m) del spa. • No utilice una extensión para conectar el spa a la fuente de corriente. El cable puede no estar conectado a tierra adecuadamente, lo que representaría un peligro de descarga eléctrica.
-
Page 35: Instrucciones Importantes Del Spa
INFORMACIÓN SOBRE LA SEGURIDAD PARA EVITAR EL RIESGO DE HIPERTERMIA La inmersión prolongada en agua caliente podría producir HIPERTERMIA, que es un trastorno peligroso que se da cuando la temperatura interna del cuerpo alcanza un nivel por encima de lo normal (98,6 °F, 37 ºC). Los síntomas de la hipertermia incluyen falta de conciencia del peligro inminente, incapacidad para percibir el calor, incapacidad para reconocer la necesidad de salir del spa, incapacidad física para salir del mismo, daños fetales en mujeres embaraza- das y pérdida del conocimiento que podría causar ahogamiento. -
Page 36: Instalación
INSTALACIÓN DÓNDE COLOCAR EL SPA Tenga en cuenta estas cosas al determinar dónde colocar su spa. LA SEGURIDAD ES PRIMORDIAL: Asegúrese de que el spa está situado de modo tal que el acceso al compartimiento del equipo y a los paneles laterales no se bloquee. -
Page 37: Colocar El Spa
INSTALACIÓN TENGA EN CUENTA: Los daños causados por el apoyo inadecuado o incorrecto de la base no están cubiertos por la garantía. Es responsabilidad exclusiva del propietario del spa proporcionarle una base adecuada. Asegúrese de que la base donde se coloca el spa drene el agua del spa. El drenaje adecuado mantendrá a los componentes aislados de la lluvia y el tiempo húmedo. -
Page 38: Acceso Al Equipo
ACCESO AL EQUIPO PANEL DE ACCESO AL EQUIPO Panel de control superior Listón Listón Tornillo Puerta del panel de acceso al equipo Grifo de la manguera Parada eléctrica y manguera de desagüe Puerta de espuma Para acceder al compartimiento del equipo: •... -
Page 39: Requisitos Eléctricos
REQUISITOS ELÉCTRICOS ELÉCTRICO ¡NO CONECTE EL SPA SIN ANTES HABERLO LLENADO DE AGUA! PELIGRO: RIESGO DE DESCARGA ELÉCTRICA Las instalaciones que no cumplan con los siguientes procedimientos y requisitos pueden exponer a los usuarios a una descarga eléctrica. Las instalaciones que no cumplan con los procedimientos y requisitos no estarán cubiertas por la garantía. - Page 40 REQUISITOS ELÉCTRICOS • El tamaño del cable debe ser apropiado según el NEC y/o los códigos locales. • El tamaño del cable se determina por la longitud del trayecto desde la caja del interruptor al spa y la máxima gen- eración de corriente.
- Page 41 REQUISITOS ELÉCTRICOS CÓMO CONFIGURAR EL SISTEMA INSTALACIÓN DE 110 VOLTIOS (CONECTADA AL CABLE) La mayoría de spas vienen con un cable de alimentación para el GFCI instalado de fábrica y debe enchufarse en una conexión a tierra en un receptáculo de 110 voltios, 15 amperios. Ningún otro aparato eléctrico o dispositivo se puede utilizar en este circuito IMPORTANTE: Bajo NINGUNA circunstancia use un cable alargador.
-
Page 42: Diagrama De Cableado Eléctrico Para El Uso De 230 V
REQUISITOS ELÉCTRICOS DIAGRAMA DE CABLEADO ELÉCTRICO PARA EL USO DE 230 V Se recomienda que un electricista autorizado haga la conexión eléctrica del spa de acuerdo al Código Nacional de Electricidad y/o los códigos locales sobre electricidad vigentes al momento de la instalación. La instalación de la fuente de alimentación debe incluir un disyuntor GFCI nominal adecuado. -
Page 43: Regulación De La Temperatura
OPERACIÓN DEL PANEL DE CONTROL Arranque inicial - una vez que el spa se conecta por primera vez, el 1 Bomba Luces indicadoras sistema de control comienza el modo inicio a los dos minutos. La pantalla mostrará códigos diferentes. En cuanto el modo Arranque se complete, se mostrará... -
Page 44: Ajustar Los Ciclos Preestablecidos De Filtrado
OPERACIÓN DEL PANEL DE CONTROL AJUSTAR LOS CICLOS PREESTABLECIDOS DE FILTRADO Puede programar la duración del filtrado entre 0,5 y 6 horas en incrementos de 30 minutos (media hora) para ambos ciclos de filtrado. Para programar los tiempos del ciclo: 1. -
Page 45: Mensaje Diagnóstico En El Lcd
OPERACIÓN DEL PANEL DE CONTROL MODO ECONÓMICO para el LS700DX: Este modo le permite reducir el punto de ajuste de la temperatura del spa en 20 °F (11 °C), para cambiar al modo económico mantenga pulsado el botón de luz durante más de 5 segundos hasta que aparezca F1. -
Page 46: Funcionamiento De Los Componentes
FUNCIONAMIENTO DE LOS COMPONENTES FUNCIONAMIENTO DE LOS COMPONENTES DEL SPA VÁLVULA DE CONTROL DE AIRE La válvula de control de aire sirve para regular la cantidad de aire mezclado con el agua cuando los surtidores están funcionando. Gire el control del aire en una dirección para alcanzar la presión máxima del surtidor y un efecto terapéu- tico. -
Page 47: Cómo Llenar Con Agua El Spa
INSTRUCCIONES DE LLENADO E INICIO Se deben seguir los siguientes procedimientos en el encendido inicial y cada vez que el spa se vacíe para el manten- imiento de rutina. CÓMO LLENAR CON AGUA EL SPA 1. Retire todos los desechos de su spa. 2. -
Page 48: Cómo Agregar Los Productos Químicos De Inicio
CÓMO AGREGAR LOS PRODUCTOS QUÍMICOS DE INICIO GUÍA SOBRE PRODUCTOS QUÍMICOS DEL AGUA El mantenimiento de la composición química del agua del spa es responsabilidad única del propietario. Una composición química del agua incorrecta puede provocar gastos de reparación que no estén cubiertos por la garantía del spa. -
Page 49: Mantenimiento Del Spa
MANTENIMIENTO DEL SPA MANTENIMIENTO DEL CARTUCHO DEL FILTRO El cartucho del filtro debe limpiarse cada dos semanas para eliminar los objetos y partículas que se han acumulado en los pliegues del filtro. Utilice la presión del agua doméstica y una manguera de jardín con una boquilla a presión para empujar el agua desde el interior al exterior de los pliegues y forzar la salida de todas las partículas atrapadas. -
Page 50: Cuidado De La Superficie
MANTENIMIENTO DEL SPA CUIDADO DE LA SUPERFICIE No utilice solventes ni limpiadores abrasivos para limpiar el spa. Por lo general, un detergente suave y agua resuelven los temas de limpieza. CUIDADO DE LA CUBIERTA Mantenga la cubierta limpia en todo momento. Use un limpiador para cubiertas o agua tibia y jabón suave para limpiar la superficie. -
Page 51: Vaciado O Acondicionamiento Para El Invierno
VACIADO O ACONDICIONAMIENTO PARA EL INVIERNO Se necesita renovar el agua cada tres a seis meses, dependiendo del estado del agua. PRECAUCIÓN: LEA ESTO ANTES DE VACIAR EL SPA • Para prevenir daños en los componentes del spa, desconéctelo del tomacorientes (230 V) antes de vaciarlo.No vuelva a encender el spa hasta haberlo llenado de agua. -
Page 52: No Funcionan Los Componentes
PROCEDIMIENTOS DE LOCALIZACIÓN Y RESOLUCIÓN DE PROBLEMAS En el caso de que el spa no esté funcionando como debiera, primero revise todas las instrucciones de instalación y funcionamiento de este manual y compruebe el mensaje en la pantalla del panel. Si aún no considera que esté funcionando correctamente, siga las instrucciones para solucionar problemas. - Page 56 303557.21ES A (8/20)
- Page 57 Découvrez la chaîne LifeSmart Spas sur YouTube qui propose des vidéos utiles pour les propriétaires de spas MANUEL DU PROPRIÉTAIRE Modèles 110 V / 230 V...
- Page 58 Nombre de Longueur Largeur Hauteur Poids à sec Contenance en eau Spécifications places électriques 60 Hz LS100/LS100DX 4 personnes 5'10" (178 cm) 5'1" (155 cm) 32" (81 cm) 270 livres (122 kg) 205 gal (776 litres) 110 V LS200 4 personnes 6'5"...
- Page 59 SOMMAIRE TITRE PAGE CONTENU INFORMATIONS SUR LA SÉCURITÉ CONSIGNES DE SÉCURITÉ IMPORTANTES .........................1 CONSIGNES IMPORTANTES SUR LE SPA ..........................4 INSTALLATION CHOIX DE L'EMPLACEMENT DE VOTRE SPA ........................5 POSITIONNEMENT DU SPA ..............................6 ACCÈS À L'ÉQUIPEMENT PANNEAU D'ACCÈS À L'ÉQUIPEMENT ..........................7 INSTALLATION ÉLECTRIQUE ÉLECTRIQUE ....................................8 CONFIGURATION DU SYSTÈME ............................10 SCHÉMA DE CÂBLAGE ÉLECTRIQUE POUR UTILISATION DE 230 V ................11...
-
Page 60: Informations Sur La Sécurité
INFORMATIONS SUR LA SÉCURITÉ CONSIGNES DE SÉCURITÉ IMPORTANTES LISEZ ET APPLIQUEZ L'ENSEMBLE DES CONSIGNES PROTECTION DES ENFANTS DANGER : • RISQUE DE NOYADE DES ENFANTS. Tout doit être mis en œuvre pour éviter l'utilisation abusive du spa par les enfants. Afin d'éviter tout accident, assurez-vous que les enfants ne puisse pas utiliser un spa sans être surveillés en permanence. - Page 61 INFORMATIONS SUR LA SÉCURITÉ d'alimentation du disjoncteur différentiel s'éteindra. Attendez 30 secondes, puis réinitialisez le disjoncteur différentiel en appuyant sur le bouton de RÉINITIALISATION. L'indicateur d'alimentation du disjoncteur différentiel s'allumera, en restaurant l'alimentation vers le spa. Tout autre comportement du disjoncteur peut indiquer un dysfonctionnement électrique et l'existence d'un risque d'électrocution.
- Page 62 INFORMATIONS SUR LA SÉCURITÉ CE QU'IL NE FAUT PAS FAIRE : • Positionner un appareil électrique à moins de 5 pieds (1,5 m) du spa. • Utiliser une rallonge pour relier le spa à une source d'alimentation. La rallonge risque de ne pas avoir de mise à...
- Page 63 INFORMATIONS SUR LA SÉCURITÉ PROTECTION CONTRE LE RISQUE D'HYPERTHERMIE L'immersion prolongée dans l'eau chaude peut entraîner une HYPERTHERMIE, une situation dangereuse qui survient lorsque la température interne du corps humain dépasse la valeur normale de 98,6°F (37ºC). Les symptômes de l'hyperthermie comprennent notamment l'inconscience du danger imminent, l'incapacité à ressentir la chaleur, l'incapacité...
-
Page 64: Installation
INSTALLATION CHOIX DE L'EMPLACEMENT DE VOTRE SPA Considérez les aspects suivants lors du choix de l'emplacement de votre spa. LA SÉCURITÉ AVANT TOUT : Positionnez votre spa de façon à libérer l'accès au bloc technique et aux panneaux latéraux. Assurez-vous que votre installation est conforme à... -
Page 65: Positionnement Du Spa
INSTALLATION ÉLÉMENTS À PRENDRE EN CONSIDÉRATION : Les dommages causés par des fondations inadéquates ou inappropriées ne sont pas couverts par la garantie du spa. Il relève de la seule responsabilité du propriétaire du spa de positionner celui-ci sur des fondations appropriées. Assurez-vous que les fondations sur lesquelles reposent le spa permettent de drainer l'eau à... -
Page 66: Accès À L'équipement
ACCÈS À L'ÉQUIPEMENT PANNEAU D'ACCÈS À L'ÉQUIPEMENT Panneau de commandes supérieur Lame Lame Porte du panneau d'accès à l'équipement vette tuyau Logement électrique et tuyau de vidange Porte en mousse Pour accéder au bloc technique : • Retirez une 1 lame verticale et les 3 vis présentes de chaque côté de la porte du panneau d'accès à l'équipement (sur certains spas). -
Page 67: Installation Électrique
INSTALLATION ÉLECTRIQUE EXIGENCES NE BRANCHEZ PAS LE SPA AVANT DE L'AVOIR REMPLI D'EAU ! DANGER – RISQUE D'ÉLECTROCUTION Les installations non conformes aux procédures et aux exigences suivantes font courir à leurs utilisateurs un risque d'électrocution. Les installations non conformes ne seront pas couvertes par la garantie. -
Page 68: Électrique
INSTALLATION ÉLECTRIQUE 8. ATTENTION, SPAS DE 230 V – Ces spas doivent être uniquement câblés au tableau électrique principal de votre résidence. Ne pas utiliser de rallonge ou autre cordon d'alimentation pouvant être débranché. L'utilisation d'une rallonge ou d'un cordon d'alimentation pouvant être débranché est extrêmement dangereuse et annulera toutes les garanties ! •... -
Page 69: Configuration Du Système
INSTALLATION ÉLECTRIQUE CONFIGURATION DU SYSTÈME INSTALLATION DE 110 VOLTS (CÂBLÉ) La plupart des spas sont fournis avec un cordon d'alimentation à disjoncteur différentiel installé en usine et doivent être branchés dans un réceptacle de 110 volts, 15 ampères mis à la terre. Aucun autre appareil électrique ne peut être utilisé... -
Page 70: Schéma De Câblage Électrique Pour Utilisation De 230 V
INSTALLATION ÉLECTRIQUE SCHÉMA DE CÂBLAGE ÉLECTRIQUE POUR UTILISATION DE 230 VOLTS Nous vous recommandons de faire installer l'alimentation de votre spa par un électricien agréé, en conformité avec la norme électrique nationale et/ou locale en vigueur au moment de l'installation. L'installation de l'alimentation doit inclure un disjoncteur différentiel de capacité... -
Page 71: Fonctionnement Du Panneau De Commandes
FONCTIONNEMENT DU PANNEAU DE COMMANDES Démarrage initial- Lorsque le spa est mis sous tension pour la première 1 pompe Voyants d'indicateur fois, le système de commande débute un mode de démarrage de 2 minutes. Différents codes s'affichent à l'écran. Une fois que le mode de démarrage est terminé, la température réelle s'affiche à... -
Page 72: Régler Les Cycles De Filtration Préréglés
FONCTIONNEMENT DU PANNEAU DE COMMANDES RÉGLER LES CYCLES DE FILTRATION PRÉRÉGLÉS La durée de la filtration est programmable entre 0,5 et 6 heures en incréments de 30 minutes (0,5 heures) pour les deux cycles de filtration. Pour programmer les durées de cycle : 1. -
Page 73: Affichage Des Messages De Diagnostic
FONCTIONNEMENT DU PANNEAU DE COMMANDES MODE ÉCONOMIE pour LS700DX : Ce mode vous permet d'abaisser le point de consigne de température du spa de 20 °F (11 °C). Pour passer en mode Économie, appuyez et maintenez la touche Éclairage pendant 5+ secondes jusqu'à... -
Page 74: Fonctionnement Des Composants
FONCTIONNEMENT DES COMPOSANTS FONCTIONNEMENT DES COMPOSANTS DU SPA VANNE DE RÉGULATION D'AIR La vanne de régulation d'air sert à réguler la quantité d'air mélangée à l'eau lorsque les jets sont en marche. Faites tourner la vanne de régulation d'air dans un sens pour obtenir la pression de jet et l'action thérapeutique maximum. Tournez les vannes de régulation d'air dans la direction opposée pour permettre aux jets de fonctionner uniquement avec de l'eau. -
Page 75: Consignes De Remplissage Et De Mise En Route
CONSIGNES DE REMPLISSAGE ET DE MISE EN ROUTE Les procédures suivantes doivent être suivies lors de la première mise en route et après chaque vidange du spa, à l'occasion de son entretien de routine. REMPLISSAGE DU SPA 1. Nettoyez tous les débris présents dans votre spa. 2. -
Page 76: Ajout De Produits Chimiques De Mise En Route
AJOUT DE PRODUITS CHIMIQUES DE MISE EN ROUTE CONSIGNES POUR L'ÉQUILIBRE CHIMIQUE DE L'EAU C'est le propriétaire du spa qui est le responsable ultime de l'équilibre chimique de l'eau du spa. Un mauvais équilibre chimique de l'eau peut entraîner des réparations coûteuses qui ne sont pas couvertes par la garantie du spa. -
Page 77: Entretien Du Spa
ENTRETIEN DU SPA ENTRETIEN DE LA CARTOUCHE DE FILTRATION Une fois par mois, la cartouche de filtration doit être nettoyée afin d'en ôter les débris et les particules qui se sont déposés dans les plis de la cartouche. En utilisant la pression de l'eau domestique au moyen d'un tuyau d'arrosage équipée d'une buse sous pression, évacuez l'eau depuis l'intérieur vers l'extérieur des plis, en repoussant vers l'extérieur toutes les particules piégées. -
Page 78: Nettoyage Du Revêtement
ENTRETIEN DU SPA NETTOYAGE DU REVÊTEMENT N'utilisez pas de solvants ou de produits abrasifs pour nettoyer le spa. Dans la plupart des cas, un détergent doux et de l'eau permettront de procéder à son nettoyage. NETTOYAGE DE LA COUVERTURE Veillez à maintenir en permanence la propreté de votre couverture. Utilisez un produit nettoyant pour couverture ou de l'eau chaude savonneuse pour en nettoyer la surface. -
Page 79: Vidange Ou Hivernage
VIDANGE OU HIVERNAGE Tous les trois à six mois, vous devrez renouveler l'eau en fonction de son état. MISE EN GARDE : LISEZ CE QUI SUIT AVANT DE VIDANGER VOTRE SPA • Afin d'éviter tout dommage aux composants du spa, débranchez le spa de la prise murale ou désactiver le disjonc- teur (230 V) avant de vidanger. -
Page 80: Procédures De Dépannage
PROCÉDURES DE DÉPANNAGE Dans le cas où votre spa ne fonctionne pas correctement, veillez à vérifier d'abord l'intégralité des consignes d'installation et d'utilisation présentes dans ce manuel et contrôlez le message présent sur le panneau d'affichage. Si vous n'êtes toujours pas satisfait de son fonctionnement, veuillez suivre les instructions de dépannage appropriées. MISE EN GARDE ! AVERTISSEMENT ! RISQUE D'ÉLECTROCUTION ! Aucune de ces pièces n'est réparable par l'utilisateur. - Page 84 303557.21FR A (8/20)
Need help?
Do you have a question about the LS100 and is the answer not in the manual?
Questions and answers
I am replacing my old hot tub that ran on 230 volt with the LS300 110 volt hot tub. Can I plug the LS300 into the 230v outlet or will I need to convert my 230v outlet to 110v and if so, how do I do this?