Table of Contents
Advertisement
Quick Links
Advertisement
Table of Contents

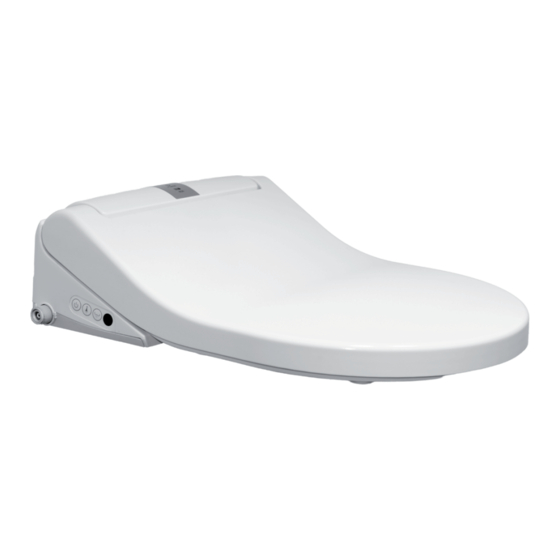
Summary of Contents for Maro D'Italia DI600
-
Page 2: Table Of Contents
Content Package content Technical specifications Technical drawing & Recommended power and water supply connections Safety precautions Before installation Installation List of installation parts Side control buttons overview Remote control overview Rear / Front wash operation Move and pulsating Rear wash mode Auto mode Seat heating setting Dryer operaton and night light... - Page 3 Bidet seat main unit Screws and anchors (remote control) T-adapter&Filter Expansion screws Bidet inlet hose (main unit)
-
Page 4: Technical Specifications
Technical Specifications ELECTRONIC TOILET SEAT NAME DI600 MODEL REAR FRONT MOVE/OSCILLATING NOZZLE REAR PULSATING 5 Settings WATER PRESSURE CONTROL WATER TEMPERATURE CONTROL 3 Settings NOZZLE POSITION ADJUSTMENT 5 Settings AIR DRYER AIR TEMPERATURE CONTROL 3 Settings SEAT HEATING TEMPERATURE CONTROL... - Page 5 Technical Drawings 385mm 136mm 140~180mm 510mm 293mm 377mm 500mm 205mm 545mm Recommended Power and Water Supply Connection Power socket can be positioned either on the left or right side of the water outlet.
-
Page 6: Safety Precautions
Safety precautions Use the specified power supply Do not loose outlets. This might AC 220V-240V/50Hz only. Never cause a fire or an electrical shock. put too much pressure on the electrical outlet. This may cause a fire or overheating. If the power cord does not suffice, please buy a professional power extension cord. - Page 7 Safety precautions Make sure replacement, repair or Do not expose the product to removal of the product is carried direct sunlight. This might cause out by a qualified service person discoloration or skin injury due to only. Failing to do so might cause unstable temperature.
-
Page 8: Before Installation
Before installation 1. Do not put the product in a room where humidity can exceed 90% RH (relative humidity). 2. Only use specified power supply (AC 220V–240V). Other power supply may cause product failure or product damage. 3. Do not apply power or supply water to the unit until the installation process is complete. 4. -
Page 9: Installation
Installation Installation tips for fixation plate: First, do not screw the plate too tightly, leaving space. Second, install the product and adjust its position, then press the button on the right side to uninstall the product so as to make a tight screw to the plate. And at last install the main unit by sliding it onto the fixation plate until it locks in place. - Page 10 Installation...
- Page 11 Installation Slide up to remove the remote control. Slide down to put the remote control back to the initial position.
- Page 12 Installation...
- Page 13 Installation Functionality test Seat sensor In order to test if the wash functions work properly, press on the “Seat sensor” position with your hand.
-
Page 14: List Of Installation Parts
List of installaton parts Cover bider Inlet Hose Display T-adapter Filter Power Filter Rear Wash Button Power Seat Front wash Button Plug IR Receiver Bidet Seat unit Fixation Plate Night Light Dryer Rear Wash Front wash Nozzle Cap... -
Page 15: Side Control Buttons Overview
Side Buttons Overview Rear Wash Button Power IR Receiver Front Wash Button Front / Rear Wash Settings Rear Wash Front Wash Press the “Rear” or “Front” button to initiate the Rear or Front Wash function. Press again to initiate the Move oscillating nozzle washing mode. -
Page 16: Remote Control Overview
Remote control overview... - Page 17 Rear / Front Wash Settings Press the “Stop” button to stop Washing and Drying Functions; The washing procedure will stop automatically after 3 minutes or when you leave the seat. Water temperature settings High temperature Medium temperature Low temperature Normal temperature Water Pressure settings Nozzle position settings...
- Page 18 Move - Oscillating Nozzle Washing Press the button to start Move. Enabled Rear /Front Mode Press again to stop. Pulsating Washing ( in Rear/Front Mode) Long press the button to start Pulsate. Press again to stop. Energy saving - ECO mode (After the ECO mode start, the seat will maintain lower temperature when leaving the seat;...
-
Page 19: Auto Mode
Auto mode Press the button to start the “Auto mode”, it will complete Rear Wash with Move function enabled and lastly Drying in sequential order automatically Step 1: Rear Wash Mode Step 2: Move Mode Step 3: Rear Wash Mode Step 4: Dryer Mode... - Page 20 Seat temperature control 5th grade 4th grade 3rd grade 2nd grade 1st grade Normal temperature Anti-scalding protection 180 seconds after the user is seated, the control system reduces the seat temperature automatically, to prevent being scolded.
-
Page 21: Dryer Operaton And Night Light
Dryer operation and night light Dryer operation High temperature Medium temperature Low temperature Normal temperature Press the “Stop” button to stop; The function will stop automatically in 3 minutes or when you stand up. Night light Press the button to enable the Night Light Press again to disable the Night Light... -
Page 22: Nozzle Cleaning
Nozzle cleaning Press the “NOZZLE SELF-CLEAN” button and the nozzle will extend to clean itself automatically. You can also choose to clean the nozzle by yourself. Manual cleaning and maintenance The cleaning procedure can be ended by pressing the “Stop” button or by waiting for 120 seconds until the nozzle retracts itself. -
Page 23: Users Memory Settings
Users Memory Settings You can save the preferred settings of the "nozzle position", "water pressure" and "water/air/seat temperature": -How to save settings for either USER1 or USER2 While the REAR or FRONT wash is enabled, set your preferred nozzle position, water pressure and water/air/seat temperature, then simply press and hold USER1 or USER2 for at least 2 seconds. - Page 24 Cleaning and Maintenance Close the corner or angle valve. max. 45° Turn the toilet seat conterclockwise and take out the old filter screen.
-
Page 25: T-Adapter Cleaning And Filter Replacement
T-Adapter cleaning and filter replacement T-adapter mesh filter cleaning Take out the mesh filter screen. Clean the mesh filter screen. Assemble the mesh filter Open the water supply Replacing the filter unscrew the hose. Turn the filterco counterclockwise and remove the old filter Close the water supply . -
Page 26: Disassembly
Disassembly max. 45° Push the velve spool up using a screwdriver to drain the internal water. -
Page 27: Troubleshooting
Troubleshooting FREQUENTLY ASKED QUESTIONS Please read the following questions carefully and refer to the instructions. If the product still does not work, contact your local sales dealer or dial the service call for help. TIPS: If there is water leakage, immediately turn off the water, pull out the power plug and switch off the power supply of the appliance. The following reasons may cause the product's working failure: 1. - Page 28 Troubleshooting Solution Cause Problem Seat temperature is not warm Is seat temperature set on low or is it Reset the seat temperature on a enough during use. turned off? higher setting. Seat Seat temperature is too high. Is the seat temperature set too high? Reset the seat temperature on a lower setting.
-
Page 30: Warranty Card
• MARO as manifacturer will not be responsible for any quality or malfunction issue caused by quality of the feed water. • Damage of loss sustained through any natural or manmade causes beyond the control of Maro D'Italia , including but not limited to fire, earthquake, floods, etc. - Page 31 Maro D'Italia part of TOOALETA GROUP Tooaleta GmbH Otto-Lilienthal-Straße 4 88046 Friedrichshafen Deutschland Leistungserklärung kann angefordert werden unter: Declaration of performance can be requested from: Email: info@maro-bathroom.com...
Need help?
Do you have a question about the DI600 and is the answer not in the manual?
Questions and answers