Advertisement
Advertisement
Table of Contents

Subscribe to Our Youtube Channel
Related Manuals for Gevi GETOE725-U


Summary of Contents for Gevi GETOE725-U
- Page 1 AIR FRYER OVEN INSTRUCTION MANUAL GETOE725-U...
-
Page 2: Important Safeguards
Always use oven mitts when handling Gevi have focused on creating perfect home appliance hot materials, and allow metal parts to cool down before for our customer. In the past years, it took us time, lots cleaning. - Page 3 Do not store or use anything in the air fryer oven Do not clean with metal scouring pad. Pieces may especially if it is not recommended by the manufacturer. break off from the pad and may get in contact with Do not use outdoors or for commercial purposes.
-
Page 4: Control Panel
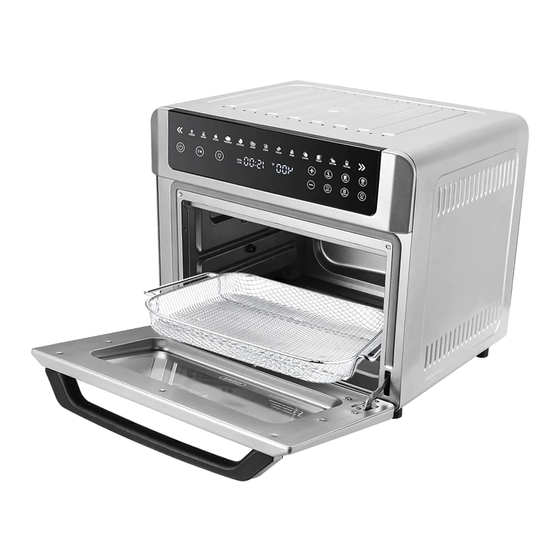
KNOW YOUR AIR FRYER OVEN CONTROL PANEL Electrical parameters: 120V AC 60Hz 1700W Housing Touch panel Glass door Smart Menus Menu Preset Buttons Menu select arrows, with Cycle through Preset Buttons, Door handle left and Right directions. with 13 Smart Programs. •... - Page 5 Light Button 360° Rotate Button Turn the internal cooking light on or off. A lighting cycle is 30 • It is designed for rotate the foods. seconds. • If this button is semi-lit, it means the 360° function is available to select.
- Page 6 SMART MENUS REFERENCE CHART Default Time Default Temp 360°Rotate Suggested Default Time Default Temp 360°Rotate Suggested Smart Menus Fan Function Smart Menus Fan Function & Range & Range Function Accessory & Range & Range Function Accessory Default Food Tray 15mins 400℉...
- Page 7 If there is Fan button or 360°button semi-lit, it means you can USING THE DIGITAL CONTROL PANNEL add it before the operation. If the button is fully-lit, you can Plug in the power cord. The LCD display lights up and all the press to cancel and it will become semi-lit.
-
Page 8: Using For The First Time
Or you can press the Start/Pause button to cancel the Wait for the Unit to begin heating and help to remove the preheating, the Time display will stop blinking. Then press smell. Start/Pause button again, the unit will get into the Menu operation immediately. - Page 9 Wire Rack SET UP AND USE THE ACCESSORIES Crumb Tray Open the front door, put the crumb tray into the unit according to the direction shown below: Rotisserie Cage And Rotisserie Tong Firstly, set up the Rotisserie Cage. Food Tray Unscrew the 2 setting screws.
- Page 10 Secondly, use the rotisserie tong to insert the rotisserie cage into the Push the food item onto the spit. inner chamber. Thirdly, align the rotisserie cage to the setting holes according to the figure shown below: Slide the forks onto both ends of the spit, ensuring the prongs are inserted into the food item.
-
Page 11: Useful Tips
Wipe the crumb tray with a damp cloth. After cleaning, push the USEFUL TIPS crumb tray back into its position. Condensation or moisture may appear on the air fryer oven’ s DO NOT use the dishwasher to clean any of the accessories that door while cooking some foods.
Need help?
Do you have a question about the GETOE725-U and is the answer not in the manual?
Questions and answers