
Subscribe to Our Youtube Channel
Summary of Contents for BOS BS-DET2000BT
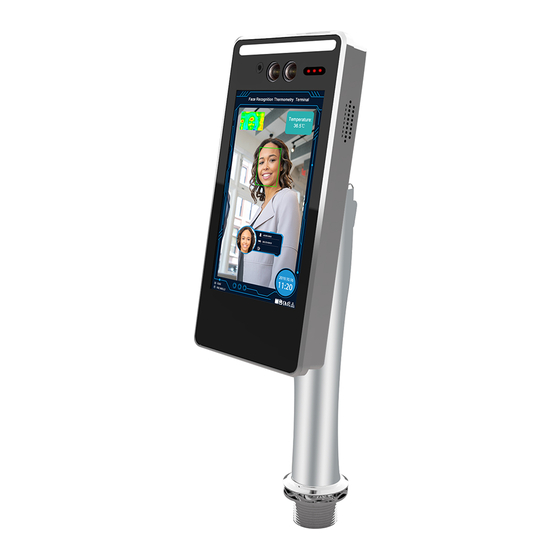
- Page 1 BS-DET2000BT /RF MANUAL VERSION 1.4 FACE RECOGNITION AND TEMPERATURE DETECTION DEVICE BS-DET2000BT...
- Page 2 • The firmware of the device will be updated from time to time. For a better experience, please update whenever a new update is available • The BS-DET2000BT device is NOT a diagnostic device nor a medical device, any abnormal temperature detection must then be verified using a suitable thermometer •...
- Page 3 IMPORTANT NOTES REGARDING THE READING OF TEMPERATURE It should be borne in mind that the DET2000 thermoscanner is a skin temperature measurement device that can be influenced by various factors: • Exposure to sources of heat / cold • Physical movement •...
- Page 4 • on the forehead - measured with an infrared forehead thermometer: from 35.4 ° C to 37.4 ° C (can deviate even 0.7 ° C from the axillary measurement and 1.2 ° C from the rectal measurement; external factors such as exposure to cold or hot ambient temperatures) The 0.3 °...
-
Page 5: Table Of Contents
INDEX 1. PRODUCT OVERVIEW ..........................7 1.1 INTRODUCTION TO THE PRODUCT ....................7 1.2 PRODUCT CHARACTERISTICS ......................7 1.3 FIELDS OF APPLICATION ........................8 2. PRODUCT INSTALLATION ........................8 2.1 INSTALLATION ............................9 2.2 INSTALLATION ON DETPAV110 PEDESTAL ..................9 2.3 INSTALLATION ON DETBASE TABLE BASE .................. - Page 6 4.6.2 DST SETTINGS ..........................24 4.6.3 NETWORK SETTINGS ......................... 25 4.6.4 PORT ............................. 25 4.6.5 P2P ..............................26 4.6.6 TF CARD ............................28 4.6.7 USER MANAGEMENT ......................... 29 4.6.8 EMAIL ............................30 4.6.9 STORAGE MANAGE ........................30 4.7 PARAMETER SETTINGS ........................31 4.7.1 FACIAL RECOGNITION .......................
-
Page 7: Product Overview
1. PRODUCT OVERVIEW 1.1 INTRODUCTION TO THE PRODUCT The DET2000BT device is a terminal that provides face detection, forehead temperature detection, face mask detection and other basic functions. The device can be widely used in the realization of access control, presence, safety of public and work environments 1.2 PRODUCT CHARACTERISTICS •... -
Page 8: Fields Of Application
1.3 FIELDS OF APPLICATION The device can find application in multiple sites such as: • Schools • Offices • Shops • Hospitals • Nursing homes • Corporate • Nursing homes • Municipal offices And in any other place where it may be necessary to check the body temperature at the entrance. The device can be used both standalone and integrated in existing access control systems thanks to the communication ports it is equipped with (LAN, 485, Wiegand) and the possibility of providing SDK and API. -
Page 9: Installation
2.1 INSTALLATION This equipment can be installed on access turnstiles. Before installation, it is necessary to make sure that the top cover plate has been perforated with the size of the hole corresponding to the diameter of the device support. 2.2 INSTALLATION ON DETPAV110 PEDESTAL... -
Page 10: Installation On Detbase Table Base
• Footboard • Tube • Nut for pipe fixing • Insert the nut for fixing the tube inside the hole in the platform, so that the part to be screwed is facing upwards, then insert the nut from the bottom of the platform. •... -
Page 11: Wall Installation
2.4 WALL INSTALLATION To install the device on the wall with its bracket: • Remove the side screws that secure the device from the rear • Insert the Allen screws (in the bag with the bracket) with the device and the bracket, then fix the bracket to the wall 3. -
Page 12: Client Software
Wiring diagram: Note: an included 12Vdc power supply is required for the power supply 4. CLIENT SOFTWARE 4.1 IPC DEMO INSTALLATION Access the device by logging in with Internet Explorer and type the IP address in the URL bar. The default address is 192.168.1.189 (or check the IP in the lower left corner of the device screen after switching on), make sure you are in the same network class as the device and in the same network. -
Page 13: Login Interface
4.2 LOGIN INTERFACE After installing "ipc demo", an icon will appear on the desktop: Double click to open it and the following login interface will appear. Enter the device password (default is 888888) and click the "Login" button to access the device Once logged in, you will be prompted to change the password. -
Page 14: Interface Preview
Click to enter the device search interface, click the "Search" button to search for the device and select the device you want to access. Once you have selected the device, you have the option of being able to change its IP address, username, password and at the bottom right in "Batch update"... -
Page 15: Creation And Management Of Lists
4.4 CREATION AND MANAGEMENT OF LISTS In the "Face List" you can view all faces, the ID, the name, the assignment to a Wiegand and information about the registered person saved within the various lists: whitelist, blacklist and visit). 4.4.1 IMAGE REQUIREMENTS OF FACES To ensure recognition accuracy, use a recent photo, the image must contain only one face and must have a width of no less than 260 pixels. -
Page 16: Importing A Single Face Image
4.4.2 IMPORTING A SINGLE FACE IMAGE Select "Faces list" to enter the list management interface: Steps: 1. Add group: set the group name and group type (whitelist, blacklist or visitor) 2. Select "Add face" • Click "Browse" to check where the photo is located and select it •... -
Page 17: Multiple Faces Import
4.4.3 MULTIPLE FACES IMPORT Select "Faces list" to enter the list management interface: Steps: 1. Add group: set the group name and type (whitelist, blacklist or visitors) 2. Select "Add more faces" • Click to set the image import format (Note: the image naming format must match to avoid import errors) •... -
Page 18: Real-Time Faces Import
4.4.4 REAL-TIME FACES IMPORT In the interface preview, when a person is detected, the latter will continue to capture faces. Click the icon on the right side of the face to see the photo captured in real time: In the history of faces, select the image, as in the model below, to import it into the device Note: for this import mode, the groups need to be configured in advance in the list management... -
Page 19: Importing The Face Library In Binary Format
4.4.5 IMPORTING THE FACE LIBRARY IN BINARY FORMAT The device supports the import of one or more faces in binary format. Select "Import single bin file" or "Import multiple bin file" respectively to select your .bin file and import it to the device: 4.4.6 EXPORT FACE LIBRARY In the list management screen: •... -
Page 20: Peripheral Control
4.5 PERIPHERAL CONTROL 4.5.1 BASIC SETTINGS Click care "System" -> "Peripherals" to enter the system settings interface • Basic configuration: set the device volume (or change it), set the duration of the screensaver and screen shutdown, the screen frequency (50 or 60 MHz), set the path to save snapshots and enable privacy mode: thanks to this last parameter you can decide whether to set a "Total privacy", so no image will be saved inside the device, or set a "partial privacy"... -
Page 21: Input / Output Configuration
• Access control: you can select two types of opening, relay or wiegand • Alarm output: relay channel 0 (out0) or relay channel 1 output (out1) • delay: waiting time for the opening state • Access mode (opening mode): 1. Face: the face captured corresponds to that of the database to open the entrance 2. -
Page 22: Wiegand Settings
4.5.4 WIEGAND SETTINGS The DET2000BT system is equipped with a Wiegand door for connection to access control systems. For the door configuration: click "Peripherals" -> "Wiegand configuration" to enter the wiegand configuration interface • Wiegand protocol (output): wiegand 26/36/66 bit •... -
Page 23: Led Light
4.5.6 LED LIGHT The device is equipped with two white LEDs that are used to compensate for any lack of light required for detection. Click "Peripherals" -> "Light" to enter the light interface • Test to see if the fill light is working properly 4.5.7 SERIAL PORTS The DET2000BT is equipped with an RS485 serial port. -
Page 24: System Configuration
4.6 SYSTEM CONFIGURATION 4.6.1 DATE AND TIME SETTINGS Click "System" -> "Time" to enter the time settings interface • Device time: to configure the time of the device. Modes: Manual and Synchronized with PC or NTP server • NTP: the device will synchronize with the time of the NTP server server network To allow the DET2000BT to keep the history of the readings correctly it is essential that the date and time are set correctly. -
Page 25: Network Settings
4.6.3 NETWORK SETTINGS The DET2000BT device is equipped with a 10/100 network port for possible connection to the company network. For network parameter settings: click "System" -> "Network" In this interface you can change the network settings of the device: IP address, DNS and choose whether to keep a static IP or set it in DHCP. -
Page 26: P2P
4.6.5 P2P If you need a device connection with the outside (mobile APP, IVMS connection) and you do not have a static IP, or for simplicity, you can enable the P2P function Click "System" -> "P2P" to enter the P2P settings interface 1. - Page 27 2. Press “Register” to register. Enter an email and press "Get Code" to verify the email; enter the code that will arrive and continue by setting a password 3. After registering, add the device as indicated above; once added click on the left menu "Remote Settings", select the device with which you want to activate notifications, go to "Notification Setting"...
-
Page 28: Tf Card
4.6.6 TF CARD The DET2000BT device is equipped with a slot for housing a TF Card for memory expansion with a maximum capacity of 128 GB. To insert the TF Card:... -
Page 29: User Management
• Open the door on the rear of the camera • Insert the card into the space provided for the memory card Click "System" -> "TF Card" to enter the TF card settings interface • You can check the TF card status in real time. 4.6.7 USER MANAGEMENT For security reasons, once all the necessary settings have been made it is recommended to replace the default device password. -
Page 30: Email
4.6.8 EMAIL The device has an email function which allows you to receive an email message in case of high temperature. I recommend using GMAIL as a SENDER email for correct operation and without any configuration and security problems: Click "System" -> "Email" to enter the email settings interface To configure the email: •... -
Page 31: Parameter Settings
4.7 PARAMETER SETTINGS 4.7.1 FACIAL RECOGNITION The main functions of the DET2000BT are temperature detection and face recognition. To make settings for these functions: click "System" -> "Parameter" -> "Face recognition" to enter the settings interface • Similarity: performs a comparison between the faces saved in the lists and the one just detected, this threshold is used to set the percentage of similarity between the two faces compared •... -
Page 32: Temperature Configuration
4.7.2 TEMPERATURE CONFIGURATION To configure the temperature settings: click “System” -> “Parameter” -> “Temp. Config. " to enter the interface • Temp Type: Celsius or Fahrenheit • Temp Show Mode: temperature display or just a status message • Temperature: enable or disable the temperature reading •... -
Page 33: Scheduling Management
4.7.4 SCHEDULING MANAGEMENT The DET2000BT device has the possibility to program when to recognize faces, setting the days and the time slot: click "System" -> "Parameter" -> "Face programming" to enter the settings interface Click “Add” to enter the schedule time setting interface, a total of 6 time periods can be set 4.7.5 AUDIO The DET2000BT incorporates audio speakers, thanks to the latter, the device provides voice messages. -
Page 34: Osd Settings
• The broadcast mode can be changed by setting either the name or the scene first • All input items can be imported or registered 4.7.6 OSD SETTINGS Click "System" -> "Parameter" -> "OSD Settings" to enter the "On Screen Display" settings interface •... -
Page 35: Factory Calibration
4.7.8 FACTORY CALIBRATION Note: setting available only to device manufacturers 4.8 DATA UPLOAD The device has the possibility to save the captured images both in http and in FTP, you can configure it: clicking "System" -> "Upload" -> "Upload Data" to enter the settings interface •... -
Page 36: Firmware Update
4.9.2 FIRMWARE UPDATE Updates will be periodically released to the device firmware that will implement new functions, fixes and bug fixes: On the login screen, press the magnifying glass and at the bottom right there will be a "Batch update" section from where you can update the device. -
Page 37: Maintenance
4.9.4 MAINTENANCE Click "System" -> "System info" -> "Maintain" to enter the device maintenance interface. This function allows you to set an auto restart of the device: once, every day or once a week by setting a time. 4.9.5 SEARCH LOG Click "System"... -
Page 38: Access Log
4.10 ACCESS LOG The access log allows you to view all the detections made by the device. Set start and end date and time and a filt ro, once set, press "Search" • Set period: start and end • Select search type: 1. - Page 39 3. According to the list query: whitelist, blacklist, visitors 4. According to the information: Enter the name and ID 5. Second image: compare the uploaded image among those in the register...
- Page 40 6. Temperature overheat The query result is shown like this:...
-
Page 41: Read Id Card
5. READ ID CARD (MODEL BS-DET2000BTRF) BS-DET2000BTRF device has integrated RFID reader for ID Cards such as badges. To assign the card to a registered face you must first read the card, then: click “System” -> “Peripherals” -> “Config. Wiegand " In "Wiegand Entrance"... - Page 42 BORINATO SECURITY SRL Via Chiesa, 22 – 36044 Val Liona (VI) Tel. +39 0444868678 – Fax. +39 04441491650 – www.bositaly.it info@bositaly.it...
Need help?
Do you have a question about the BS-DET2000BT and is the answer not in the manual?
Questions and answers