Advertisement
Available languages
Available languages
Quick Links
Advertisement

Subscribe to Our Youtube Channel
Related Manuals for VonHaus 3500114


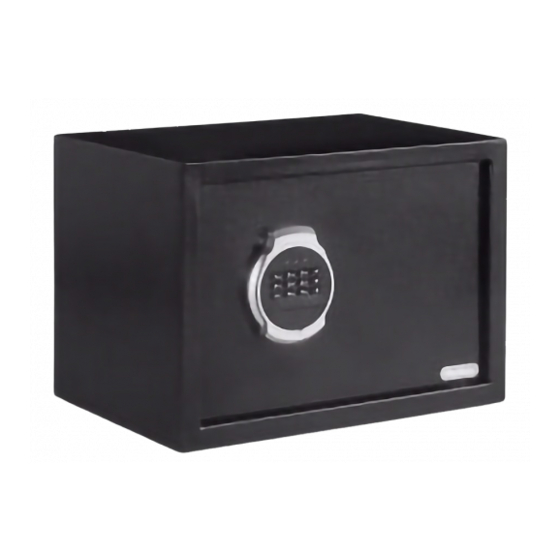
Summary of Contents for VonHaus 3500114
- Page 1 HOUSEHOLD SAFE 18L 3500114 - Instruction Manual...
- Page 2 CONTENTS Safety Instructions Tools Required, Securing the Safe Specification Before Use Opening the door/Automatic Lock Setting User Code/Setting Master Code Troubleshooting Warranty...
- Page 3 WARNING PLEASE READ THESE INSTRUCTIONS CAREFULLY AND KEEP FOR FUTURE REFERENCE This manual contains important information NOTE: These important safeguards and regarding the operation and maintenance instructions cannot cover all possible of the Safe. Please ensure you read and conditions and situations that may occur. It understand all instructions regarding the must be understood that common sense and correct operation of the product before...
- Page 4 TOOLS REQUIRED *NOT INCLUDED Power Drill Suitable Drill Bit Suitable Screwdriver Wrench Pencil SECURING THE SAFE For security reasons, it is recommended that you secure the Safe against a secure masonry wall and floor surface. 1. Drill holes for expansion bolts in the desired location. 2.
- Page 5 SPECIFICATION FIRE BATTERY INTERNAL CASH PROOFING POWER VOLUME RATING 4 x 1.5V LR6 None None 1. Concrete Anchors (x4) 6. Locking Handle 2. Override Keys 7. LED Indication 3. Screws (x4) 8. Battery Cover 9. Reset Button 4. Electronic Keypad 10.
- Page 6 BEFORE FIRST USE FIRST TIME OPENING Remove the Locker cover (5) then insert the key and rotate counter clockwise to unlock. Rotate Locking Handle (6) clockwise to open. INSTALLING BATTERIES Remove the Battery Cover (8) located on the back of the Safe door. Push in the catch and carefully remove the cover.
- Page 7 OPENING THE DOOR OPENING / CLOSING THE DOOR Input your users code (3-8 digits). NOTE Each press results in one buzzer beep and a flashing to yellow to confirm. Press * or # to confirm code. The green light will illuminate to open the safe. Rotate the Locking Handle (6) clockwise to open.
- Page 8 SETTING THE USER CODE With the door open, press the Reset Button (9) and wait for the yellow light to illuminate. Input your desired code (3-8 digits) and press * or # button to confirm. Two buzzer beeps will confirm acceptance of the new code. If the yellow light flashes with 3 buzzer beeps, you will need to repeat the process again.
- Page 9 TROUBLESHOOTING PROBLEM SOLUTION LOST OVERRIDE KEYS PIN NUMBER FORGOTTEN Please contact hello@DOMU.co.uk BATTERIES HAVE EXHAUSTED Open the Safe using the Override Keys KEYPAD IS NOT RESPONDING and replace the batteries. Unlock the Safe using the Override SAFE WILL NOT OPEN WHEN CORRECT UNLOCK CODE IS Keys and replace the batteries.
- Page 10 To register your product and find out if you qualify for a free extended warranty please go to www.Vonhaus.com/warranty. Please retain a proof of purchase receipt or statement as proof of the purchase date. The warranty only applies if the product is used solely in the manner indicated in the Warnings page of this manual, and all other instructions have been followed accurately.
- Page 11 USER NOTES...
- Page 12 SOMMAIRE Consignes de sécurité Outils nécessaires, Fixer le Coffre-fort Caractéristiques techniques Avant utilisation Ouverture de la porte/Verrouillage automatique Régler le code utilisateur/Régler le code maître Dépannage Garantie...
- Page 13 AVERTISSEMENT VEUILLEZ LIRE CES INSTRUCTIONS ATTENTIVEMENT ET LES CONSERVER COMME R… F… RENCES FUTURES Ce mode d’emploi contient des informations vos fixations, ne faites rien. Contactez une importantes liées au fonctionnement et à l’en- personne qualifiée pour obtenir des conseils et tretien du Coffre-fort.
- Page 14 OUTILS NÉCESSAIRES *NON COMPRIS Perceuse Mèche adaptée Tournevis adapté Clé à Crayon électrique douille FIXER LE COFFRE-FORT Pour des raisons de sécurité, il est conseillé de fixer le Coffre-fort sur un mur de maçonnerie solide et sur le sol. 1. Percez des trous, à l’endroit souhaité, pour les boulons à expansion. 2.
- Page 15 CARACTÉRISTIQUES TECHNIQUES PUISSANCE DE VOLUME CERTIFICATION IGNIFUGATION LA BATTERIE INTERNE POUR FONDS 4 x 1.5V LR6 Aucune Aucune 6. Poignée de verrouillage 1. Cheville pour béton (x 4) 7. Affichage LED 2. Clés de déblocage 8. Couvercle des piles 3. Vis (x 4) 9.
- Page 16 AVANT LA PREMIÈRE UTILISATION PREMIÈRE OUVERTURE Retirez le Cache de protection de serrure (5), puis insérez la clé et tournez dans le sens inverse des aiguilles d’une montre pour déverrouiller. Tournez la Poignée de verrouillage (6) dans le sens des aiguilles d’une montre pour ouvrir. INSTALLATION DES PILES Retirez le Couvercle des piles (8) situé...
- Page 17 OUVERTURE DE LA PORTE OUVRIR/FERMER LA PORTE Saisissez votre code utilisateur (de 3 à 8 chiffres) NOTE À chaque fois que vous appuyez, un son de buzzer retentira et une lumière clignotera en jaune pour confirmer Appuyez sur * ou # pour confirmer le code. La lumière verte s’allumera pour ouvrir le coffre-fort.
- Page 18 RÉGLAGE DU CODE UTILISATEUR Avec la porte ouverte, appuyez sur le Bouton de réinitialisation (9) et attendez que la lumière jaune s’allume. Saisissez le code souhaité (de 3 à 8 chiffres), puis appuyez sur le bouton * ou # pour con- firmer.
- Page 19 DÉPANNAGE PROBL»ME SOLUTION CL… S DE D… BLOCAGE PERDUES ET CODE Veuillez contacter hello@DOMU.co.uk CONFIDENTIEL OUBLI… ET PILES VIDES Ouvre le Coffre-fort à l’aide des Clés de LE CLAVIER NE R… POND PAS déblocage et remplacez les piles. Déverrouillez le Coffre-fort à l’aide des LE COFFRE-FORT NE SíOUVRE PAS LORSQUE LE BON CODE Clés de déblocage et remplacez les...
- Page 20 Pour enregistrer votre produit et découvrir si vous vous qualifiez pour une extension gratuite de garantie, rendez-vous sur www.Vonhaus.com/warranty Conservez une preuve d’achat, reçu ou attestation, pour prouver la date de l’achat. La garantie ne s’applique que si le produit a été utilisé de la manière indiquée dans la section de la page des avertissements de ce manuel et que toutes les instructions ont été...
- Page 21 NOTES DE L’UTILISATEUR...
- Page 22 INHALT Sicherheitshinweise Benötigte Werkzeuge, Sichern des Safes Spezifikation Vor Gebrauch Öffnen der Tür / Automatische Verriegelung Benutzercode einstellen / Mastercode einstellen Fehlerbehebung Garantie...
- Page 23 WARNUNG BITTE LESEN SIE DIESE ANWEISUNGEN SORGFƒ LTIG DURCH UND BEWAHREN SIE SIE F‹ R DIE ZUKUNFT AUF Dieses Handbuch enthält wichtige Infor- oder der Befestigungen nicht sicher sind, mationen zur Bedienung und Wartung des fahren Sie nicht fort. Kontaktieren Sie eine Tresors.
- Page 24 ERFORDERLICHE WERKZEUGE *NICHT INBEGRIFFEN Bohrmaschine Passender Passender Schraubenschlüssel Bleistift Bohrer Schraubendreher SICHERUNG DES TRESORS Aus Sicherheitsgründen wird empfohlen, den Tresor an eine sichere Wand- und Bode- noberfläche zu sichern. 1. Bohren Sie Löcher für Expansionsschrauben an der gewünschten Stelle. 2. Drehen Sie die Expansionsschrauben zum Trennen gegen den Uhrzeigersinn. 3.
- Page 25 SPEZIFIKATION BATTERIE- INTERNES CASH- FEUERSCHUTZ LEISTUNG VOLUMNEN BEWERTUNG 4 x 1.5V LR6 Keiner Keiner 6. Verriegelungsgriff 1. Betonanker (x4) 7. LED-Anzeige 2. Schlüssel 8. Batterieabdeckung 3. Schrauben (x4) 9. Reset-Taste 4. Elektronische Tastatur 10. Verriegelungsbolzen 5. Abdeckung verschließen...
- Page 26 VOR ERSTER NUTZUNG VOR ERSTER ERÖFFNUNG Entfernen Sie die Schließfachabdeckung (5), stecken Sie den Schlüssel ein und drehen Sie ihn gegen den Uhrzeigersinn, um ihn zu entriegeln. Zum Öffnen den Verriegelungsgriff (6) im Uhrzeigersinn drehen. BATTERIEN EINLEGEN Entfernen Sie die Batterieabdeckung (8) auf der Rückseite der Tresortür. Drücken Sie die Verriegelung ein und entfernen Sie vorsichtig die Abdeckung.
- Page 27 DIE TÜR ÖFFNEN ÖFFNEN / SCHLIESSEN DER TÜR Geben Sie Ihren Benutzercode ein (3-8 Ziffern). HINWEIS Bei jedem Drücken ertönt ein Ton und zur Bestätigung blinkt die Anzeige gelb. Drücken Sie * oder #, um den Code zu bestätigen. Das grüne Licht leuchtet auf, um den Tresor zu öffnen.
- Page 28 EINSTELLEN DES BENUTZERCODES Drücken Sie bei geöffneter Tür die Reset-Taste (9) und warten Sie, bis das gelbe Licht aufleuchtet. Geben Sie den gewünschten Code (3-8 Ziffern) ein und drücken Sie zur Bestätigung die Taste * oder #. Zwei Signaltöne bestätigen die Akzeptanz des neuen Codes. Wenn das gelbe Licht mit 3 Signaltönen blinkt, müssen Sie den Vorgang wiederholen.
- Page 29 FEHLERBEHEBUNG PROBLEM L÷ SUNG VERLORENE SCHL‹ SSEL UND PIN- Bitte kontakieren Sie hello@DOMU.co.uk NUMMER VERGESSEN UND BATTERIEN ENTLADEN Öffnen Sie den Tresor mit den Tasten KEINE REAKTION DER TASTEN und ersetzen Sie die Batterien. TRESOR WIRD NICHT Entsperren Sie den Tresor und GE÷...
- Page 30 Um Ihr Produkt zu registrieren und herauszufinden, ob Sie sich für eine kostenlose erweiterte Garantie qualifizieren, gehen Sie bitte auf: www.Vonhaus.com/garantie Bitte bewahren Sie einen Kaufbeleg oder eine Bestätigung als Kaufbeleg auf. Die Garantie gilt nur, wenn das Produkt ausschließlich in der auf der Seite “Warnungen”...
- Page 31 BENUTZERANMERKUNGEN...
- Page 32 CONTENIDO Instrucciones de Seguridad Herramientas requeridas, Asegurar la Caja Fuerte Especificaciones Antes del Uso Abrir la Puerta/Bloqueo Automatico Ajuste del Codigo de Usuario/Ajuste del Codigo Master Solucion de Problemas Garantia...
- Page 33 ADVERTENCIA LEA ESTAS INSTRUCCIONES CON CUIDADO Y MANTENGALAS PARA FUTURAS REFERENCIAS Este manual contiene información importante sobre el montaje o la idoneidad de su pared sobre el funcionamiento y mantenimiento de o las fijaciones, no continúe. Póngase en con- la caja fuerte. Asegúrese de leer y compren- tacto con una persona calificada para obtener der todas las instrucciones sobre el funcio- asesoramiento y orientación.
- Page 34 HERRAMIENTAS REQUERIDAS *NO INCLUIDAS Taladro Broca Adecuada Destornillador Llave Lapiz ASEGURAR LA CAJA FUERTE Por razones de seguridad, se recomienda que asegure la caja fuerte contra una pared de mampostería segura y la superficie del piso. 1. Taladre orificios para tornillos de expansión en la ubicación deseada. 2.
- Page 35 ESPECIFICACIONES POTENCIA VOLUMEN A PRUEBA CASH RATING 4 x 1.5V LR6 Ninguna Ninguna 6. Mango de bloqueo 1. Anclas de Concreto (x4) 7. Indicacion LED 2. Llaves de Anulacion 8. Cobertura de Bateria 3. Tornillos (x4) 9. Boton de Reseteo 4.
- Page 36 ANTES DEL PRIMER USO AL ABRIR POR PRIMERA VEZ Retire la Cobertura de Bloqueo (5) tluego inserte la llave y gírela en sentido antihorario para desbloquearla. Gire el Nango de Bloqueo (6) hacia la derecho para abrir. INSTALACION DE BATERIAS Retire la Cobertura de Bateria (8) ubicada en la parte posterior de la puerta de la caja fuerte.
- Page 37 ABRIR LA PUERTA ABRIR / CERRAR LA PUERTA Ingrese su código de usuario (3-8 dígitos)). NOTA Cada presión da como resultado un pitido de zumbador y un parpadeo a am- arillo para confirmar. Presione * o # para confirmar el código. La luz verde se iluminará para abrir la caja fuerte.
- Page 38 AJUSTE DEL CODIGO DE USUARIO Con la puerta abierta, presione el botón Restablecer (9) y espere a que se encienda la luz amarilla. Ingrese su código deseado (3-8 dígitos) y presione el botón * o # para confirmar. Dos pitidos de zumbido confirmarán la aceptación del nuevo código. Si la luz amarilla parpadea con 3 pitidos, deberá...
- Page 39 SOLUCION DE PROBLEMAS PROBLEMA SOLUCION LLAVES DE ANULACION PERDIDAS Y NUMERO DE PIN OLVIDADO Y LAS Contacte a hello@DOMU.co.uk BATERIAS ESTAN EXHAUSTAS Abra la caja fuerte usando las llaves de EL TECLADO NO RESPONDE anulación y reemplace las baterías. Desbloquee la caja fuerte utilizando LA CAJA FUERTE NO ABRE las llaves de anulación y reemplace CUANDO SE INDICA EL...
- Page 40 GARANTIA Para registrar su producto y averiguar si califica para una garantía extendida gratuita, vaya a www.Vonhaus.com/warranty Conserve un comprobante de recibo de compra o extracto como prueba de la fecha de compra. La garantía solo se aplica si el producto se utiliza únicamente de la manera indicada en la página de Advertencias de esta guía, y todas las demás instrucciones se han...
- Page 41 NOTAS DE USUARIO...
- Page 42 INDICE Istruzioni di sicurezza Attrezzi richiesti, Messa in sicurezza della Cassaforte Specifiche tecniche Prima dell’uso Apertura della porta/Blocco automatico Impostazione del codice utente/Impostazione del codice master Risoluzione dei problemi Garanzia...
- Page 43 ATTENZIONE SI PREGA DI LEGGERE ATTENTAMENTE QUESTE ISTRUZIONI E CONSERVARLE PER UNA FUTURA CONSULTAZIONE Il presente manuale contiene informazioni NOTA: Queste importanti misure di sicurez- importanti relative al funzionamento e alla za e istruzioni non possono coprire tutte le manutenzione della Cassaforte. Si prega di condizioni e situazioni possibili verificabili.
- Page 44 ATTREZZI RICHIESTI * NON INCLUSI Trapano Punta da trapano Cacciavite idoneo Chiave Matita idonea inglese METTERE AL SICURO LA CASSAFORTE Per questioni di sicurezza, si consiglia di fissare la Cassaforte a un muro portante sicuro e al pavimento. 1. Forare con dei bulloni a espansione nella posizione desiderata. 2.
- Page 45 SPECIFICHE TECNICHE POTENZA VOLUME IMPERMEALIZZAZIONE DELLA CASH RATING INTERNO DAL FUOCO BATTERIA 4 x 1.5V LR6 NESSUNA NESSUNA 6. Manico di blocco 1. Tasselli per cemento (4) 7. Spia a LED 2. Chiavi 8. Copertura della batteria 3. Viti (4) 9.
- Page 46 PRIMA DEL PRIMO UTILIZZO PRIMA APERTURA Rimuovere la Copertura del blocco (5) poi reinserire la chiave e ruotare in senso orario per sbloccare. Ruotare il Manico di blocco (6) in senso orario per aprire. INSTALLAZIONE DELLE BATTERIE Rimuovere la Copertura delle batterie (8) sul retro della porta della Cassaforte. Spin- gere e rimuovere delicatamente la copertura.
- Page 47 APERTURA DELLA PORTA APERTURA/CHIUSURA DELLA PORTA Inserire il codice utente (3-8 cifre). NOTA: Ogni inserimento comporta un bip e un lampeggio giallo di conferma. Premere * o # per confermare il codice. La spia verde si illuminerà per aprire la cassaforte. Ruotare il Manico di blocco (6) in senso orario per aprire.
- Page 48 IMPOSTAZIONE DEL CODICE UTENTE Con la porta aperta, premere il Pulsante di reset (9) e aspettare che si illumini la spia gialla. Inserire il codice desiderato (3-8 cifre) e premere il pulsante * o # per confermare. Due bip confermeranno l’accettazione del nuovo codice. Se la spia gialla lampeggia con 3 bip, bisognerà...
- Page 49 RISOLUZIONE DEI PROBLEMI PROBLEMA SOLUZIONE CHIAVI PERSE E NUMERO PIN DIMENTICATO E Contattare hello@DOMU.co.uk BATTERIE SCARICHE Aprire la Cassaforte con le Chiavi e IL TASTIERINO NON RISPONDE sostituire le batterie. LA CASSAFORTE NON SI Sbloccare la Cassaforte utilizzando le APRE QUANDO SI INSERISCE Chiavi e sostituire le batterie.
- Page 50 GARANZIA Per registrare il prodotto e capire se hai diritto all’estensione di garanzia, vai su www.VonHaus.com/warranty Si prega di conservare la ricevuta del pagamento quale prova della data d’acquisto. La garanzia si applica solo se il prodotto viene utilizzato esclusivamente come indicato nella pagina delle Avvertenze del presente manuale e se tutte le altre informazioni vengano accuratamente seguite.
- Page 51 NOTE DELL’UTENTE...
- Page 52 Thank you for purchasing the Household Safe 18L VonHaus is a registered trademark of DOMU Brands Ltd Made in China for DOMU Brands Ltd M24 2RW Merci d’avoir acheté le Coffre-fort de maison 18 L VonHaus est une marque déposée de DOMU Brands Ltd Fabriqué...
Need help?
Do you have a question about the 3500114 and is the answer not in the manual?
Questions and answers