
Summary of Contents for Aras NOX CPA
- Page 1 Control panel - NOX CPA Quickguide Version Change Author First version Jasper Johansen LED and Jasper Johansen cardreader added...
-
Page 2: Table Of Contents
Table of Contents Keys............... 3 LED Status.............4 Start Screen..........5 Login.............. 6 Main Menu........... 7 Alarm Menu........... 8 Warnings Menu..........9 Area Menu...........10 Logs Menu............15 User Menu...........16 Time Profile Menu........17 Service Menu..........18... -
Page 3: Keys
Keys Function key Function key Scroll keys (up/down) Numeric keys Clear key Enter key Function keys The function of the keys will vary depending on menu status and which menu you see. The current function is shown on the display just above each key. Scroll keys The 2 scroll keys, up and down, are used to navigate in the menu structure. -
Page 4: Led Status
LED status Some versions of the control panel are equiped with four programmable status LED’s. As default the for LED’s will give these informations: Color Description Green Normal operation All areas are not armed. Green (turns off when all areas are armed) Active alarm Technical problem... -
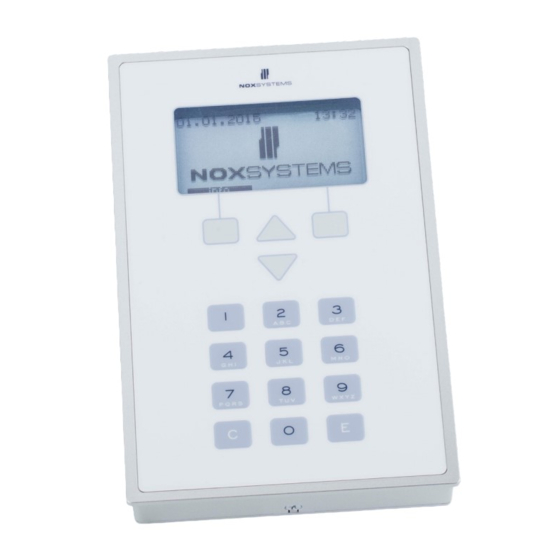
Page 5: Start Screen
Start Screen When no user is logged in, the start screen is displayed. Press Info to view important information, for example the phone number to the associated control center. In case of alarm, the internal buzzer in the control panel will sound. Press Silent to stop the buzzer (this only stops the sound, not the alarm!). -
Page 6: Login
Login Login to the control panel by entering your personal user code (4-8 characters) and finish with the Enter key. Login with threat (duress) alert to the control center. If you are threatened to log in, you can covertly send an alarm to the associated con- trol center. -
Page 7: Main Menu
Main Menu Whenever a user logs in, the main screen is displayed. The main menu is divided into seven sub menus, however some menus only appear when they are relevant (fx the menu “Alarms” is only shown when an alarm is triggered). Use the scroll keys to circle through the menus. -
Page 8: Alarm Menu
Alarm Menu The alarm menu is activated whenever an alarm is triggered from any active detector in the system. In this menu detailed alarm information can be requested and alarms can be acknowledged. The information display shows the total number of active (not acknowledged) alarms in the top row of the display. -
Page 9: Warnings Menu
Warnings Menu This menu shows system warnings. A system warning can be a system problem, which has a very low priority (e.g. AC loss - up to 30 minutes). You are not able to acknowledge a warning, the warning will be automatically acknowledged once the problem is resolved (e.g. by restoring AC). -
Page 10: Area Menu
Area Menu In the area menu the defined areas are set to armed and disarmed or any other status available. The numbers in the top line of the display mark which area out of the total number of areas is currently shown. In the example below area 1 “entry hall” out of a total number of 8 areas is shown. - Page 11 Arm error If it is not possible to arm an area, it will be shown on the control panel: Possible error messages: Error Description Solution There are active detectors Try to get all detectors inactive (e.g. close the Active detectors in that area.
- Page 12 If there are multiple active detectors, you can scroll through the list using the scroll keys. To deactivate the selected detector, press “deact.” You will then be shown this confirmation: If there are more detectors to deactivate, they will be shown if you press “back”. If there are no more, you will get this message: Note Every time an area status is changed from “armed”...
- Page 13 Deactivate detectors in advance Select the area in which you want to deactivate the detector. In the option menu, select the option “deactivate”. You will see a list of detectors you are allowed to deactivate. Select the detector you plan to deactivate. Choose a detector from the list using the scroll keys or by entering the detector number and pressing “E”...
- Page 14 Access time If the area is associated with an access time, users (with sufficient rights) have the option of changing the day’s access time / closing time. This will cause no change in general, only in regards to today’s closing time and thus the time of the automatic arming or lockout.
-
Page 15: Logs Menu
Logs Menu In the logs menu you can see the systems alarmlog, userlog and servicelog. • Alarmlog: logs alarms and alarm acknowledgements • Userlog: logs the users area settings • Servicelog: logs information needed for service personnel • All logs: all logs together The logging screen shows one log entry at the time. -
Page 16: User Menu
User Menu The user menu allows you to modify existing user access codes, and to delete and create user codes. Most of the functions in this menu are restricted to users with complete access rights – e.g. the owner of the system. User creation and editing is easier, quicker and more manageable through the NOX PC operating software. -
Page 17: Time Profile Menu
Time Profile Menu The time profile menu allows you to change existing time profiles, define new special days and delete existing special days. The creation and editing of time profiles is easier, quicker and more manageable through the NOX PC operating software. Read more about creating time profiles both via the control panel and the PC operat- ing software in the NOX user manual. -
Page 18: Service Menu
Service Menu The service menu is only needed by service personnel to troubleshoot and to check the system parameters. It is not accessible for normal users. There are 4 service levels in which the system can be set. • Level 0: Normal system operation •... - Page 19 Set date and time Unless a DCF radio clock receiver device is installed in the system, the actual time and date can be adjusted. This is done by accessing the service menu and then select- ing “date/time”. The Service Mode allows technicians to, among other things, test all detectors and outputs.
- Page 20 NOX is sold in the Nordic region by the distributor ARAS Security A/S Please contact us! Sjælland Jylland Tlf: +45 70 27 40 90 Mose Alle 10B Vardevej 1 info@aras.dk 2610 Rødovre 9220 Aalborg www.aras.dk www.noxsystems.com...
Need help?
Do you have a question about the NOX CPA and is the answer not in the manual?
Questions and answers