Table of Contents
Advertisement
Quick Links
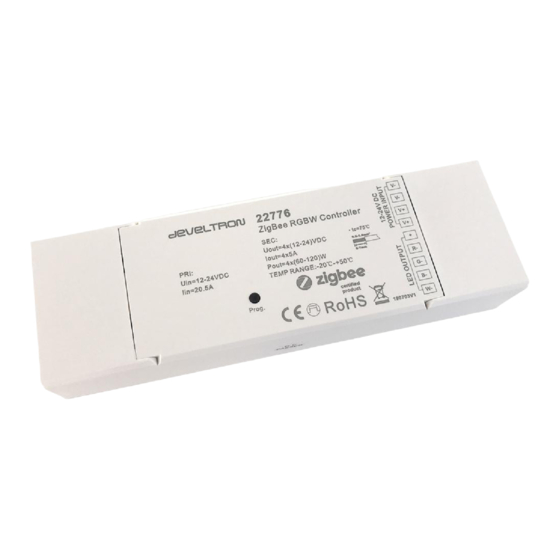
VN22776 ∙ MANUAL / DEVELTRON
ZIGBEE DÆMPER · RGBW
ZigBee LED Dimming Light Device
4CH x 5A (24VDC)
ZigBee RGBW LED Light Device
ZigBee LED Dimming Light Device
Important: Read All Instructions Prior to Installation
Important: Read All Instructions Prior to Installation
Function introduction
Important: Read All Instructions Prior to Installation
INTRODUKTION
Function introduction
Function introduction
ZigBee RGBW Receiver
ZigBee Single Color Receiver
ZigBee RGBW LED Light Device
Prog.
Prog.
ZigBee Single Color Receiver
Prog. taste:
short press to switch on/off load, press and hold down to increase/decrease light intensity
Kort tryk: On/ Off.
Program Key:
Tryk og hold nede: Dæmper eller øger lysstyrken.
Note: W channel can only be controlled through color temperature control command since Zigbee only has
Important: Read All Instructions Prior to Installation
tunable white control. Color temperature control will mix RGB channels as 1 channel white and then make color
tuning with the 4th channel white.
Bemærk: W-kanalen kan kun styres ved hjælp af kommandoen for farvetemperaturstyring, da Zigbee kun har
Function introduction
short press to switch on/off the device,
Prog.
Program Key:
Product Data
indstillelig hvid kontrol. Farvetemperaturregulering vil blande RGB-kanaler som 1 kanals hvid og derefter
press and hold down to increase/decrease light intensity
blande dem med den 4. kanal hvid.
No.
Input Voltage
Output Current
1
12-36VDC
4CH, 5A/CH
short press to switch on/off the device,
ZigBee RGBW Receiver
Program Key:
press and hold down to increase/decrease light intensity
2
12-36VDC
4CH, 0.35A/CH
PRODUKTDATA
Product Data
3
12-36VDC
4CH, 0.7A/CH
No.
• ZigBee RGBW LED light device based on latest ZigBee 3.0 protocol
Input Voltage
Output Current
Output Power
Indgangsspænding
Udgangsstrøm
Udgangseffekt
• Enables to control ON/OFF, light intensity and RGB color of connected RGBW LED lights
short press to switch on/off load, press and hold down to increase/decrease light intensity
1
12-24VDC
12-36VDC
Program Key:
4CH, 5A/CH
240-480W
240-720W
• W channel can only be controlled through color temperature control command
Note: W channel can only be controlled through color temperature control command since Zigbee only has
16.8-50.4W
2
12-36VDC
4CH, 0.35A/CH
Product Data
tunable white control. Color temperature control will mix RGB channels as 1 channel white and then make color
• Color temperature control will mix RGB channels as 1 channel white and then make color tuning with the
tuning with the 4th channel white.
33.6-100.8W
3
12-36VDC
4CH, 0.7A/CH
• ZigBee RGBW LED-lysenhed baseret på den nyeste ZigBee 3.0-protokol.
4th channel white
Product Data
Input Voltage
Output Current
No.
• Gør det muligt at kontrollere ON / OFF, lysintensitet og RGB-farve på tilsluttede RGBW LED-lys
• ZigBee end device that supports Touchlink commissioning
• ZigBee LED dimming light device based on latest ZigBee 3.0 protocol
• W-kanalen kan kun styres ved hjælp af kommandoen for farvetemperaturstyring
• Supports self-forming zigbee network without coordinator
1
12-36VDC
Input Voltage
4CH, 5A/CH
No.
Output Current
• Enables to control ON/OFF and light intensity of connected LED lights
• Farvetemperaturregulering blander RGB-kanaler som 1 kanals hvid og foretager derefter
• Supports find and bind mode to bind a ZigBee remote
2
12-36VDC
4CH, 0.35A/CH
1
12-36VDC
4CH, 5A/CH
• ZigBee end device that supports Touchlink commissioning
• Supports zigbee green power and can bind max. 20 zigbee green power remotes
farvetuning med 4. kanal hvid
2
12-36VDC
4CH, 0.35A/CH
3
12-36VDC
4CH, 0.7A/CH
• Can directly pair to a compatible ZigBee remote via Touchlink without coordinator
• Compatible with universal ZigBee gateway products
• Kompatibel med universelle ZigBee gateway-produkter
3
12-36VDC
4CH, 0.7A/CH
• Supports self-forming zigbee network without coordinator
• Waterproof grade: IP20
• Vandtæt kvalitet: IP20
• ZigBee LED dimming light device based on latest ZigBee 3.0 protocol
• Enables to add devices to the self-formed zigbee network
• ZigBee RGBW LED light device based on latest ZigBee 3.0 protocol
Safety & Warnings
• Supports find and bind mode to bind a ZigBee remote
• Enables to control ON/OFF and light intensity of connected LED lights
• Enables to control ON/OFF, light intensity and RGB color of connected RGBW LED lights
• Supports zigbee green power and can bind max. 20 zigbee green power remotes
• W channel can only be controlled through color temperature control command
• ZigBee end device that supports Touchlink commissioning
• DO NOT install with power applied to device.
• DO NOT expose the device to moisture.
• Compatible with universal ZigBee gateway products
• Color temperature control will mix RGB channels as 1 channel white and then make color tuning with the
• Can directly pair to a compatible ZigBee remote via Touchlink without coordinator
SIKKERHED OG ADVARSLER
4th channel white
• Compatible with universal single color ZigBee remotes
Operation
• Supports self-forming zigbee network without coordinator
• ZigBee end device that supports Touchlink commissioning
• Installer IKKE med strøm tilsluttet enheden.
• Waterproof grade: IP20
1.Do wiring according to connection diagram correctly.
• Enables to add devices to the self-formed zigbee network
• Supports self-forming zigbee network without coordinator
• Udsæt IKKE enheden for fugt.
• Supports find and bind mode to bind a ZigBee remote
• Supports find and bind mode to bind a ZigBee remote
Safety & Warnings
2.This ZigBee device is a wireless receiver that communicates with a variety of ZigBee compatible
• Supports zigbee green power and can bind max. 20 zigbee green power remotes
• Supports zigbee green power and can bind max. 20 zigbee green power remotes
• DO NOT install with power applied to device.
systems. This receiver receives and is controlled by wireless radio signals from the compatible ZigBee
• Compatible with universal ZigBee gateway products
• DO NOT expose the device to moisture.
• Compatible with universal ZigBee gateway products
system.
• Waterproof grade: IP20
• Compatible with universal single color ZigBee remotes
Safety & Warnings
09.ZG1FD.04280
09.ZG3FW.04282
12-24VDC indgangsspænding
12-36VDC Input
Fælles (+)
Common Anode output (+)
12-36VDC Input
CH 1 (R) output (-)
1/R-
CH 2 (G) output (-)
2/G-
Common Anode output(+)
CH 3 (B) output (-)
3/B-
CH 1 output(-)
1-
CH 4 (W) output (-)
12-36VDC Input
4/W-
CH 2 output(-)
2-
CH 3 output(-)
3-
CH 4 output(-)
4-
Common Anode output(+)
CH 1 output(-)
1-
CH 2 output(-)
2-
CH 3 output(-)
3-
4-
CH 4 output(-)
Output Power
Output Type
Dimension (LxWxH)
12-36VDC Input
240-720W
Constant voltage
170x53.4x28mm
Common Anode output (+)
16.8-50.4W
Constant current
170x53.4x28mm
CH 1 (R) output (-)
1/R-
33.6-100.8W
Constant current
170x53.4x28mm
CH 2 (G) output (-)
2/G-
Prog.
CH 3 (B) output (-)
3/B-
CH 4 (W) output (-)
4/W-
Output Type
Dimension (LxWxH)
Dæmper type
Dimensioner (LxBxH)
Spænding (PWM)
Constant voltage
170x53.4x28mm
Constant current
170x53.4x28mm
Constant current
170x53.4x28mm
Output Power
Output Type
240-720W
Constant voltage
Output Power
Output Type
16.8-50.4W
Constant current
240-720W
Constant voltage
16.8-50.4W
Constant current
33.6-100.8W
Constant current
33.6-100.8W
Constant current
FUNKTION
Operation
1. Tilslut ledningerne korrekt iht. tilslutningsdiagrammet.
3. Zigbee Network Pairing through Coordinator or Hub (Added to a Zigbee Network)
1.Do wiring according to connection diagram correctly.
Operation
09.ZG1FD.04280
2. Denne ZigBee-enhed er en trådløs modtager, der kommunikerer med en række ZigBee-kompatible
Step 1: Remove the device from previous zigbee network if it has already been added to, otherwise pairing will
1.Do wiring according to connection diagram correctly.
fail. Please refer to the part "Factory Reset Manually".
systemer. Denne dæmper modtager og styres af trådløse radiosignaler fra kompatible ZigBee
2.This ZigBee device is a wireless receiver that communicates with a variety of ZigBee compatible
Step 2: From your ZigBee Controller or hub interface, choose to add lighting device and enter Pairing mode as
systemer.
systems. This receiver receives and is controlled by wireless radio signals from the compatible ZigBee
instructed by the controller.
2.This ZigBee device is a wireless receiver that communicates with a variety of ZigBee compatible
system.
Step 3: Re-power on the device to set it into network pairing mode (connected light flashes twice slowly), 15
systems. This receiver receives and is controlled by wireless radio signals from the compatible ZigBee
seconds timeout, repeat the operation.
system.
3. Zigbee Network Pairing through Coordinator or Hub (Added to a Zigbee Network)
L
Step 1: Remove the device from previous zigbee network if it has already been added to, otherwise pairing will
ZIGBEE-NETVÆRK / PARRING
N
fail. Please refer to the part "Factory Reset Manually".
G
3. Zigbee Network Pairing through Coordinator or Hub (Added to a Zigbee Network)
AC Power
Gennem koordinator eller hub (Tilføjet til et Zigbee-netværk)
50/60Hz
Step 1: Remove the device from previous zigbee network if it has already been added to, otherwise pairing will
Step 2: From your ZigBee Controller or hub interface, choose to add lighting device and enter Pairing mode as
Trin 1: Fjern enheden fra forrige zigbee-netværk, hvis den allerede er føjet til, ellers vil parring svigte.
instructed by the controller.
fail. Please refer to the part "Factory Reset Manually".
Der henvises til delen "Fabriksindstilling - manuelt".
ZigBee RGBW Lighting Device
3. Zigbee Network Pairing through Coordinator or Hub (Added to a Zigbee Network)
09.ZG3FW.04282
1/R-
Step 2: From your ZigBee Controller or hub interface, choose to add lighting device and enter Pairing mode as
Step 3: Re-power on the device to set it into network pairing mode (connected light flashes twice slowly), 15
Step 1: Remove the device from previous zigbee network if it has already been added to, otherwise pairing will
2/G-
Trin 2: Fra din ZigBee Controller eller hub-interface skal du vælge at tilføje belysningsenhed og gå ind i
Prog.
3/B-
seconds timeout, repeat the operation.
instructed by the controller.
4/W-
fail. Please refer to the part "Factory Reset Manually".
Parringstilstand som instrueret af controller.
Step 2: From your ZigBee Controller or hub interface, choose to add lighting device and enter Pairing mode as
4. TouchLink to a Zigbee Remote
instructed by the controller.
Step 3: Re-power on the device to set it into network pairing mode (connected light flashes twice slowly), 15
Trin 3: Tænd for enheden igen for at sætte den i netværksparretilstand (tilsluttet lys blinker langsomt to
L
Step 1: Method 1: Short press "Prog" button (or re-power on the device) 4 times to start Touchlink
12V/24V/36V
Step 3: Re-power on the device to set it into network pairing mode (connected light flashes twice slowly), 15
N
seconds timeout, repeat the operation.
CV PSU
commissioning immediately, 180S timeout, repeat the operation.
G
gange), 15 sekunder timeout, gentag handlingen.
seconds timeout, repeat the operation.
AC Power
50/60Hz
Method 2: Re-power on the device, Touchlink commissioning will start after 15S if it's not added to a zigbee
network, 165S timeout. Or start immediately if it's already added to a network, 180S timeout. Once timeout,
repeat the operation.
ZigBee Single Color Receiver
AC Power
50/60Hz
AC Power
50/60Hz
1-
2-
AC Power
3-
Prog.
50/60Hz
4-
ZigBee RGBW Lighting Device
ZigBee Single Color Receiver
< 10cm
Prog.
4. TouchLink to a Zigbee Remote
Prog.
Zigbee
4. TouchLink to a Zigbee Remote
Step 1: Method 1: Short press "Prog" button (or re-power on the device) 4 times to start Touchlink
Remote
Step 1: Method 1: Short press "Prog" button (or re-power on the device) 4 times to start Touchlink
commissioning immediately, 180S timeout, repeat the operation.
Step 2: Bring the remote or touch panel within 10cm of the lighting device.
commissioning immediately, 180S timeout, repeat the operation.
Method 2: Re-power on the device, Touchlink commissioning will start after 15S if it's not added to a zigbee
Method 2: Re-power on the device, Touchlink commissioning will start after 15S if it's not added to a zigbee
network, 165S timeout. Or start immediately if it's already added to a network, 180S timeout. Once timeout,
Step 3: Set the remote or touch panel into Touchlink commissioning,
Dimension (LxWxH)
network, 165S timeout. Or start immediately if it's already added to a network, 180S timeout. Once timeout,
repeat the operation.
4. TouchLink to a Zigbee Remote
please refer to corresponding remote or touch panel manual to learn how .
ZIGBEE-NETVÆRK / FJERNELSE AF DÆMPER FRA NETVÆRK vha. HUB Interface
repeat the operation.
170x53.4x28mm
Dimension (LxWxH)
5. Removed from a Zigbee Network through Coordinator or Hub Interface
Note: 1) Directly TouchLink (both not added to a ZigBee network), each device can link with 1 remote.
Step 1: Method 1: Short press "Prog" button (or re-power on the device) 4 times to start Touchlink
2) TouchLink after both added to a ZigBee network, each device can link with max. 30 remotes.
170x53.4x28mm
170x53.4x28mm
commissioning immediately, 180S timeout, repeat the operation.
3) For Hue Bridge & Amazon Echo Plus, add remote and device to network first then TouchLink.
170x53.4x28mm
Method 2: Re-power on the device, Touchlink commissioning will start after 15S if it's not added to a zigbee
170x53.4x28mm
AC Power
4) After TouchLink, the device can be controlled by the linked remotes.
50/60Hz
network, 165S timeout. Or start immediately if it's already added to a network, 180S timeout. Once timeout,
170x53.4x28mm
5. Removed from a Zigbee Network through Coordinator or Hub Interface
repeat the operation.
< 10cm
< 10cm
ZigBee Single Color Receiver
Zigbee
Remote
Zigbee
Prog.
Remote
Step 2: Bring the remote or touch panel within 10cm of the lighting device.
Step 2: Bring the remote or touch panel within 10cm of the lighting device.
Step 3: Set the remote or touch panel into Touchlink commissioning,
Step 3: Set the remote or touch panel into Touchlink commissioning,
please refer to corresponding remote or touch panel manual to learn how .
please refer to corresponding remote or touch panel manual to learn how .
Note: 1) Directly TouchLink (both not added to a ZigBee network), each device can link with 1 remote.
Note: 1) Directly TouchLink (both not added to a ZigBee network), each device can link with 1 remote.
2) TouchLink after both added to a ZigBee network, each device can link with max. 30 remotes.
< 10cm
2) TouchLink after both added to a ZigBee network, each device can link with max. 30 remotes.
3) For Hue Bridge & Amazon Echo Plus, add remote and device to network first then TouchLink.
Zigbee
3) For Hue Bridge & Amazon Echo Plus, add remote and device to network first then TouchLink.
4) After TouchLink, the device can be controlled by the linked remotes.
Remote
4) After TouchLink, the device can be controlled by the linked remotes.
5. Removed from a Zigbee Network through Coordinator or Hub Interface
Step 1: Short press "Prog." key for 5 times continuously or re-power on the device for 5 times continuously if
the "Prog." key is not accessible.
Step 4: Connected light will blink 5 times
and then stay solid on, then the device
V-
12V/24V/36V
CV PSU
V+
will appear in your controller's menu and
can be controlled through controller or
hub interface.
V+
V+
R-
R-
G-
G-
B-
B-
W-
W-
Step 4: Connected light will blink 5 times and
V-
then stay solid on, then the device will appear
V+
in your controller's menu and can be
Trin 4: Tilsluttet lys blinker 5 gange og forbliver
Step 4: Connected light will blink 5 times
controlled through controller or hub interface.
L
derefter tændt, så vises enheden i din controllers
and then stay solid on, then the device
L
V-
12V/24V/36V
N
V-
12V/24V/36V
CV PSU
N
V+
G
CV PSU
will appear in your controller's menu and
V+
menu og kan være styres via controller eller hub
L
V+
V+
G
12V/24V/36V
V-
N
CV PSU
V+
can be controlled through controller or
G
interface.
V-
V-
hub interface.
V+
V+
R-
R-
1/R-
V+
V+
2/G-
3/B-
ZigBee RGBW Lighting Device
G-
G-
4/W-
V+
V+
1-
B-
B-
R-
R-
W-
W-
2-
V-
V-
1/R-
3-
2/G-
Prog.
3/B-
4-
G-
G-
4/W-
B-
B-
W-
W-
L
V-
12V/24V/36V
Step 4: There shall be
N
CV PSU
L
V+
G
12V/24V/36V
V-
AC Power
N
indication on the remote for
CV PSU
50/60Hz
V+
G
successful link and connected
Vælg at slette eller nulstille fra din ZigBee-controller eller
From your ZigBee controller or hub interface, choose to delete or reset
hub-interface belysningsanordningen som beskrevet.
light will flash twice.
the lighting device as instructed. The connected light blinks 3 times to
Det tilsluttede lys blinker 3 gange til indikere vellykket
ZigBee RGBW Lighting Device
indicate successful reset.
V+
V+
nulstilling.
R-
R-
1/R-
V+
V+
2/G-
Prog.
3/B-
G-
G-
1-
4/W-
B-
B-
L
From your ZigBee controller or hub interface, choose to delete or reset the
2-
V-
V-
W-
W-
3-
12V/24V/36V
N
4-
CV PSU
lighting device as instructed. The connected light blinks 3 times to indicate
G
AC Power
50/60Hz
successful reset.
ZigBee Single Color Receiver
1-
2-
3-
Prog.
4-
Step 2: Bring the remote or touch panel within 10cm of the lighting device.
Step 3: Set the remote or touch panel into Touchlink commissioning,
VN22776 ∙ MANUAL / DEVELTRON
Step 4: Connected light will blink 5 times and
then stay solid on, then the device will appear
Step 4: There shall be
indication on the
in your controller's menu and can be
remote for successful
controlled through controller or hub interface.
link and connected
light will flash twice.
8. Find and B
Step 4: There shall be
indication on the
Step 1: Short pr
remote for successful
mode (connecte
link and connected
light will flash twice.
Step 4: There shall be
V-
indication on the remote for
V+
successful link and connected
light will flash twice.
Zigbee
Remote
V+
V+
V-
V-
1
9. Learning to
Advertisement
Table of Contents

Summary of Contents for ZIGBEE VN22776
- Page 1 09.ZG1FD.04280 2. Denne ZigBee-enhed er en trådløs modtager, der kommunikerer med en række ZigBee-kompatible Step 1: Remove the device from previous zigbee network if it has already been added to, otherwise pairing will 1.Do wiring according to connection diagram correctly.
- Page 2 • 0x0019: OTA Step 1: Short press “Prog.” button 4 times (Or re-power on the device 4 times) to enable the device to setup a zigbee network (connected light flashes twice) to discover and add other devices, 180 seconds timeout, repeat 12V/24V/36V CV PSU the operation.
Need help?
Do you have a question about the VN22776 and is the answer not in the manual?
Questions and answers