Advertisement
Quick Links
Quick Start Guide
for Magnum Shear Model #520
In the Box:
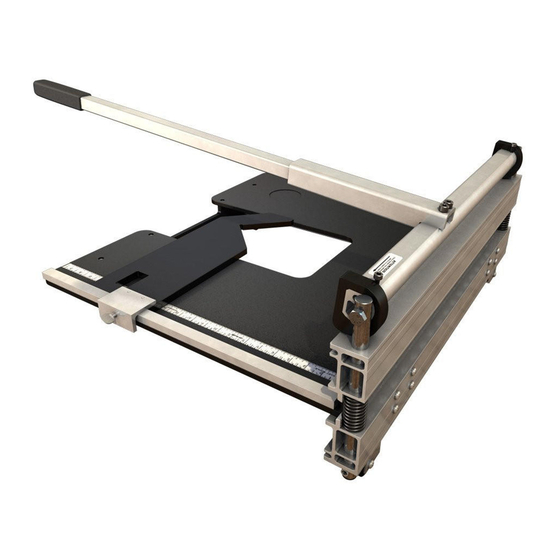
(1) Power Assembly
(1) Tail
(1) Handle Assembly
(2) Rails
(1) Angle Guide
(1) Hone Stone
(1) Table
(1) Hardware Kit
for Magnum Shear Model #526
In the Box:
(1) Power Assembly
(1) Tail
(1) Handle Assembly
(4) Rails
(1) Angle Guide
(1) Hone Stone
(1) Table
(1) Hardware Kit
ASSEMBLING YOUR SHEAR
Tools needed: #2 & #3 Phillips head screwdrivers, 1/2" socket or wrench.
IMPORTANT! Start all screws BY HAND when assembling your shear. This will help avoid cross-threading.
1. ATTACH RAILS
Attach rails to Power Assembly base using
Item A screws, fitted with Item B star washers.
1
Power Assembly
1
Power Assembly
Item A. (4) 6mm x 65mm PH Phillips Machine Screws
Item B. (4) M6 Star Washers
Item C. (6) 6mm x 25mm PH Phillips Machine Screws
Item D. (5) M6 x 16mm FH Phillips Machine Screws
The Hardware Kit is used in multiple models. Your Shear may not use all of the items listed.
Item A. (8) 6mm x 65mm PH Phillips Machine Screws
Item B. (8) M6 Star Washers
Item C. (8) 6mm x 25mm PH Phillips Machine Screws
Item D. (6) M6 x 16mm FH Phillips Machine Screws
The Hardware Kit is used in multiple models. Your Shear may not use all of the items listed.
Model
520
Model
526
In the Hardware Kit:
Item E. (4) #10 x 1 FH Phillips Self Tapping Screws
Item F. (2) M8 x 50mm Hex Bolts
Item G. (1) M6 Thumbscrew (installed)
In the Hardware Kit:
Item E. (4) #10 x 1 FH Phillips Self Tapping Screws
Item F. (2) M8 x 50mm Hex Bolts
Item G. (1) M6 Thumbscrew (installed)
2. ATTACH TAIL
Attach tail to rails using Item C screws.
Make sure holes in tail are facing up.
2
2
Tail
Tail
Advertisement

Related Manuals for Magnum 520


Summary of Contents for Magnum 520
- Page 1 Quick Start Guide for Magnum Shear Model #520 In the Box: In the Hardware Kit: (1) Power Assembly (1) Tail Item A. (4) 6mm x 65mm PH Phillips Machine Screws Item E. (4) #10 x 1 FH Phillips Self Tapping Screws Item B.
- Page 2 CUT GUIDE Bring handle down until handle down, pull Safety blade touches material. Lock pin out, lift handle. Maximum Thickness 520 = 7/16” Maximum Thickness 526 = 1” Pull Safety Lock pin Carpet Tile Luxury Vinyl Tile Commercial Vinyl Tile...