
Subscribe to Our Youtube Channel
Related Manuals for iDirect X1 Series


Summary of Contents for iDirect X1 Series
- Page 1 X1 Series Satellite Router Installation, Support, and Maintenance Guide Installation, Support, and Maintenance Guide X1 Series Satellite Router Router Products September 14, 2017...
- Page 2 TAC Contact Information: Phone: 703.648.8151 ~ Email: tac@idirect.net ~ Web site: tac.idirect.net iDirect Government™, created in 2007, is a wholly owned subsidiary of iDirect and was formed to better serve the U.S. government and defense communities. Company Web site: www.idirectgov.com ~ Main Phone: 703.648.8118...
- Page 3 Updated Appendix D. September 14, 2017 Added a section on Installing Ferrite on the AC to DC Power Cable in Chapter 5 and Removed the X1 Indoor DC Power Supply option Installation, Support, and Maintenance Guide X1 Series Satellite Router...
- Page 4 Revision History Installation, Support, and Maintenance Guide X1 Series Satellite Router...
-
Page 5: Table Of Contents
....... . . 13 3.1.2 X1 Indoor Router Rear Panel Installation, Support, and Maintenance Guide X1 Series Satellite Router... - Page 6 5.9 Installation ..........43 Installation, Support, and Maintenance Guide X1 Series Satellite Router...
- Page 7 B.2 Outdoor (ODU) Coax Installation Tools Needed ..... . . 62 Installation, Support, and Maintenance Guide X1 Series Satellite Router...
- Page 8 E.2 Level 1 Reset ..........71 viii Installation, Support, and Maintenance Guide X1 Series Satellite Router...
- Page 9 Figures Figure 1-1. Front and Rear View of the iDirect X1 Satellite Router (Indoor) ... . . 2 Figure 1-2. X1 Outdoor Router (Left), and the Power Module (Right) ....2 Figure 3-1.
- Page 10 Table B-2. Tools Included in the order..............62 Table B-3. Recommended Installation Tools and Equipment for Outdoor Coax ....63 Table C-1. Coax Trim Dimensions................66 Table D-1. Ethernet Port Pinouts ................69 Installation, Support, and Maintenance Guide X1 Series Satellite Router...
-
Page 11: About
Intended Audience This manual is intended for use by the VSAT (Very Small Aperture Terminal) equipment installer, System Engineer, and Network Operator responsible for maintaining the iDirect Network. Only qualified service personnel should install and operate the X1 Router solutions. -
Page 12: Document Conventions
NOTE: A Note is a statement or other notification that adds, emphasizes, or clarifies essential information of special importance or interest. Installation, Support, and Maintenance Guide X1 Series Satellite Router... -
Page 13: Related Documents
Getting Help iDX Software user’s guides, installation procedures and guides, an FAQ page, and other documentation that supports iDirect products, are available on the TAC Web site located at: http://tac.idirect.net. To find answers to questions or information, contact the iDirect Technical Assistance Center (TAC) at (703) 648-8151. - Page 14 About Installation, Support, and Maintenance Guide X1 Series Satellite Router...
-
Page 15: Introduction
1-2. The router specifications are described in Section 2.1, X1 Router Specifications on page 3. The front panel LEDs and rear panel connectors are described in Section 3.1, X1 Indoor Router Interfaces on page Installation, Support, and Maintenance Guide X1 Series Satellite Router... -
Page 16: X1 Outdoor Router
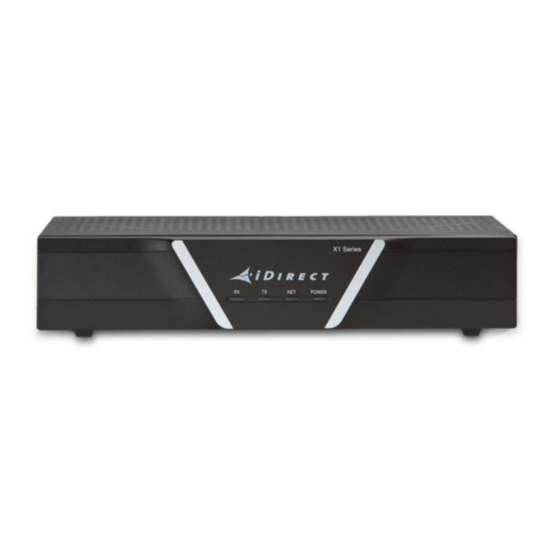
Figure 1-1. Front and Rear View of the iDirect X1 Satellite Router (Indoor) X1 Outdoor Router The iDirect X1 Outdoor Satellite Router is a cost-effective remote bundle ideal for large, narrowband networks for SCADA, femtocells or pipeline monitoring. There are three (3) options for the X1 Outdoor Router: •... -
Page 17: Specifications
2 Specifications The specifications in this chapter describe the mechanical, environmental and RF specifications for the X1 Series Satellite Router. The installation site must accommodate the mechanical and environmental specifications of the X1 Router. This chapter contains the following sections: •... -
Page 18: Power Specifications
Power Specifications Table 2-2 provides the power specifications for the router and the typical BUC/LNB for the X1 Router . NOTE: Only use the iDirect approved and provided power supply. Table 2-2. X1 Router Power Specifications Category Description Power Supply Input... -
Page 19: Rf Specifications
-30 dBm to 0 dBm, 0.5 dB step Receive, Minimum: -130 + 10Log(Sym rate) dBm (Single carrier) Receive, Maximum: -5 dBm (Wideband Composite, MAX) Receive Adjustability: Under AGC for all valid Rx input power range Installation, Support, and Maintenance Guide X1 Series Satellite Router... -
Page 20: Table 2-4. Transmit Phase Noise Parameters
Band Phase Noise Option 1-3 dbC/Hz Phase Noise (dBc/Hz) frequency at: 0.01 kHz 0.1 kHz 1 kHz 10 kHz 100 kHz 1 MHz -100 1.8 rms Typical Phase Jitter at 14 kHz to 1 MHz: Installation, Support, and Maintenance Guide X1 Series Satellite Router... -
Page 21: X1 Outdoor Router Specifications
-40 F to +176 F (-40 C to +80C) Temperature Gradient 1.8F (1.0C) per 1 minute Relative Humidity Operational: 100% condensing Altitude 10,000 ft (3048 m) Operating: 35,000 ft (9144 m) Storage: Installation, Support, and Maintenance Guide X1 Series Satellite Router... -
Page 22: Power Specifications
The X1 Outdoor Router power specifications are defined in Table 2-2. NOTE: Only use the iDirect approved and provided power supply. NOTE: The power supply provides power to the external Power Module. The Power Module supplies DC power only to the X1 Outdoor Router. -
Page 23: Table 2-7. X1 Outdoor Router Rf Specifications
Discrete Spurs, harmonics and ≥ 50 dBc, with output ≥ -15 dBm, Inband 32 dBc non-harmonics Modulator Spectral Shaping DVB-S2 (ETSI EN302307) Transmitter On/Off ≥ 50 dBc, with output power ≥ -15 dBm Installation, Support, and Maintenance Guide X1 Series Satellite Router... - Page 24 X1 Outdoor Router Specifications Installation, Support, and Maintenance Guide X1 Series Satellite Router...
-
Page 25: Physical Interfaces
Section 3.2, X1 Outdoor Router Interfaces on page 15 X1 Indoor Router Interfaces The X1 Indoor Router front panel indicators are described in Section 3.1.1 and the rear panel is described in Section 3-2. Installation, Support, and Maintenance Guide X1 Series Satellite Router... -
Page 26: X1 Indoor Router Front Panel Power And Network Led Status Indicators
X1 Router and are documented in the iDX Web iSite User Guide, iDX Satellite Router Installation and Commissioning Guide, and iDX Release Notes. The definitions of the states may be software version dependent. Installation, Support, and Maintenance Guide X1 Series Satellite Router... -
Page 27: X1 Indoor Router Rear Panel
This section describes and illustrates the rear panel connectors and LED indicators. They are shown in Figure 3-2 and defined in Table 3-2 on page 14. The LAN/RJ45 pin assignments are listed in Appendix D, Ethernet RJ45 Pinouts on page Installation, Support, and Maintenance Guide X1 Series Satellite Router... -
Page 28: Figure 3-2. X1 Indoor Router Rear Interface Connectors
RX In 75 ohm, F-Type L-band receive signal and DC power to LNB; 75 ohm, F-Type Reset, no label Internally recessed Access to reset push button: Factory default reset push button Installation, Support, and Maintenance Guide X1 Series Satellite Router... -
Page 29: X1 Outdoor Router Interfaces
User Guide, iDX Satellite Router Installation and Commissioning Guide, and iDX Release Notes. The definitions of the states may be software version dependent. Table 3-1, also, describes the Web iSite simulated LED actions for all X1 Series Routers. Installation, Support, and Maintenance Guide X1 Series Satellite Router... -
Page 30: Figure 3-3. X1 Outdoor Router Panel
RJ45 Pinouts on page 69 Power LED POWER No or low DC power input to the X1 Outdoor Router Solid Red Acceptable DC power level to the X1 Outdoor Router is detected Installation, Support, and Maintenance Guide X1 Series Satellite Router... -
Page 31: X1 Outdoor Router Power Module Unit Connectors
Table 3-5. X1 Outdoor Router Power Module Connector Descriptions Callout Label Description Ground Screw Grounding screw (provided) Power Supply Option 1: 100-240 VAC, 1.2 A 50/60 Hz Power supply connector Connector Option 2: 12-36 V Option 3: 36-76 V Installation, Support, and Maintenance Guide X1 Series Satellite Router... - Page 32 Table 3-7. Pin Assignments for DC Power Module Gland (4 pin) Definition Diagram Ground (Pin 4) Do Not Use Option 2: +12-36 V DC Option 3: +36-76 V DC DC Return Installation, Support, and Maintenance Guide X1 Series Satellite Router...
-
Page 33: X1 Router Installation
4 X1 Router Installation This chapter describes the guidelines and procedures for installing the iDirect Evolution X1 Satellite Router (Indoor) at the VSAT location. This chapter contains the following sections: • Section 4.1, X1 Router Installation at a Glance on page 20 •... -
Page 34: X1 Router Installation At A Glance
Select an installation location away from any area that tends to collect dust • Do not install the X1 Router on the floor • Use only the iDirect approved and provided Power Module • Install and ground the X1 Router according to local/national codes and regulations; for ground screw locations see Figure 3-2 on page 14 •... -
Page 35: Unpacking
Remove items from the box only as needed. Confirm the X1 Router components and accessory items listed on the order form have been received, including the optional equipment ordered. Installation, Support, and Maintenance Guide X1 Series Satellite Router... -
Page 36: Typical Items Ordered
• 1 (one) Quick Start Guide (11 X 17 inch brochure) • Additional components normally required are available in several sizes and types. Consult the iDirect Account Manager for details. The components typically are: • One antenna • IFL (Inter Facility Link) or coaxial cable appropriate for the installation •... -
Page 37: Ac Power Supply (Option 1, 2) Install
4.5.1 AC Power Supply (Option 1, 2) Install Perform the steps below with an AC power supply: NOTE: iDirect recommends that the chassis be powered from a low noise, low transient AC power source. 1. Connect the AC power cord. -
Page 38: Preparing The Pc/Laptop For Connection To Router
NOTE: The STATUS LED is normally green. A red STATUS LED indicates a malfunction of the X1 Router . iDirect recommends that the chassis be powered from a low noise, low transient power source. -
Page 39: Configuring
For instructions on how to do this, refer to the iDX Satellite Router Installation and Commissioning Guide. To download the guide, go to http:\\tac.idirect.net and click Satellite Routers. Installation, Support, and Maintenance Guide X1 Series Satellite Router... - Page 40 Configuring Installation, Support, and Maintenance Guide X1 Series Satellite Router...
-
Page 41: X1 Outdoor Router Installation
Section 5.13, Preparing the PC/Laptop for Connection to the X1 Outdoor Router on page 49 • Section 5.14, LED Status on page 49 • Section 5.15, Configuring the X1 Outdoor Router on page 50 Installation, Support, and Maintenance Guide X1 Series Satellite Router... -
Page 42: X1 Outdoor Router Installation At A Glance
Do not install the X1 Outdoor Router on the floor; install only on a wall or pole • Use only the iDirect approved and provided Power Module • Install and ground the X1 Outdoor Router and Power Module according to local codes and regulations;... - Page 43 16. Configure the router as indicated in Section 5.15, Configuring the X1 Outdoor Router on page 17. If the router needs repacking or maintenance see Section 6, Maintenance and Troubleshooting on page Installation, Support, and Maintenance Guide X1 Series Satellite Router...
-
Page 44: Unpacking
Additional components normally required are: • One antenna • IFL (Inter Facility Link) or Coaxial cable appropriate for the installation • One appropriate feed assembly for the antenna (OMT) • One BUC (Block Up Converter) Installation, Support, and Maintenance Guide X1 Series Satellite Router... -
Page 45: Mounting The Router
Install the X1 Outdoor Router in a location where access is unobstructed • The X1 Outdoor Router operation area must have adequate ventilation • Do not install the X1 Outdoor Router on the floor, install only on a wall or pole Installation, Support, and Maintenance Guide X1 Series Satellite Router... -
Page 46: Router Mounting Hardware Included
4 wood/gyprock plugs (anchors) • 4 M6x20 screws • 4 flat washers for M6 screws • 4 spring (lock) washers for the M6 screws • 1 spacer Figure 5-2. Router Mounting Kit Parts Installation, Support, and Maintenance Guide X1 Series Satellite Router... -
Page 47: Mounting Router To A Wall Or Pole
3. Mount the X1 Outdoor Router to the wall, using the four wood screws and wood/gyprock plugs, as shown in Figure 5-4. 4. Follow the instructions in Section 5.5, Mounting the External Power Module on page 35 mount the power module. Installation, Support, and Maintenance Guide X1 Series Satellite Router... -
Page 48: Figure 5-4. X1 Outdoor Router Wall Mount
(various mounting options are shown). 4. Follow the instructions in Section 5.5, Mounting the External Power Module on page 35 mount the power module. Figure 5-5. X1 Outdoor Router Pole Mount Installation, Support, and Maintenance Guide X1 Series Satellite Router... -
Page 49: Mounting The External Power Module
Section 5.5.2.1, Wall Mounting the Power Module on page 36, for wall mounting the power module • Section 5.5.2.2, Pole Mounting the Power Module on page 37, for pole mounting the power module Installation, Support, and Maintenance Guide X1 Series Satellite Router... -
Page 50: Figure 5-6. Mounting The Power Module
1. Attach the mounting plate to the router, as shown in Figure 5-6. 2. Mount the assembly to the pole using the two stainless steel tie back straps as shown in Figure 5-7. Figure 5-7. Power Module Wall Mount Installation, Support, and Maintenance Guide X1 Series Satellite Router... -
Page 51: Installing Ferrite On The Ac To Dc Power Cable
Figure 5-8. Power Module Pole Mount Installing Ferrite on the AC to DC Power Cable 1. The following tools are needed before installing the ferrite: • Scissor • Measurement Device Installation, Support, and Maintenance Guide X1 Series Satellite Router... -
Page 52: Figure 5-9. 24 Vdc Cable End
3. On the 24 VDC cable, install the Ferrite (included in the kit) as shown in Figure 5-10. Ensure the cable is not damaged when the Ferrite is closed. Figure 5-10. Installing Ferrite Installation, Support, and Maintenance Guide X1 Series Satellite Router... -
Page 53: Figure 5-11. Ferrite Distance From The Rear
The tape must be wrapped onto itself to seal the end of the insulation and to ensure a tight adhesion at the ends of the tape. See Figure 5-12. Figure 5-12. Wrapping the 4 IN Silicon Tape Installation, Support, and Maintenance Guide X1 Series Satellite Router... -
Page 54: Connect Weatherproof Ethernet Lan
Ethernet LAN cable. 2. Prepare the Ethernet weatherproof assembly as described in Table 5-1. CAUTION: After tightening the power connectors, wrap with weatherproofing tape, if necessary, following manufacturer’s guidelines. Installation, Support, and Maintenance Guide X1 Series Satellite Router... -
Page 55: Table 5-1. Rj 45 Lan Ethernet Cable Installation Steps
A wrench may be used to secure the assembly to the router. 6. Wrap with weatherproofing (self-amalgamate tape) over the connector and cable junctions according to manufacturer’s guidelines. Installation, Support, and Maintenance Guide X1 Series Satellite Router... -
Page 56: Connect Weatherproof Tx And Rx Coax Cable And Connector
Prepare the ends of the coaxial cables (F For preparation diagram details see connectors) for outdoor use. Appendix C, Coax Cable Preparation on page Insert F connector assemblies into RX-in interface and lock the connector. Installation, Support, and Maintenance Guide X1 Series Satellite Router... -
Page 57: Installation
Section 5.10, Connect Main Power Supply to Power Module on page 44, using the DC pin assignments in Table 3-7. See Figure 3-4 on page 17 for Power Module connector descriptions. Installation, Support, and Maintenance Guide X1 Series Satellite Router... -
Page 58: Connect Main Power Supply To Power Module
CAUTION: Install power on a GFI (Ground Fault Interrupter) protected circuit. CAUTION: All cables should be installed with a drip loop or service loop. Installation, Support, and Maintenance Guide X1 Series Satellite Router... -
Page 59: Figure 5-14. Power Gland Assembly
AC power) or Table 3-7 on page 18 (for DC power). 2. Using the Allen Wrench (provided), tighten the pin screws for each of the power wires in the Female Housing Assembly. Installation, Support, and Maintenance Guide X1 Series Satellite Router... -
Page 60: Connect Power Module To Router
Align and insert either end of the DC power cable into the jack and tighten the locking ring securely by hand. Tip: connector ends of the DC- DC input cable are identical Installation, Support, and Maintenance Guide X1 Series Satellite Router... -
Page 61: System Power Up
5.12 System Power Up The X1 Outdoor Router can only be powered directly from the Power Module’s DC power output connector. iDirect recommends that the chassis of the Power Module be powered from a low noise, low transient power source. -
Page 62: Checking Conditions Before System Power Up
48, power up the X1 Outdoor Router as follows: • Connect the iDirect supplied 2 meter DC power cable from the Power Module to the 4-pin power connector on the X1 Outdoor Router • Plug external power supply cord into the power source •... -
Page 63: Preparing The Pc/Laptop For Connection To The X1 Outdoor Router
Section 5.14.1, on page 50 Section 5.14.2, on page 50 describe the functions and display indicators for the physical front panel LED and the four virtual LEDs displayed in the Web Interface software, respectively. Installation, Support, and Maintenance Guide X1 Series Satellite Router... -
Page 64: Front Panel Power Indicator
For instructions on how to do this, refer to the iDX Satellite Router Installation and Commissioning Guide. To download the guide, go to http:\\tac.idirect.net and click Satellite Routers. Installation, Support, and Maintenance Guide X1 Series Satellite Router... -
Page 65: Maintenance And Troubleshooting
• Cables — Never use any other RF cable than what is supplied or recommended by iDirect • Cleaning — Do not use liquid cleaners or aerosol cleaners; use a cloth for wiping up dust 6.1.1... -
Page 66: Conditions Requiring Service
Typically, the only maintenance needed to be performed on the unit, without explicit directions from iDirect, is to maintain the temperature of the X1 Router and keep its external areas free from dust or dirt. There are no user-serviceable parts within the X1 Outdoor Router. -
Page 67: Day Regular Maintenance
Typically, the only maintenance needed to be performed on the unit, without explicit directions from iDirect, is to maintain the temperature of the X1 Outdoor Router and keep its external areas free from dust, dirt, and debris. There are no user-serviceable parts within the X1 Outdoor Router. -
Page 68: Troubleshooting
Table 6-1 describes the most common X1 Router troubleshooting events and actions to take. Consult with the iDirect TAC when considering a reset. Reset functions are described in Appendix E, X1 Reset on page 71. Table 6-1. Troubleshooting Events and Actions to Take... - Page 69 For warranty service, obtain a Return Material Authorization (RMA) number from the reseller or iDirect prior to shipping. Direct customers of iDirect, may contact the iDirect TAC directly to obtain an RMA number and shipping instructions. Follow the shipping instructions, complete the RMA form, and attach the form to the outside of the shipping box.
- Page 70 Repacking the X1 Router Installation, Support, and Maintenance Guide X1 Series Satellite Router...
-
Page 71: Appendix A Acronyms And Abbreviations
The information contained herein is proprietary and confidential to VT iDirect, Inc. (“iDirect”) and iDirect Government Technologies, Inc. (“iGT”) and shall not be published, reproduced, copied, disclosed or used, in whole or part, for other than its intended purpose without the express written consent of a duly authorized representative of iDirect or iGT. - Page 72 The information contained herein is proprietary and confidential to VT iDirect, Inc. (“iDirect”) and iDirect Government Technologies, Inc. (“iGT”) and shall not be published, reproduced, copied, disclosed or used, in whole or part, for other than its intended purpose without the express written consent of a duly authorized representative of iDirect or iGT.
- Page 73 The information contained herein is proprietary and confidential to VT iDirect, Inc. (“iDirect”) and iDirect Government Technologies, Inc. (“iGT”) and shall not be published, reproduced, copied, disclosed or used, in whole or part, for other than its intended purpose without the express written consent of a duly authorized representative of iDirect or iGT.
- Page 74 The information contained herein is proprietary and confidential to VT iDirect, Inc. (“iDirect”) and iDirect Government Technologies, Inc. (“iGT”) and shall not be published, reproduced, copied, disclosed or used, in whole or part, for other than its intended purpose without the express written consent of a duly authorized representative of iDirect or iGT.
-
Page 75: Appendix B Tools Needed
F-Connector crimper or Compression Tool Figure B-1 RG-6 Coax Stripper, see Figure B-1 Coax / Wire Cutter, see Figure B-1 length as RG-6 or RG-11 solid copper conductor coax outdoor rated cable needed Installation, Support, and Maintenance Guide X1 Series Satellite Router... -
Page 76: Outdoor (Odu) Coax Installation Tools Needed
Figure B-1 Table B-3 specify recommended tools and supplies for a typical installation. Table B-2. Tools Included in the order Quantity Tool 1.5 mm Allen wrench Installation, Support, and Maintenance Guide X1 Series Satellite Router... -
Page 77: Table B-3. Recommended Installation Tools And Equipment For Outdoor Coax
Length of outdoor rated a shielded outdoor Ethernet LAN (Optional) Wrench for securing/un-securing the plastic sealing nut designated as part A in Table 5-1, RJ 45 LAN Ethernet Cable Installation Steps on page Installation, Support, and Maintenance Guide X1 Series Satellite Router... - Page 78 Outdoor (ODU) Coax Installation Tools Needed Installation, Support, and Maintenance Guide X1 Series Satellite Router...
-
Page 79: Appendix C Coax Cable Preparation
In general, specific and detailed instructions are for RG-6 cables and connectors, only. Use high quality coaxial outdoor cable to connect the X1 Series Satellite Router to the Outdoor Unit (ODU) equipment. iDirect recommends that a solid copper center conductor,... -
Page 80: Figure C-1. Coax Cable Cutting Technique
(inch (mm)) (inch (mm)) (inch (mm)) RG-6 5/8 (15.9) 1/4 (6.4) 3/8 (9.5) RG-11 13/32 (10.3) 3/32 (2.4) 13/32 (10.3) 3. Remove any foil in the braid as shown in Figure C-2. Installation, Support, and Maintenance Guide X1 Series Satellite Router... -
Page 81: Figure C-2. Cutting Technique For Removing Foil In The Braid
RG-6/RG-11 termination. 9. Since the RG-11 connector has a built-in center pin, ensure that the coax center pin makes contact to the internal seizing pin of the connector. Refer to Figure C-3. Installation, Support, and Maintenance Guide X1 Series Satellite Router... -
Page 82: Figure C-4. Attaching The Compression Fitting F-Type Connector
It must be straight and cylindrical without any burrs at the end. Failure to follow this technique could result in damage to the satellite router, BUC, LNB connector and/or possible intermittent service. Installation, Support, and Maintenance Guide X1 Series Satellite Router... -
Page 83: Appendix D Ethernet Rj45 Pinouts
Appendix D Ethernet RJ45 Pinouts NOTE: iDirect recommends a shielded outdoor Ethernet LAN cable be bought commercially to connect the X1 router to the LAN hub or switch. A shielded Ethernet LAN Cable is a straight through cable typically used for connection to a PC. - Page 84 Installation, Support, and Maintenance Guide X1 Series Satellite Router...
-
Page 85: Appendix E X1 Reset
The X1 Router has two types of reset functions: Level 0 and Level 1. Each type has a different effect on the router. Contact the iDirect TAC center for more information. NOTE: This section references Web iSite. Refer to the iDX Web iSite User Guide for more information. - Page 86 Level 1 Reset • Use in troubleshooting: see Section 6.4, Troubleshooting on page 54 Installation, Support, and Maintenance Guide X1 Series Satellite Router...
- Page 88 13861 Sunrise Valley Drive, Suite 300 Herndon, VA 20171-6126 +1 703.648.8000 +1 866.345.0983 www.idirect.net Advancing a Connected World...
Need help?
Do you have a question about the X1 Series and is the answer not in the manual?
Questions and answers