
Related Manuals for NOCRY NPS-100 DINS


Summary of Contents for NOCRY NPS-100 DINS
- Page 1 PAINT SPRAYER INSTRUCTION MANUAL We’ve tried to make this manual useful, simple, and understandable. Please read it carefully, and keep it safe for future reference.
-
Page 3: Table Of Contents
How to clean the spray attachment How to clean the main body of your paint sprayer How to clean the air filter How to clean the air ventilation hose Some tips on troubleshooting MAINTENANCE PAINT SPRAYER LIABILITY DISPOSAL WARRANTY HOW TO CONTACT NOCRY... -
Page 4: The Abc's Of Paint Sprayer Safety
In case this manual happens to disappear, in the black hole all manuals https://nocry.com/pages/ seem to go into, you can get a digital version of it at instructions, or by letting us know to wecare@nocry.com. So, let’s get to it, shall we? Only use your paint sprayer and its accessories for spraying paint onto inanimate objects. - Page 5 Should you have any problems or concerns about anything, anything at all (and we really mean it) let us know by emailing wecare@nocry.com. Before disassembling the spray attachment, open the container to relieve the pressure. You can do that by simply unscrewing the container.
-
Page 6: Work Area Safety
Work or repairs on the paint sprayer should only be carried out by a professional. It’s best to leave the really serious stuff to a qualified repair person who only uses original replacement parts. Make sure that anyone using your paint sprayer or servicing it is acquainted with this manual. -
Page 7: Personal Safety
NoCry Work & Safety Gear and the manufacturer shall not be liable for any changes made to the tool, nor for any damage resulting from such changes. -
Page 8: Meaning Of Safety Symbols On Your Paint Sprayer
MEANING OF SAFETY SYMBOLS ON YOUR PAINT SPRAYER These symbols are on your paint sprayer for a reason - to keep you aware and safe. Please take them into account. This paint sprayer conforms with health, safety and environmental protection standards of the European Economic Area. Read the instructions before starting to use this paint sprayer. -
Page 9: Technical Specifications
TECHNICAL SPECIFICATIONS Model NoCry NPS-100 DINS Paint Sprayer Voltage 220-240V, 50Hz Power consumption 600 W Atomising output 200 W Flow 1200 ml/min Maximum viscosity 100 DIN/s Pressure 22.1 kpai... -
Page 10: Package Contents & Their Purposes
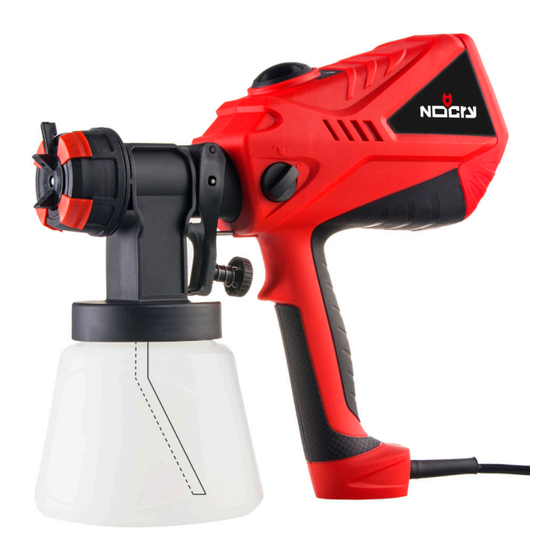
That includes changing accessories, cleaning, and servicing. This is what you will find inside your paint sprayer package. If there’s anything wecare@nocry.com missing, let us know to , and we’ll sort it out ASAP. - Page 11 1 Paint sprayer main body Houses the power motor that atomizes the coating material inside the material container. Learn how to assemble your paint sprayer on page 11. 1 Spray attachment Covers your project or wall with an even coat of atomized coating material via the sprayer nozzle.
- Page 12 4 Spray nozzles, Ø 1.5 mm, 1.8 mm, 2.2 mm, and 2.6 mm Each of the nozzles help you get a different fin- ish on different materials - we’ve compiled a little handy-dandy guide on page 20. 1 Cleaning pin The secret to getting dried paint out of your spray nozzle.
-
Page 13: How To Use Your Paint Sprayer
HOW TO USE YOUR PAINT SPRAYER HOW TO ASSEMBLE YOUR PAINT SPRAYER Your paint sprayer has arrived disassembled, and will need to be put together before use. Luckily, the process is relatively straight forward, and can be done in no time at all - just make sure that your paint sprayer is NOT connected to the power source before doing anything. -
Page 14: How To Switch The Paint Sprayer On/Off
Next, screw the container to the bottom of the spray attachment and you are good to go! HOW TO SWITCH THE PAINT SPRAYER ON/OFF Your paint sprayer doesn’t have an on/off switch as such. When the power cord is plugged into the socket, your paint sprayer is on and ready to go. To turn the paint sprayer off, pull the power cord out of the socket, aaaand... -
Page 15: How To Choose A Suitable Coating Material
HOW TO CHOOSE A SUITABLE COATING MATERIAL This paint sprayer is comfortable with the following list of coating materials: Colored paints Primers Solvent-based paints Anti-rust paints Water-soluble lacquer paints Glazes Impregnations Oils Textured paints Clear varnishes Synthetic enamels Alkyd resin varnishes Radiator paints Hammer effect enamels Mordants... -
Page 16: How To Thin Coating Material
You should check if your material is of the correct viscosity (before pouring it into the material container) by performing the flow cup test. To work out the DIN/s rating of your coating material: Place your finger over the hole of the included flow cup and fill it to the brim with your chosen material. -
Page 17: How To Strain Coating Material
Check the thickness again by doing the flow cup test. If the paint is still too thick (over 100 DIN/s), dilute further by adding 1/8 of a cup of water for every 3.8 litres of paint to be used. Mix and flow cup test again, until you have a nice even material consistency. -
Page 18: How To Adjust The Paint Sprayer
Unscrew the container from the spray attachment, and pour no more than 1000 ml of your prepared coating material into the container. Flick back to page 11 to find out how. Align the suction tube. This is key to getting all the coating material out of the container. -
Page 19: How To Increase Or Decrease Airflow (And Why)
to conventional application of coating a surface, you have full control over both the volume of material and the volume of air you use. This reduces the amount of paint required to cover an object or surface, making this method highly economical and ensures consistent surface quality and cover. As you can see, your paint sprayer takes care of things by itself. -
Page 20: How To Adjust The Spray Pattern (And Why)
HOW TO ADJUST PAINT VOLUME (AND WHY) The paint volume adjustment dial is located behind the sprayer’s trigger. Setting the dial to a fixed position means the trigger can only be pulled back a certain amount. The tighter the dial, t he further back you can pull the trigger, allowing more material to pass through the nozzle tip, increasing the amount of paint dispensed. - Page 21 Vertical spray pat- Horizontal spray Circular pattern - Turn tern - Turn the dial lever pattern - Place the dial the dial lever all the way to the right (if looking in the middle to horizon- to the left to spray directly at the spray noz- tally spray flat surfaces.
-
Page 22: How To Change The Spray Nozzles (And Why)
HOW TO CHANGE THE SPRAY NOZZLES (AND WHY) There are four different nozzle sizes included which should be changed depending on the thickness of the paint you are spraying. Change the size of the spray nozzles to adjust the density of the spray “mist”. For thinner substances like varnish, you want to use a smaller nozzle as it will atomize the material better;... -
Page 23: How To Change A Sprayer Nozzle
HOW TO CHANGE A SPRAYER NOZZLE Unscrew the nozzle cap. Use a pointy object (a screwdriver or the back of the included cleaning brush works great!) to remove the sprayer nozzle tip. 3. Give the sprayer nozzle tip a quick Insert your new nozzle tip and make clean using your cleaning pin. -
Page 24: How To Get The Best Results
HOW TO GET THE BEST RESULTS Cover everything you do not wish to get paint on with protective material. This could be plastic or canvas sheeting, tarpaulin, secured paper drop cloth or something similar. Whatever you use, make sure you cover EVERYTHING. Use painter’s tape (the blue type) as opposed to conventional masking tape. -
Page 25: How To Take A Break - The Right Way
To ensure an even amount of paint on the surface, overlap each spray pass by 50 percent. To do so, aim the sprayer so that the tip points at the edge of the previous pass. When spraying on broad, open surfaces such as ceilings or bare walls, spray the outer edges first;... -
Page 26: How To Clean The Spray Attachment
your van, empty the container and clean it before transport. The container does have an airtight seal though, so should you absolutely have to go somewhere with your paint sprayer last-minute, you can rest assured that no paint will leak. However, do secure your paint sprayer in a stable position, and don’t let it lie it on its side with coating material inside the container. -
Page 27: How To Clean The Main Body Of Your Paint Sprayer
Connect the spray attachment to the main body again with no coating material inside the container. Pull the trigger to rinse the spray attachment of any excess residue that may be still inside. HOW TO CLEAN THE MAIN BODY OF YOUR PAINT SPRAYER First, disconnect it from the mains power plug. -
Page 28: How To Clean The Air Filter
HOW TO CLEAN THE AIR FILTER Your air filter has a two year lifespan. We recommend that every now and again you remove the filter from your sprayer and give it a good clean. It’s a fairly straightforward procedure. Unplug your paint Either clean the old Put the filter back in, sprayer and remove the... -
Page 29: Some Tips On Troubleshooting
SOME TIPS ON TROUBLESHOOTING If these tips do not help to solve the issue or you are having some questions, please let us know to wecare@nocry.com , and we’ll get right on it. Malfunction Possible cause... - Page 30 The seal is stuck Remove and clean the seal Coating material drips The air cap, nozzle or Clean them with the from nozzle needle are soiled included pin The spray attach- Reassemble accord- ment is incorrectly ing to instructions on assembled page 11 The spray nozzle cap...
-
Page 31: Maintenance
Material runs down the Too much coating Reduce the material object being painted material has been volume applied The distance is too Increase the distance small Excessive paint mist The distance to the Reduce the distance (overspray) object is too large to the object Too much coating Reduce the material... -
Page 32: Paint Sprayer Liability
PAINT SPRAYER LIABILITY This product is covered by an EU directive, valid since 01.01.1990, specifying that the manufacturer is only liable for products if all the parts originate from the manufacturer or are approved by them, and if the units are mounted and operated properly. -
Page 33: Warranty
WARRANTY All NoCry products are inspected and tested to ensure their quality before leaving the factory. If you’re not happy with your NoCry product, please contact us within wecare@nocry.com 30 days of receiving it at to return it for free for a replacement product or to receive a full refund. -
Page 34: How To Contact Nocry
HOW TO CONTACT NOCRY We’re glad to have you join the NoCry community, and we hope you are happy with your new NoCry Paint Sprayer. If you have any questions or concerns, let us know by emailing wecare@nocry.com. We’d also love to connect with you via social media. You can find us on Instagram, Facebook and Pinterest by searching “NoCry Tools &... - Page 35 Your feedback helps us serve you better and it helps others choose the best products. To leave us a review on Amazon > go to Orders > Write a product review To leave us a review on Trustpilot > search NoCry > Write a review...
- Page 36 WWW.NOCRY.COM...
Need help?
Do you have a question about the NPS-100 DINS and is the answer not in the manual?
Questions and answers