Advertisement
PL
PL
Zastosowanie:
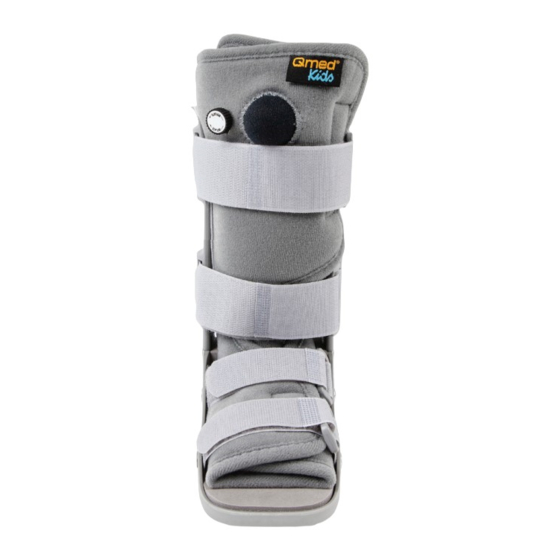
KID Air Walking Boot zapewnia stabilizację i ochronę w przypadku urazów
tkanek miękkich okolicy stawu skokowego, doleczenia stabilnych złamań
okolicy stawu skokowego i śródstopia.
Przeciwwskazania:
Komory powietrzne nie powinny być nadmiernie pompowane, może to
doprowadzić do podrażnienia skóry. Należy zwrócić szczególną uwagę
na pacjentów z zaburzeniem czucia lub diabetyków. Należy kontrolować
zmiany skórne w przypadku ich wystąpienia należy zmniejszyć poziom
powietrza w komorach. Wyrób nie powinien być stosowany w przypadku
wystąpienia owrzodzenia skóry lub otwartych ran. W przypadku
wystąpienia odrętwienia lub objawów bólowych w obrębie działania
ortezy należy niezwłocznie skontaktować się z lekarzem. Należy zachować
szczególną ostrożność przy przemieszczaniu się po mokrych lub śliskich
powierzchniach. Wszelkie korekty przy korzystaniu z ortezy powinny być
Instrukcja zakładania:
1.
Odepnij pasy i wyciągnij miękką wyściółkę z buta.
2.
Otwórz miękką wyściółkę i umieść wewnątrz niej stopę tak aby pięta
dotykała jej tylnej części. Zapnij rzepy znajdujące się na ściance
wyściółki. Upewnij się że pompa znajduje się w przedniej części
wyściółki
3.
Należy delikatnie rozłożyć pionowe podpórki buta, a następnie
wsunąć stopę wewnątrz obramowania.
4.
Upewnij się, że staw skokowy znajduje się dokładnie pomiędzy
pionowymi podpórkami pod kątem 90
.
0
5.
Zapnij taśmy zaczynając od części stopowej kierując się w stronę
goleni. Nie należy zaciskać taśm zbyt ciasno. W przypadku
wystąpienia zmian obrzęku w trakcie noszenia ortezy*, należy
ponownie dopasować taśmy.
*
Ze względu na aktywność w ciągu dnia.
6.
Aby napełnić komory powietrzem należy naciskać przycisk pompy
znajdujący się z przodu ortezy aż do uzyskania odpowiedniej
kompresji.
7.
Aby zmniejszyć ciśnienie w komorach ortezy należy przekręcić
zawór znajdujący się z przodu ortezy.
8.
Aby ściągnąć ortezę należy odpiąć taśmy zabezpieczające bez
całkowitego wyciągnięcia ich z ramy ortezy. Odepnij wyściółkę i
delikatnie wysuń nogę z buta.
Konserwacja:
Wyściółkę należy czyścić gąbką z dodatkiem łagodnego detergentu,
unikając nadmiernego przemoczenia. Nie chlorować, nie prać chemicznie,
nie wykręcać. Suszyć z dala od sztucznych źródeł ciepła. Suszyć w postaci
rozłożonej. Nie prasować. Korpus czyścić wilgotną ściereczką.
UWAGA
1.
Jeśli podczas korzystania z wyrobu pacjent odczuwa nasilający się
dyskomfort lub ból w obrębie działania ortezy należy przerwać
2.
Należy upewnić się że wszystkie pasy są zapięte parawidłowo.
Jeśli doszło do sytuacji w której pasy nie mogą być zapięte należy
zaniechać użytkowania ortezy.
PRZED PIERWSZYM UŻYCIEM NALEŻY UWAŻNIE ZAPOZNAĆ SIĘ Z PONIŻSZĄ
INSTRUKCJĄ OBSŁUGI. OSTATECZNĄ DECYZJĘ DOTYCZĄCĄ ZASTOSOWANIA
I WYBORU ZAOPATRZENIA PODEJMUJE LEKARZ SPECJALISTA
Odpowiednie dopasowanie ortezy ma kluczowe znaczenie dla jej
prawidłowego działania.
EN
EN
Use:
KID Air Walking Boot provides stabilization and protection of foot and
ankle joint area. Follow-up treatment in case of stabile fractures of ankle/
instep.
Contraindications:
The aircells must not be
as it may lead to skin irritation.
Special attention should be paid in case of diabetic patients and
patients with sensory disturbances. In case of skin changes or irritations,
the compression should be decreased.
The product cannot be used in case of open, unstable fractures,
to heal wounds, sores and other skin changes. It is necessary to
contact a doctor in case of pain or numbness.
Special attention should be paid while walking on wet or slippery surfaces.
It is necessary to contact a physiotherapist or a doctor before changing
the way of using the brace.
The product should be used only under careful medical supervision.
Placement instruction:
1.
Unfasten straps and remove inner soft liner from the boot.
2.
Open the soft liner and place foot inside with the heel
snugly into
the back portion of the liner. Fasten and wrap foot
then the leg
portion of the liner. Ensure liner is snug but not constrictive. Make sure
pump is facing outward.
3.
Gently spread the side struts and place the lower leg into the brace.
4.
The ankle should be centered at the struts with the foot and ankle at 90°.
5.
Fasten the Velcro straps beginning at the toe then moving up the leg. Do not
over tighten. As swelling pattern changes throughout the day*, it may be
necessary to adjust the straps for comfort.
*Due to activites, rest, etc.
6.
INFLATE
DEFLATE
To reduce the pressure in the orthosis chambers, turn the valve on the front of
the orthosis.
7.
To remove, simply unfasten the straps without removing them completely from
the assembled walker. Unfasten the soft good liner and gently bring the foot
and ankle forward and out of the walker. To reapply, place the foot and ankle
into the liner and reattach the Velcro closures
Washing instructions:
Remove foam liner for hand wash, using a mild detergent and cold water,
air dry. Do not wash in washing machine or in mechanical dryer. For plastic
components, clean with a damp cloth, air dry. Do not use detergent or
bleach.
Maintenance:
The inner liner should be washed using sponge and mild detergent. (but is
CAUTION
1.
If discomfort or pain results, persists or increases, discontinue to use
and consult with medical professional.
2.
Make sure the hook and loop fasteners are well fastened while
wearing the product. If the hook and loop fasteners can not be
Fastened well, stop using the product to prevent injuries.
THE FINAL DECISION CONCERNING THE USAGE AND SELECTION OF THE
APPLIANCE SHALL BE MADE BY THE DOCTOR SPECIALIZING IN THE FIELD
DE
DE
Anwendung:
Der
KID Air
Walking
Boot
bietet
Stabilisierung
und
für
Weichteilverletzungen rund um den Knöchelbereich und für die
Behandlung von stabilen Hüft- und Metatarsalfrakturen.
Gegenanzeigen:
Luftkammern dürfen nicht aufgeblasen werden, dies kann Hautreizungen
verursachen. Achten Sie besonders auf Patienten mit eingeschränkten
Sensitivitäten oder Diabetikern. Hautveränderungen sollten überwacht
werden, wenn sie auftreten, die Luftmengen in den Kammern sollten
reduziert werden.
Das Produkt sollte nicht im Falle von Hautgeschwüren oder
enen Wunden
verwendet werden. Wenn Sie Taubheit oder Schmerzen in der Orthese
erfahren, wenden Sie sich sofort an Ihren Arzt.
Besondere Vors
Jede Korrektur mit der Orthese sollte mit einem Physiotherapeuten oder
Rehabilitator konsultiert werden. Das Produkt sollte unter der Aufsicht von
qual ziertem medizinischem Personal verwendet werden.
Wartung:
Das Pad sollte mit einem milden Waschmittelschwamm gereinigt werden, um
eine übermäßige Benetzung zu vermeiden. Nicht chlorieren, nicht chemisch
waschen, nicht verdrehen. Von künstlichen Wärmequellen trocknen Trocken
in entfalteter Form nicht Bügeln Reinigen Sie den Körper mit einem feuchten
Tuch.
Anlegen:
1. Lösen Sie die Riemen und ziehen Sie das weiche Futter aus dem Schuh.
2.
Ferse den hinteren Teil berührt. Schließen Sie die sich an der Wand des
3. Klappen Sie die vertikalen Schuhstützen vorsichtig auf und schieben
Sie den Fuß in den Rahmen.
4. Stellen Sie sicher, dass sich das Sprunggelenk in einem Winkel von
90
0
5. Schließen Sie die Gurte vom Fußteil ausgehend in Richtung Schienbein.
Ziehen Sie die Gurte nicht zu fest an. Kommt es während des Tragens
der Orthese zu einer Veränderung der Schwellung*, müssen die Gurte
neu angepasst werden.
* Aufgrund der Aktivität während des Tages.
6. Um die Kammern mit Luft zu füllen, drücken Sie den Pumpknopf an der
Vorderseite der Orthese, bis die entsprechende Kompression erreicht ist.
7. Um den Druck in den Kammern der Orthese zu reduzieren, drehen
8.
Um die Orthese abzulegen, müssen die sichernden Gurte entfernt
werden, ohne sie vollständig aus dem Rahmen der Orthese
vorsichtig aus dem Schuh.
ACHTUNG
1.
Wenn der Patient während des Betriebes der Orthese erhöhte
Unannehmlichkeiten oder Schmerzen erleidet, beenden Sie die
Therapie und konsultieren Sie einen Arzt oder Physiotherapeuten.
2.
tellen Sie sicher, dass alle Gürtel zusammengeklemmt sind. Wenn es
eine Situation gibt, in der die Riemen nicht befestigt werden können,
sollte die Verwendung von Orthesen abgebrochen werden.
VOR DER ERSTEN ANWENDUNG LESEN SIE BITTE DIE FOLGENDEN
ANWEISUNGEN FÜR DEN ERSTEN GEBRAUCH GUT DURCH. DIE ENDGÜLTIGE
ENTSCHEIDUNG ÜBER DIE ANWENDUNG UND AUSWAHL DER VERSORGUNG
IST DEN SPEZIALISTEN VORENTHALTEN:
Schutz
Die korrekte Anpassung der Orthese ist entscheidend für ihre
ordnungsgemäße Funktion.
Advertisement
Table of Contents

Related Manuals for Qmed Air Walking Boot

Summary of Contents for Qmed Air Walking Boot
- Page 1 If the hook and loop fasteners can not be KID Air Walking Boot zapewnia stabilizację i ochronę w przypadku urazów Fastened well, stop using the product to prevent injuries. tkanek miękkich okolicy stawu skokowego, doleczenia stabilnych złamań...
- Page 2 15 +/- 0,5 cm 23 - 26 19 +/- 0,5 cm 27 - 30 21 +/- 0,5 cm 31 - 33 KID Air Walking Boot ANKLE FOOT ORTHOSIS mdh Sp. z o.o. FUß ul. Ks. W. Tymienieckiego 22/24 90-349 Łódź...
Need help?
Do you have a question about the Air Walking Boot and is the answer not in the manual?
Questions and answers