Table of Contents
Advertisement
Available languages
Available languages
Quick Links
Advertisement
Table of Contents

Related Manuals for Manta DUO POWER MID1005T


Summary of Contents for Manta DUO POWER MID1005T
- Page 1 Tablet DUO POWER MID1005T Instrukcja obsługi User’s Manual...
-
Page 2: Instrukcja Obsługi
InstrukCja obsługI Instrukcja obsługi Uwaga! konstrukcja produktów i parametry techniczne mogą ulec zmianie bez wcześniejszego powiadomienia. Dotyczy to przede wszystkim parametrów technicznych, oprogramowania, sterowników oraz podręcznika użytkow- nika. niniejszy podręcznik użytkownika służy ogólnej orientacji dotyczącej obsługi produktów. Produkty oraz akcesoria mogą się różnić od tych opisanych w instrukcji. Producent nie ponosi żadnej odpowiedzialności tytułem odszkodowania za jakiekolwiek nieścisłości wynikające z błędów w opisach występujących w niniejszej instrukcji użytkownika. - Page 3 InstrukCja obsługI − ładowanie akumulatora powinno odbywać się w następujących warunkach: a. Ikonka stanu naładowania akumulatora pokazuje brak zasilania; b. układ sam się wyłącza niedługo po włączeniu zasilania; C. brak reakcji na wciskanie przycisków; D. W prawym, górnym rogu ekranu pojawiają się czerwone symbole. −...
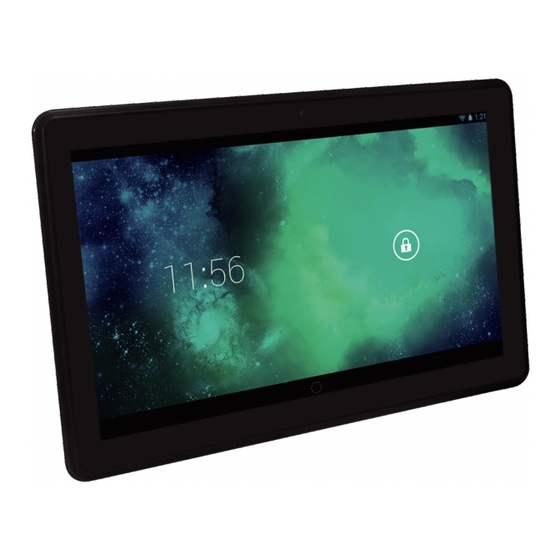
- Page 4 INSTRUKCJA OBSŁUGI Wygląd i przyciski Kamera Głośność + Przycisk zasilania Głośność - Gniazdo słuchawkowe Mikro USB HDMI Reset Karta Mikro SD Głośnik...
- Page 5 InstrukCja obsługI Panel dotykowy 7-calowy, pojemnościowy panel dotykowy: w trybie obsługi, można na nim klikać i przeciągać obrazy. Przycisk zasilania (POWER) Włączanie: po wciśnięciu i dłuższym przytrzymaniu przycisku zasilania, układ przejdzie do ekranu głównego. Wyłączanie: w menu głównym należy wciskać przez około 5 sekund przycisk zasilania.
-
Page 6: Pierwsze Uruchomienie
InstrukCja obsługI Uwaga! używać tylko, gdy nie można wyłączyć w inny sposób. W przeciwnym razie nie należy używać przycisku resetowania. sugerujemy wyłączanie tabletu w zwykły sposób, gdyż resetowanie grozi uszkodzeniem systemu. Pierwsze uruchomienie Postępowanie z akumulatorem i ładowanie Przed włączeniem po raz pierwszy, należy sprawdzić, czy akumulator urządzenia jest całkowicie naładowany. -
Page 7: Podłączenie Komputera
InstrukCja obsługI Uwaga! 1. jeśli tablet nie jest używany przez dłuższy czas, dla uniknięcia uszkodze- nia od pobieranego zasilania, zalecamy raz w miesiącu naładować akumulator i przez jakiś czas używać tabletu w celu jego częściowego rozładowania. 2. Po wyłączeniu z powodu niskiego stanu naładowania akumulatora, po podłączeniu ładowarki pojawi się... - Page 8 InstrukCja obsługI krok 2: krok 3: Zgodnie z powyższą ilustracją, wybierz połączenie przez gniazdo usb, po czym pojawi się następujący ekran:...
- Page 9 InstrukCja obsługI krok 4: Wciśnij „turn on usb storage” („Włącz zapisywanie przez usb”), po czym pojawią się następujące obrazy: Wciśnij „ok”. teraz realizowane jest połączenie przez gniazdo usb. komu- nikat „usb is connected” oznacza, że pobieranie z pamięci zewnętrznej (sD) zostało zakończone, a na komputerze widać...
- Page 10 InstrukCja obsługI na ekranie głównym można: Zarządzać ikonkami programowymi: po wciskaniu ikonki przez 3 sekun- dy, zostanie ona powiększona i można ją wtedy przeciągnąć w dowolne miejsce na ekranie. usuwanie ikon: po wciśnięciu przez 3 sekundy, przeciągnij ikonkę na ikonkę kosza na śmieci, i gdy stanie się czerwona, można ją puścić, po czym ikonkę...
-
Page 11: Rozwiązywanie Problemów
InstrukCja obsługI Używanie ekranu dotykowego urządzenie posiada 7-calowy ekran dotykowy. Poniżej opisano główne obszary ekranu dotykowego oraz podano kilka wskazówek, dotyczących korzystania z ekranu dotykowego. niezależnie od aktualnie wyświetlanego ekranu, do ekranu głównego można wrócić po wciśnięciu klawisza skrótu w prawym, dolnym rogu ekranu. - Page 12 3) sprawdź, czy kabel usb nie jest uszkodzony 4) rozłączone połączenie przez usb Dział obsługi klienta tel: +48 22 332 34 63 lub e-mail: serwis@manta.com.pl od poniedziałku do piątku w godz. 9.00-17.00 Producent zastrzega sobie możliwość wprowadzenia zmian w specyfikację produktu bez uprzedzenia.
- Page 13 user’s ManuaL User’s Manual Attention this handbook contains important security measures and the correct use of the product information, in order to avoid accidents. Pls make sure to reading the manual carefully before use the device. − Please don’t be in high temperature, moisture or very dust place −...
-
Page 14: Appearance And Button
USER’S MANUAL The company reserves the right to improve product, products specification and design have any change, The information is subject to changes without prior notice. (This tablet is no waterproof function) Remark! All pictures in this manual is just for your reference. products specification and design have any change, The information is subject to changes without prior notice. - Page 15 user’s ManuaL Touch panel 7” Capacitive touch panel: In the operation, to click dragging on the touch panel POWER startup: Long Press and hold the power button, the system will enter the main interface shutdown: In the main menu interface, Press the power button about 5 second to shutdown, the system can hint “power off”...
-
Page 16: First Use
USER’S MANUAL First use Battery management and charge Before first use, please set the device’s battery is fully charged Just need to connect the adaptor or USB interface, then you can charge The first two times charging please keep about 6 hours, after that you just need 4 hours to charge. -
Page 17: Connection With Pc
user’s ManuaL Connection with PC USB connection using usb to connect the MID and PC, the default connection mode is a synchronous mode. You can see this usb icon and then drag the status bar to drop, appeared the following interface: step 1: step 2:... - Page 18 user’s ManuaL step 3: according to the above photo, please choose usb connected. then you can see the following interface: step 4: Please press “turn on usb storage”. then you will find the follo- wing photos: Please choose “ok”. then usb is connected. “usb is connected”: means external memory (sD) loading is completed, and you can see the correspon- ding letter in the PC terminal.
-
Page 19: Equipment Operation Interface
user’s ManuaL Equipment operation interface Main interface describe after startup will enter the main interface In the main interface, you can:... -
Page 20: Status Bar Describe
user’s ManuaL Management main interface software ICons: long press the icons 3 second, after the icons will bigger, then you can drag anywhere in the interface. Delete icons: long press the icons 3 second, drag the icons to the recycle bin icon, once it become red, Loosen your hand, after that you can delete icon Status bar describe the status bar below of the screen... -
Page 21: Problem Solution
user’s ManuaL Problem solution Device can’t to open 1) Check the battery power 2) Connect adaptor first, then check again 3) after charging then can’t to open, pls contact with the supplier After startup the screen or the opening picture has been appeared, the device appear shutdown 1) Power is not enough, please charge Headset can’t hear the voice... - Page 22 Deklaracja zgodności z normami Unii Europejskiej Niniejsze urządzenie ma oznaczenie 0678 i może być używane w krajach Unii Europejskiej. Oznacza to zgodność z dyrektywą 1999/5/WE w sprawie urządzeń radiowych i koń- cowych urządzeń telekomunikacyjnych oraz z odpowiednimi częściami następujących specyfikacji technicznych: EN 300 328 –...
- Page 23 EN 60950-1 – Urządzenia techniki informatycznej – Bezpieczeństwo – Część 1: Wy- magania ogólne EN 62311: 2008 — Ocena urządzeń elektronicznych i elektrycznych w odniesieniu do ograniczeń ekspozycji ludności w polach elektromagnetycznych (0 Hz-300 GHz) Oznaczenie tym symbolem oznacza, że ograniczenia dotyczące użytkowania mają zastosowanie.
- Page 24 European Community Compliance Statement This equipment is marked with the 0678 symbol and can be used throughout the European community. This indicates compliance with the R&TTE Directive 1999/5/EC and meets the relevant parts of following technical specifications: EN 300 328 – Electromagnetic compatibility and Radio spectrum Matters (ERM); Wideband Transmission Systems;...
- Page 25 Marking by the symbol indicates that usage restrictions apply. France - 2.4GHz for Metropolitan France: In all Metropolitan departments, wireless LAN frequencies can be used under the following conditions, either for public or private use: Indoor use: maximum power (EIRP*) of 100 mW for the entire 2400-2483.5 MHz fre- quency band Outdoor use: maximum power (EIRP*) of 100 mW for the 2400-2454 MHz band and with maximum power (EIRP*) of 10 mW for the 2454-2483 MHz band...
- Page 26 Erklärung zur Einhaltung der Vorschriften der Europäischen Gemeinschaft Dieses Gerät ist mit dem Symbol 0678 gekennzeichnet und kann in der gesamten EG verwendet werden. Das weist auf die Einhaltung der R&TTE Richtlinie 1999/5/EC hin und entspricht in wesentlichen Teilen den folgenden technischen Angaben: EN 300 328 –...
- Page 27 Frequenz bändern eingestellt wird. eInHaLtung InternatIonaLer norMen Dieses gerät entspricht der empfehlung vom 12. juli 1999 des rates zur begrenzung der exposition der bevölkerung gegenüber elektromagneti schen Feldern [1999/519/eC]. Made in P.r.C. FOR MANTA EUROPE...
Need help?
Do you have a question about the DUO POWER MID1005T and is the answer not in the manual?
Questions and answers