Table of Contents
Advertisement
Quick Links
Advertisement
Table of Contents

Summary of Contents for EunSung BSG Clearlight
- Page 1 Operator Manual...
- Page 2 EUNSUNG GLOBAL. The system specifications and the information contained in this manual book are subject to change without notice. All rights reserved. EUNSUNG GLOBAL CORP., DUET RF™, ClearLight™, FractionCO2™, 3-MAX™, PowerShape™, Magicpot™, Magicpolar™, Megason™, Spring™, OctoLine™, Iontoson™, JetClear™, , Masomate™...
-
Page 3: Table Of Contents
Contents 1. Safety and Regulatory 1.1 Electrical hazards 1.2 Fire hazards 1.3 Installation hazards 1.4 Clean-up procedure 1.5 Regulatory compliance 1.6 Contraindication 2. Component 2.1 Structure 2.2 Touchscreen 2.3 Handpiece 2.4 Filters 2.5 Accessories 2.5.1 Handpiece holder 2.5.2 Funnel 2.5.3 Safe key 3. - Page 4 4. System Operation 4.1 Loading 4.2 Select Treatment mode 4.2.1 ST mode 4.2.2 HR mode 4.3 ST mode Screen 4.3.1 Filter & Skin type 4.3.2 Pulse type 4.3.3 Pulse & Delay 4.3.4 Fluence 4.3.5 State display 4.3.6 Other function 4.4 HR mode Screen 4.4.1 Filter &...
-
Page 5: Safety And Regulatory
1. Safety and Regulatory Before using, please read this manual thoroughly to ensure that you know how to operate the features and functions. This manual contains important information on the installation, safety instructions, use and care of your machine. Read all safety instructions and operating direction before using for your safety. Not limited to, personal injury and material damage that cannot be held responsible for. -
Page 6: Regulatory Compliance
1.5 Regulatory compliance To prevent incorrect use of equipment and unauthorized use of the device, disconnect the Key Switch from the device and keep separate This equipment is Class 3 medical device, the user must have familiarized yourself with this manual before using the equipment. -
Page 7: Component
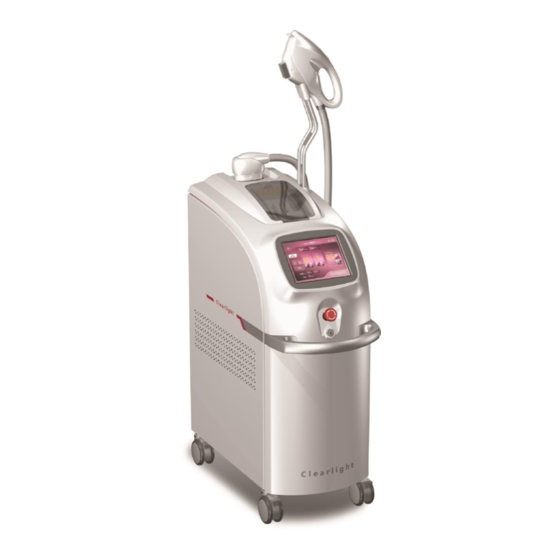
2. Component 2.1 Structure Handpiece Handpiece holder Filer Storage Emergency switch Key Switch Handle 〔Back Side〕 Water fill port Water vent port Power Switch Ground Water drain plug Inter lock Clear light™ Makes Professional IPL Treatment Easier and more Efficient... -
Page 8: Touchscreen
2.2 Touchscreen With easy interface to use and touch screen capabilities, ST (Skin Treatment) mode and HR (Hair Removal) mode can be manipulated easily and simply. For each function and using, please see 4. System Operation page. 2.3 Handpiece Multiple wavelength of filters can be used with Clear Light handpiece. Operation can choose the right filter by the purpose of the treatment. -
Page 9: Accessories
2.5 Accessories 2.5.1 Handpiece holder 2.5.2 Funnel Funnel is used to fill the distilled water in the water container of the machine. 2.5.3 Safe key Key for system on and off Clear light™ Makes Professional IPL Treatment Easier and more Efficient... -
Page 10: Installation Instructions
3. Installation Instructions 3.1 Connect Handpiece holder Connect the handpiece holder to the machine. 3.2 Connect Handpiece Connect the handpiece connector to the handpiece socket 〔Disconnection〕 Press the button in both side of handpiece and pull the connector upward 3.3 Hold handpiece Put the handpiece to the handpiece holder. -
Page 11: Fill Distilled Water
3.4 Fill Distilled water 1. Remove the 2 screws located in upper area. 2. Connect the funnel to the first hole to fill the distilled water. 3. Fill the distilled water slowly through the funnel. ※ Fill 4L of distilled water first and turn the key switch on and then fill 1L distilled water more after . -
Page 12: Insert Key
3.5 Insert Key Insert the safety key in the keyhole at center of this unit. 3.6 Turn on the Power Turn on the main power as switch up at rear of this unit and turn the safety key to clockwise for power supply. -
Page 13: Insert Filter
3.8 Insert Filter 1) Match handpiece and the connection groove of filter 2) Press until the filter fully mounted with handpiece. 3) Detaching the filter by pull the filter. < Filter mounting > < Filter detaching > Clear light™ Makes Professional IPL Treatment Easier and more Efficient... -
Page 14: System Operation
4. System Operation 4.1 Loading Loading screen will show up after power on. Power, Hand-piece, Water and Interlock check when initial system operate. 4.2 Select Treatment mode The following screen appears when the filter is not plugged. And automatically the treatment screen appears when the filter is plugged. -
Page 15: Mode
4.2.1 ST (Skin Treatment) mode 〔 Filter 560nm 〕 〔 Filter 430nm 〕 〔 Filter 585nm 〕 〔Filter 640nm 〕 4.2.2 HR (Hair Removal) mode 〔700nm Filter〕 Clear light™ Makes Professional IPL Treatment Easier and more Efficient... -
Page 16: St Mode Screen
4.3 ST (Skin Treatment) mode Screen (17) (16) (18) (10) (13) (19) (12) (15) (11) (14) (1) Filter type Provides the information of the current filter (2) Skin type button Select skin color(5Level) (3) Manual button Select 2, 3 pulse manual value (4) Pulse type button Select pulse type(4Level) (5) Pulse value... -
Page 17: St Mode
4.3.1 Filter & Skin type (1) Filter type Provides the information of the filter currently mounted. 430 nm 560 nm ST mode 585 nm 640 nm (2) Skin type button [ Preset : SKIN II ] Select skin color. White Dark Clear light™... -
Page 18: Pulse Type
4.3.2 Pulse type (3) Manual button Select the value of 2pulse and 3pulse (Pulse & Delay) manually. Click the value you want to modify and increase (+) decrease (-) button to set the value. • 2 Pulse mode PULSE DELAY •... - Page 19 (4) Pulse type button Select pulse. [ Preset : 2 Pulse ] • 1 Pulse mode(PULSEx1) • 2 Pulse mode(PULSEx2+DELAYx1) • 3 Pulse mode(PULSEx3+DELAYx2) • Toning mode Clear light™ Makes Professional IPL Treatment Easier and more Efficient...
-
Page 20: Pulse & Delay
4.3.3 Pulse & Delay (5) Pulse value Display set value of pulse. (6) Pulse decrease/increase button left(-)/right(+) button for pulse. Filter Pulse(ms) 1 Pulse 5~50 2 Pulse 5~25 3 Pulse 5~16 Toning 1~25 (7) Delay value Display set value of dely. (8) Delay decrease/increase button left(-)/right(+) button for Delay. -
Page 21: Fluence
4.3.4 Fluence (10) (9) Fluence value Display set value of Fluence. (10) Fluence decrease/increase button left(-)/right(+) button for Fluence. J/㎠ Filter Pulse( 1 Pulse 3-30 2 Pulse 3-30 3 Pulse 3-30 Toning 1-17 Clear light™ Makes Professional IPL Treatment Easier and more Efficient... -
Page 22: State Display
4.3.5 State display (11) (12) (13) (14) (15) (11) Current shot count Display the number of current shot. (12) Current shot erase button A button for erasing current shot. (13) Total shot count Display the number of total shots. Press the button to show the number of total shots for 2 second. (14) Temperature display Display current temperature of filter. -
Page 23: Other Function
4.3.6 Other function (16) (17) (18) (19) (16) Water Flow Blinking for distilled water circulation error. Normalcy Error (17) Water Level Blinking for distilled water shortage. Enough Shortage (18) Sound button Mute sound of touch screen button. (19) Standby & Ready Button Without any shot for 1minute after READY, it will be switched to Standby mode. -
Page 24: Mode Screen
4.4 HR (Hair Removal) mode Screen (18) (19) (17) (11) (10) (14) (20) (13) (16) (12) (15) (1) Filter type Provides the information of the current filter (2) Skin type button Select skin color(5Level) (3) Hair type button Select hair type(4Level) (4) Manual button Select 2, 3 pulse manual value (5) Pulse type button... -
Page 25: Filter & Skin & Hair Type
4.4.1 Filter & Skin & Hair type (1) Filter type Provides 700 nm Filter of HR mode. (2) Skin type button [ Preset : SKIN II ] Select Skin color type. White Dark (3) Hair type button [ Preset : Hair II ] Select hair type HAIR I Light Thin hair... -
Page 26: Pulse Type
4.4.2 Pulse type (4) Manual button Select the value of 2pulse and 3pulse (Pulse & Delay) manually. Click the value you want to modify and increase (+) decrease (-) button to set the value. • 2 Pulse mode PULSE DELAY •... - Page 27 (5) Pulse type button Select plulse. [ Preset : 2 Pulse ] • 1 Pulse mode(PULSEx1) • 2 Pulse mode(PULSEx2+DELAYx1) • 3 Pulse mode(PULSEx3+DELAYx2) Clear light™ Makes Professional IPL Treatment Easier and more Efficient...
-
Page 28: Pulse & Delay
4.4.3 Pulse & Delay (6) Pulse value Display set value of pulse. (7) Pulse decrease/increase button The left(-)/right(+) button for pulse. Filter Pulse(ms) 1 Pulse 5~50 2 Pulse 5~25 3 Pulse 5~16 (8) Delay value Display set value of dely. (9) Delay decrease/increase button The left(-)/right(+) button for Delay. -
Page 29: Fluence
4.4.4 Fluence (10) (11) (10) Fluence value Display set value of Fluence. (11) Fluence decrease/increase button The left(-)/right(+) button for Fluence. J/㎠ Filter Pulse( 1 Pulse 3-30 2 Pulse 3-30 3 Pulse 3-30 Clear light™ Makes Professional IPL Treatment Easier and more Efficient... -
Page 30: State Display
4.4.5 State display (12) (13) (14) (15) (16) (12) Current shot count Display the number of current shot. (13) Current shot erase button A button for erasing current shot. (14) Total shot count Display the number of total shots. Press the button to show the number of total shots for 2 second. (15) Temperature display Display current temperature of filter. -
Page 31: Other Function
4.4.6 Other function (17) (18) (19) (20) (17) Water Flow Blinking for distilled water circulation error. Normalcy Error (18) Water Level Blinking for distilled water shortage. Enough Shortage (19) Sound button Mute sound of touch screen button. (20) Standby & Ready Button Without any shot for 1minute after READY, it will be switched to Standby mode. -
Page 32: Error Messages
4.5 Error Messages • Check massage after operating <Serial Error> <Power, Handpiece, Water, Interlock Error> * Error ‘!’, Normalcy ‘OK’ sign • Error massage during operating • - 9 error massages Check Serial, Power, Handpiece, Water Level, Water Flow, Interlock, Over voltage, Charge, EEPROM - Inter lock, Water level, Water Flow Error massage(warning massage), - Serial, Simmer, Handpiece, Over voltage, Charge, EEPROM Error massage stop operating... -
Page 33: Maintenance
5. Maintenance 5.1 Cleaning Use a wet tissue to clean foreign substance on Crystal Lamp after treatment. Handpiece Power off the machine and clean the hand-piece with a dry cloth. Especially, remove the foreign substance at Filter connecting area and Crystal Lamp. Screen Use a soft cloth to clean the screen. -
Page 34: Guarantee
6. Guarantee Clear light™ Makes Professional IPL Treatment Easier and more Efficient... -
Page 35: Customer Service And Sales
7. Customer Service and Sales Manufacturer : Eunsung Global Corporation Country of Origin : South Korea Head Office : #1102~1105, Hanrasigma Valley, 345-90, Gasan-Dong, Geumcheon-Gu, Seoul, South Korea Factory 1: #1302~1303, Hanrasigma Valley, 345-90, Gasan-Dong, Geumcheon-Gu, Seoul, South Korea Factory 2: #1316-1318, Hanrasigma Valley, 345-90, Gasan-Dong, Geumcheon-Gu, Seoul, South Korea Clear light™... -
Page 36: Technical Specifications
Technical Specifications ITEM DESCRIPTION Light Source Xenon Lamp Wavelength 430~1,200 nm Fluence Max 38J/㎠ Repetition rate 1 shot in every two seconds Spot size 15mm x 40mm Pulse Sequence Single/Double/Triple Cooling Max -15℃ Display 8” Touch LCD Electrical Power 220VAC 16A 50/60Hz Dimensions 310 x 590 x 1,220mm Weight... - Page 37 "Eunsung Dealer in the U.S.A" FOR FURTHER INFORMATION, PLEASE CONTACT US AT: info@biospecgrp.com or call us at 626-314-3077 Clear light™ Makes Professional IPL Treatment Easier and more Efficient...
Need help?
Do you have a question about the BSG Clearlight and is the answer not in the manual?
Questions and answers