Advertisement
Quick Links
Advertisement

Related Manuals for iBike iAero Generation III


Summary of Contents for iBike iAero Generation III
- Page 1 Generation III Reference Manual December 2010 Firmware 424+ Copyright Velocomp LLP 2008-2010...
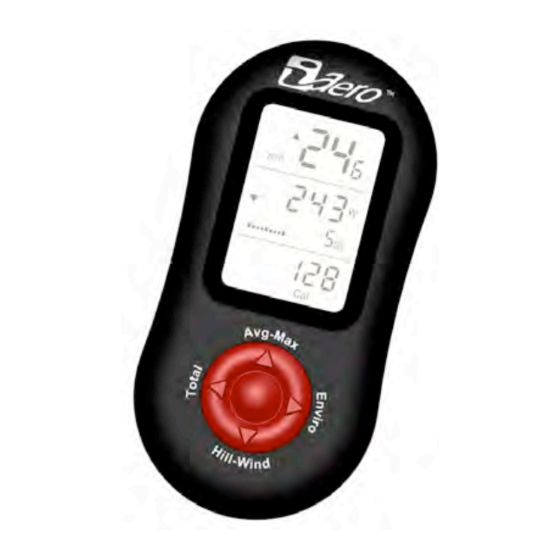
- Page 2 Setting up and Using the Gen III iAero Your iBike Gen III Aero (“iAero”) shares many common elements with the Gen III iBike Pro: mounting, calibrations, and software. You will find detailed information regarding the many aspects of the iAero in other iBike...
- Page 3 With the iBike Aero on your bike you’ll be able to learn much more about the amazing influence of aerodynamics on cycling performance. And even more important, you’ll be able to measure your personal aerodynamic characteristics with Snapshot CdA™...
- Page 4 Heart rate and cadence features built-in (requires optional accessories) • Mac and PC Compatible o Fast, USB-based data transfer to your PC (XP and Vista) or Mac (Intel Mac) o iBike software for data input, transfer, and ride analysis, both Copyright Velocomp LLP 2008-2010...
- Page 5 Mac and PC versions Copyright Velocomp LLP 2008-2010...
- Page 6 What’s in the Box Gen III iBike Aero power meter • iBike wireless mount (stem or handlebar, depending on which model you • purchased) Wireless speed, cadence, and heart rate sensors • Mounting hardware for wireless mount and sensor(s) •...
- Page 7 SETTING UP AND USING THE IAERO NOTE: FOR BEST RESULTS WE STRONGLY RECOMMENDED THAT YOU FAMILIARIZE YOURSELF WITH THE “iBIKE OPERATING INSTRUCTIONS”, “iBIKE MOUNT INSTRUCTIONS”, AND “IBIKE SOFTWARE INSTRUCTIONS” BEFORE READING THIS MANUAL Copyright Velocomp LLP 2008-2010...
- Page 8 The key is this: accurate iAero measurements are a result of proper setup and calibration! Please read the iBike Instructions to familiarize yourself with basic tilt, wind offset, and coast down calibration procedures. Make sure you understand them.
- Page 9 Follow these tips carefully and you’ll get your iAero going quickly and accurately! Copyright Velocomp LLP 2008-2010...
- Page 10 USING THE iAERO FOR AERODYNAMICS MEASUREMENT The iAero provides accurate and useful aerodynamic data as well as accurate and useful power data. As is the case with any measurement instrument, knowing how the iAero works will help you understand when it is providing you maximum-accuracy data, and when won’t be as accurate.
- Page 11 3) Wind offset is performed before the ride, after the iAero is acclimated to outdoor temperature 4) You’re doing a solo ride (not in a pack) 5) The pavement quality is the same as that used in the calibration ride 6) Cross-winds are small 7) Temperature is reasonably constant during ride 8) Bike is working properly (i.e.
- Page 12 When you perform the initial coast-downs and calibration ride, the iAero and the iBike software together determine your “baseline” aerodynamic and frictional drag coefficients. These coefficients characterize your “normal” riding position and “normal” road/bike condition.
- Page 13 HOW TO MEASURE SNAPSHOT CDA WITH THE IAERO What is Snapshot CdA Measurement? Imagine that you’re riding your bike but that you are coasting and your body isn’t moving. Your feet are stationary, your riding position isn’t changing, and your clothes are the same. It’s as if someone took a snapshot of you and your bike.
- Page 14 coasting: if your cadence is not zero, the iAero will not perform CdA calculations. 6) About 10 seconds after you’ve stopped pedaling, you will see your Snapshot CdA coefficient appear in the bottom window of your power screen. Read it as follows: 0_28 = 0.28 (i.e.
- Page 15 HOW TO MEASURE CONTINUOUS CDA WITH THE IAERO Continuous CdA Measurement Continuous CdA measurements allow your body to be in motion at all times: (e.g. pedaling, changing ride position, changing clothing); you don’t have be motionless. Continuous CdA measurements are made once each second and are recorded in your ride file. Continuous CdA is like a movie of your aerodynamic behavior at every point of your ride, in contrast to Snapshot CdA, which is a point-in-time snapshot of your static aerodynamic characteristics.
- Page 16 Copyright Velocomp LLP 2008-2010...
- Page 17 With the wireless DFPM and iAero working together at every point of the ride the iAero knows: applied force (from the DFPM), opposing gravitational force (iAero), opposing acceleration force (iAero), and opposing frictional force (iAero, based on baseline frictional drag coefficient). The only remaining opposing force is due to the wind and the iAero can determine, in real time, the CdA value required to make the above equation balance.
- Page 18 8) Click the center button; “No” will flash. Click the up arrow so that “Yes” flashes. 9) Finally, press the center button of your iAero. Your iBike will scan for your wireless sensors and, after a few moments, you’ll see “SPD FOUND”, “CAD FOUND”, “Pin FOUND”...
- Page 19 DISPLAYED ON YOUR IAERO SCREEN WILL BE THAT MEASURED BY THE DFPM 7) When you’ve completed your calibration ride use the “Profiles/Download Coast- Downs & Calibration Ride” command data to analyze your results. The iBike software will compute aerodynamic and frictional drag coefficients based on the DFPM and iAero data captured during the calibration ride.
- Page 20 TIME ADVANTAGE Time Advantage™ is another feature exclusive to the iAero/DFPM combination. What is Time Advantage? When you ride a bike, most of the time you’re riding in your “normal” position. DEFINITION: YOUR “NORMAL RIDING POSITION” IS THE POSITION YOU USED WHEN PERFORMING THE CALIBRATION RIDE WITH YOUR DFPM.
- Page 21 Graphical Example Here is a graphical depiction of an actual iAero ride with a CinQo DFPM. This data was captured in an iAero ride file and was analyzed using features in the iBike software we’ll discuss later on in this manual.
- Page 22 time did his high CdA cost him? According to the graph, the time lost peaked at -42 seconds at mile 4.4. What does negative 42 seconds mean? It means that if the rider had pedaled equally hard, but had always stayed in his normal ride position, then he would have arrived at mile 4.4 about 42 seconds sooner.
- Page 23 ADVANTAGE ON THE IAERO Once you’ve set up your iAero and DFPM you can ride as usual: 1) All traditional functions, measurements, and screens of the iBike are unchanged. 2) To enable on-screen CdA display, go to Setup/CdA. Press the center button, click the up arrow to set CdA “On”, and click to accept.
- Page 24 Of course, ALL of the features of iBike software that work for the iBike Pro also function with the iAero. These features of iBike software are described in detail in the iBike Software Reference Manual.
- Page 25 NOTE: DFPM INFORMATION INCLUDES POWER DATA AND CADENCE DATA Your iBike software automatically detects when the ride file comes from an iAero. When it sees that you have an iAero then the Features menu commands are unlocked (not grayed out): Also, you’ll see in the main window a Tab labeled DFPM that is not grayed out:...
- Page 26 POWER DATA DISPLAY Once you’ve downloaded your ride file it will appear in the main screen: Your iAero data is displayed in the window (except for cadence data, which is measured by the CinQo). NOTE: THE “DETAILED” TAB SHOWS GRAPHS AND STATS FROM THE IAERO. THE “DFPM” TAB SHOWS GRAPHS AND STATS FROM THE CINQO (OR OTHER DFPM).
- Page 27 Click the Detailed/Analyze Tile & Power button to check your ride. After analysis this ride file moves by only three watts (Use the Hold to View Original Data button to see the difference) so the iAero was well calibrated: iAero PRE ANALYSIS iAero POST ANALYSIS The biggest change pre/post analysis is that the max watts drops.
- Page 28 Next, click on the DFPM tab. You’ll see the CinQo’s graph and stats displayed: Copyright Velocomp LLP 2008-2010...
- Page 29 CinQo Comparing the CinQo and iAero stats is interesting: iAero Pre iAero Post CinQo Copyright Velocomp LLP 2008-2010...
- Page 30 All three sets of data are VERY close (within 1%) of each other; that’s what we would expect. INTERESTING SIDE NOTE: why is there ANY difference between the iAero power measurements and the wireless DFPM? The iAero uses fixed, baseline drag coefficients to measure power. As you’ve learned, when a cyclist moves from the baseline position that affects Time Advantage and power.
- Page 31 CONTINUOUS CDA/TIME ADVANTAGE To see the Continuous CdA/Time Advantage graph select Features/CdA Analysis: This window will appear: Here you can see your CdA vs time (or distance, by changing the top right menu item); Time Advantage, and Speed. NOTE: THE CDA and Time Advantage VS time graph is similar to the numbers that were displayed on your iAero power screen during your ride.
- Page 32 This graph can be used to help understand WHERE ride position is changed and WHEN to be extra careful about ride position. Copyright Velocomp LLP 2008-2010...
- Page 33 POWER METER COMPARISON If you’d like to see how your iAero and your DFPM power measurements compare moment- by-moment, select Features/Power Meter Comparison. The following graph will appear: iAero power is shown in white, and CinQo power is shown in green. Pretty close, huh? J...
- Page 34 PT ride with CyclingPeaks or some other application. Because you own an iAero you can use special features in iBike software to compare your PT file to your iAero file, AND to perform Time Advantage and Continuous CdA analyses after you’ve finished your ride.
- Page 35 6) To add your PT data to this file, click the “Add” button in the lower left corner of the window. 7) A new window will appear. Navigate to your PT file and select it. 8) After you select the PT file a new window will appear: 9) Confirm that this is the file you want.
- Page 36 10) Click the “Read & Sync” button. A new window will appear: NOTE: THERE’S SOME POWERFUL SOFTWARE NEEDED TO CREATE THIS WINDOW! THE TOP GRAPH SHOWS THE “RAW” DATA FROM EACH RIDE FILE (IAERO IS WHITE, PT IS RED). NOT ONLY WERE THE TWO RIDE FILES STARTED AT DIFFERENT TIMES (RESULTING IN THE DISPLACEMENT, BUT ALSO THE PT DOES NOT RECORD AT 1 SECOND INTERVALS (THE IAERO DOES).
- Page 37 11) Click “Accept” and the PowerTap data (in green) will be added to the iAero graph: Pretty close, huh? J Copyright Velocomp LLP 2008-2010...
- Page 38 12) If you have ANOTHER DFPM on your bike (we have a CinQo or SRM, and PT, Ergomo, and iAero on our bike), you can add MORE files too…just click the “Add” button and repeat the process 13) Here’s the same graph, this time with the iAero, CinQo, and PT data together: 14) You can also compare stats from any PMs you’ve selected.
-
Page 39: Troubleshooting
DFPM calibrations. You may need to recalibrate BOTH PMs. You can “force” the iAero to match the DFPM in iBike software by using the Tools/Tweak CdA… command. Adjust baseline CdA so that the average power is about the same. -
Page 40: Technical Support
Forums: Click on any link to get access to your selection. IBIKE FORUMS There are thousands of iBike owners, and here’s a great place to meet many of them and get your questions answered: http://www.ibikeforum.com Sign on as a member so you can learn more about iBike software, and contribute your...
Need help?
Do you have a question about the iAero Generation III and is the answer not in the manual?
Questions and answers