
Subscribe to Our Youtube Channel
Summary of Contents for Dahua DH-PFM364L-D1
- Page 1 Integrated Solar Power System User's Manual V1.0.0 Zhejiang Dahua Vision Technology Co., Ltd...
-
Page 2: Foreword
Foreword Models DH-PFM364L-D1, DH-PFM363L-D1, and DH-PFM363L-SD1. Safety Instructions The following categorized signal words with defined meaning might appear in the Manual. Signal Words Meaning Indicates a potential risk which, if not avoided, may result in property damage, data loss, lower performance, or unpredictable CAUTION result. - Page 3 About the Manual The Manual is for reference only. If there is inconsistency between the Manual and the actual product, the actual product shall prevail. We are not liable for any loss caused by the operations that do not comply with the Manual. The Manual would be updated according to the latest laws and regulations of related ...
-
Page 4: Important Safeguards And Warnings
Important Safeguards and Warnings This chapter describes the contents covering proper handling of the integrated solar power system (the “System”), hazard prevention, and prevention of property damage. Read these contents carefully before using the System, comply with them when using, and keep it well for future reference. -
Page 5: Table Of Contents
Features ............................1 2 Packing List ............................2 3 Structure ..............................3 Appearance ........................... 3 Dimensions ........................... 5 3.2.1 DH-PFM364L-D1 ........................ 5 3.2.2 DH-PFM363L-D1 and DH-PFM363L-SD1 ................. 6 4 Installation .............................. 7 Preparation ............................ 7 4.1.1 Installation Site Requirements .................... 7 4.1.2 Tools ............................ -
Page 6: Overview
Overview Introduction This off-grid integrated solar power system (the “System”) consists of solar panel, lithium battery pack, maximum power point tracking (MPPT) charge controller, and mounting bracket. The System can be used in places without power supply and network connection. Specifically, it is applicable to the following scenarios: Supplying power for surveillance devices installed at places such as small construction ... -
Page 7: Packing List
Packing List After opening the packing box, check whether there is any obvious damage to the System, and make sure all the items included in the packing list are provided. Figure 2-1 Packing list Packing List 2... -
Page 8: Structure
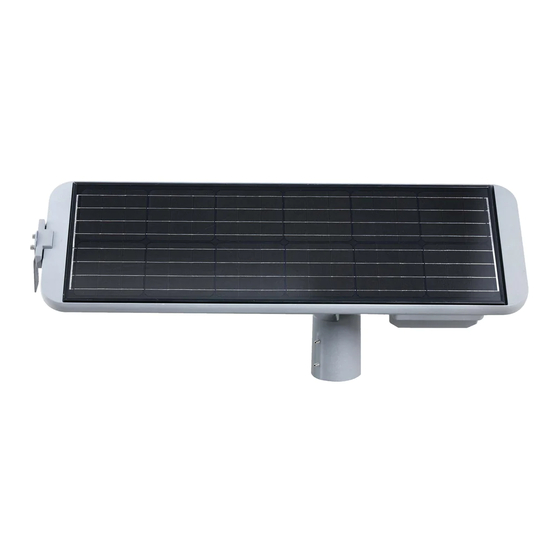
Structure Appearance Figure 3-1 Components (DH-PFM364L-D1) Figure 3-2 Components (DH-PFM363L-D1) Table 3-1 Component description (DH-PFM364L-D1 and DH-PFM363L-D1) Name Description Battery holder Holds batteries. Gear for adjusting horizontal and vertical angles. 5 Gear for adjusting angle degrees will be adjusted by rotating each slot. - Page 9 Name Description Attach the mounting sleeve to the pole, and then tighten Mounting sleeve the sleeve. Female circular connector Connector socket Male circular connector Connector pin Controller holder Holds the controller. Used for communications between the System and RS-485 serial line another device.
-
Page 10: Dimensions
Dimensions 3.2.1 DH-PFM364L-D1 Figure 3-4 Front view (mm[inch]) Figure 3-5 Side view (mm[inch]) Figure 3-6 Top view (mm[inch]) Structure 5... -
Page 11: Dh-Pfm363L-D1 And Dh-Pfm363L-Sd1
3.2.2 DH-PFM363L-D1 and DH-PFM363L-SD1 Figure 3-7 Front view (mm[inch]) Figure 3-8 Side view (mm[inch]) Figure 3-9 Top view (mm[inch]) Structure 6... -
Page 12: Installation
Installation Preparation 4.1.1 Installation Site Requirements The installation site shall meet the requirements of electrical and relevant fire prevention codes. Choose an installation site with sufficient sunshine all the year round, and make sure no shelter around the site to ensure natural lighting. ... -
Page 13: Cables
Installation Procedures Installation steps have minor differences for the three models. The Manual takes installation of DH-PFM364L-D1 for example. Step 1 Open the package, and place the System on a flat surface. Step 2 Adjust the horizontal angle. - Page 14 Figure 4-3 Installation diagram (2) You can know the rotated angle according to the quantity of slots that have been rotated. See Figure 4-4. 5° will be adjusted by rotating each slot. The System is designed with gear for adjusting horizontal or vertical angle. Figure 4-4 Installation diagram (3) Use a S10.0L wrench to tighten the screw.
- Page 15 Figure 4-5 Installation diagram (4) Adjust angle of mounting sleeve until β equals to local latitude. See Figure 4-6. Figure 4-6 Installation diagram (5) Use a S10.0L wrench to to tighten the screw. Step 4 Install camera mounting plate. Make the mounting plate parallel with the mounting sleeve, and then use a S6.0L wrench to tighten the plate.
- Page 16 Figure 4-7 Installation diagram (6) Step 5 Use a screwdriver to remove the cover of cable tray. See Figure 4-8. Figure 4-8 Installation diagram (7) Step 6 Connect cables, and then close the cover of cable tray. Wire through the cable tray, and pull the cable out of the camera mounting plate. See Figure 4-9.
- Page 17 After connecting the cables, use the screwdriver to close the cover of cable tray. See Figure 4-10. Figure 4-10 Installation diagram (9) Step 7 Align the female circular connector with the male one, and then connect the connectors. See Figure 4-11. Figure 4-11 Installation diagram (10) Step 8...
- Page 18 Step 9 Raise the System to mounting height, and then attach the mounting sleeve to the pole, and finally use a S6.0L wrench to tighten the sleeve. See Figure 4-13. Adjust the solar panel according to local longitude and latitude to make it face the sun.
-
Page 19: Daily Maintenance
Daily Maintenance Notes Tools: Ladder, screwdriver, multimeter, bucket, mop, and insulated gloves. Attention: Do not maintain the System when it is raining. Wear insulated gloves during maintenance. Maintenance interval: Twice a year. Instructions It is recommended to check the following items to keep the long-term high performance of the System: Check whether the insulation layers of all exposed cables have been damaged because of ... -
Page 20: Appendix 1 Lightning And Surge Protection
Appendix 1 Lightning and Surge Protection The System adopts TVS lightning protection technology. It can effectively prevent damages from various pulse signals below 6000V, such as sudden and indirect lighting strike. But, when installing the System in the outdoor environment, you still need to take necessary precaution measures while maintaining your local electrical safety code. - Page 21 ZHEJIANG DAHUA VISION TECHNOLOGY CO., LTD. Address: No.1199, Bin'an Road, Binjiang District, Hangzhou, P.R. China Postcode: 310053 Tel: +86-571-87688883 Fax: +86-571-87688815 Email: overseas@dahuatech.com Website: www.dahuasecurity.com...
Need help?
Do you have a question about the DH-PFM364L-D1 and is the answer not in the manual?
Questions and answers