Table of Contents
Advertisement
Quick Links
Advertisement
Table of Contents

Related Manuals for Stewart MacDonald 5295

Summary of Contents for Stewart MacDonald 5295
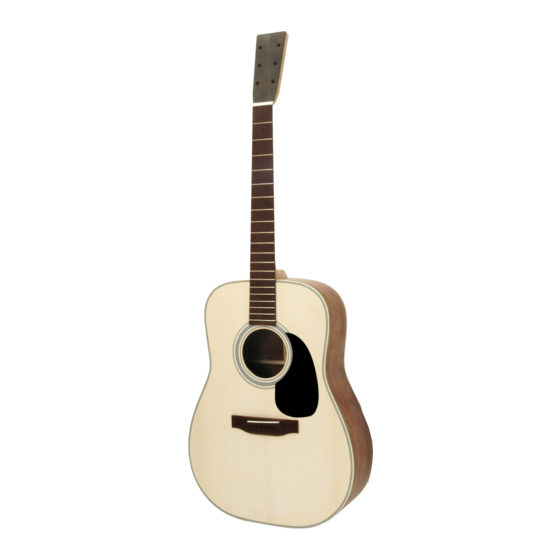
- Page 1 Dreadnought Acoustic Guitar Kit #5295 Assembly Instructions www.stewmac.com...
-
Page 3: Table Of Contents
Table of contents Getting started Neck shaping and fitting Welcome to guitar building! . . . . . . . . . . . . . . . . . . . .2 Shaping the neck . -
Page 4: Getting Started
Getting started Welcome to guitar building! You are about to build a truly great guitar! We designed this and the season, you may need to humidify or dehumidify kit with the small shop builder and a modest tool budget your shop to maintain the desired relative humidity . It is ad- in mind, with the exception of a few specialty guitar mak- visable to purchase a thermometer/hygrometer to monitor ing tools . -
Page 5: Kit Parts List
Kit parts list 1 Bent sides, rosewood or 18 Maple bridge plate stock mahogany (2) 19 Binding (2) 2 Slotted ebony fretboard 20 Back brace set (9 pieces) 3 Mahogany neck, dovetail 21 Reinforcement strips (3) or bolt-on 22 Hot Rod truss rod 4 Kerfed lining (8) 23 End trim, heel cap 5 Neck block, dovetail or bolt-on... -
Page 6: Side Assembly
Side Assembly Assembling the sides Save the cardboard box your kit came in. Cut away the sides of the box and use the large top and bottom to create Clamping caul with curved face a double-thick cardboard surface on your workboard . Each bent guitar side has been formed from a tapered piece waxed of wood . -
Page 7: Making A Body Mold
Making a body mold Using the two heavy cardboard body forms (supplied with the kit) create a guitarmaking form which supports the body during the early stages of assembly . First, place two scraps of 3/4" plywood onto the work surface inside the guitar . -
Page 8: Installing Kerfed Linings
Installing kerfed linings Eight kerfed (notched) wooden lining strips, or “kerfing”, are supplied for reinforcing the glue joints between the soundboard, sides and back . Refer to the blueprint; dry- clamp (no glue) the kerfing strips to the top edge of the side assembly using ordinary spring-tension clothespins (pictured) . - Page 9 Leveling the kerfed linings Prepare a “sanding board” from a straight flat piece of wood 1-1/2° wedge about 3-4" wide, at least 1" thick, and 24" long (illustrated) . for sanding top edge Add a wedge on each side of one end of the sanding board . These wedges will tip the sanding board to match the angles Sandpaper of the top and back as you sand the kerfed linings, neck and...
-
Page 10: Soundboard Bracing And Fitting
Soundboard bracing and fitting Installing the soundhole rosette Three bent wooden purflings form the soundhole rosette . The two narrow rings composed of parallel black and white strips install in the inner and outer rings of the rosette, and the wide decorative ring goes in the middle channel . The purflings are longer than needed, to enable the removal of the straightened ends on each ring left from the bending process . -
Page 11: Bridge And Shoulder Brace Clamping Cauls
tuck under . Reclamp the X-braces onto the soundboard and workboard . Check the fit of the tone bars in the notches . Disassemble, apply Titebond to the braces and tone bars, reclamp, and let the glue dry overnight . This work can be done in stages, depending upon the number of available clamps . -
Page 12: Fitting The Soundboard To The Sides
Fitting the soundboard to the sides To fit the top, the ends of the X-braces and the tall shoulder a pencil mark on the centerline, on the underside of the brace must be notched into the kerfed linings . The remain- soundboard . -
Page 13: Opening The Dovetail Joint
the end positions of the X-braces and the large shoulder With a knife and/or file, remove wood from the linings and brace . Remove the soundboard and trace the brace positions the sides in the penciled areas to accomodate the ends of onto the kerfed linings with a straightedge, using the marks the braces . -
Page 14: Back Bracing And Fitting
Back bracing and fitting Installing the back bracing Choose the less attractive side of the joined guitar back as As was done with the soundboard braces, follow the taper the inside surface, and transfer the back bracing pattern and shape of the pre-machined back braces and chisel the from the blueprint to this surface . -
Page 15: Installing The Side Reinforcing Strips
back braces on the sides . File . 1 00"-deep notches in the When the back assembly fits correctly, cut the cardboard in- kerfed linings and the sides to accept the braces, as you did ner mold into pieces with a sharp knife and remove them . for the guitar top . -
Page 16: Routing And Binding
Routing and binding Trimming the top and back overhang With a saw, chisel and file, remove the section of soundboard the router bit better, and there’s less chance of wood tearout . that covers the top of the neck joint cavity, and smooth the You can trim off the overhang with a sharp knife and a file, edges . - Page 17 KIT TIP: Router base compensation Interior strip: Fine black/white or herringbone trim Here’s a tip for routing the top and back more ac- Outside strip: 7/32" tall for black or white binding curately: The arch of the top, and especially the back, will change the router alignment .
-
Page 18: Shaping End Trim And Heel Cap
Shaping the end trim and heel cap Cut off 2-1/4" from the rectangular blank, to be used for Clean up the cut edges with a file . Take care to file along the the heel cap material . On the remaining 6" piece, draw a whole length of the piece, so you don’t lose the straightness center line from end to end . -
Page 19: Peghead Shaping And Drilling
Peghead shaping and drilling Peghead overlay Align the nut end of the fretboard with the break angle, where the peghead begins . Pencil a mark on the peghead face 3/16" from the nut line . Align the peghead overlay with this mark . -
Page 20: Fitting The Truss Rod
Fitting the truss rod The neck block has been drilled to allow access to the truss rod’s adjusting nut, but the rod is not designed to extend beyond the neck . This allows for neck removal, should it ever become necessary (this is normal on a dovetail neck reset) . Mark the position of the truss rod’s adjustment nut on the face of the dovetail or bolt-on tenon . -
Page 21: Making A Fretboard
Making a fretboard Trimming the fretboard The fretboard needs to be shaped to match the taper of the thick and as wide and long as the fretboard — this is a shim neck . Here’s how to use the neck as a template for cutting to lift it off the work surface for sanding . -
Page 22: Installing The Fretboard Side Dots
Installing the fretboard side dots Clamp the fretboard to a board, rest that board on its side, 12th fret . Drill all these holes with a 1/16" bit . One at a time, and clamp this assembly to your benchtop with the bass touch a drop of medium-viscosity superglue to each hole side of the fretboard facing up . -
Page 23: Installing The Fretboard
edge and run a bead of water-thin superglue into the slot . a smooth mill file, or sandpaper on the carpenter’s level, Let it run through the slot and out the other side . Loose frets to bring the fret ends flush . Then, holding the fretboard can be clamped using a 16"-radius sanding block as a caul flat against your work surface, use the mill file to bevel the before running the superglue into the slot . -
Page 24: Neck Shaping And Fitting
Neck shaping and fitting Shaping the neck When the glue is dry, remove the rubber bands . The neck must be trimmed to meet the edges of the fretboard, with- out removing any of the fretboard edges or filing deep marks into them . -
Page 25: Understanding The Neck Joint
Understanding the neck joint Ideally, the neck block has remained square to the side as- The neck joint is a mortise-and-tenon joint . The tenon is sembly . The neck will meet the top at a subtle 1-1/2° angle . the precision-cut extension on the end of the neck, and the When they are square, a minimum of hand-fitting is needed mortise is the neck block recess which fits it . -
Page 26: Neck Adjustment: Side-To-Side
Remove from shaded area Remove wood here view Bolt-on neck view Dovetail neck Remove Leave edges intact wood here Tape the bridge to the soundboard (guitar top) using low It’s important to note that removing wood from a dovetail tack draftsman’s tape . Center the bridge on the soundboard neck will move the neck toward the bridge slightly . -
Page 27: Neck Adjustment: Tilt The Neck Up
emoving wood from the top edge tips the neck upward straight line from the bottom of the heel to the zero point at the top . Continue this line across the heel cap and up the opposite side . These lines may be tricky to draw, because they must taper away to nothing —... -
Page 28: Tightening The Dovetail Joint
Tightening the dovetail joint When the cheeks fit accurately and look good on both sides, shim stock in a wedge-shape to fill the gap . You may need fit a piece of the supplied shim stock into the loose side of to make more than one shim to get it right . -
Page 29: Finishing
Finishing Introduction to finishing and materials We recommend finishing the neck and body separately, rections . If you decide to use spray equipment, always thin for a better job of sanding and buffing . When the neck is nitrocellulose lacquers with nitrocellulose thinner only . attached, it’s more difficult to fill the grain, sand, and buff KIT TIP: Aerosol Lacquers around the neck/body joint . -
Page 30: Filling The Fret Ends
Filling the fret ends Before sanding the neck, “drop-fill” the small fret slot spaces under the ends of the frets . Use black superglue, black epoxy, or fine ebony sawdust in Titebond . We used black superglue on the ebony fretboard . We brushed superglue accelera- tor on the openings first, waited five minutes, then used a toothpick to apply the superglue . -
Page 31: Staining
Staining Wear plastic gloves when handling stains! The neck, back take more than a minute to stain the neck, nor more than and sides of the mahogany kit should be stained . For the three minutes to stain the body . Stain the peghead veneer, rosewood kit, only the neck should be stained (the back and too —... -
Page 32: Sanding And Rubbing-Out The Finish
Day Three: Lightly scuff-sand the finish with 320-grit pa- a uniformly dull look . Spray three more clear coats, one per again, and clean off all the residue . You can be slightly hour apart . You now have TWELVE coats . Allow overnight more aggressive in flattening the sprayed surface now, but drying . -
Page 33: Final Assembly And Setup
Final assembly and setup Prepare for neck installation Be sure that the gluing surfaces of the neck joint and fretboard extension are free from dirt, finish and buffing residue . If your neck has a dovetail, press it, with the shim on the cor- rect side, into the body . -
Page 34: Installing The Bridge
straightedge to align with the center of the 12th fret, let- file or sandpaper to match the bridge’s contours, and glue ting the straightedge extend over the bridge . The second sandpaper to the bottom of each caul to help keep it steady (compensation) mark on the straightedge should rest over when clamped . -
Page 35: Fitting The Bridge Saddle
no deeper than 1/3 to 1/2 the diameter of the string, just enough so the strings don’t pop out (the remainder of each string will fit in the bridge pin groove) . The slot widths should match the diameters of the strings . Clean the saw marks with a needle file, and file a slight “ramp”... -
Page 36: Understanding Neck Relief
Understanding neck relief KIT TIP: Feeler gauges Neck “relief,” the upward curvature of the neck in the direc- tion of the string’s pull, is adjusted with the truss rod . You Unwound guitar strings make excellent feeler should set the neck relief before final adjustment of the nut gauges for measuring relief . - Page 37 Your bridge saddle will probably be too tall . Decide how much each string must be lowered at the 12th fret . Twice that amount must be removed from the saddle height (this is a proven formula for lowering or raising the strings ac- curately) .
-
Page 38: Leveling The Frets
Leveling the frets Reinstall the nut (without glue) and play the guitar . Check for Using a flat fine-tooth mill file, gently level the tops of the false notes or string buzzes caused by uneven frets . Buzzing frets with long full-length strokes down the fretboard . Re- is corrected by leveling the frets . - Page 40 21 N. Shafer St • Athens, Ohio 45701 • USA USA & Canada call toll-free: 800-848-2273 9am-6pm weekdays Eastern time 24-hour fax: 740-593-7922 www.stewmac.com i-5295 04/08...
Need help?
Do you have a question about the 5295 and is the answer not in the manual?
Questions and answers