Advertisement
Quick Links
www.centurybaby.com
Owner's Manual • Manual del propietario
Copyright Century Children's Products 2020 NWL0001160588C 12.20
NWL0001160588C Stroll On 3W_R02.indd 1
NWL0001160588C Stroll On 3W_R02.indd 1
Stroll On
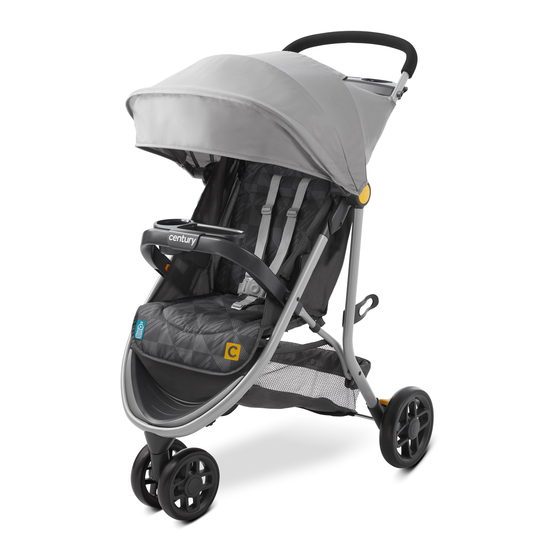
Century® Stroll On™ 3W Lightweight Stroller
Cochecito ligero Century® Stroll On™ 3W
3-Wheel
TM
12/22/20 9:29 AM
12/22/20 9:29 AM
Advertisement

Subscribe to Our Youtube Channel
Related Manuals for Century Stroll On 3-Wheel


Summary of Contents for Century Stroll On 3-Wheel
- Page 1 Century® Stroll On™ 3W Lightweight Stroller www.centurybaby.com Cochecito ligero Century® Stroll On™ 3W Owner’s Manual • Manual del propietario Copyright Century Children’s Products 2020 NWL0001160588C 12.20 NWL0001160588C Stroll On 3W_R02.indd 1 NWL0001160588C Stroll On 3W_R02.indd 1 12/22/20 9:29 AM 12/22/20 9:29 AM...
- Page 2 Quick Guide Guía rápida CLICK! ¡CLIC! Carton • Caja CLICK! ¡CLIC! 1. Open storage latch. Lift 2. Attach brake assemblies to rear wheel axle rod and attach to handle of stroller up. the frame. Be sure brake faces the rear of the stroller. Add brake cogs, wheel, washer, cotter pin and hub cap (see section 3-B).
-
Page 3: Features • Características
4-C To Recline • Para reclinar 4-D Brakes • Los frenos 4-E To Attach Century Infant Car Seat • Para instalar el asiento ® de automóvil para bebé Century ® 4-F To Fold Stroller • Cómo plegar el cochecito 5 CARE • CUIDADO 23-24 Pages •... - Page 4 • See Century infant car seat owners manual for • TO PREVENT A HAZARDOUS, maximum size of child. UNSTABLE CONDITION, do not place more than 10 lb (4.5 kg) in the storage basket.
- Page 5 ADVERTENCIA No observar estas advertencias y las instrucciones de ensamblaje podría resultar en lesiones serias o la muerte. Use solamente el producto según las instrucciones. • POR FAVOR, GUARDE EL • EL COCHECITO DEBE USARSE MANUAL DEL PROPIETARIO solamente a la velocidad del caminar. PARA USO FUTURO.
- Page 6 COCHECITO se use como un • Vea el manual del propietario del juguete. asiento de automóvil para bebé • DEJE DE USAR SU Century para determinar el tamaño COCHECITO si resulta dañado o máximo del niño. roto. • LA PERSONA A CARGO DEL CUIDADO debe ayudar siempre al niño a subirse y bajarse del...
- Page 7 Parts List Lista de piezas Check that you have all the parts and Verifique que tenga todas las piezas y los hardware (red bag) for this model BEFORE equipos (bolsa roja) de este modelo ANTES assembling your product. If any parts are de armar su producto.
- Page 8 To Open Stroller Abrir el cochecito Be sure to place stroller on top of a piece of cardboard or some other protective cover to prevent any damage to floor. Asegúrese de poner el cochecito sobre un pedazo de cartón o algún otro material de protección para prevenir dañar el piso.
- Page 9 Rear Wheels Las ruedas traseras Rear Wheel Axle Rod • Varilla del eje de las ruedas traseras 1. Attach break assemblies to axle rod as shown. 1. Instale los ensamblajes del freno a la varilla del eje como se indica. Brake levers point toward rear of stroller.
- Page 10 2. Attach wheels on axle. 2. Sujete las ruedas traseras al eje. 3. Place washer on axle. 3. Ponga la arandela en el eje. 4. Push straight side of cotter pin through axle hole. The cotter pin will separate around the axle. Curved end of the cotter pin MUST face up as shown.
-
Page 11: Front Wheel
Basket Assembly www.centurybaby.com Ensamblaje de la canasta 1. Fasten bottom of basket to the axle with 3 snaps as shown. SNAP! ¡RUIDO! 1. Sujete la parte inferior de la canasta al eje con 3 broches como se indica. Front Wheel La rueda delatera 1. - Page 12 Arm Bar and Child’s Tray Barra para los brazos y bandeja para el niño WARNING Always secure your child with the seat belt. The is not a restraint device. arm bar DO NOT lift the stroller by the arm bar or child tray. Use care when snapping the arm bar on the stroller with a child in the stroller.
- Page 13 Removing Arm Bar • Cómo retirar la barra para los brazos 1. Press the arm bar latches, then pull the arm bar away from the frame. 1. Oprima las trabas de la barra para los brazos, luego tire de la barra para los brazos hacia afuera del armazón.
- Page 14 Canopy Capota 1. Pull forward to open canopy. 1. Tire hacia adelante para abrir la capota. 2. Push backwards to close canopy. 2. Empuje hacia atrás para cerrar la capota. 3. Pull flap forward to open and backwards to close canopy window. 3.
-
Page 15: To Secure Child
To Secure Child Sujetar al niño WARNING Falling Hazard: Always use the seat belt. ADVERTENCIA Peligro de caídas: Use siempre el cinturón de seguridad. 5 Point Harness • Arnés de 5 puntos 1. To open, press button on buckle to release the waist straps. - Page 16 3 Point Harness • Arnés de 3 puntos 1. To open, press button on buckle to release the waist straps. 1. Para abrirlo, oprima el botón de la hebilla para liberar las correas de la cintura. 2. Slide shoulder strap connectors off of waist straps.
- Page 17 6. To open, press button on buckle to release the waist straps. 6. Para abrirlo, oprima el botón de la hebilla para liberar las correas de la cintura. Adjusting Shoulder Harness position • Ajustar la posición del arnés para los hombros Shoulder harness anchor Anclaje del arnés del hombro Slide adjuster...
- Page 18 To Recline Para reclinar WARNING When making adjustments to the stroller seat, make sure child’s head, arms, and legs are clear of moving seat parts and stroller frame. ADVERTENCIA Cuando realiza ajustes al asiento del cochecito, asegúrese que la cabeza, brazos y piernas del niño estén lejos de las piezas del asiento que se mueven y del armazón del cochecito.
- Page 19 Brakes Los frenos WARNING Always apply both brakes. CHECK that brakes are on by trying to push stroller. ADVERTENCIA Siempre use ambos frenos. VERIFIQUE que los frenos estén activados tratando de empujar el cochecito. 1. Push down on both brakes to lock. 1.
- Page 20 To Attach Century Infant Car Seat ® Para instalar el asiento de automóvil para bebé Century ® 1. Recline seat to full recline position. 1. Recline el asiento en la posición totalmente reclinada. 2. If attached, remove child’s tray from arm bar.
- Page 21 4. Insert infant car seat into stroller and push down on infant car seat until the latches snap into the infant car seat mounts. 4. Ponga el asiento de automóvil para bebé en el cochecito y empuje hacia abajo el asiento de automóvil para bebé...
- Page 22 To Fold Stroller Cómo plegar el cochecito 1. Before folding stroller: (a) remove infant carseat if in use (b) lock brakes 1. Antes de plegar el cochecito: (a) saque el asiento de automóvil para bebé si está en uso (b) trabe los frenos CLICK! ¡CLIC! 2.
-
Page 23: Care And Maintenance
• TO CLEAN CUP HOLDER, wash in dishwasher (Top Rack Only). • FROM TIME TO TIME CHECK YOUR STROLLER for loose screws, worn parts, torn material or stitching. Replace or repair the parts as needed. Use only Century replacement parts. - Page 24 We currently do not accept product registrations from those living outside the United States of America. Para registrar su producto Century desde dentro de los EE.UU., visítenos en línea en www.centurybaby.com/registration o envíe la tarjeta de registro provista con su producto.
Need help?
Do you have a question about the Stroll On 3-Wheel and is the answer not in the manual?
Questions and answers