
Summary of Contents for Savio Livingpond F100
- Page 1 EASY STEPS EASY STEPS To Create a Superior Easy To Create a Superior Easy to Maintain Water Garden. to Maintain Water Garden.
-
Page 2: Table Of Contents
C O N T E N T S ™ L I V I N G P O N D S Livingpond designs and equipment work in harmony to create ™ low-maintenance, living water gardens that stay healthy with minimal effort. The equipment and the pond are designed with a philosophy that emphasizes low-maintenance combined with natural beauty. -
Page 3: Welcome
W E L C O M E W E L C O M E T O O L S Gather necessary equipment prior to installation. • shovel REMINDER: Read through the entire design • 4’ hand level and construction guide before starting. •... -
Page 4: Choose A Location
I N S TA L L S T E P 1 – C H O O S E A L O C AT I O N Pick a Location waterfall Choosing a location is the first step toward building your pond. Locate the pond for easy access and viewing from your home. -
Page 5: Level The Site
I N S TA L L S T E P 2 – L E V E L T H E S I T E Level the Site Careful attention to site levelling will create a more professional looking finished product and make the installation process easier. -
Page 6: Measurements
I N S TA L L S T E P 3 – M E A S U R E M E N T S Select the your S Pond Package below to determine the correct excavation dimensions for your pond. ™... -
Page 7: Mark Outlines
I N S TA L L S T E P 4 – M A R K O U T L I N E S Mark Pond Outline Once the site has been leveled and the equipment has been placed, re-draw the outline of the pond. Marking the overall pond shape and shelf locations with spray paint prior to excavation will help guide the digging process and ensure that the pond stays within the... -
Page 8: Place Equipment
I N S TA L L S T E P 5 – P L A C E E Q U I P M E N T Locate Equipment For Pond Package 800 ™ Position the Skimmerfilter and flexible PVC prior to excavation. -
Page 9: Connect Livingponds Filter
I N S TA L L S T E P 6 – C O N N E C T T H E L I V I N G P O N D S F I LT E R ™ ( f o r p o n d p a c k a g e s 1 , 5 0 0 & 3 , 0 0 0 ) Prevention of leaks in pond installation begins with proper component assembly. -
Page 10: Bury Filter
I N S TA L L S T E P 6 – B U R Y F I LT E R OPTION: OPTION: See page 28 for a description of a more elaborate waterfall installation. Drain filter before proceeding. Place filter Check level front to back and in previously determined sites prior to side to side. -
Page 11: Dig Levels
I N S TA L L S T E P 7 – D I G L E V E L S Dig 1st Level Once the ground has been leveled on all sides, dig the pond to a depth of 6” to create the coping shelf level. Warning! Before undertaking any excavation project, always check first with your local utility company for the presence... -
Page 12: Add Underlayment & Liner
I N S TA L L S T E P 8 – A D D U N D E R L AY M E N T A N D L I N E R Place Underlayment Once excavation is complete it is time to create the containment that will hold the water and act as the foundation for your Livingpond. -
Page 13: Add Coping Stones
I N S TA L L S T E P 9 – A D D C O P I N G S T O N E S Place Coping Stones Secure underlayment and liner by adding coping stones. Set coping stones on top of the liner around the edge of the pond. -
Page 14: Install Water Return
I N S TA L L I N S TA L L W AT E R R E T U R N ( f o r p o n d p a c k a g e 8 0 0 ) Build Waterfall For Pond Package 800 only, use rockwork to build up a waterfall or water re-entry location... -
Page 15: Attach Liner To Filter
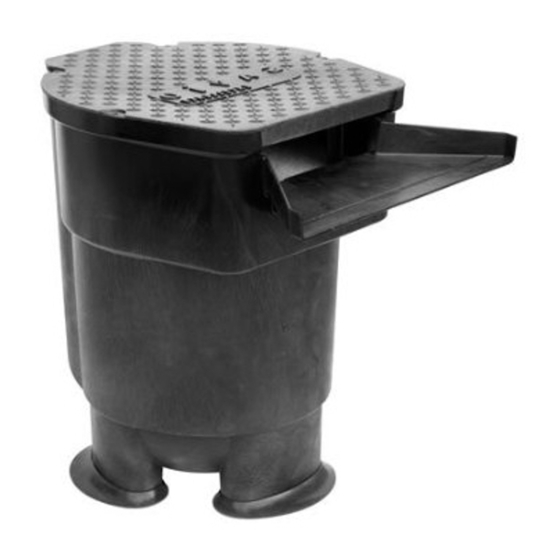
I N S TA L L AT TA C H L I N E R T O F I LT E R ( f o r p o n d p a c k a g e s 1 , 5 0 0 & 3 , 0 0 0 ) Pull liner over the face of the Livingponds Filter. - Page 16 I N S TA L L S T E P 1 0 – I N S TA L L S K I M M E R F I LT E R ™ One of the most crucial steps is installing the Skimmerfilter. ™...
-
Page 17: Install Skimmerfilter
I N S TA L L Verify that the face of the Level the unit front to back and side to side. Backfill around the Skimmerfilter ™ Skimmerfilter ™ is flush with the back Make the front edge 1⁄4” lower than the back with the lid in place. - Page 18 I N S TA L L S T E P 1 0 – I N S TA L L S K I M M E R F I LT E R ™ ( c o n t i n u e d ) locator pins go here...
-
Page 19: Attach Pump
I N S TA L L S T E P 1 1 – AT TA C H P U M P You are almost done! Disengage the gator Re-attach the upper assembly and Place the pump and plumbing assembly into lock union and remove the upper assembly. -
Page 20: Finishing Up
I N S TA L L I N S TA L L F I N I S H I N G U P Fill Pond Fill the pond with water and check for leaks. Initially the pond may be cloudy from the accumulated debris of rockwork and dust. - Page 21 I N S TA L L I N S TA L L F I N I S H I N G U P Add Bacteria Establish ecosystem for plants and fish by adding S Natural Beneficial Bacteria. The secret to good water quality is ™...
- Page 22 You’ll enjoy the easy maintenance and superior water quality only a pond built with S products can provide. Send Us Your Pictures Take a photo and send it to us at: pondstories savio.cc. We’d love to share your success on our website. The End Result...
-
Page 23: Maintain
M A I N TA I N ™ C A R I N G F O R Y O U R L I V I N G P O N D Keeping your pond looking beautiful is easy with S equipment. - Page 24 M A I N TA I N C A R I N G F O R Y O U R L I V I N G P O N D ™ Cleaning the Pond Bottom A long handled leaf rake net belongs on the list of necessary equipment for every pond owner.
- Page 25 M A I N TA I N M A I N TA I N W AT E R Q U A L I T Y Below are some of the most common challenges for maintaining water clarity: Hair and string algae, stringy masses of green material that cling to rocks and liner.
-
Page 26: Options
O P T I O N S F U N O P T I O N S F O R Y O U R P O N D The following projects are intended as enhancements to your Livingpond. In some instances additional materials may be required. ™... - Page 27 O P T I O N S R O C K T H E L I N E R Disguising your pond liner is not necessary. EPDM liner is specifically designed full sun exposure for decades. A natural layer of growth disguises liner within months. If you are inclined to disguise the liner follow the directions on this page for a Smooth Bottom Rock covering.
- Page 28 O P T I O N S W AT E R FA L L A N D S T R E A M O P T I O N With the purchase of additional underlayment and EPDM Liner you can enhance your water feature with a dramatic waterfall or stream. Use soil excavated from the pond to Place down underlayment and liner.
- Page 29 O P T I O N S PAT C H T H E L I N E R Fixing a puncture in EPDM liner is easy. Use the self adhesive cover included with your kit and follow the instructions below. Clean Hole Clean area around puncture so that it is free of dirt and debris.
-
Page 30: Accessories
A C C E S S O R I E S A C C E S S O R I E S Ultraviolet Clarifiers The best way to clear green water. Aids in filtration and reduces the need for chemicals to control water clarity. -
Page 31: Troubleshooting
T R O U B L E S H O O T I N G T R O U B L E S H O O T I N G Use this troubleshooting guide to determine common problems and remedies. See component instructions for more information. Skimmerfilter ™... - Page 32 P O N D PA C K A G E S ™ PP3000 PP800 PP1500 Includes Waterfall Filter Includes Waterfall Filter 8’ x 11’ x 2’ 11’ x 16’ x 2’ 16’ x 21’ x 2’ 800 gal 1,500 gal 3,000 gal Equipment Provided Skimmerfilter...
Need help?
Do you have a question about the Livingpond F100 and is the answer not in the manual?
Questions and answers