Advertisement
Quick Links
104 mm
Safety Instructions
Read all safety instructions before using this product:
V2
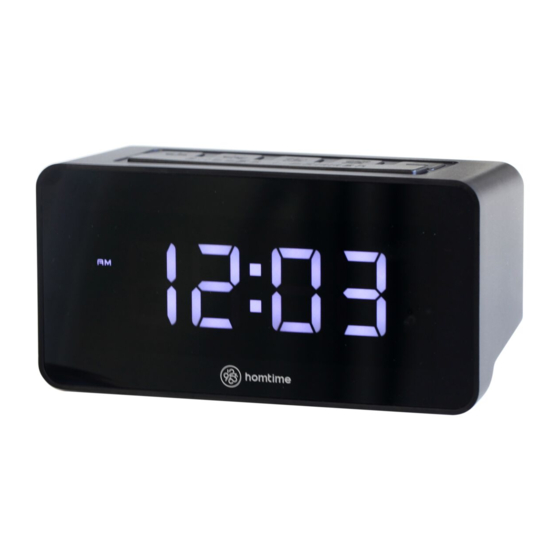
Alarm Clock with Bed Shaker
WARNING
IF YOU IGNORE SAFETY INSTRUCTIONS, ERROR MANIPUL-
ATION MAY CAUSE DAMAGE TO PERSONS AND PRODUCTS.
Please read this manual carefully including safety instructions,
parts instruction and operation manual before using this product.
. Install the product strictly according to this operation manual.
. Use only with Homtime-recommended attachments, accessories,
and replacement parts.
. Please do not open the decomposition of the product.
. Please use the original power cord .
. Please do not place items on the product and cord, Please do
not bend, cut off or process the cord. Please do not use with a
damaged cord or plug.
. Before cleaning the product, please disconnect the power supply
first and clean the product with dry cloth.
. Suitable for dry locations only.
. Do not use outdoors or on wet surfaces. Never locate the
product where it may fall into a bath or other water container.
. Please do not put other parts into this product.
. Please stopping using the product immediately if the product is
damaged, smell or smoked caused by improper use.
. It may cause product damage and data loss if the product has
been clashed or dropped.
. Unplug the power cord when encounter a thunderstorm or do not
use the product for a long time.
TIPS / IMPORTANT:
All safety and operation instructions should be read thoroughly before
proceeding and please keep the handbook for future reference.
- 2 -
Operation Instruction
5:Turn off Alarm
1:Turn on the Device & the Shaker
When the alarm sounds, press and hold SNOOZE button to turn off
Connect the micro USB power cord with a 5V power adapter(Not
alarm. The alarm icon will display on the screen. Alarm will work in
included) and push the micro USB terminal into the power input
the next day.
port on the back of the device or install 3 AAA batteries(not
When the alarm sounds, press
button, then alarm is cancelled.
included). On battery mode, USB charging function can not work
The alarm icon disappears.
and the LED display will turn to standby mode in 10 seconds.
Install 3 AAA batteries (not included) into the shaker to turn on the
6:Alarm Mode Setting
shaker. The shaker is on when it vibrates a second. It will connect
Press ALARM MODE button on the back of the device to switch
with the device automatically as the shaker is paired with the
buzzer,vibration and buzzer&vibration. The
icon is for buzzer and
device before it leaves the factory. If fail to connect with the device,
the
icon is for vibrating alarm and the
is for buzzer &
please refer to the label on the bottom of the device.
Vibration. If choosing vibration or buzzer & vibration alarm. If
choosing vibrating alarm, please make sure you have installed 3
2:Time Setting
AAA batteries(not included) inside the bed shaker.
Press TIME button on the back of the device, the time figure
The default alarm mode is buzzer & vibration.
begins to flash. Press+/-to select time by minute; Press and hold
+/- to select time quickly(Recommended). Press TIME button to
7: Alarm Volume & Vibrating Level
confirm time setting(If no operation on any keys in 10seconds, it
On buzzer mode,press
button to switch High(V3)/Medi-
will confirm the setting and exit automatically ).
um(V2)/Low(V1) alarm volume. The default volume is medium
volume. V1,V2 and V3 are the icons displaying on the screen.
3:12H/24H Mode
Setting vibrating level is same as setting alarm volume.
Use the 12H/24H switch behind the unit to select 12 hour or 24
hour display. On 24H mode, AM or PM will display on the screen.
8:Snooze
When the alarm sounds:
4:Alarm Setting
1:Press SNOOZE button to activate snooze function, snooze icon
Press
button to set alarm. 12:00 and the alarm icon begin to
Z is on, the alarm will activate again in 9 minutes. Press and
Z
flash on the screen. Press +/- button to select time by minute. Or
hold SNOOZE button to turn off snooze mode and snooze icon
press and hold +/- button to select time quickly(Recommend).
Z disappears.
Z
Then press
button to confirm the setting. The alarm icon will
2:The alarm will sound for 30 minutes if no button is pressed, after
stop flashing automatically in 10 seconds if no operation occurs.
30 minutes, the alarm will be off automaticallyfor the day. The
If the alarm is not cancelled, the alarm works everyday.
alarm will work in the next day.
- 6 -
- 7 -
A0
#Please strictly follow above safety instructions, otherwise it may
Features and Functions
lead to short circuit, electric shock, fire and other malfunction.
1. Alarm: Easy operating, High/Medium/Low alarm volume, Snooze
#If the product is not functioning properly. Please contact our
2. Clock: Big LED screen to display,12/24 hour mode
3. 4 level dimmable
technical support team or the s authorized service provider
4. 5V 1A USB charging port
This product is precise. Please do not store and use under the
5. Standby mode
6. Dual Alarm Mode: Shaker/Ringtone
following conditions:
7. One touch to turn off the alarm
. Vibrate or shocking place.
. Direct sunlight or high temperature place.
Included in this Package
. Wet and flooded place.
(Please check the accessories included in this package after
. Dusty place.
purchasing)
. Strong electromagnetic waves and electromagnetic force place.
◎V2 main unit
1 pc
◎Micro USB power cord
1 pc
. Strong static place.
1 pc
◎User manual
1 pc
. in the condition of moisture.
◎Shaker
. Close to the radiator, electric heater,or heat generating device.
◎Warranty card
1 pc
.
Applicable only for in areas below 2000m above sea level.
Diagram of the LED Display & Controls
.
Applicable only for non - tropical climates.
Display
#Please do not step on the product and the cord.
#Please consult your distributor if you have any questions
regarding the installation, operation and safety of this product,
2
1
Honored customer, thank you for purchasing our product. Please
3
read this manual carefully before using this product.
4
5
1
AM/PM
2
Snooze
3
Alarm
4
Vibrating alarm
5
Time display
- 3 -
- 4 -
9: Display Brightness Adjustment
FCC Caution.
Press SNOOZE button to adjust brightness of the LED display.
There are 4 brightness levels.
This device complies with part 15 of the FCC Rules. Operation is
subject to the following two conditions: (1) This device may not
10: USB Charging
cause harmful interference, and (2) this device must accept any
The USB charging port supports charging mobiles and supplies 1A
interference received, including interference that may cause
charging current.
undesired operation.
Battery Operated Mode
Any Changes or modifications not expressly approved by the party
When the device is powered by batteries only, the display will be
responsible for compliance could void the user's authority to
off in 10 seconds and the alarm will only sound for 3 minutes. USB
operate the equipment.
charging function does not work.
The battery life can last for one year normally.
Note: This equipment has been tested and found to comply with
We recommend the use of a long-life battery to ensure maximum
the limits for a Class B digital device, pursuant to part 15 of the
performance.
FCC Rules. These limits are designed to provide reasonable
protection against harmful interference in a residential installation.
Power Adapter
This equipment generates uses and can radiate radio frequency
Please make sure the power adapter is 5V 1.5A or above (Recom-
energy and, if not installed and used in accordance with the
mend 5V 2A).
instructions, may cause harmful interference to radio communica-
tions. However, there is no guarantee that interference will not
Restore Factory Settings
occur in a particular installation. If this equipment does cause
To restore factory settings, press TIME and
button for 5 seconds
harmful interference to radio or television reception, which can be
at the same time, after hearing DiDi sound, then all settings are
determined by turning the equipment off and on, the user is
cleared.
encouraged to try to correct the interference by one or more of the
following measures:
-Reorient or relocate the receiving antenna.
-Increase the separation between the equipment and receiver.
-Connect the equipment into an outlet on a circuit different from
that to which the receiver is connected.
-Consult the dealer or an experienced radio/TV technician for help.
- 8 -
- 9 -
V2(Homtime)黑/白
英文说明书
120g道林纸
正反面+风琴折
发行A0版图档
Top Controls
8
9
11
6
10
7
6
Press to adjust clock and alarm time
7
Snooze / LED dimmable
8
Alarm volume
9
Alarm time setting
10
Press to adjust clock and alarm time
11
Turning off alarm
side 1
Controls on the back
12
5V OUT
5V IN
TIME
12H/24H
13
14
15
16
17
12
Battery compartment
13
Alarm mode switch
(Buzzer/Vibration/Buzzer&Vibration)
Time setting
12H/24H mode switch
14
15
USB charging output
External power input-DC 5V
16
17
- 5 -
side 2
Shanghai Funner Electronic Technology Co.,Ltd
www.homtime.com
- 10 -
2020-03-11
Advertisement

Related Manuals for Homtime V2


Summary of Contents for Homtime V2
- Page 1 The default volume is medium mend 5V 2A). instructions, may cause harmful interference to radio communica- volume. V1,V2 and V3 are the icons displaying on the screen. tions. However, there is no guarantee that interference will not 3:12H/24H Mode Setting vibrating level is same as setting alarm volume.
- Page 2 Alarm Clock with Bed Shaker TIPS / IMPORTANT: All safety and operation instructions should be read thoroughly before proceeding and please keep the handbook for future reference.
- Page 3 Please read this manual carefully including safety instructions, parts instruction and operation manual before using this product. . Install the product strictly according to this operation manual. . Use only with Homtime-recommended attachments, accessories, and replacement parts. . Please do not open the decomposition of the product.
- Page 4 #Please strictly follow above safety instructions, otherwise it may lead to short circuit, electric shock, fire and other malfunction. #If the product is not functioning properly. Please contact our technical support team or the s authorized service provider This product is precise. Please do not store and use under the following conditions: .
- Page 5 6. Dual Alarm Mode: Shaker/Ringtone 7. One touch to turn off the alarm Included in this Package (Please check the accessories included in this package after purchasing) ◎V2 main unit 1 pc ◎Micro USB power cord 1 pc 1 pc ◎User manual...
- Page 6 Top Controls Press to adjust clock and alarm time Snooze / LED dimmable Alarm volume Alarm time setting Press to adjust clock and alarm time Turning off alarm Controls on the back 5V OUT 5V IN TIME 12H/24H Battery compartment Alarm mode switch (Buzzer/Vibration/Buzzer&Vibration)...
- Page 7 Operation Instruction 1:Turn on the Device & the Shaker Connect the micro USB power cord with a 5V power adapter(Not included) and push the micro USB terminal into the power input port on the back of the device or install 3 AAA batteries(not included).
- Page 8 On buzzer mode,press button to switch High(V3)/Medi- um(V2)/Low(V1) alarm volume. The default volume is medium volume. V1,V2 and V3 are the icons displaying on the screen. Setting vibrating level is same as setting alarm volume. 8:Snooze When the alarm sounds: 1:Press SNOOZE button to activate snooze function, snooze icon Z is on, the alarm will activate again in 9 minutes.
- Page 9 9: Display Brightness Adjustment Press SNOOZE button to adjust brightness of the LED display. There are 4 brightness levels. 10: USB Charging The USB charging port supports charging mobiles and supplies 1A charging current. Battery Operated Mode When the device is powered by batteries only, the display will be off in 10 seconds and the alarm will only sound for 3 minutes.
- Page 10 FCC Caution. This device complies with part 15 of the FCC Rules. Operation is subject to the following two conditions: (1) This device may not cause harmful interference, and (2) this device must accept any interference received, including interference that may cause undesired operation.
Need help?
Do you have a question about the V2 and is the answer not in the manual?
Questions and answers