Table of Contents
Advertisement
Available languages
Available languages
Quick Links
Advertisement
Table of Contents

Subscribe to Our Youtube Channel
Summary of Contents for GameFactor CSG501
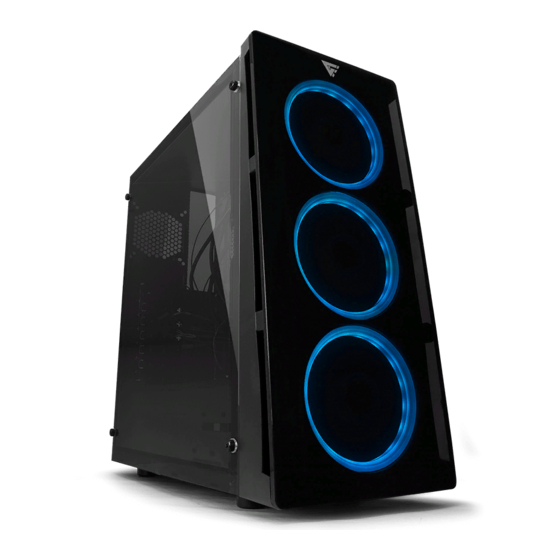
- Page 1 CSG501 CSG500 GAMING case Guia rápida / Quick guide...
- Page 2 We invite you to register your product and enjoy the benefits. Register your purchase on our website and participate in promotions at: www.gamefactor.mx 01 (33) 3044 6666 +52 33 3044 6666 Síguenos en: Follow us:...
-
Page 3: Precauciones Y Advertencias
PRECAUCIONES Y ADVERTENCIAS INSTRUCCIONES DE INSTALACIÓN • Antes de colocar cualquier cable de energía, a) Retira la tapa derecha del gabinete quitando los asegúrate que el interruptor de corriente se dos tornillos manuales, desliza hacia atrás y retírela encuentre en la posición de apagado. b) La tapa lateral izquierda está... -
Page 4: Panel Frontal
3.5” y 2.5” HDD Panel Frontal Instalación de Unidad de Estado Sólido de 2.5” a) Instala el SSD en la estructura lateral interna usando los tornillos. b) Fija los ventiladores o panel de enfriamiento por agua en el panel frontal. 2.5”... - Page 5 Guía de conectores LED de Conector MB Encendido LED de HDD Conector MB Power S/W Conector MB Reset S/W Conector MB HD Audio Conector MB Instalación de Fuente de Poder a) Coloca la fuente de poder en el espacio destinado USB 2.0 Conector MB para ella en el gabinete.
-
Page 6: Localización De Averías
LOCALIZACIÓN DE AVERÍAS FICHA TÉCNICA Factor: Si el gabinete no funciona: Calibre: 0.5mm / 0.6 mm Panel Superior • Asegúrate de que está bien conectado el cable de Tarjetas soportadas: ATX, Micro ATX, Mini ITX alimentación. Disipador de CPU: Hasta 145mm •... -
Page 7: Installation Instructions
CAUTION & WARING INSTALLATION INSTRUCTIONS • Before conecting any power cable, make sure that a) Open the computer case by removing the side the power switch is in off position. panels. Find the screws that hold the side panels in place and remove them •... - Page 8 3.5” y 2.5” HDD Panel Frontal Installation of 2.5 “Solid State Unit a) Install the SSD in the internal side structure using the screws. b) Fix the fans or radiator in to the front panel. 2.5” SSD Motherboard installation Ventilation system configuration a) Follow the picture below using the correct screws.
-
Page 9: Connectors Guide
Connectors guide LED Switch on MOBO Connector HDD LED MOBO Connector Power S/W MOBO Connector Reset S/W MOBO Connector HD Audio MOBO Power Supply Installation Connector a) Place the power supply in the space destined for it. USB 2.0 MOBO Take care that the holes for the screws of your power supply Connector match the holes in the case if not turn it untill the screws fits... -
Page 10: Troubleshooting
TROUBLESHOOTING DATA SHEET Factor: If the computer does not work: Aluminium body: 0.5mm / 0.6 mm (Top panel) • Make sure the cable is properly connected to the Supported motherboards: ATX, Micro ATX, Mini ITX power source. CPU Heatsink: Up to 145mm •... - Page 11 Producto: c) Cuando el producto hubiese sido alterado o reparado por personas no Gabinete gamer autorizadas por parte de Vorago. Modelo: CSG501 Sello del distribuidor Marca: Game G Factor Vorago no ofrece ninguna otra garantía expresa para este producto. Número de serie: Para hacer válida la garantía, así...
-
Page 12: Limited Product Warranty
To make the guarantee valid, as well as the acquisition of parts, Product: Gaming case components, consumables and accessories Model: CSG501 Dealer stamp To validate a guarantee, the following information must be sent to the email: Brand: GAME G FACTOR garantias@voragolive.com... - Page 13 www.gamefactor.mx...
Need help?
Do you have a question about the CSG501 and is the answer not in the manual?
Questions and answers