Table of Contents
Advertisement
Quick Links
Advertisement
Table of Contents

Related Manuals for Tempest Leader SMOKE 3

Summary of Contents for Tempest Leader SMOKE 3
- Page 3 Product references R20.00.113 LEADER Smoke 3 600 m³ per minute-220 v-50/60 Hz R20.00.114 LEADER Smoke 5 1320 m³ per minute-220 v-50/60 Hz R20.00.115 LEADER Smoke 3 600 m³ per minute-115 v-50/60 Hz R20.00.116 LEADER Smoke 5 1320 m³ per minute-115 v-60 Hz...
-
Page 4: Table Of Contents
INTRODUCTION ............................5 SAFETY INFORMATION ..........................5 TECHNICAL SPECIFICATIONS ........................8 PRODUCT DETAILS ........................... 10 QUICK START ............................. 11 5.1 Setting up ............................... 11 5.2 Making fog ..............................11 INSTALLATION AND SETTING UP ......................12 6.1 Location ................................. 12 AC POWER ..............................12 7.1 Setting up ............................... -
Page 5: Introduction
1 INTRODUCTION The LEADER Smoke 3 and 5 from LEADER provide a versatile and convenient solution for fire training. It can produce a variety of effects from and optically translucent haze to a dense ‘white out’ that very effectively simulates dense smoke for realistic firefighter training to a wide range of fog requirements whether permanently installed or taken on the road. - Page 6 Preventing electric shocks • Always ground (earth) the machine electrically. • Use only a source of AC power that complies with local building and electrical codes, and that has both overload and ground-fault protection. • Before connecting the machine to power, check that the voltage indicated on the machine’s serial label matches your local AC power voltage.
- Page 7 Preventing injuries • Ensure that any surface on which the machine is installed can safely hold the weight of the machine. • Suspending the machine directly over peoples heads is not recommended. Use smoke ducting instead. • Do not point the smoke output directly at a person’s face or at face height. •...
-
Page 8: Technical Specifications
▪ Optional ducting kits. Use only an approved LEADER fog fluid as shown on page 16. Use of other fluid will void warranty. ▪ Physical LEADER Smoke 3 LEADER Smoke 5 Length 485 mm (19.1 in) 602 mm (23.1 in) Width 335 mm (13.2 in) - Page 9 ▪ Performance LEADER Smoke 3 LEADER Smoke 5 Coverage volume 660 m³ per minute 1320 m³ per minute Fluid consumption (max) 88 ml per minute 176 ml per minute Continuous effect output Ready time 7 minutes* 10 minutes* * Please not the 110V units may take approximately 10% longer to reach their ready temperature.
-
Page 10: Product Details
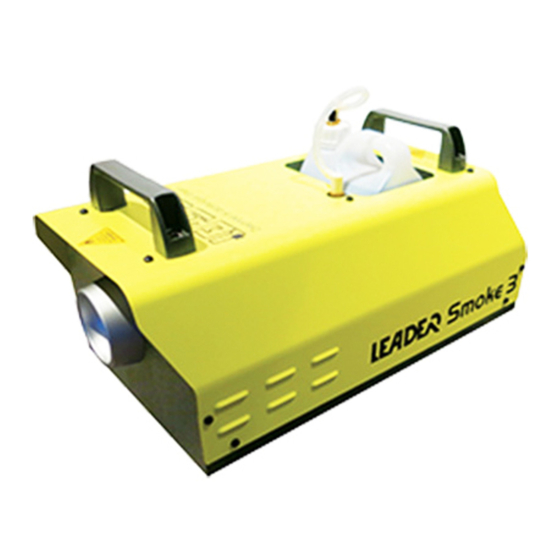
EN 60 335-1+A15, EN62233 EU EMC EN 61000-6-3 EU Immunity EN 61000-6-1 Australia/NZ (pending) 4 PRODUCT DETAILS LEADER Smoke 3 / LEADER Smoke 5 Integrated digital remote control AUX input Mains power connector Mains fuse Mains power switch Fluid container... -
Page 11: Quick Start
Install approved LEADER fog fluid as shown on page 16. Connect the machine to a suitably rated power source. The power requirements are: LEADER Smoke 3 1200 W, 5.3 A / 240 V (EU) 1050 W, 8.75 A / 110 V LEADER Smoke 5 2100 W, 9.2 A / 240 V (EU) -
Page 12: Installation And Setting Up
DANGER! Make sure the power plug is correctly rated: For UE LEADER Smoke 3 and LEADER Smoke 5 models use a plug rated at 10 A minimum. When installing the plug, follow the plug manufacturer’s instructions and connect pins as follows: Yellow and green wire to ground (earth), blue wire to neutral and brown wire to live. -
Page 13: Setting Up
7.1 Setting up Fill the fluid tank with an approved LEADER fluid as shownon page 16. 7.2 Final checks Before applying power to the machine, verify the following: • The machine is safely located or installed and meets the location requirements stated on page 11. -
Page 14: Control Settings
8 CONTROL SETTINGS 8.1 Overview The integrated digital remote control on the rear of the machine allows you to configure it using option menus. Display Timer value Up/Down buttons Output level Up/Down buttons Timer button Smoke Button The integrated digital remote control may be removed from the unit and used as a handheld remote control by removing the two hand wheel bolts either side of the display. -
Page 15: Setting Continuous Operation
8.3 Setting continuous operation At power up the machine will automatically heat to its operating temperature. READY 00% When the operating temperature is reached the display will show “READY”. To set continuous operation, adjust output level to desired value and press “SMOKE” button. -
Page 16: Resetting The Machine After Fluid Out
8.5 Resetting the machine after fluid out FLUID OUT If the machine runs out of fluid, it will automatically shut down and show FLUID OUT on the display to prevent damage to the pump(s). To reset this, fault down power the system and refill the fluid reservoir. Avoid prolonged operation without fluid, since this will damage the pump and prevent the machine from re-priming. -
Page 17: Approved Fog Fluid Types
APPROVED FOG FLUID TYPES The LEADER Smoke machines must only be used with the LEADER fluids listed below. LEADER supplies high quality fog fluids that are based on ultra-pure deionized water. No other fluid is suitable for use. Trainer Fluid (Medium) This fluid is used in areas where shorter duration training exercises occur and faster dispersal of the fog is required. -
Page 18: Basic Service
DANGER! Disconnect the power supply before removing any covers orchanging fuses. Live parts inside! Rear panel fuse LEADER Smoke 3: 6.3 AT (slow-blow), 250 V 10 AT (slow-blow), 110 V LEADER Smoke 5: 12.5 AT (slow-blow), 250 V 20 AT (slow-blow), 110 V Replace fuse only with one of exactly the same size and rating. -
Page 19: Troubleshooting
11 TROUBLESHOOTING Problem Probable cause(s) Suggested remedy Machine will not produce fog Machine not at operating temperature Wait until HEAT message no longer when control panel set to CONTINUOUS or fog button shown pressed FOG option set to 0 Increase setting Fog output is weak Machine requires priming Down power the unit, ensure the fluid... - Page 20 Notes...
-
Page 22: Warranty
13 WARRANTY LEADER equipment has a contractual limited guarantee from the date of purchase, defined below by product, parts and labor (excluding transport costs and travel). This warranty is specifically limited to replacing or repairing the equipment (or its parts) which proves defective after examination for reasons attributable to LEADER. - Page 24 Code Notice : LEADER SMOKE 3et 5.00.ZN4.33. EN.0...
Need help?
Do you have a question about the Leader SMOKE 3 and is the answer not in the manual?
Questions and answers