Table of Contents
Advertisement
Quick Links
Advertisement
Table of Contents

Summary of Contents for SuperMax DSL642E
- Page 1 SuperMax DSL642E Quick Start Guide VERSION 1.1 – UPDATED 08/28/2007...
-
Page 2: Table Of Contents
Easy Start Guide Contents About the Router ..............3 Requirements ..................... 3 Software ......................................3 Hardware......................................3 Package Contents ....................4 Device Design ..................... 5 Front Panel ....................................... 5 Back Panel ......................................6 ... -
Page 3: About The Router
Easy Start Guide About the Router Congratulations on the purchase of your router. This router provides advanced features that allow you to converge your phone, Internet, and other network appliances into a single network. Requirements Your computer must meet the following minimum requirements. Software Operating System: Any operating system can be used... -
Page 4: Package Contents
Easy Start Guide Package Contents Package contents are listed below. For any missing items, please contact your dealer immediately. Product contents vary for different models. Router Ethernet cable Telephone cable 9V Power Adapter Easy Start Guide Resource CD Page 4 of 20... -
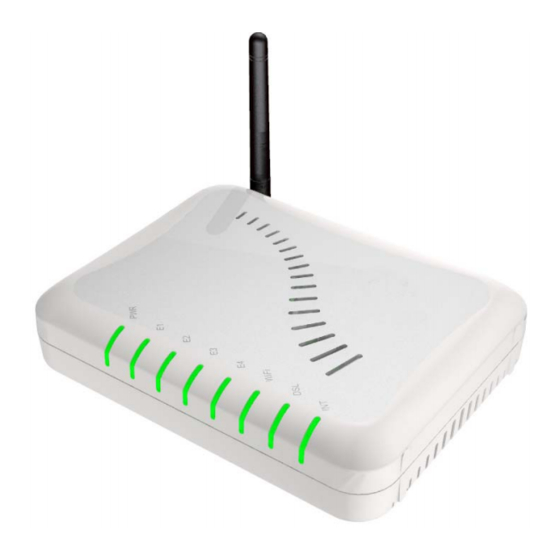
Page 5: Device Design
Easy Start Guide Device Design Front Panel The LEDs on the front panel gives you an idea about the power and connection status. Label Action Description POWER No power is supplied to the device Steady light Connected to an AC power supply ETHERNET No Ethernet connection Steady light... -
Page 6: Back Panel
Easy Start Guide Blinking light Transmitting/Receiving data No DSL signal Blinking light Establishing DSL signal INTERNET Steady light DSL signal is established No Internet connection Green light Connected to the Internet Green Blinking light Transmitting/Receiving data Red Blinking light Cannot establish Internet connection Back Panel The back panel provides ports to power up and connect the router into the network. -
Page 7: Getting Started
Easy Start Guide Getting Started Setting up the device is easy. The flowchart below provides an outline of the steps you need to complete the installation. There are brief descriptions beside each step to help you along. Detailed instructions are provided in the subsequent pages. Page 7 of 20... -
Page 8: Planning Your Network
Easy Start Guide Planning Your Network Before moving ahead to setup your network, it is a good idea to draw out a network diagram to help identify the devices and plan out how to connect these devices. The illustration below is an example of a network diagram. Sample network diagram To create a network diagram: For wired devices, identify which router port you want to use for each device. -
Page 9: Remove Or Disable Conflicts
Easy Start Guide Remove or Disable Conflicts To make sure the router installation moves on smoothly, you need to remove or disable conflicts that may interfere the installation. Probable conflicts may include: Internet sharing applications Proxy software Security software TCP/IP settings Internet properties Temporary Internet files Internet Sharing, Proxy, and Security Applications... -
Page 10: Configuring Tcp/Ip Settings
Easy Start Guide Configuring TCP/IP Settings Use the default TCP/IP settings to allow the router to provide a network address to the computer, To set the TCP/IP properties: 1. Select Start > Run. This opens the Run dialog box. 2. Enter control ncpa.cpl and then click OK. This opens the Network Connections in your computer. 3. - Page 11 Easy Start Guide 2. Enter control and then click OK. This opens the Control Panel. 3. Double-click Internet Options. This opens the Internet Options dialog box. 4. In the Temporary Internet Files pane, click Delete Cookies. 5. Click Delete Files. 6.
-
Page 12: Hardware Setup
Easy Start Guide Hardware Setup When installing the router, the common practice is to have the router, the main computer, and phone jack in the same room. The room should also have enough electrical outlets to match your needs. To setup the hardware: 1. - Page 13 Easy Start Guide To setup the telephone POTS Splitter: a. Locate the phone jack in your house. b. Insert the POTS Splitter into the phone jack. c. Plug one end of the telephone cable from the POTS Splitter’s TEL port and then plug the other end into the telephone. 4.
-
Page 14: Connecting To The Internet
Easy Start Guide Connecting to the Internet There are two ways to connect to the Internet. You can either use the Web Interface or the Utility Wizard. Connecting Via the Web Interface To connect to the Internet via the Web Interface: 1. - Page 15 Easy Start Guide 5. Click the Advanced tab. Then click the System Password link. System Password page 6. Select Enable Authentication. 7. Enter User Name, Password, and Confirm Password. 8. Enter the number of minutes for Idle Timeout. 9. Click Apply. 10.
- Page 16 Easy Start Guide For Verizon ISP users only. Follow steps 1 & 2 of the “Connecting via the Web Interface” section to open the Quick Start Page. Quick Start page 2. Click on the Advanced tab. 3. Move the mouse pointer over the WAN link and select quickstart from the pop-up menu. Advanced page Page 16 of 20...
- Page 17 Easy Start Guide Change the Type pull-down menu from PPPoE to DHCP. The Connection Setup page options will change automatically. Connection Setup page Make sure Encapsulation is set to LLC and the Default Gateway box is checked 6. Click Apply. 7.
- Page 18 Easy Start Guide 8. Make sure the VPI is set to 0 and the VCI is set to 35. 9. Click Apply. 10. Return to step 5 of the previous section to Enable Authentication. To connect to the Internet via the Web Interface using predefined configuration files Click the Advanced tab.
-
Page 19: Connecting Via The Utility Wizard
Easy Start Guide 5. Click the Upgrade Gateway button. This will open the second Upgrade Firmware page. 6. Click the Restart Gateway button to put the new configuration into effect. (Note: It will take the modem 30 – 60 seconds to restart.) Connecting Via the Utility Wizard The Setup Wizard can also be used to configure your router. - Page 20 Easy Start Guide Safety Precautions Do not open, service, or change any component. Only qualified technical specialists are allowed to service the equipment. Observe safety precautions to avoid electric shock Check voltage before connecting to the power supply. Connecting to the wrong voltage will damage the equipment. Copyright ©...
Need help?
Do you have a question about the DSL642E and is the answer not in the manual?
Questions and answers