Advertisement
User Instructions for the Forster Products Co-Ax
1.0
GENERAL INFORMATION
The
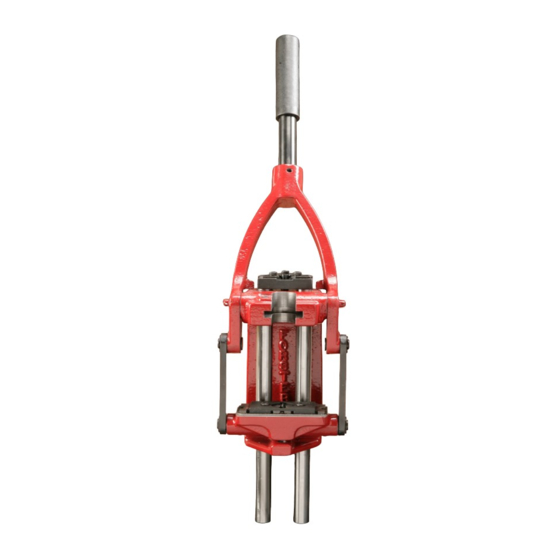
Co-Ax® Reloading Press
purposes:
1. Rifle and pistol case resizing and bullet seating.
2. Rifle and pistol primer seating.
The Co-Ax Press accepts any 7/8" X 14 rifle or pistol reloading
die. For proper press operation, you must use our aluminum
Cross Bolt Die Lock Rings
(two are provided in the Important
Parts Packet – see Figure 2) on either your own dies or on our
Forster Products Reloading Dies. Using our Cross Bolt Die
Lock Rings is important for two reasons:
• They keep the Co-Ax Press T-Slot free from wear that may
be caused by other harder steel lock rings.
• They are the proper thickness to allow the dies to "float" in
the T-Slot for optimal reloading.
CAUTION
PRODUCT DAMAGE
•
Do not drop or expose the Co-Ax Press to sudden
stresses.
Failure to comply with these instructions may result in
product damage.
2.0
SHIPPING PACKAGE CONTENTS (See Figure 2.)
Your shipping package should contain the following:
• Section A: Co-Ax Press with all components not noted in
Sections B and C already assembled.
• Section B: Important Parts Packet.
• Section C: Loose Components.
3.0
SAFETY INFORMATION
WARNING
PERSONAL INJURY
•
Avoid possible pinch points.
Failure to comply with these instructions could result
in death or serious injury.
Always wear safety glasses.
4.0
MOUNT THE CO-AX PRESS TO A WORK SURFACE
The Co-Ax Press may be directly mounted to a work bench, or
to a board for later use on the range or in the field. Due to the
extreme mechanical advantage engineered in the Co-Ax
Press, only two "C" clamps are needed to fasten the board-
mounted Co-Ax Press to a working surface.
1. See Figure 11 on the back page for a scale drilling
template.
is designed for two main
Reloading Press
®
2. Drill four ¼" holes. Mount the Co-Ax Press using ¼" lag
bolts.
5.0
SETUP AND ASSEMBLY
5.1
Install the Handle
1. Insert the Handle into the B3 Yoke Handle Casting (-055).
2. Using the 1/8 Allen Wrench (SHORTARMHEXKEY1/8),
tighten the Handle Set Screw (¼-28) (-014).
Note: A short handle with a ball end is available separately for
use when less leverage is needed. See Section 9.0.
5.2
Install the Primer Catcher (See Figure 1.)
1. From below, insert the threaded part of the Primer Drop
Tube (-053) through the hole in the Primer Catcher Cap
(-050).
2. Screw the Primer Catcher Cap to the Primer Catcher Cup
(-051).
3. Pass the Primer Drop Tube through the middle hole in the
bottom of the Frame Casting (-031).
4. Screw the Primer Drop Tube into the tapped hole in the
bottom of the Guide Block Casting (-045) until finger tight.
Figure 1. Primer Catcher Installation
5.3
Adjust the Jaw Opening Screw (-044) (See Figure 2.)
The Jaw Opening Screw controls the amount the lower
Shellholder Jaws open to accept cases when the Handle is
raised to its highest position. Adjust the Jaw Opening Screw's
height so that the Shellholder Jaws completely open when the
handle is in the full up position against overhead stops, but not
too far that it could damage the Shellholder Housing (-037).
Issue 4
1
Advertisement
Table of Contents

Summary of Contents for Forster Products Co-Ax
- Page 1 User Instructions for the Forster Products Co-Ax Reloading Press Issue 4 ® GENERAL INFORMATION 2. Drill four ¼” holes. Mount the Co-Ax Press using ¼” lag bolts. Co-Ax® Reloading Press is designed for two main purposes: SETUP AND ASSEMBLY 1. Rifle and pistol case resizing and bullet seating.
-
Page 2: Section A. Co-Ax Press With All Components Not Noted In Sections B And C Already Assembled
Figure 2. Co-Ax Reloading Press (028271) Nomenclature Section A. Co-Ax Press with All Components Not Noted Section B. Important Parts in Sections B and C Already Assembled Packet 1/8 Allen Wrench SHORTARMHEXKEY1/8) 5/32 Allen Wrench SHORTARMHEXKEY5/32) 7/64 Allen Wrench SHORTARMHEXKEY7/64) Locator (028271-018) (See Figure 9.) - Page 3 • Table 1 shows the three lower shell holders available for the Co-Ax Press. • Figure 3 shows how to use the on-line FORSTER PRODUCTS TOOL SEARCH BY CARTRIDGE to find which lower shell holder to use with your particular caliber, Table 1.
- Page 4 Button Head Screws. Step 1: Using the provided 1/8 Allen wrench, loosen the two Button Head Step 12: Replace the subassembly Screws (-020). on the Co-Ax Press and tighten the Button Head Screws. Step 2. Carefully lift off the subassembly containing: •...
- Page 5 Adapter Plate) tighten the set screw against the shell or the amount of force used in seating the primer, with the holder. Forster Products Co-Ax Press, it is impossible to crush a primer or vary the seating depth. Adjust the Sizing/Seating Die in the Co-Ax Press T-Slot (See Figure 5.)
- Page 6 Based on the primer diameter being used, select either the Small Primer Seater Assembly or the Large Primer Seater Figure 9. Locator (-018) Assembly (see Figure 7) and screw it into the Co-Ax Press. .175" Diameter Figure 7. Primer Seater Assembly Versions...
-
Page 7: Maintenance
We recommend using our Resellers when ordering our products. Their experience and knowledge will help you Raise the Co-Ax Press handle to seat the primer. Only a select the best products that meet your specific very small amount of force is needed. - Page 8 WARRANTY All Forster Products are warranted against defects in materials and workmanship for the life of the product. Parts which, by nature of their function, are subject to normal wear (such as springs, pins, etc.) and parts which have been altered, abused or neglected, are excluded from the warranty.
Need help?
Do you have a question about the Co-Ax and is the answer not in the manual?
Questions and answers