Table of Contents
Advertisement
Quick Links
Instruction Manual
Digital Pressure Cooker
Questions or concerns
about your Pressure
Cooker?
Before returning to the store...
Aroma’' s customer service
experts are happy to help. Call
us toll-free at 1-800-276-6286.
Answers to many common
questions and even replacement
parts can be found online. Visit
www.AromaCo.com/Support.
APC-990
Advertisement
Table of Contents

Related Manuals for Aroma APC-990


Summary of Contents for Aroma APC-990
- Page 1 Digital Pressure Cooker Questions or concerns about your Pressure Cooker? Before returning to the store... Aroma’’ s customer service experts are happy to help. Call us toll-free at 1-800-276-6286. Answers to many common questions and even replacement parts can be found online. Visit...
- Page 2 With three pressure level settings, your new digital pressure cooker is perfect for a wide variety of pressure cooking recipes. And with its pressure safety systems, you can rest easy while your pressure cooker handles the cooking. And it’’ s not just pressure cooking! Your new Aroma Pressure Cooker also includes easy-to-use digital functions to brown, simmer, slow cook, steam and warm. With ®...
-
Page 3: Important Safeguards
23. Extreme caution must be used when moving a pressure cooker containing 8. The use of accessory attachments not recommended by Aroma hot liquids. ® Housewares may result in re, electrical shock or injury. - Page 4 IMPORTANT SAFEGUARDS DO NOT DRAPE CORD! Short Cord Instructions 1. A short power-supply cord is provided to reduce the risks resulting from becoming entangled in or tripping over a longer cord. 2. Longer extension cords are available and may be used if care is exercised in their use. 3.
-
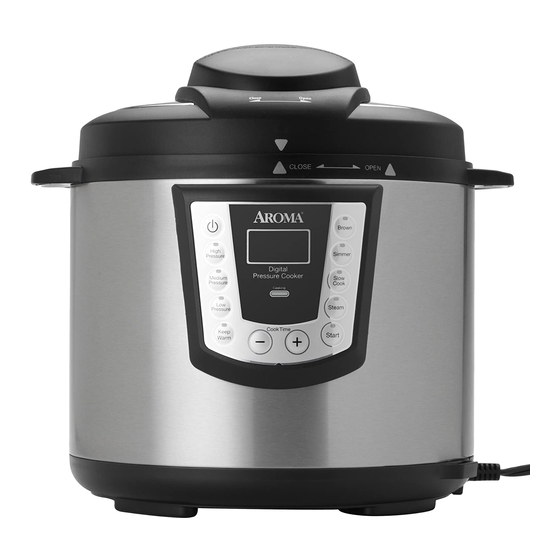
Page 5: Parts Identification
PARTS IDENTIFICATION Float Valve Steam Vent Condensation Collection Area Lid Handle Locking Lid Pressure Cooker Handles Digital Display Cooking Indicator Light Digital Control Panel Pressure Cooker Body Nonstick Inner Cooking Pot Steam Rack... - Page 6 PARTS IDENTIFICATION (CONT.) Digital Controls Power Button Brown Button The POWER button turns the pressure cooker on and off. The BROWN button heats the pressure cooker to a high temperature perfect for browning and sautéing. High Pressure Button Simmer Button The HIGH PRESSURE button sets to the highest pressure level The SIMMER button is perfect for ...
-
Page 7: Safety Systems
SAFETY SYSTEMS The Aroma ® Digital Pressure Cooker was built with safety in mind. Along with its convenient digital features, this pressure cooker also includes seven advanced safety systems. Safety System #1: Vent automatically releases pressure if it becomes too high. -
Page 8: Before First Use
BEFORE FIRST USE 1. Read all instructions and important safeguards. 2. Remove all packaging materials and check that all items have been received in good condition. 3. Tear up all plastic bags as they can pose a risk to children. 4. - Page 9 TO PRESSURE COOK OPEN OPEN VENT VENT CLOSED VENT Add food to be pressure cooked to Place the inner cooking pot into the Close the lid securely onto the Move the steam vent to the the inner cooking pot. pressure cooker. pressure cooker, turning it clockwise ““CLOSED VENT””...
- Page 10 TO PRESSURE COOK (CONT.) Plug the power cord into an available Press the POWER button to turn the Press the HIGH PRESSURE, The digital display will begin with a power outlet. pressure cooker on. Each button’’ s MEDIUM PRESSURE or LOW ““1””...
- Page 11 TO PRESSURE COOK (CONT.) Once the needed time is selected, Once the selected pressure level is Once the selected time has elapsed, Allow the pressure cooker to cool press the START button to begin reached, the pressure cooker will the pressure cooker will ““beep”” and release all excess pressure cooking.
- Page 12 TO PRESSURE COOK (CONT.) Allow all pressure to escape from Open the lid by turning it Check food for doneness. If cooking Once serving is complete, press the the steam vent. Pressure should be counterclockwise to unlock it. is complete, remove food for POWER button to turn the pressure released once steam is no longer Remove the lid.
- Page 13 PRESSURE LEVELS The Aroma ® Digital Pressure Cooker includes three pressure settings for a variety of cooking options. The table below gives an approximate pressure level that each pressure setting will reach. APPROXIMATE PRESSURE SETTING PRESSURE LEVEL (pounds per square inch) High 9.5 to 10.5 psi...
- Page 14 TO BROWN Add food to be browned/sautéed Place the inner cooking pot into the Plug the power cord into an available Press the POWER button to turn the into the inner cooking pot. pressure cooker. power outlet. pressure cooker on. Each button’’ s indicator light will ...
- Page 15 TO BROWN (CONT.) CLOSE Once the needed time is selected, The digital display will begin Using a long-handled wooden Once the selected time has elapsed, press the START button to begin counting down from the selected spoon, brown/sauté food as needed. the pressure cooker will ““beep””...
- Page 16 TO SIMMER The steam vent should be open when simmering. OPEN OPEN VENT VENT CLOSED VENT Add food to be simmered into the Place the inner cooking pot into the Close the lid securely onto the Move the steam vent to one of the inner cooking pot.
- Page 17 TO SIMMER (CONT.) Plug the power cord into an available Press the POWER button to turn the Press the SIMMER button. The digital display will begin with a power outlet. pressure cooker on. Each button’’ s ““1”” representing one minute of indicator light will ...
- Page 18 TO SIMMER (CONT.) Once the needed time is selected, The digital display will begin Once the selected time has elapsed, Open the lid by turning it press the START button to begin counting down from the selected the pressure cooker will ““beep”” counterclockwise to unlock it.
-
Page 19: To Slow Cook
TO SLOW COOK The steam vent should be open when slow cooking. Begin slow cooking by following steps 1 to 6 of ““To Simmer”” beginning on page 14. Press the SLOW COOK button. The digital display will begin with a Once the needed time is selected, The digital display will begin ““1H””... - Page 20 TO SLOW COOK (CONT.) Once the selected time has elapsed, Open the lid by turning it Check food for doneness. If cooking Once serving is complete, press the the pressure cooker will ““beep”” counterclockwise to unlock it. is complete, remove food for POWER button to turn the pressure and automatically switch to Remove the lid.
- Page 21 TO STEAM The steam vent should be open when steaming. Pour 3 cups water into the inner Place the inner cooking pot into the Place the steam rack into the center Place food to be steamed on top of cooking pot. pressure cooker.
- Page 22 TO STEAM (CONT.) OPEN OPEN VENT VENT CLOSED VENT Close the lid securely onto the Move the steam vent to one of the Press the POWER button to turn the Press the STEAM button. pressure cooker, turning it clockwise ““OPEN VENT”” positions. pressure cooker on.
- Page 23 TO STEAM (CONT.) The digital display will begin with Once the needed time is selected, Once the water reaches a boil, the Once the selected time has elapsed, a ““1”” representing one minute of press the START button to begin pressure cooker will ““beep””...
- Page 24 TO STEAM (CONT.) Open the lid by turning it Check food for doneness. If cooking Press the POWER button to turn the counterclockwise to unlock it. is complete, remove food immediately pressure cooker off. Unplug from the Remove the lid. for serving.
- Page 25 STEAMING TABLES When steaming, Aroma recommends using 3 cups of water. ® Meat Steaming Table Vegetable Steaming Table SAFE INTERNAL MEAT STEAMING TIME VEGETABLE STEAMING TIME TEMPERATURE Asparagus 9-11 Minutes Fish 25 Min. 140° Broccoli 6-8 Minutes Chicken 30 Min.
- Page 26 •• Always make sure the outside of the inner pot is dry prior to use. NOTE If the inner cooking pot is returned to the pressure cooker when wet, it may damage this product, causing it to malfunction. •• Any other servicing should be performed by Aroma ® Housewares Company. Contact Aroma ®...
- Page 27 RECIPES Fresh Brussels Sprouts with White Wine Vinaigrette Ingredients 4 slices smoked bacon Slice bacon into thin strips and place in the inner cooking pot. Set to Brown for 9 minutes and sauté 1¼ lbs. fresh Brussels sprouts, cleaned, trimmed until crisp.
- Page 28 RECIPES Chunky Beef Goulash with Sweet Hungarian Paprika Ingredients 2 tablespoons olive oil Place the oil in the inner cooking pot and heat with the Brown setting until hot. In a plastic bag, 3 tablespoons our combine the our, salt and pepper. Add several pieces of beef to the bag and seal, tossing the our 1½...
- Page 29 RECIPES Crimini Mushroom & White Wine Risotto Ingredients 2 tablespoons olive oil Place the oil in the inner cooking pot and heat with the Brown setting until hot. Add the shallots and 3 tablespoons shallots, peeled, chopped sauté until tender. Add the mushrooms and rice and cook, stirring often, for 2 minutes. Add the 8 oz.
-
Page 30: Limited Warranty
LIMITED WARRANTY SERVICE & SUPPORT Aroma Housewares Company warrants this product free from defects in In the event of a warranty claim, or if service is required for this product, please material and workmanship for one year from provable date of purchase in...
Need help?
Do you have a question about the APC-990 and is the answer not in the manual?
Questions and answers