
Related Manuals for A&D PT Series

Summary of Contents for A&D PT Series
- Page 1 Pipette Accuracy Tester PT-Series AD-4212B-PT AD-4212A-PT FX-300i-PT INSTRUCTION MANUAL 1WMPD4001794...
- Page 2 © 2009 A&D Company, Limited. All rights reserved. No part of this publication may be reproduced, transmitted, transcribed, or translated into any language in any form by any means without the written permission of A&D Company, Limited. The contents of this manual and the specifications of the instrument covered by this manual are subject to change for improvement without notice.
-
Page 3: Table Of Contents
CONTENTS 1. INTRODUCTION ..........................2 1-1 Unpacking the Tester.......................... 2 1-2 Description of Each Component......................4 1-3 WinCT-Pipette, Software for Pipette Accuracy Testing............... 4 1-4 Function of the Evaporation Trap ....................... 5 2. ASSEMBLING THE TESTER......................6 2-1 AD-4212B-PT / AD-4212A-PT ......................6 2-2 FX-300i-PT ............................ -
Page 4: Introduction
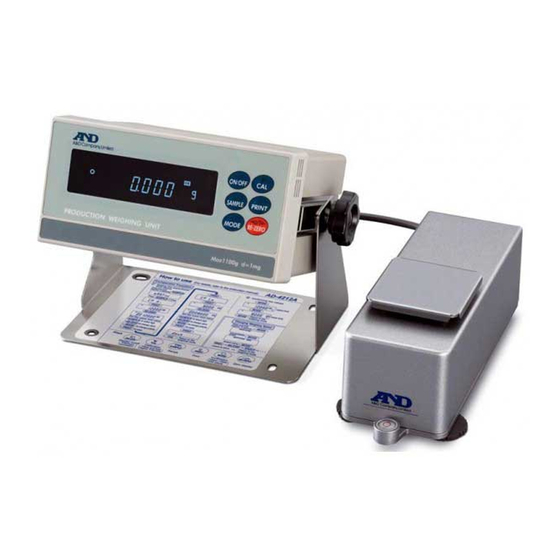
ISO 8655. This manual describes how the PT series Pipette Accuracy Tester works and how to get the most out of it in terms of performance. It includes how to assemble the tester, how to measure and how to use the software, WinCT-Pipette, for pipette accuracy testing. - Page 5 AD-4212B-PT / AD-4212A-PT The connection cable provided as an accessory is one meter long. Weighing unit AC adapter WinCT-Pipette Instruction manual (CD-ROM) Display for the balance Carrying Shoulder case belt USB converter RS-232C cable (25P-9P) Instruction manual for the tester Connection cable (1 m) Thermometer...
-
Page 6: Description Of Each Component
1-2 Description of Each Component Evaporation trap A chamber to prevent the evaporation of the dispensed test liquid. (Refer to “1-4 Function of the Evaporation Trap”.) Sample cup (Two types: 5 mL and 30 mL) A cup to contain the test liquid dispensed from a pipette. Test liquid cup A container to keep a test liquid such as distilled water. -
Page 7: Function Of The Evaporation Trap
NOTE For detailed information on WinCT-Pipette, refer to “How to use WinCT-Pipette.pdf” in the WinCT-Pipette CD-ROM. Main Window When WinCT-Pipette starts up, the window below opens Specifications Enter the pipette volume, specifications of accuracy and repeatability used for pass/fail judgment. Measured Values Displays the mass values transmitted from the balance and the volumetric values obtained... -
Page 8: Assembling The Tester
2. ASSEMBLING THE TESTER 2-1 AD-4212B-PT / AD-4212A-PT 1. Place the weighing unit on a solid table. For details on the installation site, refer to “3. PRECAUTIONS Display BEFORE USE”. Connection Secure the display to the stand using the angle cable adjustment knobs. - Page 9 4. Install the lower part of the evaporation trap on the Lower part of the evaporation trap weighing unit, mating the tabs with the holes on the base. Hole 5. Attach the upper part of the evaporation trap to the Upper part of lower part, mating the tab with the notch.
-
Page 10: Fx-300I-Pt
2-2 FX-300i-PT 1. Place the balance on a solid table. For details on the installation site, refer to “3. PRECAUTIONS BEFORE USE”. 2. Install the fitting boss on the balance, then install Evaporation the evaporation trap base on the fitting boss. trap base Fitting... - Page 11 4. Install the lower part of the evaporation trap on the Lower part of the evaporation trap weighing unit, mating the tabs with the holes on the base. Hole 5. Attach the upper part of the evaporation trap to the Upper part of lower part, mating the tab with the notch.
-
Page 12: Precautions Before Use
3. PRECAUTIONS BEFORE USE To get the optimum performance from the balance and acquire accurate weighing data, note the following, especially when using the AD-4212B-PT / AD-4212A-PT with a minimum weighing value of 0.01 mg / 0.1 mg. Install the balance where the measurement environment is appropriate. The best operating temperature is 15°C to 30°C ±0.5°C with greater than 50% RH. -
Page 13: Anti-Static Treatment
4. ANTI-STATIC TREATMENT An anti-static treatment has been applied to the evaporation trap. Cleaning it with alcohol will reduce the effect of the treatment. If the evaporation trap has acquired a static charge, apply an anti-static agent or use the optional AD-1683 DC static eliminator to remove the static electricity. -
Page 14: Connecting A Pc To The Balance
6. CONNECTING A PC TO THE BALANCE To make a connection between a PC and the balance, use the RS-232C cable or use both the RS-232C cable and the USB converter. 6-1 Connecting a PC When a PC COM port is used When using the COM port of a PC to make a connection to the balance, use the accessory RS-232C AC adapter jack cable. -
Page 15: Checking Com Port Numbers
6-2 Checking COM Port Numbers COM port numbers vary depending on the PC used. Use the Windows Device Manager to check COM port numbers. NOTE When the USB converter is used, check the COM port number with the USB converter connected. -
Page 16: Calibrating The Balance
7. CALIBRATING THE BALANCE For details on calibration, read the balance instruction manual in addition to this manual. Before calibration, refer to “3. PRECAUTIONS BEFORE USE”. Especially when calibrating the AD-4212B-PT / AD-4212A-PT with a minimum weighing value of 0.01 mg / 0.1 mg, make sure that the installation environment is appropriate and the balance is warmed up for the appropriate duration. -
Page 17: Fx-300I-Pt
7-2 FX-300i-PT 1. Remove the 30 mL sample cup and leave Upper part of only the sample cup holder (30 mL) inside the evaporation trap the evaporation trap as shown to the right. Lower part of the evaporation trap Sample cup 2. -
Page 18: Preparation Before Use
8. PREPARATION BEFORE USE The measurement environment recommended by ISO 8655 is as follows. Temperature: 15°C to 30°C ±0.5°C Humidity: Greater than 50% RH 8-1 Filling the Evaporation Trap with Water Remove the evaporation trap from the balance. Separate the upper and lower part of the evaporation trap. Pour water into the groove along the circumference of the inner wall of the lower part of the evaporation trap, using a wash bottle or a pipette, up to the center between the two lines on the evaporation trap. -
Page 19: Using The Thermometer
8-3 Using the Thermometer Part names Front Back ON / FAST AUTO-OFF 1: LCD 2: ON/FAST button MAX / MIN 3: MAX/MIN button 4: Sensor sheath 5: AUTO-OFF button 6: Sheath protector 7: Battery cover Before use One LR-44 battery is provided with the thermometer. It is for testing the performance of the thermometer and may have a limited life. - Page 20 Displaying modes The thermometer has three display modes. Displaying mode Display example • Current temperature mode Displays the current temperature. • Max/Min temperature mode Maximum temperature Displays the latest maximum and minimum temperatures that are automatically stored in the thermometer. Minimum temperature •...
- Page 21 Recalling the maximum and minimum temperatures stored in memory With the current temperature displayed, Current temperature each pressing of the MAX/MIX button displays the maximum and minimum temperatures in Press MAX/MIN turn. Maximum temperature Press MAX/MIN check maximum minimum temperature during measurement, reset the Minimum temperature values in memory before measurement.
- Page 22 Cleaning the thermometer For accurate temperature measurement, keep the temperature detection part clean. Wash the thermometer softly in water. If contamination is hard to remove, clean the thermometer with a lint free cloth moistened with water and a mild detergent. Specifications Sensor : Thermister...
-
Page 23: Measurement
9. MEASUREMENT 9-1 Measuring Procedure Using the predetermined pipette volume, perform the measurement the specified times. ISO 8655 recommends ten measurements for each for the volumes described below. At the nominal volume of a fixed volume pipette At the following three points of an adjustable volume pipette 1. -
Page 24: Example Causes Of Measurement Errors
9-3 Example Causes of Measurement Errors Evaporation of the test liquid Evaporation of the distilled water dispensed from the pipette into the sample cup can be a cause of measurement error. To reduce errors caused by evaporation Be sure to use the evaporation trap. Using the evaporation trap, evaporation of the test liquid can be reduced to 0.05 mg per minute (0.05 μL per minute). - Page 25 Air flow Air flow in the measurement environment yields unstable measurement values To reduce errors caused by air flow Install the balance where it is not affected by heaters or air conditioners or where no drafts exist. Especially when using the AD-4212B-PT / AD-4212A-PT with a minimum weighing value of 0.01 mg / 0.1 mg, use much care in choosing an installation site or cover the weighing unit.
-
Page 26: Ad-4212B-Pt / Ad-4212A-Pt
10. AD-4212B-PT / AD-4212A-PT The AD-4212B-PT / AD-4212A-PT is designed exclusively as a pipette accuracy tester. Although the performance as a balance is the same as the AD-4212B / AD-4212A production weighing unit, some of the specifications are different. 10-1 Factory Settings When shipped, the factory settings of the AD-4212B-PT / AD-4212A-PT as a pipette accuracy tester are as follows. -
Page 27: Display Lock Function
10-2 Display Lock Function To use this function, set “Display lock function ( ploc )” to “ON ( 1 )”. Why use this function This function is used to compensate time-elapsed errors caused by evaporation. Even when the evaporation trap is used, an evaporation of 0.05 mg per minute (0.05 μL per minute) will occur. -
Page 28: Troubleshooting
11. TROUBLESHOOTING Displayed values are unstable. The AD-4212B-PT / AD-4212A-PT has a minimum weighing value of 0.01 mg / 0.1 mg and is influenced by the measurement environment. Measures to take Use the accessory breeze break. Referring to “3. PRECAUTIONS BEFORE USE”, check the measurement environment for sources of drafts, vibration and static electricity. -
Page 29: Specifications
12. SPECIFICATIONS AD-4212B-PT AD-4212A-PT FX-300i-PT Weighing capacity 110 g 320 g 110 g / 31 g Minimum weighing 0.1 mg / 0.01 mg 0.1 mg 0.001 g value Linearity ±0.2 mg / ±0.05 mg ±0.3 mg ±0.002 g Repeatability 0.1 mg / 0.05 mg 0.15 mg 0.001 g (Standard deviation) -
Page 30: Appendix
13. APPENDIX The table below lists the relation between the ISO 8655 requirements and the PT series pipette accuracy testers. ISO 8655 requirements Pipette Maximum permissible error Balance nominal minimum Pipette accuracy tester volume Accuracy Repeatability weighing corresponding to the requirements value μL...
Need help?
Do you have a question about the PT Series and is the answer not in the manual?
Questions and answers