Advertisement
Quick Links
Advertisement

Related Manuals for EZCast Pro QuattroPod

Summary of Contents for EZCast Pro QuattroPod
- Page 1 QuattroPod Quick Start Guide Rev. 1.055...
-
Page 2: System Requirement
Introduction Firstly, thanks for choosing QuattroPod as wireless presentation facility. It integrates powerful dual core SoC and advanced 802.11ac 5G Wi-Fi/Bluetooth (GFSK,п/4-DQPSK, 8DPSK) to provide you a smooth wireless display experience, and it supports almost all devices. Our features not only support ‘’Split Screens Display”, “ Host Control System”... -
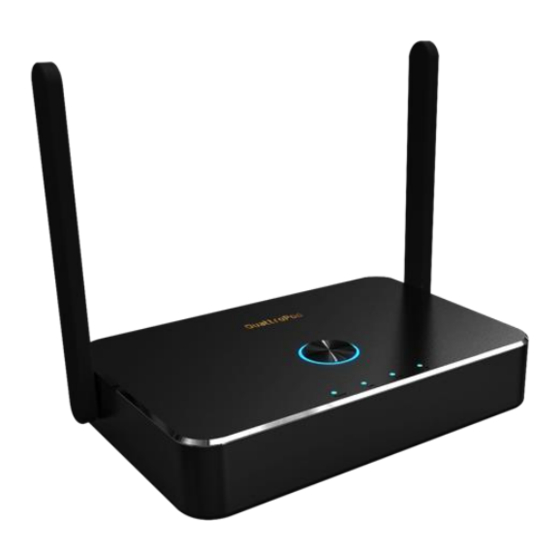
Page 3: Led Indication
2. To connect TX with Laptops, to connect HDMI or DP2 ports with proper cables. To connect TX with Smart phones, to connect USB port with proper cable with phone’s connectors such as micro USB, Lighting or USB type C. I/O Descriptions: QuattroPod Receiver QuattroPod Transmitter... - Page 4 To pair Quattro TX with RX for first time use may be needed. It’s suggested if you are not sure QuattroPod TX has ever paired with the Quattro RX you want to cast. 1. Adjust the switch of the side to right Plug Quattro TX’s USB cable onto Quattro RX’s USB port in the rear.
-
Page 5: Finger Tips
Finger Tips Before understanding the status of our Quattro, let us introduce the definition of the LED Lights. There are 2 LED indicators on Quattro RX upside surface. One is in central named Main Button. The smaller button named Side Button. Main Button indicated the projection status. - Page 6 LED Status list Activate Host Activate Guest without source without source input input Activate Host & in Host received request projecting of projection Guest standby Host standby without without projecting projecting 1. Under connection Guest send request 2. Pairing/TX OTA of projection and 3.
-
Page 7: Web Setting
Function & Link Status- * Outbound link can select only one of Wi-Fi and RJ45 wire line (LAN). Airplay activated after web setting. (Default is off) Quattro RX has been powered on, however, there is neither Quattro TX nor device linked. Shift in 3, which means “under pairing”... - Page 8 1.1 Direct link- you can apply notebook or mobile phone to search Quattro RX by wifi and key in relative SSID and Password. Turn on web browser and enter “192.168.168.1” in the address bar. 1.2 Through Wifi AP or Routers- if your Quattro RX has been connected to a certain networking device, you can apply notebook or mobile phone to connect the same device.
- Page 9 - to indicate menu icon. - to indicate log-in icon. 2. Log in- Press the on the right up corner to log in.
- Page 10 They are Device Management, Network Management, and Admin Setting, and About which indicates device version, IP addresses and wifi frequency..etc. 4. Device Management- This section helps to manage user interface language, output resolutions, Max connection and QuattroPod Receiver & Transmitter pairing file download.
- Page 11 4.1 Language- click it and choose the language you prefer to show in the webpage.
- Page 12 4.2 Resolution- 4.3 Max Connection- to set the maximum users of the Receiver. Default is 20 users.
- Page 13 4.4 Pair File Download- down load the pairing file from here and copy to USB drive. Plug in Transmitter for pairing* when the Receiver has been installed on the ceiling or wherever difficult to plug directly. The switch of USB on Transmitter shall be adjusted to “mobile”.
- Page 15 5. Network Management- mainly provide outbound Wi-Fi setting. 5.1 Scan 5G SSID and Connect- this function can help you to scan available Wi-Fi AP and join.
- Page 16 5.2 Remember Wi-Fi- it to provide options to remember the AP setting parameter or not. 6. Admin Setting-...
- Page 17 6.1 Wi-Fi Channel- to select the channel between QuattroPod Receiver & Transmitter to adjust the performance. 6.2 LAN IP Setting- to configure the wire line connection through LAN cable. *we can support only one connection, either LAN or Wi-Fi at one time.
- Page 18 6.3 SSID- to set the SSID indication of the Receiver on the main screen.
- Page 19 6.4 users can change password of the Receiver, or hide the password to avoid connections without authorization. 6.5 My Screen- Users can replace the theme of the main page of Receiver by uploading graphic or photos.
- Page 20 Share screen will present in screen split when it was on. If set it off, the new casting will be full screen mode. 6.7 Airplay- to turn on/off the iOS /Mac devices can cast without QuattroPod Transmitters. 6.8 Change Admin Password- to change the web setting’s log in password.
- Page 21 6.9 Screen Saving- to configure the screen off when the input is idle for certain time. 6.10 upgrade firmware- to remind users if there is new firmware released and execute the upgrade (* but the Receiver must connect to internet)
- Page 22 6.11 Reboot- to reboot the equipment. 7. About- showing the information of the Receiver. Frequent Applications & Operation 1. Host has projected on screen, and quest required sharing the screen. Host allows. Indicator 1 Indicator 2 Indicator 3 Result of screen Host click...
- Page 23 2. Host has projected on screen, Host rejects Guest’s screen share request. Indicator 1 Indicator 2 Indicator 3 Result of screen Host Double Click Host Guest Click 3. From share screen mode, Host allows Guest full screen request. Indicator 1 Indicator 2 Indicator 3 Result of screen...
- Page 24 5. Guest full/share screen mode, Host retrieves full screen request. Indicator 1 Indicator 2 Indicator 3 Result of screen Host Long Press Host Guest © 2017 Actions Microelectronics Co., Ltd. All right reserved. Quattro Pod or Quattro are trademarks of Actions Microelectronic Co., Ltd., registered in China and other countries.
Need help?
Do you have a question about the QuattroPod and is the answer not in the manual?
Questions and answers