
Related Manuals for dji Naza

Summary of Contents for dji Naza
- Page 1 Naza Multi-Rotor User Manual V 2.7 2013.03.22 Revision www.dji-innovations.com ©2012 DJI Innovations. All Rights Reserved.
-
Page 2: Warning & Disclaimer
DJI Innovations assumes no liability for damage(s) or injuries incurred directly or indirectly from the use of this product. Please strictly follow these steps to mount and connect Naza on your multi-rotor, as well as to install the assistant software on your computer. -
Page 3: Product Profile
Naza for multi-motors is an autopilot system designed for serious multi-rotor enthusiasts providing excellent self-leveling and altitude holding, which completely takes the stress out of flying RC multi-rotors for both professional and hobby applications. Naza can be installed in a variety of models from quad-rotor to hexa-rotor. -
Page 4: In The Box
Naza and other electronic devices. It also has an LED to indicate different operating states of Naza and a USB interface for configuring the Naza unit and firmware upgrade. GPS & Compass Module ×1 Optional The GPS/Compass module is for sensing the position and direction. -
Page 5: Table Of Contents
APPENDIX ......................... 37 TBE (T ................. 37 IX THE OILET FFECT ROBLEM IMU C ......................38 ALIBRATION ....................39 ULTI OTORS UPPORTED ......................40 ESCRIPTION ......................41 IGHT ESCRIPTION ....................42 ECOMMENDED ETTINGS ........................43 PECIFICATIONS ©2012 DJI Innovations. All Rights Reserved. -
Page 6: Matters That Need Attention
Throttle stick position should always be higher than 10% from cut-throttle during the flight! The NAZA-M has Low voltage protections! If you are seeing a Red Flashing light, you should land your multi-rotor ASAP to prevent your multi-rotor from crashing or other harmful... - Page 7 VU; otherwise, it may cause the VU safeguard and lead to the main controller reboot. Refer to the Specification section in the Appendix to get more VU parameters. ©2012 DJI Innovations. All Rights Reserved.
-
Page 8: Assembly
P l e a s e s e t u p A i l e r o n , E l e v a t o r , · If use with DJI multi-rotor, you can solder the VU power cable to power Throttle, Rudder channels on your Tx pads on frame bottom board. -
Page 9: Assistant Software
Open folder DJI_USB_Driver, follow the Driver Installation Manual strictly to finish installation. TOOL Calibration: For gyroscope calibration and acceleration checking. Firmware upgrade: Always check for any updates of your firmware from Website, This will keep your autopilot system up-to-date. Disable All Knob ©2012 DJI Innovations. All Rights Reserved. - Page 10 It will auto detect the software version you have when you open the assistant software and prompt you to Check for Updates if your version is not the latest one. Do not disconnect MC and PC when you are using the assistant software.. ©2012 DJI Innovations. All Rights Reserved.
-
Page 11: Firmware Upgrade
Fill-in the S/N and then click Write button. If you filled in an invalid S/N over 30 times, your MC will be locked and you have to contact our customer support. ©2012 DJI Innovations. All Rights Reserved. -
Page 12: Configuration
Notices Users with GPS module please mount GPS location. Please follow the requirements to mount your Naza MC, so as to prevent the aircraft from abnormal, such as drifting in horizontal direction, or even rollover. You must re-configure if the ALL-UP-WEIGHT had been changed on your multi-rotor, If GPS mounting locations are not accurate enough or the signs are wrong, error on X, Y,Z axles will... -
Page 13: Motor Mixer
Setting the Motor Idle Speed as HIGH, the motors idle speed will be at its highest. RECOMMEND is the advised level. You can reset the Motor Idle Speed according to your personal preference. Notices: ©2012 DJI Innovations. All Rights Reserved. - Page 14 You can get the proportional values by computing according to the above formula for a special TX. Use Futaba TX for example. Notice that Futaba TX End Point is 100%. RECOMMEND HIGH proportion value ©2012 DJI Innovations. All Rights Reserved.
-
Page 15: Xmonitor
(Only first 8 channels of S-Bus/PPM receiver are used at the moment). STEP2: Cut Off Type Please read the introductions of start and stop motor in this step first, and then choose a cut off type. ©2012 DJI Innovations. All Rights Reserved. - Page 16 The motors will start or stop immediately when you execute CSC when Tx commands are valid under any of the control modes. It has nothing to do with current throttle stick position. Please DO NOT execute the CSC during flight unless safety is at stake. ©2012 DJI Innovations. All Rights Reserved.
- Page 17 (become ), just click FINISH, then slides will be at center automatically. If still not, please reboot MC, and do not apply Tx command during the reboot. CSC may not start motors If trims and sub-trims of sticks are not 0! ©2012 DJI Innovations. All Rights Reserved.
- Page 18 Check status bar at the bottom side of the software interface. If the Fail-Safe has been correctly set-up the Control mode will change to Fail-Safe. Check the LED indicator. Read the appendix in this manual for details. LED will give fast yellow ©2012 DJI Innovations. All Rights Reserved.
- Page 19 Once the MC goes into the Fail-Safe Mode, and you are using the GPS, the aircraft will auto Stop the Motors when landed; without GPS the aircraft the motors will not auto Stop when landed. ©2012 DJI Innovations. All Rights Reserved.
-
Page 20: Autopilot
Therefore, large gain will not produce tail vibration like helicopter, but severe reaction at the start or stop of motors, which will affect the stabilization of the other directions. ©2012 DJI Innovations. All Rights Reserved. - Page 21 Enhanced Fail-safe method will be triggered when MC loses the control signal, no matter what mode you fly. This could be one of the following situations: Signal lost between transmitter and receiver, e.g. multi-rotor is out of the communication range, or ©2012 DJI Innovations. All Rights Reserved.
- Page 22 Orientation Control (IOC), wherever the nose points, the forward direction has nothing to do with nose direction: In course lock flying, the forward direction is the same as a recorded nose direction. See the following figures (Mode 2): ©2012 DJI Innovations. All Rights Reserved.
- Page 23 Do NOT set a 2-position switch as: Position-1 is Course Lock; Position-2 is Home Lock. Course Lock Usage: During the same flight: STEP1: Record STEP2: Open STEP3: Close STEP4: Re-open Nose direction; Forward direction STEP1: Record forward direction: There are two ways: Manually; Automatically: ©2012 DJI Innovations. All Rights Reserved.
- Page 24 And LED will blink quickly if recording is successful. STEP2: Open home lock: flip the X2 channel switch to the Home Lock position to fly in home lock ©2012 DJI Innovations. All Rights Reserved.
- Page 25 10m range around home point, and this is the first time you are going to fly in home lock during the current flight, then if all the requirements are met, MC will ©2012 DJI Innovations. All Rights Reserved.
- Page 26 The aircraft fly’s within 10m range of the home point. You toggle the control mode switch to the ATTI. Mode. The GPS signal becomes bad (The GPS signal LED is blinking Red twice or three times). ©2012 DJI Innovations. All Rights Reserved.
-
Page 27: Gimbal
F1 and F2 ports. You should never connect these ports to ESCs which are wired with propellers and motors. Tips: NAZA supports servo center 1520us. STEP2: Servo Travel Limit Range: -1000 to+1000 MAX/MIN are servo travel limits; adjust them to avoid mechanical binding; Place your multi-rotor on level ground, adjust Center value of Pitch and Roll direction to make the camera mounting frame to your desired angle-to-ground. - Page 28 Do not use X1 to control gimbal pitch and remote adjust parameters at the same time. Please reset the Basic Parameters in Autopilot section if there is flight jitter after gimbal is mounted. ©2012 DJI Innovations. All Rights Reserved.
-
Page 29: Voltage Monitoring
If the battery voltage displayed here is different from the voltage you measure from a voltmeter, you have to calibrate it. Click the Calibration box, enter that voltage in the ©2012 DJI Innovations. All Rights Reserved. - Page 30 When you change the payload or multi-rotor, you have to get new line loss voltages. The line loss voltage will be larger after many times of use, you should get new ones after 30 times ©2012 DJI Innovations. All Rights Reserved.
- Page 31 When the center point is at 90% of endpoint, multi-rotor will still start to ascend slowly if you continue to pull the throttle stick back, and the control of Pitch, Roll and Yaw are the same as before. Please land ASAP to prevent your multi-rotor from crash or other harmful consequences! ©2012 DJI Innovations. All Rights Reserved.
-
Page 32: Flight
Calibration will eliminate such influences, and ensure MC system performs well in a non-ideal magnetic environment. When to do it? The first time you install Naza on your multi-rotor. When the multi-rotor mechanical setup has changed: a) If the GPS/Compass module is re-positioned. - Page 33 1. Tips: If you keep having calibration failure, it might suggest that there is very strong magnetic interference around the GPS & Compass module, please avoid flying in this area. ©2012 DJI Innovations. All Rights Reserved.
-
Page 34: Fly Test
Roll, Pitch and Yaw to feel if your multi-rotor moves to the corresponding direction. If not, go back to Configuration Procedure and correct your settings. Push the throttle stick slowly within 3 seconds after executing CSC until all the rotors are working, and then take-off your multi-rotor gently ©2012 DJI Innovations. All Rights Reserved. - Page 35 If the aircraft drifts or spins in horizontal direction when hovering, please use IMU Calibration in TOOL of assistant software to observe sensor output. If there is bigger gyroscope bias, do gyroscope calibration according to the IMU Calibration in Appendix. ©2012 DJI Innovations. All Rights Reserved.
-
Page 36: Fly With Gps
Θ in the figure is the offsetting angle. θ Objective flight direction GPS mounting direction Without GPS offset angle With GPS offset angle Actual flight direction Objective flight direction θ ©2012 DJI Innovations. All Rights Reserved. -
Page 37: Appendix
θ is the arrow direction on the GPS module, is the offset angle for GPS re-mounting(about 10~30 Clockwise rotating GPS re-mounting θ Counter Clockwise rotating GPS re-mounting θ ©2012 DJI Innovations. All Rights Reserved. -
Page 38: Imu Calibration
Tips: IMU works normally if the value of X, Y and Z is between [-1.5,1.5]. IMU works normally if the sum of the squares of X, Y and Z is around 1. ©2012 DJI Innovations. All Rights Reserved. -
Page 39: Multi-Rotors Supported
To coaxial propellers: Blue propeller is at Top; propeller is at Bottom. Otherwise all propellers are at top. Quad-rotor X Quad-rotor I Hexa-rotor I Hexa-rotor V M1,4 M3,6 M2,5 M2,5 M3,6 M1,4 Hexa-rotor IY Hexa-rotor Y ©2012 DJI Innovations. All Rights Reserved. -
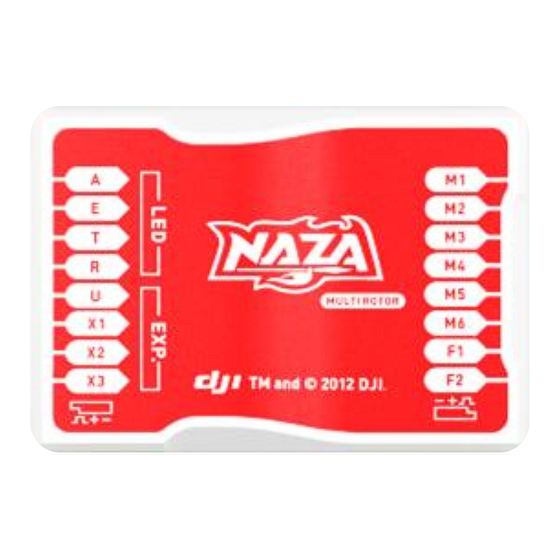
Page 40: Port Description
Orange wire (signal wire) output: ±3.3V Red wire (power wire) output: 4A@5V LED wire, to MC LED port. Micro-B USB port: PC connection for configuration and firmware upgrades. Optional GPS & Compass Connect to the EXP. port. ©2012 DJI Innovations. All Rights Reserved. -
Page 41: Light Description
Tx signal lost Low voltage / Other errors Connect to PC correctly System start and self-check Do NOT move any command sticks during this procedure! Please contact us if the last four green blinks are abnormal. ©2012 DJI Innovations. All Rights Reserved. -
Page 42: Recommended Settings
Aircraft Motor Propeller Battery Weight Pitch Roll Vertical Pitch Roll F330 DJI-2212 DJI-18A DJI-8 Inch 3S-2200 790 g F450 DJI-2212 DJI-30A DJI-8 Inch 3S-2200 890 g F550 DJI-2212 DJI-30A DJI-8 Inch 4S-3300 1530 g ©2012 DJI Innovations. All Rights Reserved. -
Page 43: Specifications
(can be effected by mechanical performance and payloads) Vertical: ± 0.8m Hovering Accuracy (GPS Mode) Horizontal: ± 2.5m 200° /s Max Yaw Angular Velocity Max Tilt Angle 45° Max Ascent / Descent Speed ±6m/s ©2012 DJI Innovations. All Rights Reserved.
Need help?
Do you have a question about the Naza and is the answer not in the manual?
Questions and answers