Table of Contents
Advertisement
Available languages
Available languages
Quick Links
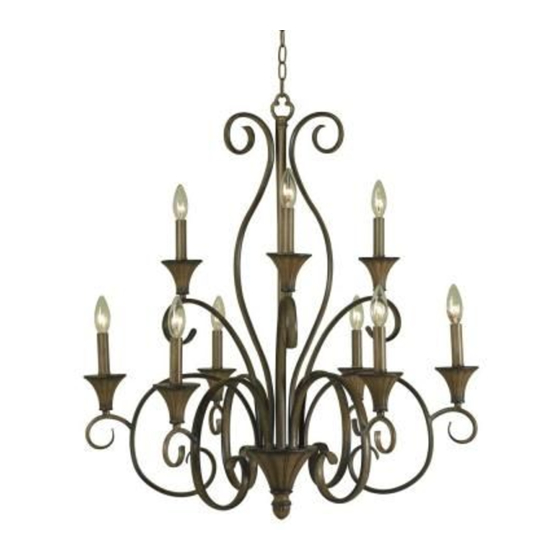
Model #HDP11965
USE AND CARE GUIDE
CHESTER 9-LIGHT CHANDELIER
Questions, problems, missing parts? Before returning to the store,
call Hampton Bay Customer Service
8 a.m.-6 p.m., EST, Monday-Friday
1-877-527-0313
HAMPTONBAY.COM
THANK YOU
We appreciate your trust and confidence in Hampton Bay with your purchase of this light fixture. At Hampton Bay we make quality
products to help you improve your home and give you peace of mind about your choice. Don't forget to visit our website for other
Hampton Bay products. We hope you enjoy this new addition to your home and thanks again for choosing Hampton Bay.
Advertisement
Chapters
Table of Contents

Subscribe to Our Youtube Channel
Related Manuals for HAMPTON BAY HDP11965


Summary of Contents for HAMPTON BAY HDP11965
- Page 1 THANK YOU We appreciate your trust and confidence in Hampton Bay with your purchase of this light fixture. At Hampton Bay we make quality products to help you improve your home and give you peace of mind about your choice. Don’t forget to visit our website for other...
-
Page 2: Table Of Contents
Table of Contents Table of Contents ............2 Assembly ............... 5 Safety Information ............2 Installation ..............6 Warranty ................. 2 Care and Cleaning ............7 Pre-Installation .............. 2 Troubleshooting ............7 Safety Information □... - Page 3 Pre-Installation (continued) TOOLS REQUIRED Safety Wire Flathead Wire strippers goggles cutters screwdriver Phillips screwdriver Ladder MATERIALS REQUIRED 60-watt max. candelabra-base Electrical tape type B bulb (9) HARDWARE INCLUDED NOTE: Hardware not shown to actual size. Part Description Quantity Wire nut Cross bar Outlet box screw Nipple...
- Page 4 Pre-Installation (continued) PACKAGE CONTENTS Part Description Quantity Chain loop Pole Upper arm assembly Middle arm Lower arm Candle sleeve Distributor Nipple Finial...
-
Page 5: Assembly
Assembly Assembling the chandelier Preparing the chandelier to hang □ The middle arms (D) and lower arms (E) have been □ Use pliers to open one link on the end of the chain turned to lay flat for shipping. Carefully turn them (JJ) and attach the chain (JJ) to the chain loop (A) so that they are evenly spaced apart. -
Page 6: Installation
Installation Installing the cross bar Connecting the wires □ Turn the power off at the main fuse box. □ Install the fixture copper ground wire (KK) under the ground screw (EE) on the cross bar (BB). □ Install the cross bar (BB) with nipple (DD), lock nut (FF), and screw collar loop (HH) to the outlet box □... -
Page 7: Care And Cleaning
Installation (continued) Hanging the light fixture □ Push all excess wires into the outlet box. □ Raise the canopy (GG) to the ceiling and secure in place by screwing the screw collar nut (II) onto the screw collar loop (HH). Care and Cleaning □... - Page 8 Questions, problems, missing parts? Before returning to the store, call Hampton Bay Customer Service 8 a.m.-6 p.m., EST, Monday-Friday 1-877-527-0313 HAMPTONBAY.COM Retain this manual for future use.
- Page 9 MERCI Nous vous remercions de la confiance que vous avez témoignée à Hampton Bay en achetant ce luminaire. À Hampton Bay nous fabriquons des produits de qualité pour vous aider à améliorer votre demeure tout en ayant l'esprit tranquille quant à votre choix.
- Page 10 Table des matières Table des matières ............2 Assemblage ..............5 Consignes de sécurité ..........2 Installation ..............6 Garantie ................2 Entretien et nettoyage ..........7 Pré-installation .............. 2 Dépannage ..............7 ...
-
Page 11: Pré-Installation
Pré-installation (suite) OUTILS REQUIS Lunettes Outil à Coupe- Tournevis protectrices dénuder fils plat Tournevis Escabeau cruciforme MATÉRIEL REQUIS Ampoule de type A de 60 Ruban isolant watts max. (9) QUINCAILLERIE FOURNIE REMARQUE: Les pièces de quincaillerie ne sont pas illustrées à grandeur nature. Pièce Description Quantité... - Page 12 Pré-installation (suite) CONTENU DE L’EMBALLAGE Pièce Description Quantité Anneau de suspension Montant Bras supérieur Bras intermédiaire Bras inférieur Manchon de chandelle Distributeur Tige filetée du luminaire Faîteau...
-
Page 13: Assemblage
Assemblage Assemblage du lustre Préparation du lustre à le suspendre □ Les bras intermédiaires (D) et les bras inférieurs □ Servez-vous de pinces pour ouvrir un maillon à (E) ont été rabattus de manière à reposer à plat l'extrémité de la chaîne (JJ) et attachez la chaîne pendant le transport. -
Page 14: Installation
Installation Installation de la traverse Raccordement des fils □ Coupez l’alimentation au niveau de la boîte à □ Placez le fil de mise à la terre en cuivre du fusibles principale. luminaire (KK) sous la vis de mise à la terre (EE) de la traverse (BB). -
Page 15: Entretien Et Nettoyage
Installation (suite) Suspension du luminaire □ Rangez tout excédent de fil à l'intérieur de la boîte de sortie de courant. □ Soulevez la monture (GG) jusqu'au plafond et fixez solidement en position en vissant l'écrou pour anneau de suspension à col fileté (II) sur l'anneau de suspension à... - Page 16 Questions, problèmes, pièces manquantes? Avant de retourner au magasin, appelez le service à la clientèle Hampton Bay entre 8h00 et 18h00, HNE, du lundi au vendredi 1-877-527-0313 HAMPTONBAY.COM Conservez ce guide pour un usage ultérieur.
- Page 17 GRACIAS POR TU COMPRA Apreciamos tu seguridad y confianza en Hampton Bay al comprar esta lámpara. En Hampton Bay hacemos productos de calidad para ayudarte a mejorar tu hogar y darte tranquilidad sobre tu selección. No olvides visitar nuestro sitio Web para ver otros productos de Hampton Bay.
-
Page 18: Índice
Índice Índice ................2 Ensamblaje ..............5 Safety Information ............2 Instalación ..............6 Garantía ................2 Mantenimiento y Limpieza ........... 7 Pre-Instalación .............. 2 Solución de problemas ..........7 Safety Information □... - Page 19 Pre-Instalación (continuación) HERRAMIENTAS NECESARIAS Gafas de Destornillador Pelacables Cortacables seguridad plano Destornillador Escalera Phillips MATERIALES NECESARIOS 9 bombillas tipo B de base de Cinta de candelabro de electricista hasta 60 vatios HERRAJES INCLUIDOS NOTA: No se muestra el tamaño real de los herrajes. Pieza Descripción Cantidad...
- Page 20 Pre-Instalación (continuación) CONTENIDO DEL PAQUETE Pieza Descripción Cantidad Aro de cadena Poste Ensamblaje del brazo superior Brazo intermedio Brazo inferior Funda del Candelabro Distribuidor Boquilla Roscada Remate...
-
Page 21: Ensamblaje
Ensamblaje Cómo preparar el candelabro para Cómo ensamblar el candelabro colgarlo □ Los brazos intermedios (D) y los brazos inferiores □ Usa los alicates para abrir un eslabón en el (E) se voltearon para que quedaran planos durante extremo de la cadena (JJ) y sujeta la cadena (JJ) el envío. -
Page 22: Instalación
Instalación Cómo instalar la barra transversal Cómo conectar los cables □ Apaga la electricidad en la caja de fusibles □ Instala el cable de cobre a tierra de la lámpara principal. (KK) debajo del tornillo a tierra (EE) en la barra transversal (BB). -
Page 23: Mantenimiento Y Limpieza
Instalación (continuación) Cómo colgar la lámpara □ Empuja los cables hacia adentro de la caja eléctrica. □ Levanta la cubierta (GG) hacia el techo y asegúrala en su lugar atornillando la tuerca roscada de la cubierta (II) en el gancho roscado de la cubierta (HH). - Page 24 ¿Preguntas, problemas o piezas faltantes? Antes de regresar a la tienda, llama al Servicio al Cliente de Hampton Bay de 8 a.m. a 6 p.m., Hora Estándar del Este, de Lunes a Viernes 1-877-527-0313 HAMPTONBAY.COM Conserva este manual para uso en el futuro.
Need help?
Do you have a question about the HDP11965 and is the answer not in the manual?
Questions and answers