Table of Contents
Advertisement
Available languages
Available languages
Quick Links
ITEM # 1005741761, 314569601
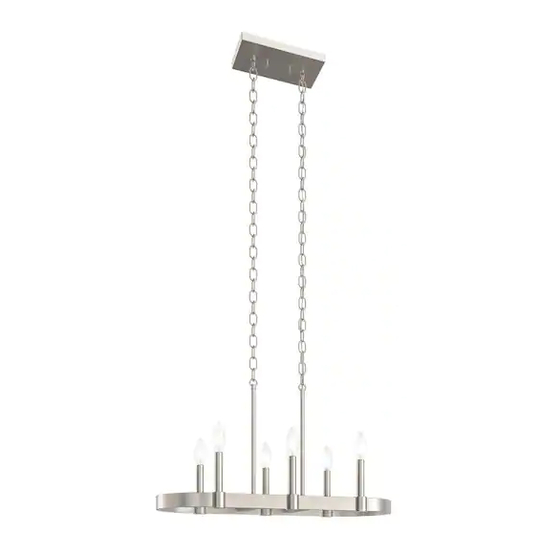
BRENÉ 6-LIGHT LINEAR CHANDELIER
MODEL #82352
Français p. 8
Español p. 15
ATTACH YOUR RECEIPT HERE
Serial Number
Purchase Date
Questions, problems, missing parts? Before returning to your retailer, call our customer
service department at 800-554-6504, 8 a.m. - 4:30 p.m, EST, Monday - Friday.
kichler.com/customer-care/contact-us
1
Advertisement
Table of Contents

Related Manuals for Kichler Lighting 82352

Summary of Contents for Kichler Lighting 82352
- Page 1 ITEM # 1005741761, 314569601 BRENÉ 6-LIGHT LINEAR CHANDELIER MODEL #82352 Français p. 8 Español p. 15 ATTACH YOUR RECEIPT HERE Serial Number Purchase Date Questions, problems, missing parts? Before returning to your retailer, call our customer service department at 800-554-6504, 8 a.m. - 4:30 p.m, EST, Monday - Friday.
-
Page 2: Package Contents
PACKAGE CONTENTS PART DESCRIPTION QTY. PART DESCRIPTION QTY. Canopy Fixture Loop Mounting Bracket Threaded Pipe Canopy Loop (preassembled) Coupling Chain Link Socket Cover Socket... -
Page 3: Hardware Contents
HARDWARE CONTENTS Threaded Wire Knob Short Connector Qty: 2 Machine Qty: 3 Screw Long Machine Screw Qty: 2 Qty: 2 SAFETY INFORMATION Please read and understand this entire manual before attempting to assemble, operate or install the product. WARNING • CAUTION – RISK OF SHOCK – Disconnect Power at the main circuit breaker panel or main fusebox before starting and during the installation. - Page 4 ASSEMBLY INSTRUCTIONS 1. Screw threaded pipe (G) into coupling (H). Next, screw fixture loop (F) into threaded pipe (G). Repeat. NOTE: The electrical cable will need to get pulled through the individual parts as they are installed on this and later steps. 2.
- Page 5 ASSEMBLY INSTRUCTIONS 4. Orient the mounting bracket (B) so the raised Outlet Box center portion protrudes into the outlet box (not included). Insert long machine screws (DD) through mounting bracket (B) so the long machine screws (DD) protrude downward. Connect the mounting bracket (B) to the outlet box with short machine screws (BB).
- Page 6 ASSEMBLY INSTRUCTIONS 6a. Pass canopy (A) over the long machine screws protruding from mounting bracket (B) and secure with threaded knobs (CC). Hardware Used Threaded Knob NOTE: The bottom edge of an outlet box should be flush with the bottom surface of a ceiling.
-
Page 7: Care And Maintenance
1. Check wiring. Fixture does not light. 1. Fixture may be wired incorrectly. 1. Check wiring. 2. Worn or broken bulb. 2. Replace bulb. Distributed by: Kichler Lighting LLC 7711 East Pleasant Valley Rd Cleveland, OH 44131 Printed in China REV 23-SEP-2020... - Page 8 ARTICLE # 1005741761, 314569601 LUSTRE LINÉAIRE À 6 LUMIÈRES BRENÉ MODÈLE # 82352 JOIGNEZ VOTRE REÇU ICI Numéro de série Date d’achat Des questions, des problèmes, des pièces manquantes? Avant de retourner le produit à votre détaillant, appelez notre service à la clientèle au 800-554-6504, entre 8 h et 16 h 30...
-
Page 9: Contenu De L'emballage
CONTENU DE L’EMBALLAGE PIÈCE DESCRIPTION QTÉ PIÈCE DESCRIPTION QTÉ Couverture Boucle de fixation Support de fixation Tige filetée Boucle de couverture Raccord Couvercle de Douille Maillon de chaîne Douille... -
Page 10: Quincaillerie Incluse
QUINCAILLERIE INCLUSE Bouton Capuchon fileté de connexion Vis à Qté: 2 Qté: 3 métaux courte Vis à Qté: 2 métaux longue Qté: 2 CONSIGNES DE SÉCURITÉ Veuillez vous assurer de lire et de comprendre l’intégralité du présent guide avant d’assembler, d’utiliser ou d’installer ce produit. -
Page 11: Instructions Pour L'assemblage
INSTRUCTIONS POUR L’ASSEMBLAGE 1. Vissez le tube fileté (G) dans le raccord (H). Ensuite, vissez l'anneau de suspension du luminaire (F) dans le tube fileté (G). Répéter. Remarque : le câble électrique devra être tiré à travers les di érents éléments au fur et à mesure de leur montage, lors de cette étape et des suivantes. - Page 12 INSTRUCTIONS POUR L’ASSEMBLAGE 4. Orientez le support de fixation (B) de sorte que Boîte de la partie centrale surélevée fasse saillie dans la sortie boîte de sortie (non fournie). Insérez les vis à métaux longues (DD) à travers le support de fixation (B) de sorte que les vis à...
- Page 13 INSTRUCTIONS POUR L’ASSEMBLAGE 6a. Placez le couverture (A) sur les vis à métaux longues (DD) qui dépassent du support de fixation (B) et fixez-le à l’aide des boutons filetés (CC). Quincaillerie utilisée Bouton fileté 6b. REMARQUE : Le bord inférieur d'une boîte de sortie doit être à...
-
Page 14: Entretien
Le luminaire ne s’allume pas. 1. Le luminaire est mal branché. 1. Vérifiez le câblage. 2. L’ampoule est usée ou brisée. 2. Remplacez l’ampoule. Distribué par: Kichler Lighting LLC 7711 E. Pleasant Valley Rd Cleveland, OH 44131 Imprimé en China REV 23-SEP-2020... - Page 15 ARTÍCULO # 1005741761, 314569601 CANDELABRO LINEAL DE 6 LUCES BRENÉ MODELO # 82352 ADJUNTE SU RECIBO AQUÍ Número de serie Fecha de compra ¿Preguntas, problemas, piezas faltantes? Antes de devolverlo a la tienda, llame a nuestro departamento de servicio al cliente al 800-554-6504, de 8:00 a.m. a 4:30 p.m. hora del Este...
-
Page 16: Contenido Del Paquete
CONTENIDO DEL PAQUETE PIEZA DESCRIPTIÓN CANT. PIEZA DESCRIPTIÓN CANT. Cubierta Lazo de fijación Soporte de montaje Tubo roscado Lazo de cubierta Acoplamiento Tapa del Portalámparas Eslabón de la cadena Portalámparas... -
Page 17: Información De Seguridad
ADITAMENTOS Perilla Conector roscada Tornillo de cables Cant.: 2 para metal Cant.: 3 corto Tornillo para metal largo Cant.: 2 Cant.: 2 INFORMACIÓN DE SEGURIDAD Lea y comprenda completamente este manual antes de intentar ensamblar, usar o instalar el producto. ADVERTENCIA •... -
Page 18: Instrucciones De Ensamblaje
INSTRUCCIONES DE ENSAMBLAJE 1. Atornille tubo roscado (G) al acoplamiento (H). Después atornille el aro de suspensión (F) al tubo roscado (G). Repetir. Nota: Se deberá tirar del cable eléctrico a través de las partes individuales a medida de que se instalan en este paso y en pasos posteriores. - Page 19 INSTRUCCIONES DE ENSAMBLAJE 4. Oriente el soporte de montaje (B) de modo que Caja la parte central elevada sobresalga en la caja electrica eléctrica (no se incluye). Inserte tornillos largos para metal (DD) a través del soporte de montaje (B) de manera que los tornillos largos para metal (DD) sobresalgan hacia afuera.
- Page 20 INSTRUCCIONES DE ENSAMBLAJE 6a. Pase la cubierta (A) sobre los tornillos para metal largos (DD) que sobresalen del soporte de montaje (B) y fíjelo en su lugar con las perillas roscadas (CC). Aditamentos utilizados Perilla roscada 6b. NOTA: el borde inferior de una caja eléctrica debería estar a ras con la superficie inferior de un techo.
-
Page 21: Cuidado Y Mantenimiento
1. Inspeccione el cableado. La lámpara no se incorrectamente cableada. enciende. 2. La bombilla está quemada o rota. 2. Reemplace la bombilla. Distribuido por: Kichler Lighting LLC 7711 E. Pleasant Valley Rd Cleveland, OH 44131 Impreso en China REV 23-SEP-2020...
Need help?
Do you have a question about the 82352 and is the answer not in the manual?
Questions and answers