Table of Contents
Advertisement
Quick Links
Exabeam Appliance Setup
Guide
Exabeam Security Management Platform - Version SMP 2019
Publication date March 15, 2021
Exabeam
2 Waters Park Dr. Suite 200
San Mateo, CA 94403
650.209.8599
Have feedback on this guide? We'd love to hear from you!
Email us at
docs@exabeam.com
Disclaimer: Please ensure you are viewing the most
up-to-date version of this guide
by visiting the
Exabeam
Community.
Advertisement
Table of Contents

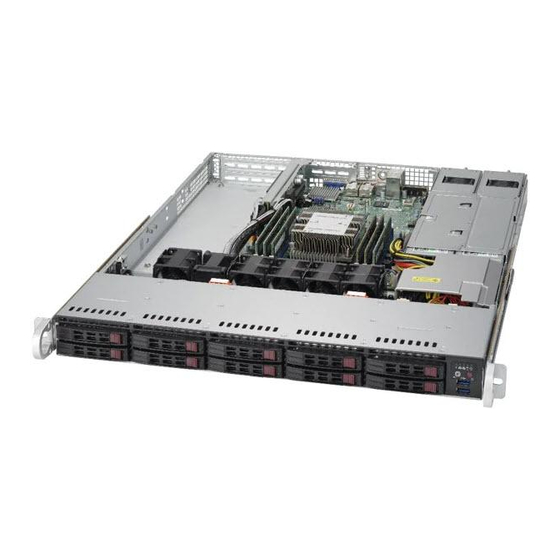
Summary of Contents for exabeam EX2003
- Page 1 Exabeam Appliance Setup Guide Exabeam Security Management Platform - Version SMP 2019 Publication date March 15, 2021 Exabeam 2 Waters Park Dr. Suite 200 San Mateo, CA 94403 650.209.8599 Have feedback on this guide? We'd love to hear from you! Email us at docs@exabeam.com...
- Page 3 The compilation (meaning the collection, arrangement, and assembly) of all content in this document is the exclusive property of Exabeam and is also protected by U.S. and international copyright laws. The content in this document may be used as a resource. Any other use, including the reproduction, modification, distribution, transmission, republication, display, or performance, of the content in this document is strictly prohibited.
-
Page 4: Table Of Contents
2.2.2. Install The Inner Rail Extension And Rails ............8 2.3. Install Outer And Middle Rails ..................9 3. Install The Exabeam Appliance Chassis Into A Rack ..............12 4. Connect The Exabeam Appliance Cabling ................14 5. Exabeam Appliance Network Configuration ................15 5.1. -
Page 5: Set Up The Appliance
Follow the steps to set up the physical appliance. A number of steps are involved in mounting the rack and getting the network and hostname configured on the EX3000, which is required for Data Lake and the EX2003 and EX4003, which is required for Advanced Analytics. -
Page 6: Rack Mounting Instructions
NOTE EX2003 and EX4003 are 1U rack units. The rail fits a rack between 26" and 33.5" deep. EX3000 is a 2U rack unit. The rail fits a rack between 26.5" and 36.4" deep 2.1. Identify the Sections of the Rack Rails The rack rails must be properly identified in order to assemble them in the correct order. -
Page 7: Install The Inner Rails
To mount the rail onto the chassis, first release the inner rail from the outer rails: Pull the inner rail out of the outer rail until it is fully extended as illustrated below. Press the locking tab down to release the inner rail. Exabeam Appliance Setup Guide - Version SMP 2019 Published Mar 15, 2021... -
Page 8: Install The Inner Rail Extension And Rails
(Optional) Attach the inner rail extension to stabilize the chassis within the rack. NOTE The Exabeam appliance chassis includes a set of inner rails in two sections: inner rails and inner rail extensions. The inner rails are pre-attached and do not interfere with normal use of the chassis if you decide not to use a server rack. -
Page 9: Install Outer And Middle Rails
Clip in, and then secure the long bracket to the front side of the outer rail with two M5 screws, and the short bracket to the rear side of the outer rail with three M5 screws. Exabeam Appliance Setup Guide - Version SMP 2019 Published Mar 15, 2021... - Page 10 Take care that the proper holes are used so the rails are level. If desired, use screws to secure the rear of the outer rail to the rear of the rack. Repeat steps 1-5 for the other outer rail. Exabeam Appliance Setup Guide - Version SMP 2019 Published Mar 15, 2021...
- Page 11 Rack Mounting Instructions Exabeam Appliance Setup Guide - Version SMP 2019 Published Mar 15, 2021...
-
Page 12: Install The Exabeam Appliance Chassis Into A Rack
Install the Exabeam Appliance Chassis into a Rack 3. Install the Exabeam Appliance Chassis into a Rack Follow the instructions to securely install the appliance chassis. We recommend two people working together to install the chassis into the rack in order to avoid breaking or dropping the chassis. - Page 13 Install the Exabeam Appliance Chassis into a Rack Exabeam Appliance Setup Guide - Version SMP 2019 Published Mar 15, 2021...
-
Page 14: Connect The Exabeam Appliance Cabling
4. Connect the Exabeam Appliance Cabling You must connect your appliance cables to the proper ports in order to start configuration. Before installing an operating system image and Exabeam software onto your appliance, ensure your appliance is connected to your network. -
Page 15: Exabeam Appliance Network Configuration
Set up the network configuration to install the OS and Exabeam software. In order to install the operating system and Exabeam software on your appliance, it must have its network presence established. Before configuring the network interface of your host, determine the address assignment of your host and network details, including: •... - Page 16 For persistent address assignment at the host: Open the menu next to IPv4 and select Manual. Choose to <Show> the IPv4 details: iii. Enter the IPv4 Addresses and Gateway. Exabeam Appliance Setup Guide - Version SMP 2019 Published Mar 15, 2021...
- Page 17 Select OK, and then press Enter. Select Quit, and then press Enter. Restart the network by entering the following command on the command prompt: Exabeam Appliance Setup Guide - Version SMP 2019 Published Mar 15, 2021...
-
Page 18: Appliance Network Teaming Configuration
- Go to the network configuration directory. cd /etc/sysconfig/network-scripts/ Backup existing network interface configuration files, for example, to /home/exabeam/. (Do not place backups into /etc/sysconfig/network-scripts.) cp ifcfg-eno* /home/exabeam/ Create and bind network interfaces. In this example, the host interfaces eno1 and eno2 are aggregated to make team0 for the runner state activebackup. -
Page 19: Static Ip Teaming Configuration
- Go to the network configuration directory. cd /etc/sysconfig/network-scripts/ Backup existing network interface pointers to, for example, /home/exabeam/. (Do not place backups into /etc/sysconfig/network-scripts.) cp ifcfg-eno* /home/exabeam/ Create and bind network interfaces. In this example, the host interfaces eno1 and eno2 are aggregated to make team0 for the runner state activebackup. - Page 20 You can also verify that your throughput for one interface is up. teamnl team0 ports The response should resemble: eno2: down 0Mbit HD eno1: up 1000Mbit FD Exabeam Appliance Setup Guide - Version SMP 2019 Published Mar 15, 2021...
Need help?
Do you have a question about the EX2003 and is the answer not in the manual?
Questions and answers