Advertisement
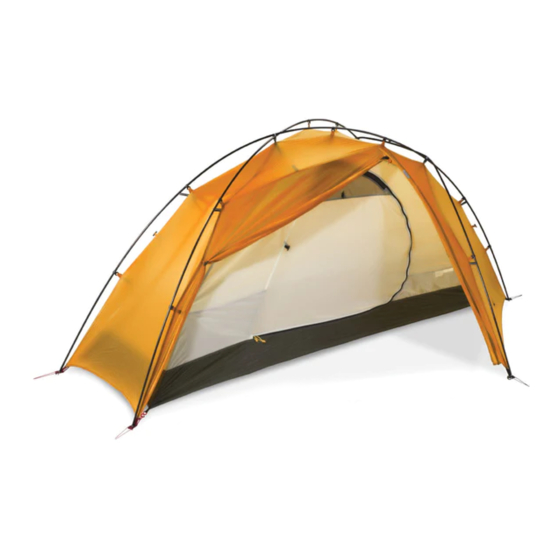
Big Sky International, Inc. – Chinook 1P tent revA
The silnylon fabric that we use is very popular for lightweight products, but it
will burn so keep it away from heat or open flame.
We have enclosed a fabric swatch for a test burn... after burning a fabric swatch
you need to decide to either to accept the risk of using the product with this fabric
or return the unused product for full refund
Setup instructions:
1) If the interior is not attached:
First attach either an interior or the "X-cord" to the outer shell. The outer shell has color coded
straps that match the tent interior or "X-cord", i.e. red to red:
a. To attach an interior 1) clip "red" hook to "red" ring at narrow end. 2) clip "black" hook
to "black" ring at wide end, 3) buckle top "reflective" buckle to peak, and 4) buckle
remaining buckles between these.
b. To attach the "X-cord" 1) clip "red" hook to "red" ring at narrow end, 2) clip "black"
hook to "black" ring at wide end.
If the interior is attached, proceed to step 2.
2) Clear the ground of any sharp objects that will damage the tent floor. Lay out the tent shell.
(Option: stake corners, staking diagonally works best rather than staking one end then staking the
other end; stake so poles are in straight line – staking the outer shell down first before attaching
the poles is recommended in windy conditions.)
3) "Hoop" each the two (2) long poles and insert ends into grommets on each corner
4) Lift and attach the REFLECTIVE webbing top loop and buckle over poles where the pole cross,
do this BEFORE attaching the pole clips... then attach each pole clip to the poles.
rd
5) Insert 3
(shorter) pole through two (2) REFLECTIVE webbing loops UNDER two longer poles.
Insert each end of the pole into the webbing grommet. Attach pole clips to pole.
rd
6) 3
pole cord/webbing S-hooks are connected to the ring on each webbing grommet at the end of
rd
3
pole.
TIP: Leave shell and interior attached for quick setup and take down
TIP: When cold, wearing mittens, etc. it is sometimes easier to leave reflective webbing
"buckled" and thread/push poles through the loop rather than trying to buckle the webbing.
7) Staking the tent – one stake/peg on each vestibule, and one stake/peg for each tent corner, one
stake for head end, and one stake/peg for the foot end. In windy conditions, a person may want to
use the four optional reflective guy out loops. We suggest staking the guy lines at 45 degree
angles to the tent. See guy line diagram on the next page.
Big Sky International, Inc. 970 W Broadway, Ste E289 Jackson, WY 83001 USA
www.BigSkyInternational.com 888-535-7085
** Warning **
.
pg 1 of 2
Revised 2014-07-03
Advertisement
Table of Contents

Related Manuals for Big Sky Chinook 1P


Summary of Contents for Big Sky Chinook 1P
- Page 1 We suggest staking the guy lines at 45 degree angles to the tent. See guy line diagram on the next page. Big Sky International, Inc. 970 W Broadway, Ste E289 Jackson, WY 83001 USA pg 1 of 2 Revised 2014-07-03 www.BigSkyInternational.com 888-535-7085...
- Page 2 (This creates a more uniform tension on the shock cord.) Suggested guy lines, numbered by priority: Big Sky International, Inc. 970 W Broadway, Ste E289 Jackson, WY 83001 USA pg 2 of 2 Revised 2014-07-03...
Need help?
Do you have a question about the Chinook 1P and is the answer not in the manual?
Questions and answers